Are you tired of looking at unsightly trash cans cluttering up your backyard? Do you want to keep your outdoor space organized and aesthetically pleasing? It’s time to consider building your own DIY trash enclosure. Not only will it help conceal your bins, but it will also improve outdoor waste management and make your yard look neat and tidy.
Many people believe that trash cans are an eyesore that can’t be easily hidden. But what if I told you that with just a few materials and some DIY skills, you could create a stylish and functional trash enclosure that blends seamlessly into your outdoor space? By following this step-by-step guide, you’ll be able to transform your backyard and keep your trash cans out of sight.
Key Takeaways:
- Building a DIY trash enclosure helps conceal unsightly trash cans and improves the aesthetics of your outdoor space.
- A trash enclosure can be customized to match your existing outdoor decor and provide a convenient storage solution for your bins.
- To build your own trash enclosure, you will need materials like fence pickets or cedar boards, screws or nails, and tools like a saw and drill.
- Designing the size and location of your trash enclosure is crucial to ensure it fits seamlessly into your yard.
- Preparing a stable and level foundation is essential for the stability and longevity of your trash enclosure.
Why Build a DIY Trash Enclosure?
Building a DIY trash enclosure offers several benefits for your outdoor space. Discover why it’s worth considering:
Conceal Unsightly Trash Cans
No one wants to look at a pile of garbage cans in their backyard. By building a DIY trash enclosure, you can hide those unsightly bins from view, keeping your outdoor area clean and visually appealing.
Improve Aesthetics
A trash enclosure can be designed to seamlessly blend with your existing outdoor decor. Choose materials and finishes that match your style, creating an enclosure that enhances the overall aesthetics of your yard.
Prevent Animal Access
Animals can be a nuisance when it comes to garbage. A DIY trash enclosure provides a barrier that prevents animals from accessing your trash cans and scattering garbage around your yard. Keep unwanted critters out and maintain a clean outdoor environment.
Customize and Personalize
When you build your own trash enclosure, you have the freedom to customize it according to your needs and personal preferences. Add unique features, incorporate storage solutions, or customize the size to fit your specific requirements. The possibilities are endless!
Convenient Storage Solution
A DIY trash enclosure provides a designated and organized space for your trash cans. No more tripping over bins or searching for a place to put them. With a well-built enclosure, you can easily access and store your trash cans, making waste management a breeze.
Enhance Outdoor Living
By building a visually appealing trash enclosure, you create an inviting outdoor space for relaxation and enjoyment. You can transform your yard into a beautiful oasis where you and your family can spend quality time, free from the eyesore of exposed garbage cans.
Take advantage of the benefits a DIY trash enclosure offers and create a functional and attractive solution for your outdoor waste management needs.
Materials and Tools
To build your DIY trash enclosure, you will need the following materials and tools:
- Fence pickets or cedar boards
- 2x4s or 2x3s
- Screws or nails
- A saw (such as a miter saw or circular saw)
- A drill or driver
- A level
- A measuring tape
- Optional tools like a framing nailer and a pocket hole jig
These materials and tools are easily accessible and affordable, making this project a cost-effective solution for garbage bin storage.
Designing Your Trash Enclosure
Before starting your DIY trash enclosure project, it’s important to determine the size and design that will best fit your needs. You can find ready-made trash can enclosure plans online or create your own design. Consider the number of trash cans you need to store, the space available in your yard, and any specific aesthetic preferences you have. Planning the design in advance will ensure a successful and functional final result.
Exploring Trash Can Enclosure Plans
If you’re looking for inspiration or want a tried-and-tested design, ready-made trash can enclosure plans are readily available online. These plans provide step-by-step instructions, detailed diagrams, and a list of materials needed, making it easier to visualize and execute your project. By following a pre-designed plan, you can save time and ensure that your trash enclosure meets the necessary specifications.
| Benefits of Trash Can Enclosure Plans | Considerations |
|---|---|
|
|
Creating Your Own Design
If you prefer a more personalized touch and have specific requirements for your trash enclosure, designing your own plan is a great option. Start by sketching out your ideas on paper or using a design software. Consider elements such as the overall shape, dimensions, door placement, roof design, and any additional features you desire.
Note: When designing your own trash can enclosure, make sure to consider functionality, aesthetics, and ease of use. Ensure that the dimensions can accommodate the size and number of trash cans you own, as well as provide ample access for depositing and removing the bins.
Once you have a clear vision of your trash enclosure, create a list of materials and take precise measurements. This will help you calculate the amount of wood and other supplies needed for your project. Keep in mind that designing your own plan allows for greater customization, so you can incorporate specific features like built-in storage, decorative accents, or a matching color scheme.
Whether you choose to follow existing plans or create your own design, taking the time to plan the size and design of your trash enclosure is essential for a successful DIY project. By considering your unique needs and preferences, you can build a functional and aesthetically pleasing garbage can shed that blends seamlessly with your outdoor space.
Preparing the Foundation
Before you can start building your DIY trash enclosure, it’s crucial to prepare a stable and level foundation. This step ensures the long-term stability and durability of your enclosure. Follow these steps to properly prepare the foundation:
- Clear the area: Begin by removing any debris, rocks, or vegetation from the area where you plan to build your trash enclosure. This will help create a clean and clear space for the foundation.
- Level the ground: Use a shovel or garden hoe to level the ground as much as possible. Pay attention to any uneven areas and make sure to create a smooth surface.
- Adjust soil levels: If necessary, make adjustments to the soil levels to achieve a level surface. You may need to add or remove soil to ensure that the foundation is properly aligned.
By taking the time to properly prepare the foundation, you are laying the groundwork for a sturdy and reliable trash enclosure. This will ensure that your enclosure stands the test of time and provides effective outdoor waste management.
“A solid foundation is crucial for the stability and longevity of your trash enclosure.”
Foundation Preparation in Action
| Steps | Before | After |
|---|---|---|
| Clear the area | ||
| Level the ground | ||
| Adjust soil levels |
Illustrated above are the steps involved in foundation preparation. By clearing the area, leveling the ground, and making necessary adjustments to the soil levels, you can create a solid and level foundation for your trash enclosure.
Building the Frame
Now that you have prepared the foundation for your trash enclosure, it’s time to start building the frame. The frame serves as the structural backbone of the enclosure, providing stability and support.
To construct the frame, you will need 2x4s or 2x3s, which are readily available at your local hardware store. These lumber pieces will be used to create both the vertical and horizontal members of the frame.
Begin by cutting the 2x4s or 2x3s to the desired lengths, based on the dimensions of your enclosure. Use a saw, such as a miter saw or circular saw, to make accurate cuts.
Next, assemble the frame by securing the pieces together using screws or nails. Ensure that the frame is sturdy and square, as this will contribute to the overall strength and durability of your trash enclosure.
To reinforce the frame and provide additional stability, it’s important to add horizontal supports. These supports can be strategically placed along the frame, such as in the middle and back sections, to evenly distribute the weight and secure the structure.
By incorporating horizontal supports, you can enhance the structural integrity of your trash enclosure, ensuring it can withstand various weather conditions and the weight of the bins stored inside.
| Materials | Tools |
|---|---|
|
|
Adding Siding
Once you have constructed the frame of your DIY trash enclosure, it’s time to add the siding. To achieve a seamless and attractive appearance, you can use fence pickets or cedar boards for this purpose. Cut the pickets or boards to the desired size, ensuring they fit perfectly onto the frame.
Start by attaching the back panel of the enclosure. Use screws or nails to secure the pickets or boards to the frame, ensuring a sturdy and consistent installation. Take care to align the pickets or boards properly, creating a uniform appearance.
Next, move on to adding the siding to the sides of the enclosure. Attach the pickets or boards using the same method as before, making sure they are securely fastened to the frame. Maintain the alignment and spacing of the pickets or boards to achieve a professional and polished finish.
Attaching the siding is a critical step to enhance the aesthetics and functionality of your trash enclosure. The right choice of fence pickets or cedar boards adds a touch of elegance to your outdoor space while effectively concealing the trash cans.
With the siding securely in place, your DIY trash enclosure is starting to take shape. The next step is to move on to the finishing touches, such as adding trim, lids, and a door, which will further enhance the overall appearance and functionality of your trash enclosure.
Finishing Touches
To complete your DIY trash enclosure, it’s important to pay attention to the finishing touches. Adding trim, lids, and a door will not only enhance the functionality of your enclosure but also contribute to its overall aesthetics.
Trim
Trim can be added to the top and bottom of the enclosure to create a polished and visually appealing look. It helps to conceal any gaps or imperfections, giving your trash enclosure a professional finish. Choose trim that complements the design of your outdoor space and secure it using screws or nails.
Lids
Building and attaching lids for your trash enclosure is essential for easy access to the trash cans. These lids can be opened whenever you need to dispose of garbage or remove the bins for collection. Ensure that the lids fit securely and are easy to open and close. Consider using hinges to allow for smooth operation.
Door
Installing a door in your trash enclosure provides convenient entry and makes it effortless to remove the bins when necessary. Choose a door design that complements the overall aesthetics of your enclosure and ensure that it is properly aligned and securely attached. A door also helps to prevent animals from accessing the trash cans and scattering the garbage.
By adding these finishing touches to your DIY trash enclosure, you’ll not only improve its functionality but also enhance the overall appearance of your outdoor space.


Determining the Size and Location
Before building your trash can enclosure, it’s important to determine the appropriate size and location that will best suit your needs. Consider the number and size of your trash cans, as well as the available space in your yard. By taking these factors into account, you can ensure that your trash can enclosure fits seamlessly into your outdoor space and provides efficient waste management.
Start by measuring the dimensions of your bins. This will give you a clear idea of the size of enclosure needed to accommodate them. Allow for additional space around the bins to comfortably access and maneuver around the enclosure. This will make it easier to empty the bins and maintain the enclosure.
Next, evaluate the available space in your yard. Take into consideration any existing structures or features that may limit the location of the enclosure. You’ll want to choose an area that is easily accessible yet doesn’t obstruct the flow of your outdoor space. Take note of any potential obstacles or obstructions that need to be taken into account when determining the location.
Once you have a clear understanding of the size of the enclosure needed and the available space in your yard, you can proceed with the construction process. Building an appropriately sized and well-placed trash can enclosure will not only provide effective waste management but also enhance the overall appearance and functionality of your outdoor area.

“Choosing the right size and location for your trash can enclosure is crucial to ensure it blends seamlessly into your outdoor space and provides optimal waste management.”
Preparing the Foundation and Setting Posts
Before you start building your trash can enclosure, it’s essential to prepare a solid foundation to ensure stability and longevity. Follow these steps to prepare the foundation and set the posts:
Step 1: Using Concrete Stepping Stones
To create a stable and level surface for your trash can enclosure, start by placing concrete stepping stones on the ground. These stones will provide a sturdy base for your structure and help distribute the weight of the enclosure evenly.
Step 2: Setting Pressure Treated Posts
Next, it’s time to set the posts that will support your trash can enclosure. Use pressure treated 4×4 posts, as they are resistant to rot and decay. Here’s how to set the posts:
- Using a post hole digger, dig holes in the ground where you want to place the posts. The holes should be deep enough to accommodate about one-third of the length of the posts.
- Insert the pressure treated posts into the holes, ensuring they are plumb and level. You can use a level to double-check the alignment.
- Once the posts are positioned correctly, pour quick-setting concrete mix into the holes around the posts. Follow the manufacturer’s instructions for mixing and pouring the concrete.
- Make sure the posts remain plumb and level as the concrete sets. Use temporary supports, such as braces or clamps, to keep the posts in position until the concrete hardens.
Setting the posts with concrete will provide a strong and stable foundation for your trash can enclosure, ensuring it can withstand various weather conditions and securely hold your bins.
With the foundation prepared and the posts set, you’re ready to move on to the next steps of building your DIY trash can enclosure. In the following sections, we’ll cover the frame construction, adding siding, and finishing touches to complete your project.
Creating the Paver Foundation
After setting the posts, it’s time to create a solid paver foundation for your trash can enclosure. This foundation will not only provide stability but also ensure proper drainage. Follow these steps to create the perfect paver foundation:
Laying Landscaping Weed Fabric
Start by laying down landscaping weed fabric over the prepared area. This fabric will help prevent weed growth, keeping your paver foundation clean and free from unwanted plants.
Pouring the Paver Base
Next, pour a layer of paver base over the weed fabric. The paver base acts as a stable foundation for your enclosure. Use a rake to spread and level the paver base, ensuring an even surface. By carefully leveling the paver base, you’ll create a solid foundation for your trash can enclosure.
Adding Leveling Sand
Once the paver base is in place, add a layer of leveling sand on top. This sand is essential for providing a smooth and level surface for the pavers. Use a tamper or paver base panels to compact the leveling sand, ensuring a sturdy and even base.
With a well-prepared paver foundation, your trash can enclosure will have a solid base to withstand the test of time and ensure proper drainage. The next step is to proceed with building the frame and completing your DIY trash can enclosure.
Building the Frame and Door
When constructing your trash can enclosure, it’s crucial to build a sturdy and durable frame using 2x4s or other suitable materials. The frame provides the foundation for the entire structure and ensures its stability and longevity.
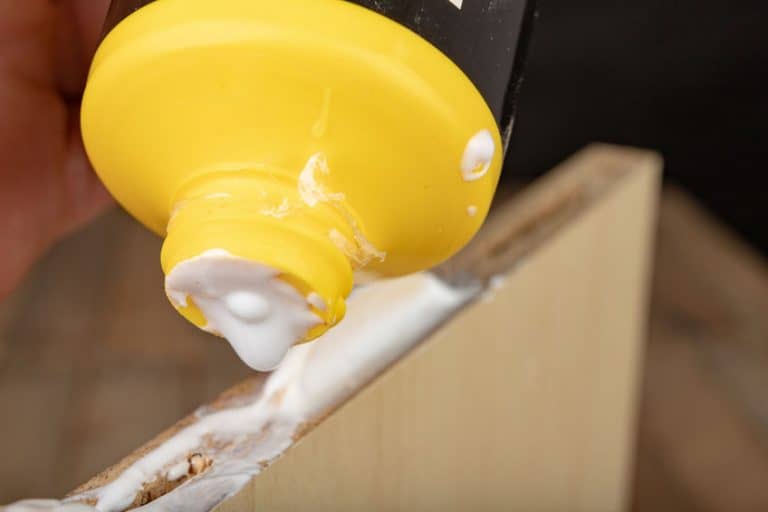
To secure the frame pieces together, consider using pocket hole joinery. This technique involves drilling pocket holes at an angle into one piece of wood and joining it to another piece using screws. Pocket hole joinery creates strong and hidden connections, eliminating the need for visible screws or nails.
As you assemble the frame, pay attention to the details to ensure a professional finish. Measure and cut the frame pieces accurately, ensuring they are properly aligned and level. Take the time to check for squareness and make any necessary adjustments before securing the pieces together.
Additionally, during the frame construction, don’t forget to build a door for easy access to the trash cans. The door should be properly aligned within the frame and function smoothly when opening and closing.
By focusing on the details of the frame and door construction, you’ll create a strong and functional trash can enclosure that will effectively conceal your bins and enhance the overall appearance of your outdoor space.
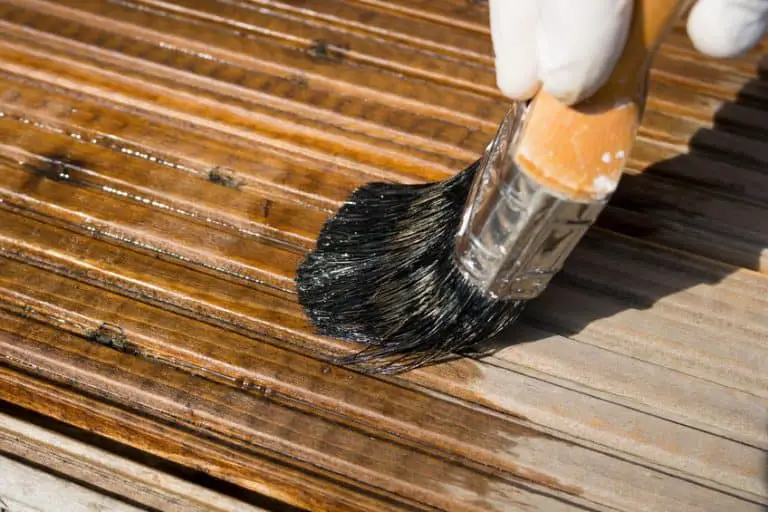
Staining and Sealing
Before installing the slats and completing the enclosure, it is essential to apply a suitable exterior finish to the frame and door. This step not only enhances the appearance of the wood but also provides vital protection from the elements. By staining or painting the wood, you can safeguard it from moisture, UV damage, and other environmental factors.
When selecting an exterior finish, opt for a high-quality product that is compatible with the type of wood used in your trash enclosure. Different finishes may be suitable for different wood types, so be sure to read the manufacturer’s instructions for application and follow them carefully. This will ensure that you achieve the best results and maximize the longevity of your trash enclosure.
Properly staining and sealing the wood offers multiple advantages. Firstly, it acts as a barrier against water, preventing moisture from penetrating the wood and causing rot or warping. It also helps to protect the wood from the harmful effects of UV rays, which can cause fading and deterioration over time. Additionally, the right exterior finish can enhance the aesthetics of your trash enclosure, giving it a polished and finished look that complements your outdoor space.
Why Staining and Sealing is Important
By applying an exterior finish, you can extend the lifespan of your trash enclosure and ensure it remains in excellent condition for years to come. With proper staining and sealing, you can protect your investment and enjoy a durable and attractive outdoor waste management solution.
| Benefits of Staining and Sealing | How It Enhances Your Trash Enclosure |
|---|---|
| Protection from moisture | Prevents rotting and warping |
| UV damage resistance | Prevents fading and deterioration |
| Aesthetic enhancement | Gives a polished and finished look |
Next up, we’ll dive into the process of installing the slats to complete your trash enclosure, bringing it one step closer to its final form.
Installing the Slats
Once the frame is finished and protected, it’s time to install the slats that will form the walls and roof of your trash can enclosure. This step requires precise measurements and attention to detail to ensure a clean and functional installation.
Start by measuring and cutting the slats to the appropriate size. Use a tape measure or ruler to determine the length and width needed, taking into account the dimensions of your enclosure. It’s crucial to cut the slats accurately to achieve an even and snug fit.
When attaching the slats to the frame, it’s essential to use screws or nails that are suitable for outdoor use and provide strong holding power. Make sure to space the slats evenly and align them properly to create a visually appealing design. Take your time during this process to ensure precise measurements and a secure installation.
An attractive and functional trash can enclosure relies on the proper installation of slats. The slats not only serve as the walls and roof of the enclosure but also contribute to its overall stability and durability. By following precise measurements and paying attention to alignment and spacing, you can achieve a clean and professional look for your trash can enclosure.
See the illustration below for a visual representation of slat installation:
Adding Final Details and Accessories
Now that you’ve built the main structure of your DIY trash can enclosure, it’s time to add those final touches that will elevate its functionality and aesthetics. By incorporating hinges, a latch, and solar lights, you can ensure smooth operation, secure closure, and improved visibility at night.
Firstly, install hinges on the door of your trash can enclosure. Hinges allow for easy opening and closing, providing convenient access to your bins. Choose durable hinges that can withstand regular usage and the elements. Ensure that the hinges are properly aligned and securely fastened to guarantee smooth functionality.
Next, add a latch to the door of your trash can enclosure. The latch will ensure a secure closure, preventing any unwanted access to your trash cans. Opt for a latch that is sturdy and easy to operate. Install it in a position that is convenient for you to reach and operate effortlessly.
In addition to hinges and a latch, consider incorporating solar lights into your trash can enclosure. Solar lights are an eco-friendly and cost-effective way to illuminate your outdoor space, providing visibility during nighttime or low-light conditions. Install solar lights on top of the posts of your enclosure, ensuring that they are strategically positioned to maximize illumination.
By adding these final details and accessories to your DIY trash can enclosure, you can enhance its functionality and visual appeal. The hinges and latch will ensure convenient access and secure storage, while the solar lights will improve visibility, making your enclosure both practical and visually appealing.
Conclusion
Building your own DIY trash enclosure is a practical and cost-effective way to manage your outdoor waste. By following the step-by-step instructions and design tips provided in this article, you can create a stylish and functional enclosure that enhances the aesthetics of your yard and conceals unsightly trash cans.
With the right materials and tools, you can customize the size and design of your trash enclosure to fit your specific needs. Whether you have a small urban backyard or a spacious outdoor area, this do-it-yourself project can be tailored to suit any space.
Not only does a DIY trash enclosure improve the appearance of your yard, but it also prevents animals from accessing and scattering your garbage. By keeping your bins securely stored, you can maintain a clean and organized outdoor space.
Take control of your outdoor waste management by building a DIY trash enclosure. Enjoy the benefits of effective waste storage and add a touch of style to your yard. Start your project today and transform your outdoor space into a tidy and functional area.
FAQ
Why should I build a DIY trash enclosure?
Building a DIY trash enclosure offers several benefits, including concealing unsightly trash cans, improving the aesthetics of your outdoor space, and preventing animals from accessing and scattering your garbage. Additionally, it allows for customization to match your existing outdoor decor and provides a convenient storage solution for your bins.
What materials and tools do I need to build a DIY trash enclosure?
To build a DIY trash enclosure, you will need fence pickets or cedar boards, 2x4s or 2x3s, screws or nails, a saw (such as a miter saw or circular saw), a drill or driver, a level, a measuring tape, and optional tools like a framing nailer and a pocket hole jig. These materials and tools are easily accessible and affordable, making this project a cost-effective solution for garbage bin storage.
How do I design the perfect trash enclosure for my needs?
When designing your trash enclosure, consider factors such as the number of trash cans you need to store, the available space in your yard, and any specific aesthetic preferences you have. You can find ready-made trash can enclosure plans online or create your own design. Planning the design in advance will ensure a successful and functional final result.
How do I prepare the foundation for my trash enclosure?
To prepare the foundation for your trash enclosure, clear the area of any debris or vegetation and use a shovel or garden hoe to level the ground as much as possible. If necessary, add or remove soil to achieve a level surface. This step is crucial for the stability and longevity of your trash enclosure.
How do I build the frame of my trash enclosure?
To build the frame of your trash enclosure, use 2x4s or 2x3s to create the vertical and horizontal members of the frame. Secure the pieces together using screws or nails, ensuring a sturdy and square structure. Additionally, add horizontal supports to reinforce the frame and provide stability. These supports can be placed at strategic points along the frame, such as the middle and back sections.
How do I add siding to my trash enclosure?
To add siding to your trash enclosure, use fence pickets or cedar boards. Cut the pickets or boards to the desired size and attach them to the frame using screws or nails. Start with the back panel, then move on to the sides, ensuring a secure and consistent installation. Take care to align the pickets or boards properly and create a uniform appearance.
What finishing touches should I add to my trash enclosure?
To complete your DIY trash enclosure, you can add finishing touches such as trim, lids, and a door. Trim can be added to the top and bottom of the enclosure to create a polished look. Build and attach lids that allow for easy access to the trash cans. Finally, install a door that provides convenient entry and ensures the bins are easily removable when necessary. These finishing touches will enhance the functionality and aesthetics of your trash enclosure.
How do I determine the size and location for my trash enclosure?
Before building your trash can enclosure, consider the number and size of your trash cans, as well as the available space in your yard. Measure the dimensions of your bins and allow for additional space to comfortably access and maneuver around the enclosure. Choosing the right size and location will ensure that your trash can enclosure fits seamlessly into your outdoor space.
How do I prepare the foundation and set the posts for my trash enclosure?
Prepare the foundation for your trash can enclosure by using concrete stepping stones as a stable and level surface. Additionally, dig holes with a post hole digger and insert pressure-treated 4×4 posts into the holes. Secure the posts with quick-setting concrete mix and ensure they are level and plumb. A sturdy foundation is crucial for the stability and longevity of your trash can enclosure.
How do I create the paver foundation for my trash enclosure?
To create the paver foundation for your trash can enclosure, lay down landscaping weed fabric to prevent weed growth. Then, pour a layer of paver base to create a stable base. Use a rake to level the paver base and ensure an even surface. Next, add a layer of leveling sand and compact it with a tamper or paver base panels. This foundation will provide a solid base for your trash can enclosure and ensure proper drainage.
How do I build the frame and door for my trash enclosure?
To build the frame and door for your trash can enclosure, use 2x4s or other suitable materials. Utilize pocket hole joinery to secure the frame pieces together, creating a sturdy and durable structure. Additionally, construct a door for easy access to the trash cans, ensuring it is properly aligned and functions smoothly. Pay attention to the details of the frame and door construction to ensure a professional finish.
How do I stain and seal my trash enclosure?
Before installing the slats and completing the enclosure, apply a suitable exterior finish to the frame and door. Staining or painting the wood will not only enhance its appearance but also provide protection from the elements. Choose a high-quality exterior finish that is compatible with the type of wood used and follow the manufacturer’s instructions for application. Properly staining and sealing the wood will enhance its durability and resistance to moisture and UV damage.
How do I install the slats in my trash enclosure?
Once the frame is finished and protected, install slats that will create the walls and roof of the trash can enclosure. Measure and cut the slats to the appropriate size, ensuring an even and snug fit. Attach the slats securely to the frame using screws or nails, paying attention to proper alignment and spacing. Take your time to ensure precise measurements and a clean installation for an attractive and functional trash can enclosure.
What final details and accessories can I add to my trash enclosure?
Complete your DIY trash can enclosure by adding final details and accessories such as hinges and a latch on the door for smooth operation and secure closure. Consider adding solar lights to the top of the posts for improved visibility at night. These final touches will add functionality and aesthetics to your trash can enclosure, making it a practical and visually appealing addition to your outdoor space.