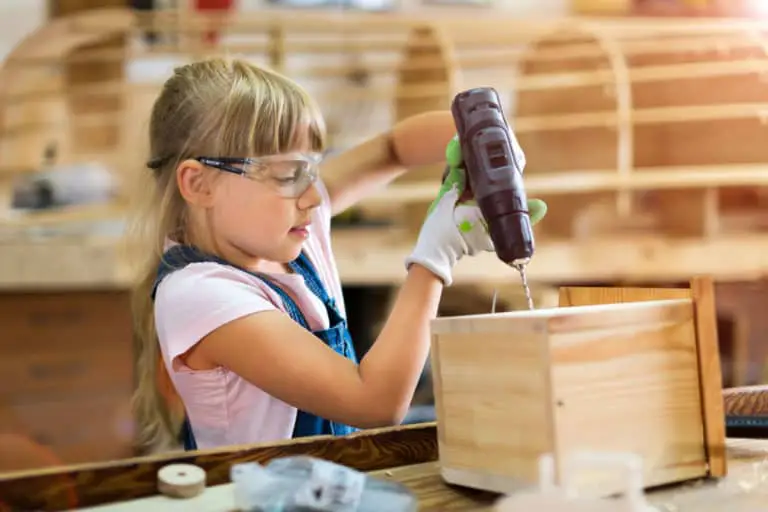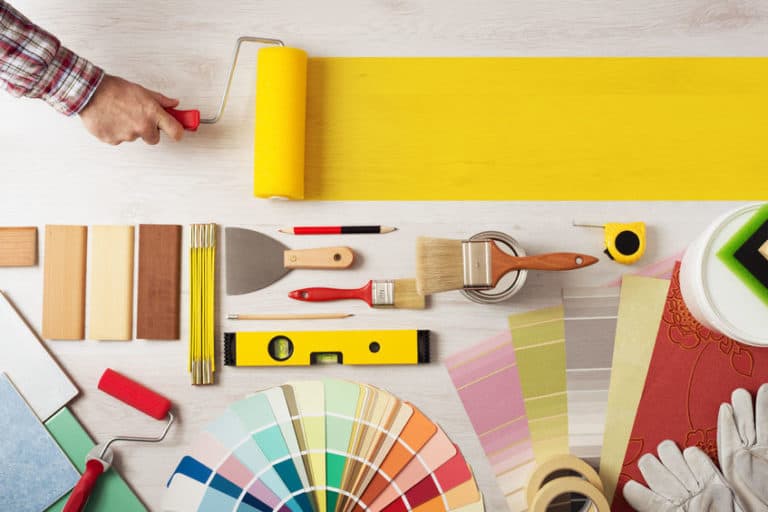
If you’re looking to unlock your crafting potential and create a personalized storage solution for your cherished jewelry pieces, then you need detailed jewelry box plans. Building your own jewelry box allows you to customize it to your liking and ensure it meets your specific needs. With the help of free plans available online, you can easily create a unique and functional jewelry box that will be a treasured item for many years to come.
Key Takeaways:
- Create a personalized jewelry box by using detailed plans and building it yourself
- Free plans are available online for every skill level, from beginner to intermediate
- Consider building a wall-mounted jewelry box or a jewelry cabinet for larger collections
- Repurpose an existing box or modernize it with paint, leather, or other materials
- Craft a customizable embroidery box for storing small items and embroidery supplies
Free Jewelry Box Plans for Every Skill Level
Whether you’re a beginner or have intermediate woodworking skills, there are free jewelry box plans available for every skill level. These plans include detailed instructions, diagrams, and material lists to guide you through the building process. From simple designs to more complex ones with secret compartments and multiple drawers, you can choose a plan that suits your skill level and preferences.
For beginners, there are jewelry box plans that focus on basic woodworking techniques and require minimal tools. These plans typically feature straightforward designs with single compartments and easy-to-follow assembly instructions. They provide an excellent opportunity for novice woodworkers to learn and practice foundational woodworking skills while creating a beautiful jewelry box.
Intermediate woodworkers can explore more intricate jewelry box plans that offer additional challenges and opportunities for creativity. These plans may feature advanced joinery techniques, such as dovetail joints or mitered corners, to enhance the box’s construction and aesthetics. They can also incorporate unique design elements, such as inlaid patterns or decorative handles, to elevate the overall look of the jewelry box.
Regardless of your skill level, it’s important to choose a jewelry box plan that matches your woodworking capabilities and interests. By selecting a plan that aligns with your skill level, you can ensure a successful and enjoyable woodworking experience. Remember to review the instructions, material list, and diagrams thoroughly before starting your project to ensure you have all the necessary tools and materials.
“Crafting your own jewelry box allows you to personalize it to your liking and create a truly one-of-a-kind piece. With a wide range of free plans available, you can find the perfect jewelry box design that matches your skill level and woodworking aspirations.”
| Skill Level | Features | Plan Example |
|---|---|---|
| Beginner | Simple design Single compartment | Plan A |
| Intermediate | Intricate joinery Additional drawers or compartments | Plan B |
| Advanced | Complex design elements Multiple secret compartments | Plan C |
By exploring the world of jewelry box plans, you can embark on an exciting woodworking journey and create a beautiful and functional piece that showcases your craftsmanship. Whether you’re a beginner looking for a simple project or an experienced woodworker seeking a new challenge, there’s a jewelry box plan out there waiting for you.
DIY Jewelry Box Wall Unit
If you’re looking for a unique storage solution, consider building a jewelry box wall unit. This plan includes a secret compartment behind a mirror, three drawers, and hooks. The instructions provide all the details you need to build this stylish and functional wall unit for your jewelry.

With a jewelry box wall unit, you can maximize storage space while adding a decorative element to your room. This wall-mounted jewelry box is not only functional but also serves as a beautiful piece of wall decor.
The secret compartment behind the mirror is perfect for storing valuable pieces, keeping them hidden and secure. The three drawers provide additional storage for bracelets, rings, and other accessories. The hooks are ideal for hanging necklaces and preventing them from tangling. This wall unit design allows you to keep your jewelry organized and easily accessible.
Building a jewelry box wall unit is a rewarding project that allows you to showcase your creativity and woodworking skills. By following the provided instructions, you can create a customized storage solution that meets your specific needs and complements your room’s aesthetics.
Whether you have a large jewelry collection or simply want to add a touch of sophistication to your space, a DIY jewelry box wall unit is a practical and stylish solution. Start building your wall-mounted jewelry box today and enjoy a functional and visually appealing storage solution for your precious jewelry.
Easy Jewelry Box with Drawers
If you’re looking for a slightly more complex woodworking project that offers enhanced storage capabilities, then Ana White’s free jewelry box plan is perfect for you. This plan includes additional drawers, providing you with ample space to organize and store your jewelry collection.
With clear and concise instructions, Ana White’s plan ensures that even novice woodworkers can successfully complete this project. The plan includes a detailed shopping list of materials, cutting instructions, and illustrations of the jewelry box’s dimensions, making it easy for you to gather everything you need and visualize the end result.
The easy jewelry box with drawers plan allows you to showcase your woodworking skills while creating a functional and beautiful piece for storing and protecting your precious jewelry.
“The easy jewelry box with drawers plan allows you to showcase your woodworking skills while creating a functional and beautiful piece for storing and protecting your precious jewelry.”
If you’re ready to tackle a slightly more challenging woodworking project and want the satisfaction of building a jewelry box with additional storage options, then Ana White’s plan is the perfect choice.
Materials Needed
| Materials | Quantity |
|---|---|
| Wood boards | 5 |
| Drawer slides | 4 |
| Knobs | 8 |
| Screws | Various sizes |
| Wood glue | 1 bottle |
Transform an Existing Box into a Jewelry Box
If you’re not up for building a jewelry box from scratch, don’t worry! You can easily transform an existing box into a beautiful jewelry box with just a few simple steps. This option is particularly great if you have a box with sentimental value or if you want to repurpose materials and reduce waste.
“Turning any box into a jewelry box is easier than you think. With a simple sewing project, you can create a personalized storage solution for your jewelry collection.”
To help you get started, there is a tutorial available that walks you through the process of turning an ordinary box into a functional and stylish jewelry box. By following the step-by-step instructions, you’ll learn how to add compartments, dividers, and even a padded section for delicate pieces. The tutorial also provides tips on selecting the right fabric, sewing techniques, and decorative elements to enhance your jewelry box.
Whether it’s a wooden keepsake box, a vintage tin, or a sturdy cardboard container, you can easily give it new life and create a unique jewelry box that reflects your personal style. Don’t let an old box go to waste when you can transform it into a one-of-a-kind treasure to store and display your jewelry.
Discover the joy of repurposing and add your own touch of creativity to an existing box by following the tutorial below:
Turn an Existing Box into a Jewelry Box Tutorial:
- Gather all the materials you’ll need, including:
- An existing box
- Fabric of your choice
- Scissors
- Needle and thread
- Padding material (optional)
- Decorative elements (buttons, ribbons, etc.)
- Measure the interior of the box and cut the fabric accordingly, leaving some extra for folding and sewing.
- Line the interior of the box with the fabric, ensuring it fits snugly.
- Sew the fabric in place using a needle and thread, making sure to secure the corners and edges for durability.
- If desired, add padding material to create a soft and protective section for delicate jewelry pieces.
- Finish off your jewelry box by adding decorative elements, such as buttons or ribbons, to enhance its appearance.
- Finally, organize your jewelry within the newly transformed box, taking advantage of the added compartments and dividers.
With a bit of creativity and some basic sewing skills, you can turn any box into a stunning jewelry box that not only showcases your precious pieces but also adds a personal touch to your home decor.

| Pros | Cons |
|---|---|
| Repurposes an existing box | May require basic sewing skills |
| Customizable to suit your style | Limited by the size and shape of the box |
| Preserves sentimental value | May not offer as much organization as a purpose-built jewelry box |
| Environmentally friendly | Requires sourcing appropriate materials |
DIY Jewelry Cabinet
For those who have a large jewelry collection, a jewelry cabinet may be the ideal solution. A free plan is available for a jewelry cabinet with six drawers, fold-out sides, and a top case with a mirror. This plan provides a materials list, cut list, step-by-step directions, and diagrams to guide you through the building process.
Jewelry Cabinet Specifications:
| Features | Dimensions |
|---|---|
| Number of Drawers | 6 |
| Fold-out Sides | Yes |
| Top Case | With Mirror |
With this jewelry cabinet, you’ll have ample storage space for your extensive collection, along with a convenient mirror to help you choose the perfect accessory. The fold-out sides create additional room for necklaces and bracelets, ensuring your jewelry stays organized and tangle-free.
By following the provided plan, you can build a customized jewelry cabinet that suits your unique style and storage needs. Showcase your creativity and woodworking skills by incorporating personal touches and finishes that complement your overall decor.
DIY Earring Stand
If you’re looking for an alternative to a traditional jewelry box, consider building a DIY earring stand. This stand is made from wood boards and decorative aluminum sheets, creating a unique and eye-catching display for your earrings. The tutorial provides detailed instructions and offers the opportunity to customize the stand with paint or staining.

Create a Standout Display
With a DIY earring stand, you can showcase your earring collection in a stylish and organized way. By using wood boards and decorative aluminum sheets, you can create a stand that reflects your personal taste and complements your jewelry collection. This stand not only keeps your earrings easily accessible but also adds a decorative touch to your dressing table or vanity.
Customization Options
The tutorial provides step-by-step instructions on how to build the earring stand, allowing you to customize it according to your preferences. You can choose to paint or stain the wood boards to match your existing decor or add a pop of color. Additionally, you can experiment with different patterns and designs using the decorative aluminum sheets, giving your earring stand a unique and personalized look.
Easy Assembly Process
The tutorial breaks down the assembly process into simple steps, making it accessible for DIY enthusiasts of all skill levels. With clear instructions and accompanying diagrams, you’ll be able to follow along easily and build your earring stand in no time. The required materials are readily available at your local hardware store, making this a convenient and budget-friendly project.
| Benefits of a DIY Earring Stand |
|---|
| Organize and display earrings in a stylish and accessible manner. |
| Add a decorative touch to your dressing table or vanity. |
| Customize the stand to match your personal style and existing decor. |
| Create a unique and eye-catching display for your earring collection. |
| Convenient and budget-friendly project for DIY enthusiasts of all skill levels. |
Personalize an Existing Jewelry Box
If you already have a plain wood jewelry box, you can easily give it a personal touch and make it truly unique. By following a simple tutorial, you can transform your jewelry box into a personalized masterpiece.
One way to personalize your jewelry box is by adding a photo of your choice to the top. Using epoxy and mod podge, you can securely adhere the photo and create a sentimental piece that showcases your cherished memories.
Here’s how you can do it:
- Cut your desired photo to fit the top of the jewelry box.
- Apply a thin layer of epoxy to the top of the box.
- Place the photo on the epoxy-covered surface and press down gently.
- Allow the epoxy to dry and set according to the manufacturer’s instructions.
- Once the epoxy has dried, apply a layer of mod podge over the photo to seal it.
In addition to adding a photo, you can also paint the sides of the jewelry box to give it a fresh look. Choose a color that complements your style and preferences. Whether you prefer bold and vibrant hues or soothing pastels, a touch of paint can completely transform the appearance of your jewelry box.
Personalizing an existing jewelry box allows you to create a one-of-a-kind piece that reflects your personality and taste. It’s a great way to breathe new life into a plain box and make it a truly special item.
Modernize a Jewelry Box with Paint and Leather
Why build a new jewelry box when you can give new life to an old one? Modernizing a plain jewelry box with paint and leather is a simple and stylish DIY project that can transform your old box into a modern and trendy storage solution for your precious jewelry.
To start, gather the following materials:
- A plain jewelry box
- Acrylic paint in your preferred color
- Paintbrushes
- A piece of soft leather or faux leather
- Scissors
- Strong adhesive
Follow these steps to modernize your jewelry box:
- Clean the jewelry box to ensure a smooth surface for painting.
- Apply a coat of acrylic paint to the exterior of the box. Choose a color that matches your personal style and complements your other décor.
- Allow the paint to dry completely before proceeding to the next step.
- Measure the interior dimensions of the box and cut a piece of soft leather or faux leather to fit.
- Apply a thin layer of strong adhesive to the bottom and sides of the box’s interior.
- Place the cut piece of leather into the box, pressing it firmly against the adhesive to ensure a secure bond.
- Smooth out any wrinkles or bubbles in the leather.
- Allow the adhesive to dry according to the manufacturer’s instructions.
- Your modernized jewelry box is now ready to use!
Add a personal touch:
Enhance the modern look of your jewelry box by adding decorative elements such as metallic accents, stenciled patterns, or even personalized engravings. Get creative and make the box uniquely yours.
Tips:
If you want to add compartments or dividers inside the box, use small wooden or acrylic trays that can be easily inserted.
Experiment with different paint colors and leather textures to achieve the desired modern aesthetic.
Consider adding a layer of clear varnish or sealer over the painted exterior to protect it and ensure longevity.
Modernizing your jewelry box with paint and leather is a cost-effective way to breathe new life into an old piece. This project allows you to showcase your creativity, personalize your storage solution, and create a stylish and modern jewelry box that reflects your unique style.
Three Jewelry Box Plans in One
Popular Woodworking offers a versatile jewelry box plan that provides you with three different design options to choose from. Each plan includes detailed measurements, building pictures, and written instructions, making it easy for you to create stunning jewelry boxes.
Design Options
With Popular Woodworking’s plan, you’ll have the freedom to build multiple jewelry boxes, each with its own unique style and features. The three design options are:
- Standard Jewelry Chest: This classic design features a spacious interior with dividers to keep your jewelry organized. The chest has a hinged lid and a pull-out drawer for additional storage.
- Twister Jewelry Box: This innovative design incorporates a twist mechanism that reveals hidden compartments, providing a touch of surprise and intrigue. The box is perfect for storing smaller pieces of jewelry.
- Dovetailed Keepsake Box: Crafted with precision, this elegant box showcases the beauty of dovetail joinery. Its compact size makes it ideal for storing precious keepsakes and special jewelry pieces.
With these three jewelry box plans at your disposal, you can create a collection of beautiful boxes to store and showcase your jewelry.
Simple and Beginner-Friendly Jewelry Box Plan
If you’re new to woodworking, there’s a simple and free jewelry box plan available that’s perfect for beginners. The plan includes a list of tools, cutting requirements, and step-by-step instructions to guide you through the building process. While the instructions are text-based, the plan is designed to be beginner-friendly and easy to follow.
With this beginner-friendly jewelry box plan, you don’t need to worry about complicated woodworking techniques or advanced tools. It’s a great opportunity for woodworking enthusiasts who are just starting out to hone their skills and create a beautiful handmade jewelry box.
This plan takes into consideration that beginners may not have an extensive collection of tools. The required tools are basic and commonly found in most households. By following the simple instructions, you’ll be able to create a functional jewelry box that will impress your friends and family.
Invest in your crafting journey today and give this beginner-friendly jewelry box plan a try. You’ll gain confidence in your woodworking abilities and have a stunning jewelry box to show for it.
Craft a Customizable Embroidery Box
If you enjoy embroidery or need a small storage solution for your embroidery supplies, crafting a customizable embroidery box is a perfect project for you. This plan provides detailed drawings and instructions to help you create a box specifically designed for organizing embroidery needles and threads. Additionally, the embroidery box can also be used to store other small items, making it a versatile storage solution.
With the help of this plan, you can create a customized embroidery box that perfectly suits your needs and preferences. The detailed drawings ensure accurate measurements, while the instructions guide you through the building process step by step. You’ll have a wide range of options to choose from, including the number and size of compartments, as well as additional features like a magnetic strip for storing needles or a thread holder.
- Designed specifically for organizing embroidery needles and threads.
- Can also be used to store other small items.
- Offers a wide range of customization options.
- Allows you to choose the number and size of compartments.
- Additional features like a magnetic strip for needles and a thread holder can be added.
“Crafting your own embroidery box not only provides a practical storage solution but also allows you to express your creativity.”
By crafting your own embroidery box, you have the opportunity to create a functional and beautiful piece that reflects your personal style. Plus, it’s a great way to showcase your embroidery skills even when you’re not actively working on a project.
So, if you’re ready to take your embroidery organization to the next level, start crafting a customizable embroidery box today. With the provided plan and your creativity, you’ll have a unique storage solution that not only keeps your supplies tidy but also enhances your crafting experience.
Conclusion
Crafting your own jewelry box allows you to create a personalized and unique storage solution. With free plans and a wide range of design options available, you can build a jewelry box that meets your specific needs and reflects your style. Whether you’re a beginner or have intermediate woodworking skills, there’s a plan out there for you.
By taking the time to build your own jewelry box, you not only save money on store-bought options but also experience the satisfaction of creating a functional and beautiful piece that will be treasured for years to come. The handmade jewelry box becomes a testament to your craftsmanship and attention to detail.
With various materials and finishes, you can customize your jewelry box to match your decor and personal taste. From elegant wooden boxes to sleek modern designs, the possibilities are endless. Start building your own jewelry box today and enjoy the unique storage solution that showcases your creativity and enhances the beauty of your cherished jewelry pieces.
FAQ
What are jewelry box plans?
Jewelry box plans are detailed instructions and diagrams that guide you through the process of building your own jewelry box. These plans provide measurements, material lists, and step-by-step directions to help you create a personalized storage solution for your cherished jewelry pieces.
Where can I find free jewelry box plans?
Free jewelry box plans can be found online. There are various websites and woodworking resources that offer a wide range of plans, catering to different skill levels and design preferences. Simply search for “free jewelry box plans” to explore the available options.
Are there jewelry box plans suitable for beginners?
Yes, there are jewelry box plans available that are specifically designed for beginners. These plans typically provide simplified instructions, beginner-friendly techniques, and minimal tool requirements, making it easier for those new to woodworking to successfully complete the project.
Can I repurpose an existing box into a jewelry box?
Yes, you can repurpose an existing box into a jewelry box. There are tutorials available that show you how to transform a regular box into a functional jewelry storage solution using simple techniques like sewing or adding compartments. This is a great option if you have a box with sentimental value or want to recycle materials.
How can I customize and personalize a jewelry box?
There are several ways to customize and personalize a jewelry box. You can use techniques like epoxy and mod podge to adhere a photo of your choice to the top of the box, or you can paint the exterior to give it a new look. Additionally, you can add soft materials like leather or fabric on the inside to protect and display your jewelry pieces.
Are there plans available for larger jewelry storage solutions?
Yes, there are jewelry cabinet plans available for those who have a large jewelry collection. These plans include multiple drawers, fold-out sides, and a top case with a mirror. With detailed instructions and diagrams, you can build a jewelry cabinet that provides ample storage space for your valuable pieces.
Can I build a jewelry box specifically for earrings?
Yes, you can build a DIY earring stand that provides a unique and eye-catching display for your earrings. These stands are typically made from wood boards and decorative aluminum sheets, allowing you to showcase your earring collection in a stylish and organized manner.
Are there jewelry box plans that include additional drawers?
Yes, there are jewelry box plans available that include additional drawers for enhanced storage capabilities. These plans provide shopping lists, cutting instructions, and illustrations to guide you through the process of building a jewelry box with multiple drawers. This is a great option for those who need extra storage space.
Are there jewelry box plans suitable for intermediate woodworking skills?
Yes, there are jewelry box plans available that cater to intermediate woodworking skills. These plans may involve more complex designs or techniques, but they provide detailed measurements, building pictures, and written instructions to help you successfully complete the project.
Can I use jewelry box plans to create a customized embroidery box?
Yes, you can use jewelry box plans to create a customized embroidery box. There are plans available that provide detailed drawings and instructions on how to design a box with storage spaces specifically designed for embroidery needles and threads. This allows you to have a dedicated storage solution for your embroidery supplies.
Why should I build my own jewelry box?
Building your own jewelry box allows you to create a personalized and unique storage solution that meets your specific needs. It also gives you the opportunity to showcase your craftsmanship and add a touch of creativity to your jewelry storage. Additionally, building your own jewelry box can be a fulfilling and enjoyable project that provides long-lasting satisfaction.