Are you tired of searching for the perfect bookshelf that fits both your style and storage needs? Look no further – it’s time to take matters into your own hands and craft your own bookshelf. With a wide range of bookshelf plans available, you can unleash your creativity and design a custom bookcase that will elevate your space and add a personal touch. But where do you start and how do you ensure that your DIY project is a success? Let’s dive in and discover the world of bookshelf plans!
Key Takeaways
- Create a custom bookshelf that perfectly fits your style and storage needs.
- Explore a variety of bookshelf plans to find the design that suits your space.
- Choose the right materials and tools for your bookshelf project.
- Follow step-by-step instructions to measure, cut, assemble, and finish your bookshelf.
- Add unique features, accessories, or repurpose old bookcases for added functionality.
Clever Bookshelf Ideas
Looking to go beyond traditional bookshelf designs? Get inspired by these clever bookshelf ideas that will add a touch of creativity to your space. Whether you’re a DIY enthusiast or looking for unique storage solutions, there are plenty of options to choose from. Let your imagination run wild and create a bookshelf that not only holds your favorite reads but also becomes a statement piece in your room.
1. DIY Crate Bookshelves
Repurpose old wooden crates or create your own to build rustic and charming bookshelves. Stack them together in various configurations and secure them with screws or brackets. You can leave them as they are or add a coat of paint for a pop of color. These bookshelves not only provide ample storage but also give your space a cozy and eclectic feel.
2. Built-in Bookcases
If you’re looking for a seamless and custom look, consider installing built-in bookcases. These bookshelves can be designed to fit perfectly into your wall, maximizing space and creating a polished look. Add adjustable shelves to accommodate books of different sizes and display your favorite decor items on top.
3. Leaning Bookshelves
For a minimalist and contemporary look, opt for leaning bookshelves. These open-style shelves lean against the wall, creating a visually appealing display of books and decorative items. They are perfect for small spaces and can be easily moved around to change the room layout.
4. Low Bookshelves
If you have a low ceiling or want to create a cozy reading nook, low bookshelves are a great option. These bookshelves sit closer to the ground, providing easy access to your favorite books. You can place cushions or a small bench on top for comfortable seating while you immerse yourself in a good read.
5. Wall-Mounted Bookshelves
If you’re tight on floor space, consider utilizing the walls with wall-mounted bookshelves. These shelves can be installed at any height and can span the entire length of your wall. They create a sleek and modern look while adding vertical storage to your room.
Don’t be afraid to think outside the box and experiment with different materials, colors, and arrangements. The key is to find a bookshelf design that reflects your personal style and enhances the overall aesthetic of your space.
“A well-designed bookshelf is not only a storage solution but also an opportunity to showcase your personality and style.”
So let your creative juices flow and create a bookshelf that not only holds your beloved books but also becomes a focal point that sparks conversation and admiration.
| Bookshelf Ideas | Description |
|---|---|
| DIY Crate Bookshelves | Repurpose old wooden crates or create your own to build rustic and charming bookshelves. Stack them together in various configurations and secure them with screws or brackets. |
| Built-in Bookcases | Install built-in bookcases for a seamless and custom look. These bookshelves can be designed to fit perfectly into your wall, maximizing space and creating a polished look. |
| Leaning Bookshelves | Opt for leaning bookshelves for a minimalist and contemporary look. These open-style shelves lean against the wall, creating a visually appealing display of books and decorative items. |
| Low Bookshelves | Create a cozy reading nook with low bookshelves. These bookshelves sit closer to the ground, providing easy access to your favorite books. |
| Wall-Mounted Bookshelves | Maximize floor space with wall-mounted bookshelves. These shelves can be installed at any height and span the entire length of your wall, adding vertical storage to your room. |
Stay tuned for the next section where we’ll guide you on choosing the right materials for building your dream bookshelf.
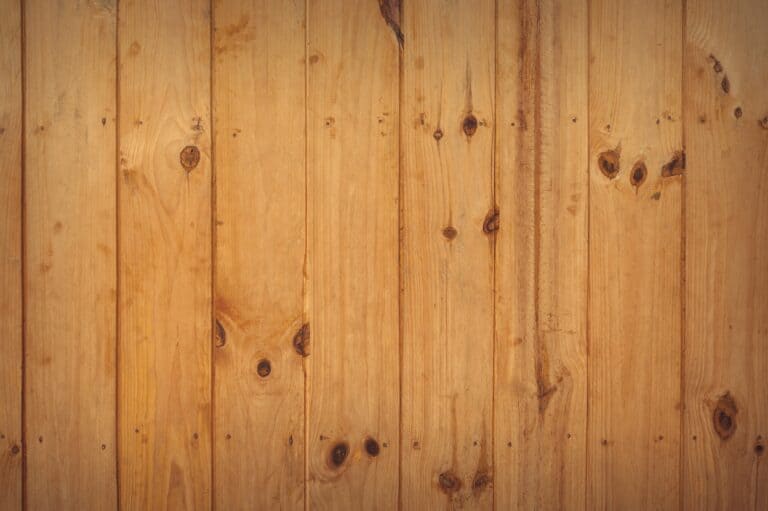
Choosing the Right Materials
When building your own bookshelf, it’s important to choose the right materials. Wooden bookshelf projects are popular for their durability and timeless appeal. Consider using plywood for the shelves and framing, as it provides a sturdy base for the bookcase. Additionally, you may want to explore alternative materials such as reclaimed wood or metal for a more unique and industrial look. Ultimately, the choice of materials will depend on your personal style and budget.
Investing in high-quality materials ensures that your bookshelf will withstand the test of time. Here’s a breakdown of the most common materials used in bookshelf construction:
| Material | Pros | Cons |
|---|---|---|
| Wood |
|
|
| Plywood |
|
|
| Reclaimed Wood |
|
|
| Metal |
|
|
Consider your desired aesthetic, budget, and level of maintenance when selecting materials. Keep in mind that each material has its own unique characteristics and can greatly influence the overall look and feel of your bookshelf.
Enhancing Your Bookshelf with Finishes
Once you’ve chosen the right materials, you can further enhance the appearance of your bookshelf by applying finishes. Whether you prefer a natural wood look or want to add a pop of color, finishes can bring your bookshelf design to life.
“The right choice of materials can elevate your bookshelf from functional storage to a statement piece in your space.”
Popular finishes for wooden bookshelves include:
- Stain: Enhances the natural beauty of the wood while adding a protective layer.
- Paint: Allows you to create a customized look that matches your decor.
- Clear Varnish: Preserves the wood’s natural color and provides long-lasting protection.
Remember to properly prepare the surface by sanding it and applying a primer if necessary. This will ensure a smooth and even finish.
Essential Tools for Building
Before you start building your bookshelf, it’s important to have the right tools on hand. With the right tools, you can ensure accurate cuts, strong joints, and a smooth finish. Here are the essential woodworking tools you’ll need:
Circular Saw
A circular saw is a versatile tool that will allow you to make accurate cuts in the wood. It’s essential for creating straight lines and precise measurements in your bookshelf construction.
Kreg Rip-Cut Jig
The Kreg rip-cut jig is a handy tool that helps you make straight cuts with your circular saw. It ensures precise and consistent cuts, making your bookshelf construction easier and more efficient.
Mitre Saw
A mitre saw is essential for making angled cuts in your bookshelf construction. It allows you to create perfect angles and mitre joints, giving your bookshelf a professional finish.
Kreg Pocket Hole Jig and Drill
The Kreg pocket hole jig and drill are essential for creating strong joints in your bookshelf construction. The pocket holes provide extra support and stability, ensuring that your bookshelf is built to last.
Orbital Sander
An orbital sander is essential for smoothing the surfaces of your bookshelf. It helps to remove any rough edges or imperfections, allowing you to achieve a smooth and professional finish.
Nail Gun
A nail gun is necessary for securing the pieces of your bookshelf together. It provides a quick and efficient way to join the components, saving you time and effort in the construction process.
Wood Glue and Screws
Wood glue and screws are essential for adding stability to your bookshelf. The wood glue creates a strong bond between the pieces, while screws provide additional support and reinforcement.
With these essential tools in your arsenal, you’ll be well-equipped to tackle your bookshelf construction project. Remember to prioritize safety and precision in your work, and enjoy the satisfaction of building your own custom bookshelf.
Measuring and Cutting the Pieces
Accurate measurements are key to ensuring your bookshelf fits perfectly in your space. Start by determining the desired dimensions for your bookshelf, considering factors like height, width, and depth. A well-planned bookshelf will not only look aesthetically pleasing but also provide functional storage for your books and other items.
Remember, measure twice and cut once. This age-old adage certainly applies when it comes to cutting plywood for your bookshelf. One wrong measurement or inaccurate cut can throw off the entire assembly process, resulting in a misaligned or unstable bookcase.
When cutting plywood for your bookshelf, it’s essential to use the right tools for precise and clean cuts. A circular saw paired with a Kreg rip-cut jig is an excellent combination for achieving straight and accurate cuts. The Kreg rip-cut jig acts as a guide, ensuring that your cuts remain consistent and parallel.
Here’s a step-by-step guide to measuring and cutting the pieces for your bookshelf:
- Measure the dimensions: Determine the height, width, and depth of your bookshelf. Take into account any specific requirements, such as fitting the bookshelf in a specific space or accommodating the size of your books.
- Mark the plywood: Use a measuring tape and a pencil to mark the dimensions on the plywood sheets. Double-check your measurements before proceeding to the next step.
- Position the jig: Attach the Kreg rip-cut jig to the plywood sheet, aligning it with the marked dimensions. Ensure that the jig is securely positioned and won’t wobble during the cutting process.
- Make the cuts: Use the circular saw to cut along the edge of the Kreg rip-cut jig, following the marked dimensions. Take your time and maintain a steady hand to achieve smooth and accurate cuts.
- Repeat for other pieces: Repeat the same process for cutting the sides, shelves, and back of the bookcase. Double-check the dimensions of each piece before making the cuts.
By following these steps and using the right tools, you can ensure that the pieces for your bookshelf are accurately measured and precisely cut. This attention to detail will result in a well-fitted, sturdy, and visually appealing bookshelf that stands the test of time.
Now that you have your pieces cut, you’re ready to move on to the next step: assembling your bookshelf.

Assembling the Bookshelf
When it comes to bookshelf assembly, using pocket hole screws can greatly simplify the process. By utilizing a Kreg pocket hole jig, you can easily create pocket holes on the sides of the bookcase and the shelves. This clever technique allows for strong and secure joints, resulting in a sturdy and stable bookshelf.
Here’s how to assemble your bookshelf using pocket hole screws:
- Start by applying wood glue between the joints of the bookshelf pieces.
- Insert the pocket hole screws into the pocket holes, using a screwdriver or drill.
- Tighten the screws until the pieces are securely fastened together.
- Repeat this process for each shelf, ensuring that they are evenly spaced and aligned.
This method not only simplifies the assembly process but also provides added strength and stability to your bookshelf. By using pocket hole screws, you can confidently display your favorite books and decor without worrying about the structural integrity of the bookcase.
With your bookshelf assembled, you’re one step closer to enjoying your newly created storage space. In the next section, we’ll explore different finishing touches you can add to personalize your bookshelf and make it truly unique.
Finishing Touches
Once you have assembled your bookshelf, it’s time to add the final touches that will bring it to life. One of the options to consider is painting or staining the bookshelf to match your existing decor and personal style.
If you prefer a colorful and vibrant look, painting the bookshelf might be the ideal choice. Select a paint color that complements the room or adds a pop of color to make a statement. Whether you go for a bold and dramatic shade or a soft and subtle hue, painting the bookshelf can transform it into a stunning focal point in your space.
On the other hand, if you want to accentuate the natural beauty of the wood, staining might be the perfect option for you. Choose a wood stain that enhances the grain and texture of the wood, creating a warm and inviting look. This timeless finish can add a touch of sophistication and elegance to your bookshelf.
Before applying paint or stain, ensure that you have filled any holes or imperfections in the wood with wood filler. This step will help you achieve a smooth and flawless surface. Once the filler is dry, use sandpaper to gently sand the entire bookshelf, creating an even and polished finish.
When you are ready to apply the paint or stain, make sure to follow the manufacturer’s instructions for the best results. Use a brush or a roller to evenly coat the surfaces, applying multiple thin layers for a professional finish. Allow each layer to dry completely before adding the next one.
For added durability and protection, consider applying a coat of varnish or polyurethane. This clear topcoat will shield the bookshelf from everyday wear and tear, making it more resistant to scratches and stains. It will also give the bookshelf a polished and glossy appearance.
Remember, the finishing touches you choose for your bookshelf can greatly impact its overall look and feel. Whether you decide to paint it in a vibrant color or stain it to showcase the natural beauty of the wood, take the time to ensure a smooth and flawless finish. The result will be a bookshelf that not only provides functional storage but also adds a touch of style and personality to your space.
Picking the Perfect Finish
- If you want a sleek and modern aesthetic, consider a glossy paint finish. This will create a polished and reflective surface that adds a touch of sophistication to your bookshelf.
- For a more rustic or vintage look, opt for a distressed or antiqued finish. This involves adding layers of paint or stain and intentionally sanding or scraping away some of the layers to create a worn and weathered appearance.
- If you prefer a natural and organic vibe, choose a clear varnish or wax finish. This will protect the wood while preserving its natural color and texture, giving your bookshelf a warm and inviting feel.


Adding Additional Features
Make your bookshelf truly unique by incorporating additional features and accessories. These custom bookshelf ideas and bookshelf accessories will elevate the functionality and aesthetic appeal of your bookcase. Explore the following options to create a personalized and stylish storage solution:
Adjustable Shelves
Add versatility to your bookshelf by incorporating adjustable shelves. This feature allows you to customize the height between shelves, accommodating books of different sizes and creating room for decorative items. Whether you prefer a tall bookshelf to showcase your collection or a compact one for smaller spaces, adjustable shelves offer the flexibility you need.
Decorative Molding
Elevate the elegance of your bookshelf by adding decorative molding. This intricate detail enhances the overall design, giving your bookcase a refined and sophisticated look. Consider options like crown molding, panel molding, or trim to create a visually appealing border or embellishment that complements your interior decor.
Integrated Lighting
Illuminate your bookshelf and create a warm ambiance by incorporating integrated lighting. LED strip lights or small spotlight fixtures can be installed along the top or underside of the shelves. This not only enhances visibility but also adds a modern touch to your bookcase. Adjust the lighting to suit different moods or highlight specific items on display.
Built-in Desk or Workspace
Maximize the functionality of your bookshelf by incorporating a built-in desk or workspace. This innovative design allows you to combine storage and a functional work area, making the most of limited space. Whether you need a designated spot for studying, working from home, or pursuing your hobbies, a built-in desk within your bookshelf provides a practical and space-saving solution.
With these custom bookshelf ideas and bookshelf accessories, you can transform a simple bookcase into a unique and personalized piece of furniture. Let your imagination run wild and create a bookshelf that not only organizes your books but also showcases your individual style.
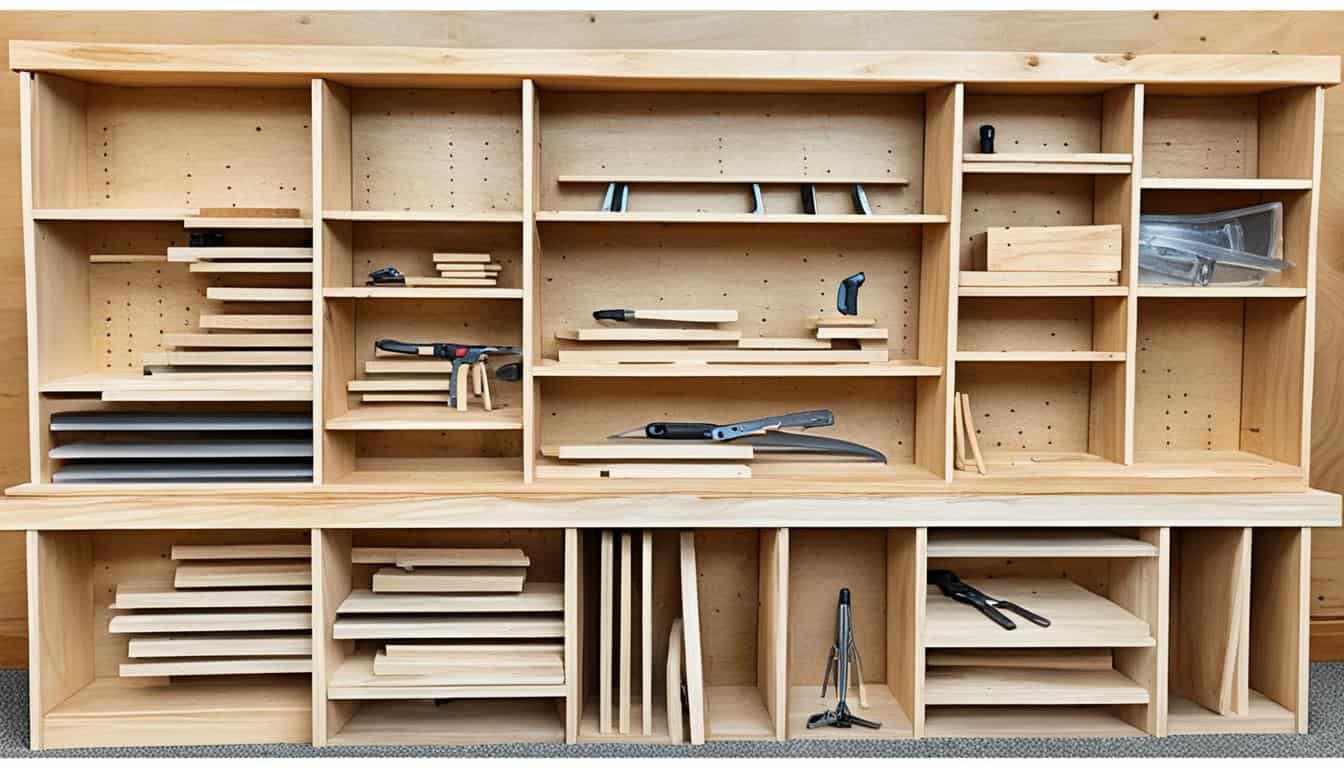
Upcycling Bookcases for a Rolling Work Table
If you’re looking to repurpose old bookcases, why not consider transforming them into a rolling work table? By attaching castor wheels to the bottom and adding a tabletop, you can create a versatile and mobile workspace that fits your needs perfectly. This upcycled bookcase solution offers both storage opportunities and the flexibility to move your workspace as required. Whether you’re a crafter, artist, or someone who needs a dedicated workspace in your home, this budget-friendly idea is worth considering.
Using your old bookcases as a foundation for your rolling work table not only reduces waste but also gives your furniture a new lease on life. Instead of discarding them, repurpose them and unlock their full potential.

The image above showcases a creative example of an upcycled bookcase transformed into a rolling work table. Using a tabletop in a complementary finish, the bookcase is now a mobile and functional workspace that combines storage and convenience.
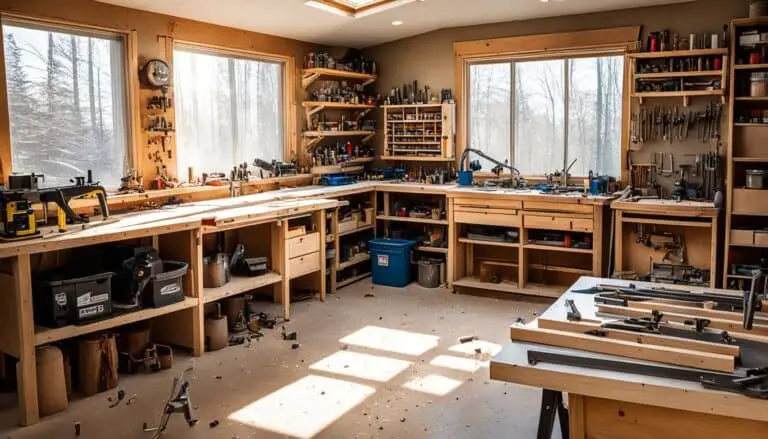
Tips for Organizing and Storing Supplies
Once your bookshelf or rolling work table is complete, it’s time to organize and store your craft supplies effectively. A well-organized craft room not only enhances your productivity but also makes it easier to find and access your materials. Here are some practical storage ideas and organization tips to keep your workspace tidy and inspiring.
Categorize and Containerize
Utilize bins, baskets, or labeled containers to categorize and store your craft supplies. Sort similar items together, such as paints, brushes, paper, and fabrics, so you can easily locate what you need. Clear containers are particularly useful as they allow you to see the contents at a glance. Consider using stackable containers to optimize vertical space and keep everything within reach.
Small Item Storage
For smaller craft items like paintbrushes, pens, and beads, consider using fabric storage boxes or mason jars. These containers provide a neat and organized solution, preventing your supplies from getting lost. Label each box or jar to quickly identify its contents, making it easier to find what you’re looking for.
Hanging Tools and Accessories
Maximize your storage space by installing hooks or pegboards on the sides of your bookshelf. Hang frequently used tools, such as scissors, rulers, or cutting mats, for easy access. You can also utilize the pegboard to hang spools of ribbons, thread, or other craft materials. This not only keeps your supplies organized but also adds visual interest to your craft room.
“Organizing your craft supplies is like a canvas waiting for you to bring it to life. Find a system that works for you and let your creativity flow.”
Mobile Storage Cart
If you need the flexibility to move your supplies around your craft room, consider investing in a mobile storage cart. These carts usually come with multiple drawers or shelves, providing ample space for various craft materials. You can sort your supplies by category or project, making it easy to roll your cart to your work area whenever you need it.
Utilize Wall Space
Make use of vertical space by installing shelves or hanging storage units on the walls of your craft room. This allows you to store items off the floor and frees up valuable workspace. Use decorative baskets or wall-mounted bins to store fabric scraps, yarn, or other materials. By utilizing your wall space, you can maximize storage capacity without sacrificing floor space.
| Storage Idea | Benefits |
|---|---|
| Clear plastic bins | Provides visibility and easy access to supplies |
| Stackable containers | Optimizes vertical space and organization |
| Fabric storage boxes | Perfect for small craft items and easy to label |
| Mason jars | Keeps small craft supplies visible and organized |
| Hooks and pegboards | Hangs tools and accessories for easy access |
| Mobile storage cart | Provides portability and versatile storage options |
| Wall-mounted shelves | Utilizes vertical space for efficient storage |
By implementing these craft room organization and storage ideas, you can create a clutter-free and inspiring workspace. Experiment with different storage solutions to find the perfect system that suits your needs and allows you to focus on your creative projects.
Maximizing Space Efficiency
If you have limited space, there are smart solutions to maximize the efficiency of your bookshelf and optimize the organization of your small room. By implementing space-saving bookshelves and small room organization techniques, you can create a functional and stylish solution that maximizes both floor and vertical space.
Vertical Bookshelves
Opt for vertical bookshelves that utilize the height of your room. These bookshelves are designed to take advantage of vertical space, allowing you to store more books and items while minimizing the footprint on the floor. With a vertical bookshelf, you can decorate your walls and transform them into a practical storage solution.
Wall-Mounted Bookshelves
Consider wall-mounted bookshelves as another space-saving option. These bookshelves are attached directly to the wall, freeing up valuable floor space. They can be mounted at various heights, allowing you to customize the organization of your books and decorative items. Not only do wall-mounted bookshelves create visual interest, but they also provide easy access to your favorite reads.
Built-in Bookcases
If you have alcoves or niches in your small room, utilizing built-in bookcases can maximize floor space. These bookcases are custom-built to fit seamlessly into existing architectural features, creating a streamlined and integrated look. Built-in bookcases offer the advantage of blending with the room’s design while offering ample storage for your books and personal belongings.
| Advantages of Space-Saving Bookshelves | Features |
|---|---|
| Maximizes floor space | Utilizes vertical space |
| Creates visually appealing storage | Offers easy access to books and items |
| Customizable storage solutions | Blends with the room’s design |
Additionally, make the most of the top of your bookshelf as a display area for cherished photographs, decorative items, or plants. This not only adds visual interest but also helps to free up space on other surfaces in your small room. Adding hooks to the sides of your bookshelf can provide a convenient spot to hang bags, scarves, or hats, making use of every inch of available space.
By employing these space-saving techniques and incorporating them into your small room organization, you can maximize the efficiency of your bookshelf and create a visually appealing and functional storage solution that perfectly suits your needs.
Personalizing Your Bookshelf Design
Your bookshelf should reflect your personal style and taste. When it comes to custom bookshelf design, the possibilities are endless. Don’t be afraid to think outside the box and incorporate unique elements into your design. By adding personal touches, you can create a bookshelf that not only serves its purpose but also adds beauty and character to your space.
Decorative Accents
One way to personalize your bookshelf is by adding decorative accents. Consider incorporating elements like ornamental brackets, carved moldings, or stylish drawer pulls. These small details can elevate the overall look of your bookshelf and make it stand out.
Unconventional Materials
Another way to make your bookshelf design unique is by using unconventional materials. Instead of traditional wood, you can consider using materials like metal, glass, or even recycled materials. This will give your bookshelf a modern and eclectic look.
Personal Touches
To truly make your bookshelf one-of-a-kind, incorporate personal touches that reflect your interests and personality. Display photographs of loved ones, artwork you’ve created, or objects that hold sentimental value. This will not only make your bookshelf visually appealing but also create a sense of nostalgia and warmth.
“Your bookshelf is a reflection of your personality and interests. Take the opportunity to showcase who you are through your bookshelf design.”
Remember, the goal is to create a bookshelf that showcases your unique style and creates a statement in your space. Don’t be afraid to experiment and let your creativity shine. Your custom bookshelf design should be a reflection of you and what you love.
| Decorative Accents | Unconventional Materials | Personal Touches |
|---|---|---|
| Ornamental brackets | Metal | Photographs |
| Carved moldings | Glass | Artwork |
| Stylish drawer pulls | Recycled materials | Personal objects |
Conclusion
Building your own bookshelf can be a fulfilling and exciting project that allows you to showcase your creativity while providing a practical storage solution. By choosing the right plans and tools, you can customize a bookcase that perfectly fits your needs and style, whether it’s a traditional design, a repurposed piece, or a versatile rolling work table.
With a wide range of bookshelf ideas and DIY projects available, you have the freedom to create a truly unique and functional piece of furniture for your space. It’s an opportunity to express your personal style through the choice of materials, finishes, and additional features.
So, get ready to embark on your DIY bookshelf journey and enjoy the satisfaction of crafting a custom bookcase that enhances your home. With your imagination, the possibilities are endless. Start exploring custom bookcase ideas and dive into exciting DIY bookshelf projects today!
FAQ
What are some popular bookshelf ideas?
Some popular bookshelf ideas include DIY crate bookshelves, built-in bookcases, leaning bookshelves, low bookshelves, and wall-mounted bookshelves. These unique designs go beyond traditional bookshelves and offer creative storage solutions.
What are the best materials for building a bookshelf?
Wooden bookshelf projects are popular for their durability and timeless appeal. Plywood is a great choice for the shelves and framing, as it provides a sturdy base. Reclaimed wood or metal can also be used for a more unique and industrial look.
What tools do I need to build a bookshelf?
Essential tools for building a bookshelf include a circular saw, Kreg rip-cut jig, mitre saw, Kreg pocket hole jig, drill, orbital sander, nail gun, wood glue, and screws.
How do I measure and cut the pieces for a bookshelf?
Start by determining the desired dimensions for your bookshelf, then use a circular saw and a Kreg rip-cut jig to make precise cuts in the plywood for the sides, shelves, and back of the bookcase. Remember to measure twice and cut once to avoid mistakes.
How do I assemble a bookshelf?
Use a Kreg pocket hole jig to create pocket holes on the sides of the bookcase and the shelves. Apply wood glue between the joints and use pocket hole screws to secure the pieces together. Repeat this process for each shelf to ensure a sturdy and stable bookshelf.
How should I finish my bookshelf?
If desired, you can paint or stain the bookshelf to match your decor. Fill any holes with wood filler and sand the surfaces for a smooth finish. Apply a coat of paint or varnish for added durability.
Can I add additional features to my bookshelf?
Yes, you can customize your bookshelf by adding adjustable shelves, decorative molding, integrated lighting, or even a built-in desk or workspace.
How can I repurpose old bookcases?
One option is to create a rolling work table by attaching castor wheels to the bottom and adding a tabletop. This transforms the bookcases into a versatile and mobile workspace, perfect for crafters or artists.
What tips do you have for organizing and storing supplies on a bookshelf?
Utilize bins, baskets, labeled containers, fabric storage boxes, or mason jars to keep items categorized and easily accessible. Install hooks or pegboards on the sides of the bookshelf for hanging tools or accessories.
How can I maximize space efficiency with a bookshelf?
Opt for vertical bookshelves or wall-mounted bookshelves to make use of vertical space. Consider incorporating built-in bookcases that fit seamlessly into alcoves or niches. Use the top of the bookshelf as a display area or add hooks for hanging items.
How can I personalize my bookshelf design?
Add decorative accents, use unconventional materials, or incorporate personal touches like photographs or artwork to make your bookshelf unique and reflective of your personal style.