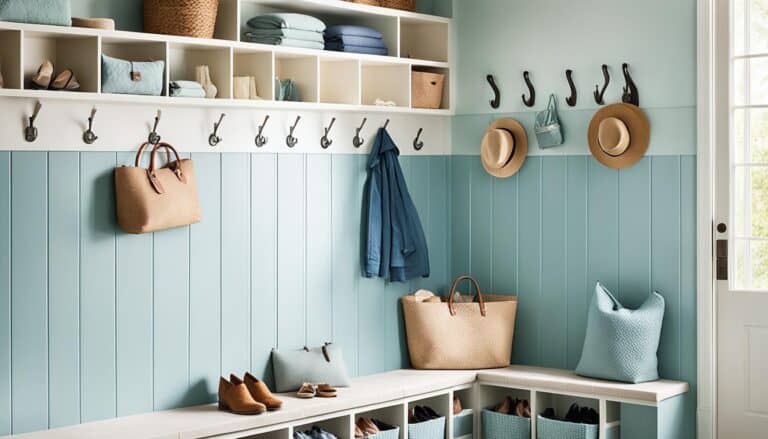
Are you looking to add a touch of elegance and style to your home? Have you considered creating a board batten accent wall? This simple DIY project can transform any room into a modern and textured masterpiece. But what exactly is a board batten accent wall, and how can you bring this rustic and chic aesthetic to your space? Let’s explore the materials, installation process, and design tips to help you create a stunning board batten accent wall that will leave everyone in awe.
Key Takeaways:
- Adding a board batten accent wall can give your home a stylish and elegant makeover.
- A board batten accent wall consists of thin strips of wood molding, known as battens, placed over panel boards.
- Before starting your project, gather inspiration and plan the design of your board batten accent wall.
- Measure and mark your wall accurately to ensure precise placement of the battens.
- Install the frame and vertical and horizontal slats of your board batten accent wall, using adhesive and nails for stability.
What is a Board and Batten Accent Wall?
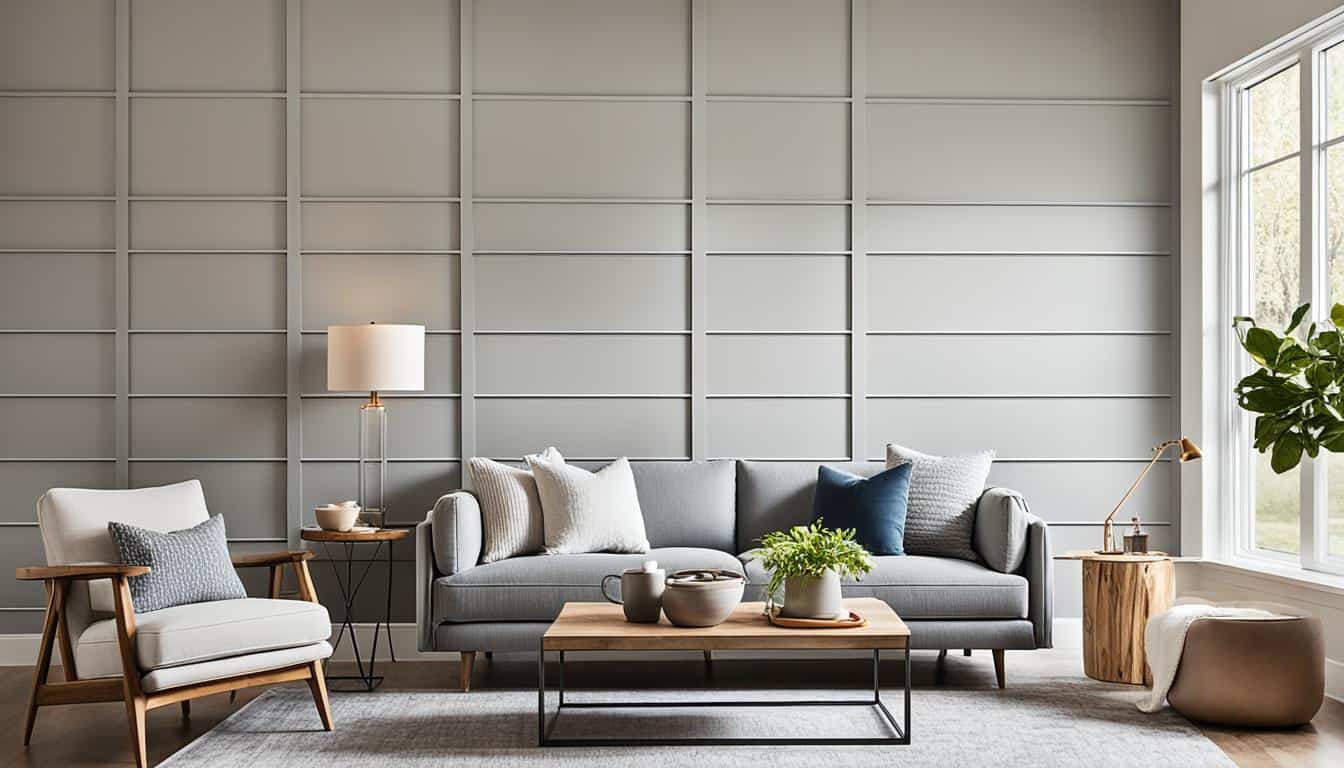
A board and batten accent wall is a type of siding where thin strips of wood molding, called battens, are placed over panel boards. This creates a stylish and elegant look that is both rustic and chic. The strong vertical lines of the battens provide shadows and textures to the home exterior, adding depth and character to any room.
Materials Needed for a Board and Batten Accent Wall
To create a stunning board and batten accent wall, you will need the following materials:
- Primed MDF molding (9/16″ x 3 1/2″ x 12′ and 9/16″ x 3 1/2″ x 8′)
- Construction adhesive
- LePage Wood Filler
- ALEX PLUS Caulk, Acrylic Latex Plus Silicone
- Interior primer
- Final interior paint
- Paintbrush
- Mini paint roller
- Tape measure
- Level
- Stud finder
- Finish nailer
- Mitre saw
- Hand sander
- Safety eyewear
With these essential materials, you’ll have everything you need to complete your board and batten accent wall project. Let’s dive into the process of creating your masterpiece!
| Materials | Quantity |
|---|---|
| Primed MDF molding (9/16″ x 3 1/2″ x 12′) | Depends on the dimensions of your wall |
| Primed MDF molding (9/16″ x 3 1/2″ x 8′) | Depends on the dimensions of your wall |
| Construction adhesive | 1 tube |
| LePage Wood Filler | 1 container |
| ALEX PLUS Caulk, Acrylic Latex Plus Silicone | 1 tube |
| Interior primer | 1 gallon |
| Final interior paint | 1 gallon |
| Paintbrush | 1 or more |
| Mini paint roller | 1 or more |
| Tape measure | 1 |
| Level | 1 |
| Stud finder | 1 |
| Finish nailer | 1 |
| Mitre saw | 1 |
| Hand sander | 1 |
| Safety eyewear | 1 pair |
Planning and Inspiration for Your Board and Batten Accent Wall
Before starting your project, it’s essential to plan and gather inspiration for your board and batten accent wall. Creating a vision board or exploring design websites and Pinterest can provide you with ideas and inspiration for your desired look. Consider the dimensions of your wall and determine the number of rectangles that will fit based on the width of the molding you choose.
Creating a Vision Board
If you’re unsure about the design or style you want for your board and batten accent wall, creating a vision board is a great way to visualize your ideas. Gather images, paint swatches, fabric samples, and any other items that represent the look you want to achieve. Arrange them on a corkboard or create a digital vision board using online tools. This will help you clarify your vision and make design decisions more confidently.
Browsing Design Websites and Pinterest
Browsing design websites and Pinterest can provide you with a wealth of inspiration and ideas for your board and batten accent wall. Look for images of rooms with similar dimensions to yours and pay attention to the color schemes, patterns, and textures that catch your eye. Save or pin any images that resonate with your style, and take note of the key elements you’d like to incorporate into your own accent wall.
Considering Wall Dimensions
When planning your board and batten accent wall, consider the dimensions of your wall. Measure the height and width, and take note of any architectural features or obstacles that may affect the placement of the battens. This will help you determine the number of rectangles that will fit on your wall and ensure a balanced and visually appealing design.
By taking the time to plan and gather inspiration for your board and batten accent wall, you’ll be better equipped to bring your vision to life and create a stunning focal point in your space.
| Planning Tips | Inspiration Sources |
|---|---|
|
|
Measuring and Marking Your Wall for the Board and Batten Design
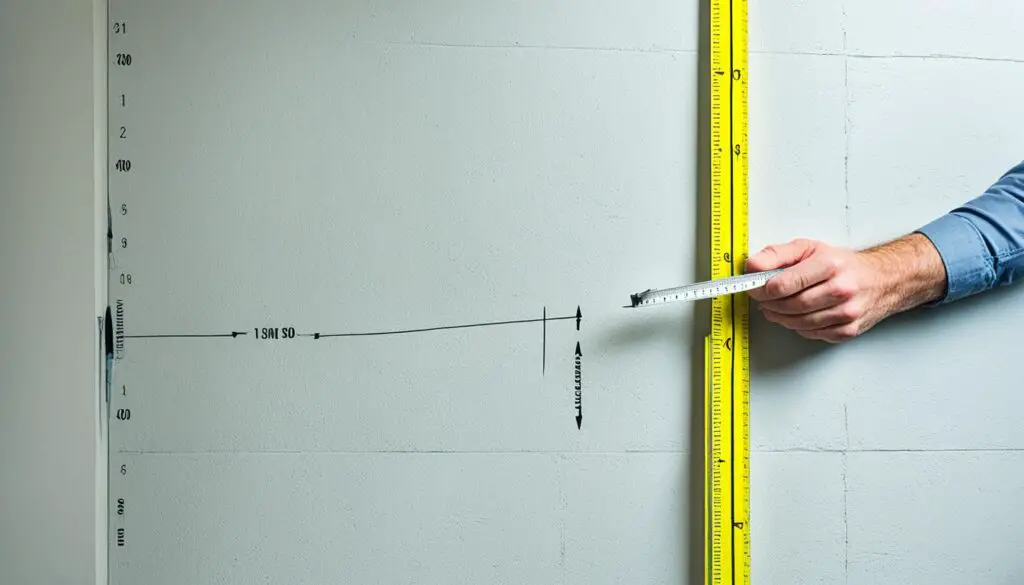
Before installing the battens for your board and batten accent wall, it’s crucial to accurately measure and mark your wall. This step will ensure that the placement of the battens is precise and aligned, resulting in a polished and professional look. Follow these steps to measure and mark your wall effectively:
- Measure the top, middle, and bottom: Use a tape measure to measure the height of your wall at the top, middle, and bottom. It’s essential to take these measurements as walls are rarely perfectly level. Note down the measurements for reference.
- Determine horizontal and vertical rectangles: Consider the dimensions of your wall and the width of the molding you have chosen. Based on these factors, determine the number of rectangles that will fit horizontally and vertically on your wall while leaving space for the frame.
- Visually plan the design: With your measurements in hand, take a moment to visually plan the design of your board and batten accent wall. Consider the spacing and proportions of the rectangles, ensuring a balanced and aesthetically pleasing arrangement.
- Mark the wall: Using a pencil or painter’s tape, mark the wall where each rectangle will be placed. This will act as a guide during the installation process, ensuring precise placement of the battens.
By taking the time to measure and mark your wall accurately, you’ll set a solid foundation for the installation of your board and batten accent wall. This attention to detail will result in a stunning and harmonious design that enhances the overall aesthetic of your space.
Preparing and Installing the Frame for Your Board and Batten Accent Wall
To create a stunning board and batten accent wall, you’ll first need to prepare and install the frame. This step sets the foundation for your wall and ensures stability and durability.
To begin, gather the following materials:
- Primed MDF molding (9/16″ x 3 1/2″ x 12′ and 9/16″ x 3 1/2″ x 8′)
- Construction adhesive
- Stud finder
- Finish nailer
- Safety eyewear
Once you have the necessary materials, follow these steps:
- Start by cutting the largest boards to the appropriate size for your wall. Remember to account for any openings such as windows or doors.
- Apply construction adhesive to the back of each board to ensure a secure attachment.
- Using a stud finder, locate the studs in your wall and mark their positions.
- Position the boards on the wall, aligning them with the marked stud positions.
- Using a finish nailer, secure the boards to the wall by nailing them into the studs. This will provide additional stability and support.
Remember to wear safety eyewear while using a nailer to protect your eyes from any flying debris. Take your time and double-check the alignment and levelness of the boards as you go.
Tip: Applying construction adhesive and nails will ensure a strong and durable frame for your board and batten accent wall, preventing any potential warping or movement over time.
Once you’ve completed this step, you’re ready to move on to the next phase of your board and batten accent wall project.
| Materials | Quantity |
|---|---|
| Primed MDF molding (9/16″ x 3 1/2″ x 12′) | Varies based on wall size |
| Primed MDF molding (9/16″ x 3 1/2″ x 8′) | Varies based on wall size |
| Construction adhesive | As needed |
| Stud finder | 1 |
| Finish nailer | As needed |
| Safety eyewear | 1 pair |
Installing the Vertical Slats of Your Board and Batten Accent Wall
Now that you have installed the frame for your board and batten accent wall, it’s time to move on to the next step: installing the vertical slats. This is where the true beauty and charm of your accent wall will come to life.
To begin, you’ll need to measure the distance between each batten and mark the wall where each board will go. Remember to refer back to the measurements and spacing you determined during the planning phase to ensure consistent and even spacing between the vertical slats.
| Materials Needed | Tools Needed |
|---|---|
|
|
Once you have marked the wall, it’s time to secure the vertical slats. Apply a generous amount of construction adhesive to the back of each board and press it firmly against the wall, aligning it with the marks you made. Make sure the boards are level and plumb by using a level. To ensure a secure installation, use nails to further anchor the boards to the wall.
Repeat this process for each vertical slat until your board and batten accent wall is complete. Take your time to ensure each board is properly aligned and securely fastened.
By installing the vertical slats, you are adding depth, texture, and visual interest to your accent wall. The contrast between the vertical battens and the panel boards creates a striking design element that is both modern and timeless.
Remember to maintain consistency in spacing and alignment as you install the vertical slats. This will help create a clean and polished finish for your board and batten accent wall.
Installing the Horizontal Slats of Your Board and Batten Accent Wall
Now that the vertical slats are securely in place, it’s time to move on to the next step: installing the horizontal slats of your board and batten accent wall. This step brings your wall to life, adding depth and dimension to your space. Here’s how to get started:
- Cut the boards: Measure and cut the boards to the necessary width, taking into account any variations in wall spacing. Ensure that each board is cut precisely to fit your design.
- Secure the boards: Using the appropriate adhesive or nails, secure each horizontal slat to the wall. Make sure to maintain even spacing between the boards to achieve a polished and professional look. Use a level to ensure that the slats are perfectly horizontal.
- Make adjustments: During the installation process, you may need to make additional measurements and cuts to ensure a precise fit. Be prepared to make adjustments as needed to create a seamless and visually appealing board and batten accent wall.
Installing the horizontal slats of your board and batten accent wall is a crucial step that adds the final touch to your project. Take your time and pay attention to detail to achieve the desired aesthetic. Once this step is complete, you’ll be one step closer to enjoying your stylish and elegant new space.
| Materials needed: | Tools required: |
|---|---|
|
|
Filling and Caulking the Cracks and Edges of Your Board and Batten Accent Wall
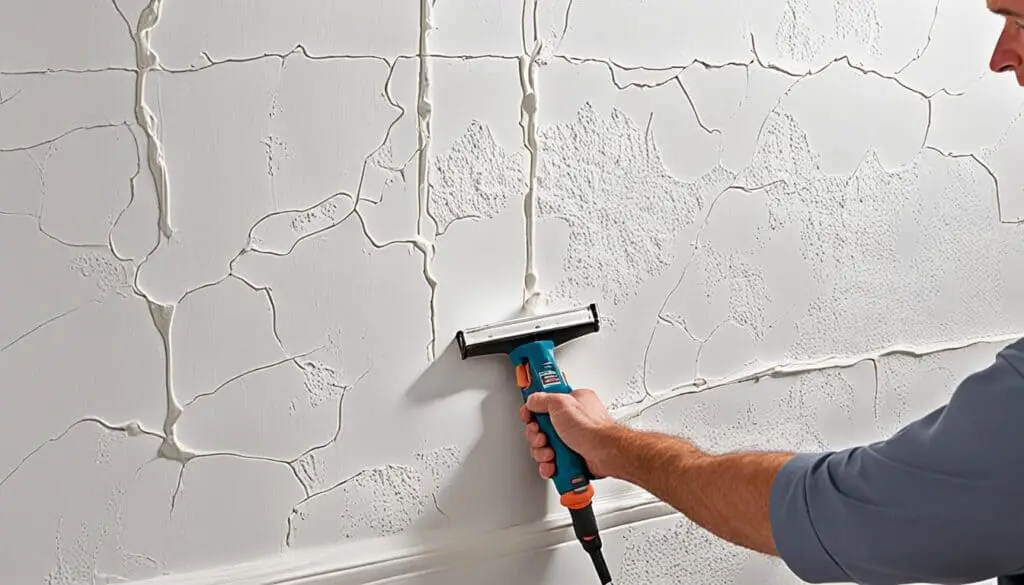
After completing the installation of the battens for your board and batten accent wall, the next step is to fill the cracks and gaps between the boards to achieve a seamless and polished finish. Properly filling and caulking the cracks and edges will ensure a professional-looking result. Follow the steps below to complete this important part of the process:
- Start by using wood filler to fill in the cracks where the boards meet. Apply the wood filler using a putty knife, ensuring that it completely fills in any gaps or spaces between the boards. Smooth the surface of the wood filler with the putty knife and let it dry according to the manufacturer’s instructions.
- Once the wood filler is dry, it’s time to apply caulk along the edges of every board. Choose a high-quality caulk that is paintable and matches the color of your boards. Apply a thin and even bead of caulk along each edge, making sure to fill any gaps or inconsistencies.
- Smooth the caulk using a caulk smoothing tool or your finger, ensuring that it creates a tight seal between the boards. Wipe away any excess caulk using a damp cloth or sponge.
- Allow the caulk to dry completely before proceeding to the next step. The drying time may vary depending on the caulk brand and environmental conditions, so refer to the manufacturer’s instructions for guidance.
Expert Tip:
Before applying wood filler and caulk, ensure that the surface of the boards is clean and free from dust or debris. Wipe down the boards with a soft cloth or use a vacuum with a brush attachment to remove any dirt.
By filling and caulking the cracks and edges of your board and batten accent wall, you will achieve a seamless and finished look. This step is essential to ensure that your accent wall appears professionally installed and enhances the overall aesthetic of your space.
Priming and Painting Your Board and Batten Accent Wall
Before you start painting your board and batten accent wall, it’s important to prime the surface to ensure even coverage and proper adhesion. Follow these steps to achieve a flawless finish:
- Choose a high-quality interior primer: Select a primer that is suitable for your wall type and the type of final paint you will be using. This will ensure optimal adhesion and durability.
- Prepare the surface: Clean the wall and ensure it is free of dust, dirt, and any imperfections. Use a mild detergent or a mixture of water and vinegar, and allow the wall to dry completely before proceeding.
- Apply primer to the entire wall: Use a brush or a roller to apply the primer evenly to the entire board and batten accent wall, including the battens. Make sure to cover all surfaces and edges.
- Allow the primer to dry: Follow the manufacturer’s instructions for drying time. It is important to ensure that the primer is completely dry before applying the final paint.
- Choose your final interior paint: Select the color and type of paint that best suits your style and desired aesthetic. Consider using a washable or durable paint finish for added longevity.
- Apply the final paint: Start by cutting in the edges using a brush, and then use a roller to paint larger sections of the wall. Apply multiple coats as needed, allowing each coat to dry before applying the next.
By priming and painting your board and batten accent wall, you can transform your space into a stunning focal point that complements your overall aesthetic.
Benefits of Priming and Painting Your Board and Batten Accent Wall
Adding a fresh coat of paint to your board and batten accent wall not only enhances its visual appeal but also provides multiple benefits:
- Enhanced durability: Priming and painting your accent wall helps protect it from wear and tear, making it easier to clean and maintain over time.
- Improved aesthetics: Choosing a paint color that complements your space allows you to create a cohesive and stylish look, enhancing the overall design and ambiance of the room.
- Easy personalization: Painting your accent wall gives you the freedom to express your personal style and creativity, as you can choose from a wide range of colors and finishes. It allows you to make a statement and create a unique focal point in your space.
- Added protection: Applying paint to your board and batten accent wall provides an additional layer of protection against moisture, stains, and damage, prolonging the life of the wall.
By investing time in priming and painting your board and batten accent wall, you can achieve a truly customized and finished look that will elevate the aesthetics and functionality of your space.
Tips for a Successful Board and Batten Accent Wall Project
Creating a stunning board and batten accent wall requires careful planning and execution. To ensure a successful project, follow these expert tips:
- Measure and plan carefully before starting your project: Take accurate measurements of your wall and determine the layout for your battens. Plan the number and spacing of battens to achieve your desired look.
- Use a level to ensure precise and level installation: Check the level of each batten as you install it to ensure it is straight and even.
- Secure the boards to the studs for added stability: Use a stud finder to locate the studs and attach the battens securely for a strong and durable accent wall.
- Consider pre-primed boards for a seamless finish: Using pre-primed boards can save time and effort in the painting process, resulting in a smoother and more polished final look.
- Fill cracks and caulk edges for a polished look: Use wood filler to fill any gaps or cracks between the boards. Caulk the edges to create clean lines and a professional finish.
- Prime the wall before painting for better adhesion: Apply a high-quality interior primer to the entire wall, including the battens, to ensure better adhesion and a longer-lasting paint finish.
- Apply multiple coats of paint for a professional finish: To achieve a flawless and professional look, apply multiple coats of paint, allowing each coat to dry before applying the next.
By following these tips, you can create a stunning and visually appealing board and batten accent wall that transforms your space into a work of art.
Cost of Creating a Board and Batten Accent Wall
The cost of creating a board and batten accent wall can vary based on factors such as the size of your wall, the type of materials used, and the overall design. One of the key materials needed is primed MDF molding, which typically costs around $3-4 per linear foot.
In addition to the molding, you’ll also need other materials such as adhesive, filler, caulk, primer, and paint. The total cost will depend on the quantity and quality of these materials.
On average, a board and batten accent wall project can range from $150 to $300, including the cost of materials and any tools that may be required. However, it’s important to keep in mind that these are just estimates and the final cost may vary.

Cost Breakdown of a Board and Batten Accent Wall
| Materials | Cost |
|---|---|
| Primed MDF molding | $3-4 per linear foot |
| Construction adhesive | Varies |
| Wood filler | Varies |
| Caulk | Varies |
| Primer | Varies |
| Paint | Varies |
How to Create a Board Batten Accent Wall on a Budget
If you’re looking to create a board and batten accent wall on a budget, there are affordable options that can help you achieve a stylish look without breaking the bank. One cost-effective approach is to use primed MDF molding and bender boards, which are more affordable compared to other wood materials. These materials are readily available at home improvement stores and can be easily cut and installed for your accent wall project.
Fortunately, there are plenty of resources available online that provide step-by-step tutorials and guides for creating a board and batten accent wall DIY style. These tutorials walk you through the process, offering tips and tricks to help you achieve a high-end look on a budget. By following these tutorials, you can gain valuable insights and learn the techniques needed to complete your project successfully.
With a little creativity and resourcefulness, you can create a stunning board and batten accent wall without spending a fortune. By utilizing affordable materials and following DIY tutorials, you can transform your space and achieve a stylish, high-end look that will impress your friends and family.
So, don’t let a tight budget hold you back from creating the board and batten accent wall of your dreams. Get inspired, grab your tools, and embark on a budget-friendly DIY adventure that will add charm and character to your space.
| Materials | |
|---|---|
| Primed MDF molding (9/16″ x 3 1/2″ x 12′) | |
| Primed MDF molding (9/16″ x 3 1/2″ x 8′) | |
| Construction adhesive | |
| LePage Wood Filler | |
| ALEX PLUS Caulk, Acrylic Latex Plus Silicone | |
| Interior primer | |
| Final interior paint | |
| Paintbrush | |
| Mini paint roller | |
| Tape measure | |
| Level | |
| Stud finder | |
| Finish nailer | |
| Mitre saw | |
| Hand sander | |
| Safety eyewear |
Benefits of Adding a Board and Batten Accent Wall to Your Home
Adding a board and batten accent wall to your home offers several benefits. It can transform any room by adding depth, character, and texture. The vertical lines created by the battens draw the eye upward, making the room appear taller and more spacious. Additionally, the rustic and chic aesthetic adds elegance and sophistication to your space, creating a visually pleasing and inviting atmosphere.
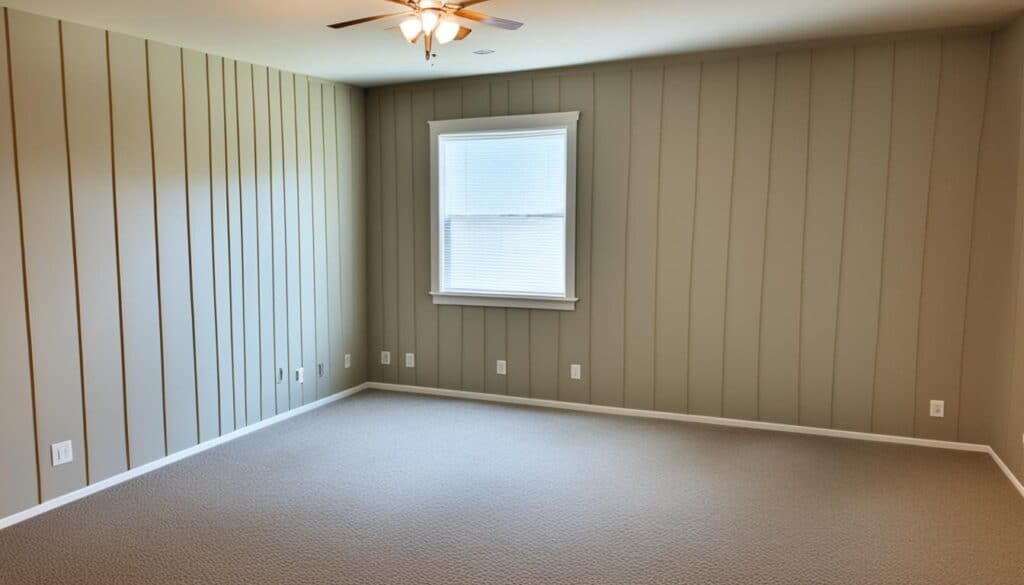
Whether you’re looking to update a living room, bedroom, or entryway, a board and batten accent wall can provide a unique focal point that enhances the overall design of your home. This type of accent wall offers both visual appeal and practical benefits that can greatly impact the ambiance of your space.
| Benefits of a Board and Batten Accent Wall |
|---|
| 1. Adds depth, character, and texture to any room |
| 2. Draws the eye upward, making the room appear taller and more spacious |
| 3. Provides a unique focal point that enhances the overall design |
| 4. Creates a visually pleasing and inviting atmosphere |
| 5. Adds elegance and sophistication to your space |
With a board and batten accent wall, you can easily transform the ambiance of any room and create a cohesive and elegant space. Whether you choose a modern or traditional style, this type of accent wall is versatile and can complement various interior design themes. Consider adding a board and batten accent wall to your home to achieve an elegant and timeless look.
Maintenance and Care for Your Board and Batten Accent Wall
To maintain the pristine appearance of your board and batten accent wall, it’s essential to perform regular maintenance and care. By following these simple steps, you can keep your accent wall looking its best for years to come.
1. Wipe Down Regularly
Using a soft cloth or duster, gently wipe down the surface of your board and batten accent wall on a regular basis. This will help remove any dust, dirt, or debris that may accumulate over time, ensuring a clean and fresh appearance.
2. Avoid Harsh Cleaners
Avoid using abrasive cleaners or harsh chemicals when cleaning your accent wall. These products can damage the paint or wood and strip away the protective finish. Instead, opt for mild soapy water or a specialized wood cleaner designed for delicate surfaces.
3. Promptly Address Repairs
If you notice any cracks, gaps, or other damages on your board and batten accent wall, it’s important to address them promptly. Use wood filler to fill any cracks and gaps, and re-caulk any edges where the boards meet. This will help maintain the wall’s integrity and appearance, preventing further damage.
4. Touch Up Paint
If any areas of your accent wall’s paint become chipped or damaged, touch up the paint as needed. Keep a small container of the final interior paint color used for your wall for easy touch-ups. This will help maintain a consistent and flawless finish.
Pro Tip: It’s a good idea to periodically assess the condition of your board and batten accent wall so you can address any maintenance needs promptly. Regular care and attention will keep your wall looking beautiful and extend its lifespan.
5. Extra Care for High-Traffic Areas
If your board and batten accent wall is in a high-traffic area, such as a hallway or entryway, it may require more frequent maintenance. Consider applying an extra layer of protective finish to these areas to prevent wear and tear.
6. Protect from Direct Sunlight
Direct sunlight can cause the paint on your accent wall to fade over time. To protect your wall from excessive sun exposure, consider using curtains or blinds to limit the amount of sunlight that reaches it. This will help preserve the vibrant colors and overall appearance of your board and batten accent wall.
7. Regular Inspections
Perform regular inspections of your board and batten accent wall to identify any potential issues or areas that may require maintenance. By catching and addressing problems early on, you can prevent further damage and ensure your wall continues to look its best.
| Maintenance Tips | |
|---|---|
| 1. Wipe down regularly | |
| 2. Avoid harsh cleaners | |
| 3. Promptly address repairs | |
| 4. Touch up paint | |
| 5. Extra care for high-traffic areas | |
| 6. Protect from direct sunlight | |
| 7. Regular inspections |
Conclusion
In conclusion, the creation of a board and batten accent wall offers a fulfilling and creative DIY project that has the power to completely transform any room in your home. By carefully selecting the right materials, meticulously planning the design, and paying close attention to detail, you can achieve a chic and elegant look that adds depth and character to your space.
Whether you are working with a limited budget or aiming for a more luxurious makeover, a board and batten accent wall is a versatile and stylish option to consider. This design choice not only enhances the visual appeal of your room but also provides a sense of texture and sophistication. The vertical lines created by the battens draw the eye upward, making the room appear taller and more spacious.
Remember, regular maintenance and care are crucial to ensuring that your board and batten accent wall continues to look its best. Wipe down the surface regularly with a soft cloth or duster to remove dust and debris. Avoid using harsh chemicals or abrasive cleaners that may damage the paint or wood. Address any necessary repairs promptly, such as filling cracks or re-caulking, to maintain the wall’s integrity and appearance.
Whether you’re embarking on a small-scale DIY project or taking on a larger home renovation, a board and batten accent wall is an excellent choice to add a touch of style and charm to any room. With dedication and creativity, your space can be transformed into a sophisticated and visually pleasing haven.
FAQ
What is a board and batten accent wall?
A board and batten accent wall is a type of siding where thin strips of wood molding, called battens, are placed over panel boards to create a stylish and elegant look that is both rustic and chic.
What materials are needed for a board and batten accent wall?
To create a board and batten accent wall, you will need primed MDF molding, construction adhesive, wood filler, caulk, interior primer, final interior paint, paintbrush, mini paint roller, tape measure, level, stud finder, finish nailer, mitre saw, hand sander, and safety eyewear.
How do I plan and gather inspiration for my board and batten accent wall?
Before starting your project, you can create a vision board or browse design websites and Pinterest to find inspiration for your desired look. Consider the dimensions of your wall and determine the number of rectangles that will fit based on the width of the molding you choose.
How do I measure and mark my wall for the board and batten design?
It’s important to measure the top, middle, and bottom of the wall and determine how many rectangles will fit horizontally and vertically while leaving space for the frame. Write down your measurements and visually plan the design before proceeding.
How do I prepare and install the frame for my board and batten accent wall?
Cut the largest boards to the right size and use construction adhesive to secure them to the wall. Use a stud finder to locate and nail the boards into the studs for a secure installation.
How do I install the vertical slats of my board and batten accent wall?
Measure the distance between each batten and mark the wall where each board will go. Secure the boards to the wall using adhesive and nails, ensuring even spacing.
How do I install the horizontal slats of my board and batten accent wall?
Cut the boards to the necessary width, accounting for any variations in wall spacing. Secure the boards in place, ensuring they are evenly spaced and level for a precise fit.
How do I fill and caulk the cracks and edges of my board and batten accent wall?
Use wood filler to fill in the cracks where the boards meet and caulk along the edges of every board to create a tight seal. Smooth the caulk and let it dry before proceeding.
How do I prime and paint my board and batten accent wall?
Before painting, prime the surface with a high-quality interior primer. Once the primer is dry, apply the final interior paint in your desired color, using a brush for detailed areas and a roller for larger sections. Apply multiple coats for a flawless finish.
What are some tips for a successful board and batten accent wall project?
Some tips include measuring and planning carefully, using a level for precise installation, securing the boards to the studs for added stability, considering pre-primed boards for a seamless finish, and applying multiple coats of paint for a professional look.
What is the cost of creating a board and batten accent wall?
The cost of creating a board and batten accent wall can vary depending on the size of your wall, the type of materials used, and the overall design. On average, a board and batten accent wall project can range from 0 to 0.
How can I create a board and batten accent wall on a budget?
If you’re looking to create a board and batten accent wall on a budget, consider using affordable materials such as primed MDF molding and bender boards. DIY tutorials and step-by-step guides are available online, providing instructions and tips for a cost-effective and stylish accent wall.
What are the benefits of adding a board and batten accent wall to my home?
Adding a board and batten accent wall can transform any room by adding depth, character, and texture. The vertical lines created by the battens draw the eye upward, making the room appear taller and more spacious. Additionally, the rustic and chic aesthetic adds elegance and sophistication to your space.
How do I maintain and care for my board and batten accent wall?
To keep your board and batten accent wall looking its best, wipe down the surface regularly with a soft cloth or duster to remove dust and debris. Avoid using abrasive cleaners or harsh chemicals that may damage the paint or wood. Address any repairs promptly to maintain the wall’s integrity and appearance.

