Are your shoes scattered all over the house, leaving your space cluttered and disorganized? It’s time to take control of your shoe situation and find a creative solution that not only keeps your shoes organized but also adds style to your home. Say goodbye to the days of tripping over stray sneakers and hello to a neat and tidy shoe storage system.
In this article, we will explore a variety of innovative DIY shoe storage ideas that will transform your space. From clever uses of cubbies and baskets to hidden cabinets and DIY shelves, get ready to discover creative ways to store your shoes and enjoy a clutter-free home.
Key Takeaways:
- Explore creative DIY shoe storage ideas to declutter and organize your space.
- Utilize cubbies and baskets for stylish and practical shoe storage solutions.
- Transform an Ikea TV stand into a functional mudroom bench with shoe storage.
- Create a hidden shoe cabinet to keep your footwear organized and out of sight.
- Optimize vertical space with DIY ladder shelves and under bed storage solutions.
Use Cubbies and Baskets for Shoe Storage
When it comes to organizing your shoe collection, cubbies and baskets offer a versatile and stylish solution. By incorporating these storage options into your entryway, you can create a functional space that meets all your shoe storage needs.
One practical way to utilize cubbies and baskets is by using IKEA Kallax shelves. These shelves can be transformed into cubbies, providing individual compartments for your shoes. Half of the cubbies can be filled with decorative baskets, serving as a designated spot for your shoe storage. The remaining half can be used to store knick-knacks, books, or other items you want to keep in your entryway.
The combination of cubbies and baskets not only keeps your shoes organized but also adds a touch of decor to your space. With a variety of stylish baskets available, you can choose ones that match your entryway’s aesthetic and enhance the overall ambiance of your home.
By incorporating cubbies and baskets into your entryway shoe storage, you can transform a cluttered area into an organized oasis. Not only will this solution declutter your space, but it will also make it easier to find and access your shoes when you need them.
Whether you have a small entryway or a spacious foyer, utilizing cubbies and baskets is a practical and visually appealing way to store your shoes. Embrace the versatility of these storage solutions and create a shoe storage area that suits your style and space.
Hack an Ikea TV Stand for Shoe Storage
Transform your shoe storage with a simple Ikea Hemnes TV unit. This versatile piece of furniture can be repurposed into a functional and stylish mudroom bench where you can store your shoes with ease. The large drawers and shelves of the TV stand provide ample space for organizing your footwear collection, while adding a touch of modernity to your home.
To create the ultimate mudroom bench, follow these steps:
- Start by assembling the Ikea Hemnes TV unit according to the manufacturer’s instructions. Make sure all the components are securely in place.
- Once the TV unit is assembled, place it in the desired location in your mudroom or entryway. Ensure there is enough space for the drawers and shelves to open comfortably.
- Attach a sturdy wood panel above the cabinet of the TV stand to create a bench. This panel will not only provide a comfortable seating area but will also support your weight when putting on or taking off your shoes.
- Consider adding a cushion or seat pad to the bench for extra comfort. Choose a fabric or material that complements your mudroom decor and adds a touch of coziness.
- Organize your shoes in the TV stand’s drawers and shelves. You can use baskets or shoe organizers to further separate and categorize your footwear collection.
This DIY mudroom bench combines convenience and style, offering an organized solution for shoe storage. It allows you to effortlessly access your shoes while adding a practical and visually pleasing element to your mudroom or entryway.
With this Ikea TV stand hack, you can create a mudroom bench that meets your shoe storage needs, making your daily routine more efficient and enjoyable. Say goodbye to shoe clutter and hello to a well-organized mudroom!
Create a Hidden Shoe Cabinet
If you prefer to keep your clutter out of sight, consider building a hidden shoe cabinet. This DIY cabinet features vertical shelves concealed within drawers, providing ample storage for your entire shoe collection. With this hidden shoe storage solution, you can keep your shoes organized and out of sight.
Having a dedicated space for your shoe collection is essential for keeping your home tidy and organized. However, traditional shoe racks and open shelves can sometimes contribute to visual clutter. If you’re looking for a more discreet and space-saving shoe storage option, a hidden shoe cabinet is the perfect solution.
By concealing the shelves within drawers, you can maintain a clean and streamlined look in your living space. This clever design not only keeps your shoes neatly organized but also provides a visually appealing storage solution that blends seamlessly with your home decor.
When building a hidden shoe cabinet, you have the freedom to customize it according to your specific needs. You can choose the size, number of shelves, and even incorporate additional features such as hooks or compartments for accessories.
To get started, measure the available space where you plan to install the shoe cabinet. This will help determine the dimensions and ensure a perfect fit. Next, gather the necessary materials, including plywood for the cabinet frame, drawer slides, and hardware for the drawer fronts.
Once you have the materials, begin by constructing the cabinet frame and attaching the drawer slides. Make sure to follow the manufacturer’s instructions for accurate installation. Then, install the shelves within the drawers, ensuring they are sturdy and secure.
Once the hidden shoe cabinet is complete, you can start organizing your shoe collection. Group similar types of shoes together and consider using dividers or boxes to keep them separate and prevent any damage. You can also label the drawers or create a labeling system to easily find the shoes you need.
With a hidden shoe cabinet, you not only keep your shoes neatly stored but also create a more visually pleasing and clutter-free environment. It’s a practical and stylish solution for those who value both organization and aesthetics.
Investing your time and effort into building a hidden shoe cabinet will pay off in the long run. Say goodbye to scattered shoes and hello to a well-organized and space-saving storage solution.
Build a DIY Ladder Shelf for Shoe Storage
Optimize your space with a DIY ladder shelf for shoe storage. This vertical storage solution allows you to easily place your shoes on the shelves as soon as you walk through the door. The absence of drawers or baskets makes it a convenient and straightforward way to store your shoes.
Not only does a DIY ladder shelf provide simple shoe storage, but it also adds a touch of rustic charm to your home decor. You can customize the ladder to match your preferred style and paint it to complement your existing color scheme.
If you want to make your ladder shelf multifunctional, consider incorporating additional elements. For example, you can hang a small basket on one of the rungs to store items like keys or sunglasses. Alternatively, you can display a terrarium or small succulent plants to create a visually appealing and cohesively decorated space.
Materials Needed:
- Wooden ladder
- Wooden boards
- Nails or screws
- Saw
- Sandpaper
- Paint or wood stain
- Decorative elements (optional)
Instructions:
Follow these step-by-step instructions to create your own DIY ladder shelf for shoe storage:
- Measure the available space where you plan to place the ladder shelf. Make sure the ladder is an appropriate size for your needs.
- Choose the type of ladder you want to use. You can repurpose an old wooden ladder or build one from scratch using wooden boards and nails or screws.
- If necessary, cut the wooden boards to the desired length to create the shelves.
- Sand the ladder and shelves to remove any rough edges or imperfections.
- Paint or stain the ladder and shelves in your chosen color. Allow them to dry completely.
- Position the shelves on the ladder rungs at your desired heights. Secure them in place using nails or screws.
- Attach any additional decorative elements, such as baskets or terrariums, to the ladder.
- Place your shoes on the shelves, ensuring they are organized and easily accessible.
With your DIY ladder shelf complete, you have a straightforward and visually appealing solution for shoe storage in your home. Enjoy the convenience and style it brings to your space. Happy organizing!
Quote:
“A DIY ladder shelf is not only practical but also adds a charming touch to your home decor while keeping your shoes neatly organized.” – Home Organization Enthusiast
| Pros | Cons |
|---|---|
| Affordable and customizable | Limited storage capacity compared to other shoe storage solutions |
| Suitable for small spaces or narrow entryways | Requires some DIY skills and tools |
| Can be used for decorative purposes as well | Not suitable for large shoe collections |
Utilize Under Bed Storage with Wheels for Shoe Storage
If you’re struggling with limited closet or entryway space, under bed storage with wheels can be a game-changer for your shoe storage needs. Instead of letting your shoes clutter up valuable living areas, consider storing your lesser-worn shoes in convenient under bed drawers. With the added benefit of wheels, accessing your shoes has never been easier, and you can say goodbye to the hassle of a messy shoe pile under your bed.
Under bed storage is an excellent solution for those seeking to optimize space and keep their shoes organized. By utilizing the often-underutilized area beneath your bed, you can create a designated space for your shoes without sacrificing valuable floor or closet space.
Space-Saving Shoe Storage Solution
Under bed storage with wheels offers a space-saving solution for shoe storage by utilizing an area that is typically unused. Whether you live in a small apartment or simply want to make the most of your available space, under bed storage is a practical and effective option.
“Maximize your shoe storage space by utilizing under bed storage with wheels and keep your living areas clutter-free.”
The Benefits of Under Bed Storage for Shoes
Under bed storage with wheels provides several key benefits that make it an ideal choice for shoe storage:
- Maximizes vertical space: By taking advantage of the space beneath your bed, under bed storage allows you to make the most of your room’s vertical dimensions.
- Easy accessibility: The wheels on the storage drawers make it effortless to slide them out and access your shoes whenever you need them.
- Organized storage: Under bed storage promotes a neat and organized environment by providing designated compartments for your shoes, preventing clutter and ensuring everything has its place.
- Preserves shoe condition: Storing your shoes in under bed drawers helps protect them from dust, sunlight, and potential damage, preserving their quality and longevity.
By incorporating under bed storage with wheels into your shoe storage system, you can create a functional and organized space without sacrificing style or convenience.
| Benefits of Under Bed Storage with Wheels for Shoes |
|---|
| Maximizes vertical space |
| Easy accessibility |
| Organized storage |
| Preserves shoe condition |
Make the most of your available space and keep your shoes easily accessible with under bed storage with wheels. Say goodbye to cluttered floors and closets, and embrace a more organized and stylish living environment.
Continue reading to explore more DIY shoe storage ideas that can transform your space and enhance your shoe organization.
Build a DIY Shoe Cabinet for Shoe Enthusiasts
For shoe enthusiasts, a DIY shoe cabinet is a perfect solution. With this tutorial, you can build your own shoe cabinet and customize it to your liking. You can even paint the inside of the cabinet in a fun color to add a touch of pizzazz to your shoe storage.
Creating a DIY shoe cabinet not only provides you with ample shoe storage but also allows you to showcase your collection in a stylish and organized manner. By building your own cabinet, you have complete control over its design, size, and functionality, ensuring it perfectly fits your shoe storage needs.
Here is a simple step-by-step guide to help you build your own DIY shoe cabinet:
Materials you will need:
- Plywood boards
- Wood screws
- Wood glue
- Hinges
- Knobs or handles
- Paint or stain
Tools you will need:
- Measuring tape
- Saw
- Screwdriver
- Drill
- Sanding block or sandpaper
- Paintbrush
Now, let’s get started with the construction process:
Step 1: Measure and cut the plywood boards
Measure and cut the plywood boards according to the desired size of your shoe cabinet. Make sure to consider the height, width, and depth based on the number and types of shoes you plan to store.
Step 2: Assemble the cabinet frame
Using wood screws and wood glue, assemble the plywood boards to create the basic frame of the shoe cabinet. Ensure the corners are properly aligned and reinforced for sturdiness.
Step 3: Install the shelves and dividers
Measure and cut additional plywood boards to create shelves and dividers within the cabinet. These will help separate and organize your shoes effectively. Use wood screws and wood glue to secure them in place.
Step 4: Attach the doors
Using hinges, attach the doors to the cabinet frame. Make sure the doors are aligned properly and open and close smoothly. Add knobs or handles for easy access.
Step 5: Sand and finish
Sand the entire surface of the shoe cabinet to achieve a smooth finish. Remove any rough edges or splinters and wipe away any dust. Apply paint or stain of your choice to complement your interior design and add a personal touch.
Step 6: Organize and enjoy!
Once the paint or stain is dry, your DIY shoe cabinet is ready for use. Arrange your shoes neatly on the shelves and dividers, creating a visually appealing display. Admire your shoe collection, stay organized, and enjoy a clutter-free space.
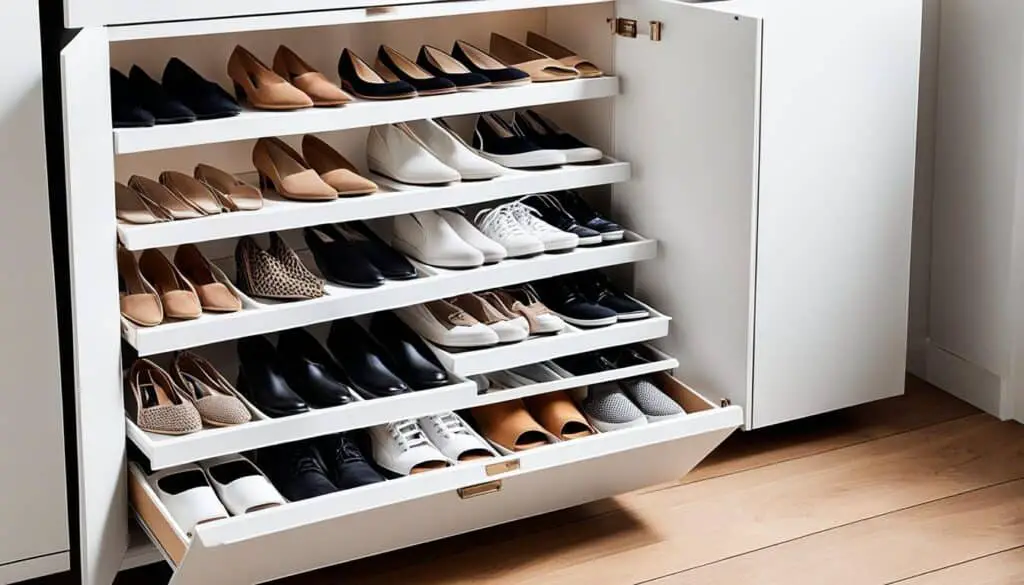
Building your own shoe cabinet not only provides a practical storage solution but also allows you to unleash your creativity. Customize the design, color, and features to suit your unique style and needs. Whether you’re a shoe enthusiast or simply looking for efficient shoe storage solutions, a DIY shoe cabinet is a fantastic project to undertake.
Take pride in your homemade shoe rack and enjoy the benefits of a well-organized and stylish space. Happy DIY-ing!
Utilize Vertical Space with a DIY Shoe Organizer
Sometimes, simple storage solutions make a big impact. This DIY shoe organizer is a perfect example, offering levels of shoe storage using straightforward scrap wood. The best part? It can be made in just 30 minutes, providing a quick and easy way to keep your shoes organized and accessible.
When vertical space is limited, it’s essential to make the most out of what you have. This DIY shoe organizer allows you to take advantage of unused wall space to create a functional and visually appealing shoe storage solution. By using scrap wood, you can repurpose materials and reduce waste while organizing your shoe collection.
How to Build a DIY Shoe Organizer
To create your own vertical shoe storage, follow these simple steps:
- Measure the available wall space where you want to install the shoe organizer.
- Collect scrap wood pieces of suitable length and width.
- Cut the scrap wood into equal-sized planks to serve as the shelves.
- Sand the edges and surfaces of the planks to ensure a smooth finish.
- Decide on the spacing between each shelf, keeping in mind the height of your shoes.
- Using a level and a measuring tape, mark the desired locations for each shelf on the wall.
- Attach the planks to the wall using screws or brackets, ensuring they are secure and level.
- Repeat the process for each shelf, leaving enough space to fit your shoes comfortably.
- Optional: Add decorative elements, such as paint or stain, to enhance the overall look of your shoe organizer.
Once installed, your DIY shoe organizer will provide vertical storage space for your shoes, allowing you to easily see and access each pair. Not only does this solution help declutter your living space, but it also adds a touch of creativity and personalization to your home decor.
With a vertical shoe organizer, you can say goodbye to messy shoe piles and lost pairs. This DIY project is an excellent way to maximize your storage options without breaking the bank. Get creative with the design and color of your shoe organizer to match your personal style and complement your existing decor.
Take advantage of your vertical space and create a stylish and functional shoe storage solution with this DIY shoe organizer. Say goodbye to cluttered floors and disorganized shoe racks, and enjoy the convenience and aesthetic appeal of a vertical shoe storage system.
Add Style with a DIY Shoe Organizer Using Wood Dowels and Copper Pipe Fittings
Looking for a shoe organizer that combines function and style? Try this DIY shoe organizer using wood dowels and copper pipe fittings. With its industrial flair, this unique organizer will add a modern touch to your shoe storage.
Materials Needed:
- Wood dowels
- Copper pipe fittings
- Wood screws
- Drill
- Saw
- Tape measure
- Level
Step-by-Step Guide:
1. Measure and mark the desired height for your shoe organizer on the wall.
2. Cut the wood dowels to the desired length, ensuring they fit snugly between the marked measurements. Sand the edges for a smooth finish.
3. Use a drill to create holes in the wood dowels and corresponding holes in the copper pipe fittings.
4. Attach the wood dowels to the wall using wood screws, making sure they are level and secure.
5. Slide the copper pipe fittings onto the wood dowels, aligning them with the holes.
6. Place your shoes on the wood dowels and adjust the copper pipe fittings to secure them in place.
Benefits of a DIY Shoe Organizer with Wood Dowels and Copper Pipe Fittings:
This stylish shoe organizer offers several benefits:
- Industrial design: The combination of wood dowels and copper pipe fittings creates a unique and eye-catching look for your shoe storage.
- Customizable: You can adjust the height and width of the organizer to fit your space and shoe collection.
- Easy access: The open design allows you to easily see and grab the shoes you need.
- Space-saving: By utilizing vertical space on your wall, this organizer maximizes your storage capacity without taking up valuable floor space.
With just a few materials and a little bit of DIY know-how, you can create a shoe organizer that adds style and functionality to your home. Showcase your shoe collection while keeping it organized with this industrial-inspired DIY project.
Install a Built-In Shoe Cabinet for a Seamless Look
Whether you’re renovating your home or in the process of building, consider installing a built-in shoe cabinet. This sleek and functional solution allows you to seamlessly integrate shoe storage into your home’s design, creating a seamless look.
Unlike traditional shoe racks or cabinets, a built-in shoe cabinet appears as a regular wall until it’s pulled out to reveal the hidden shoe storage within. This clever design keeps your shoes out of sight and organized, reducing clutter and maintaining a clean and uncluttered space.
With a built-in shoe cabinet, you can customize the size and layout to fit your needs. You can determine the number of shelves, the height of each shelf, and even incorporate additional storage features such as drawers or hooks. This enables you to create a shoe storage solution that perfectly caters to your shoe collection.
Furthermore, a built-in shoe cabinet offers a space-saving advantage. By using the vertical space on your wall, you can free up valuable floor space, making your room feel more spacious and open. This is particularly beneficial for smaller homes or apartments where maximizing storage is crucial.
Not only does a built-in shoe cabinet provide functional benefits, but it also enhances the aesthetic appeal of your home. By seamlessly integrating it into your home’s design, you can achieve a cohesive and polished look that complements your overall decor style.
Whether you choose a modern, minimalist design or opt for a more traditional or rustic finish, a built-in shoe cabinet adds a touch of sophistication to your space. It blends seamlessly with your existing furniture and creates a harmonious balance between style and functionality.
So, if you’re looking for a shoe storage solution that offers a seamless look, hidden storage, and enhances the overall design of your home, consider installing a built-in shoe cabinet. It’s a smart and stylish choice for those who value both fashion and functionality.
| Benefits of a Built-In Shoe Cabinet | Features |
|---|---|
| 1. Seamless integration into your home’s design | 1. Customizable size and layout |
| 2. Hidden storage for a clutter-free space | 2. Vertical storage for space-saving |
| 3. Maximizes storage in smaller homes or apartments | 3. Enhances the aesthetic appeal of your home |
| 4. Creates a cohesive and polished look | 4. Blends seamlessly with existing furniture |
DIY Wall Shelf for Decorative and Handy Shoe Storage
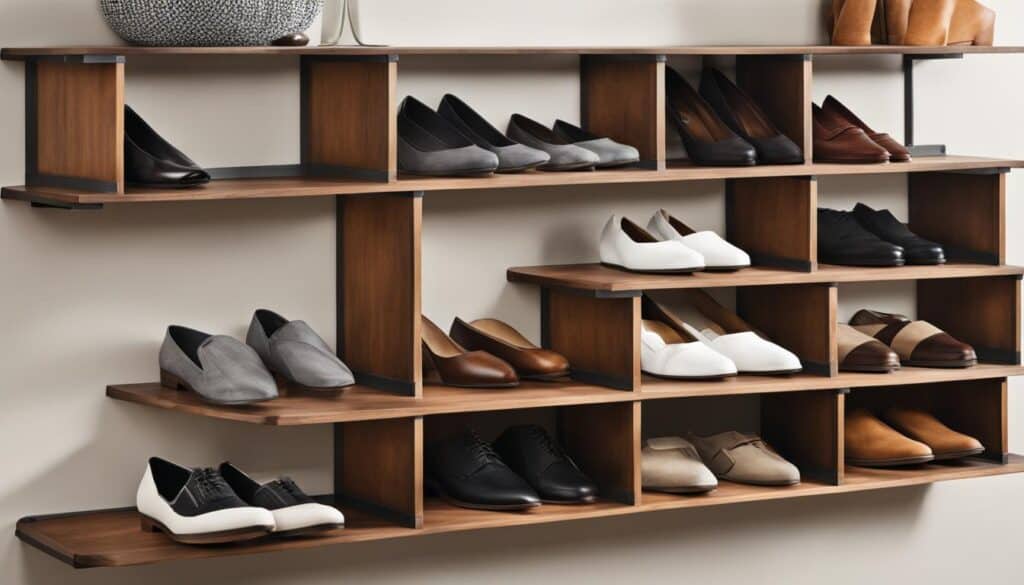
Transform a corner of your home into a decorative and practical shoe-storage masterpiece with a DIY wall shelf. This step-by-step guide will help you create a wall shelf that not only adds a touch of style to your space but also provides a convenient solution for organizing your shoes. Say goodbye to cluttered entryways and hello to a neat and tidy shoe storage solution.
By building a DIY wall shelf, you can customize the design to match your home decor while maximizing the available space. Whether you have a small apartment or a spacious hallway, a wall shelf offers a versatile and space-saving solution.
Materials:
- Wooden boards
- Wood screws
- Drill
- Saw
- Sandpaper
- Paint or stain (optional)
Instructions:
- Measure the available space on your wall and decide the dimensions for your shelf. Cut the wooden boards accordingly, ensuring a sturdy and well-fitted shelf.
- Sand the edges of the boards to remove any roughness or splinters.
- Using a drill, attach the boards together to create the shelf structure. Reinforce the joints with wood screws for added stability.
- If desired, apply a coat of paint or stain to the shelf to match your preferred aesthetic. Allow it to dry completely.
- Install the shelf securely on the wall using appropriate brackets and screws, considering the weight it will bear with the shoes.
- Arrange your shoes on the shelf, placing them strategically to create an eye-catching display. You may choose to organize them by style, color, or frequency of use.
With your new DIY wall shelf, you can enjoy the convenience of having your shoes neatly stored while adding a decorative element to your home. The open design of the shelf allows for easy access to your shoes, saving you time and eliminating the frustration of searching for the perfect pair.
This modern shoe storage solution ensures that your shoes are visible and easily accessible, making it a breeze to coordinate your outfits in the morning or before a night out. Additionally, the decorative aspect of the wall shelf adds a touch of personality to your space, enhancing your overall home decor.
Investing a little time and effort into creating a DIY wall shelf can make a significant difference in your shoe organization and home aesthetics. Say goodbye to scattered shoes and hello to a stylish and efficient shoe storage solution that will impress both your guests and yourself.
So, roll up your sleeves and get ready to enhance your home with this practical and visually appealing DIY wall shelf project.
Optimize Closet Space with Pull-Out Trays for Shoe Storage
If you have a large shoe collection and struggle to see all your shoes at once, consider installing pull-out trays for shoe storage. These trays allow for easy access to each pair of shoes, preventing the dreaded shoe pile that often accumulates in closets and entryways. Keep your shoes organized and visible with this simple and effective solution.
When it comes to closet shoe storage, pull-out trays are a game-changer. Instead of rummaging through a messy pile of shoes or digging through a crowded shoe rack, pull-out trays provide a convenient and organized way to display your footwear collection.
Benefits of Pull-Out Trays:
- Easy access: With pull-out trays, each pair of shoes has its designated spot, making it effortless to find the perfect pair for any occasion.
- Prevent shoe pile-ups: Say goodbye to cluttered closets and entryways. Pull-out trays keep your shoes neatly organized, eliminating the need for messy shoe piles.
- Optimize space: The compact design of pull-out trays maximizes your closet space, allowing you to store more shoes in less space.
- Visibility: No more forgetting about hidden shoes at the back of the closet. Pull-out trays ensure every pair is visible and easily accessible.
- Customization: Pull-out trays can be customized to fit your specific needs, whether you have a large collection of heels, sneakers, or boots.
Installing pull-out trays in your closet is a straightforward process. Simply measure your closet dimensions and choose trays that fit your space. Whether you prefer wooden trays or wire baskets, there are various options available to suit your style and budget.
H3: How to Install Pull-Out Trays:
- Measure your closet dimensions to determine the size and number of pull-out trays needed.
- Choose the type of pull-out trays that best suit your shoe collection and closet space.
- Install the pull-out trays according to the manufacturer’s instructions, ensuring they are securely attached to the closet walls or shelving.
- Organize your shoes on the pull-out trays, grouping them by style or occasion for easy selection.
“Pull-out trays provide a stylish and practical solution for organizing your shoe collection. With easy access and visible display, you’ll never have to search for the right pair of shoes again.”
With pull-out trays for shoe storage, you can transform your cluttered closet into an organized shoe haven. Say goodbye to shoe pile-ups and hello to a beautifully arranged collection of footwear.
DIY Boot Rack for Boot Storage and Drying
Keep your boots organized and dry with a DIY boot rack. This practical and versatile shoe-storage solution helps prolong the life of your boots and keeps your entryway tidy. Follow this step-by-step guide to build a boot rack that not only stores your boots but also provides additional storage space for bike helmets or other accessories.
- Wood planks: Choose sturdy planks in the appropriate length and width for your desired boot rack size.
- Measuring tape: Use a measuring tape to accurately measure and cut the wood planks.
- Saw: A saw will be necessary to cut the wood planks to the desired lengths.
- Screws: Select screws of the appropriate size to securely attach the wood planks together.
- Drill: A drill will be needed to make pilot holes for the screws and to secure them in place.
Instructions:
- Measure and cut the wood planks to your preferred length and width for the boot rack.
- Arrange the wood planks horizontally, leaving enough space between each plank for the height of a boot.
- Secure the wood planks together by drilling pilot holes and screwing them in place.
- Repeat the above steps to create additional layers of wood planks for more boot storage.
- Place the completed boot rack in your desired location, making sure it is stable and secure.
Pro tip: Place a boot tray or mat underneath the boot rack to catch any dirt or water that may drip from the boots.
Not only does this DIY boot rack provide a designated spot for your boots, but it also helps them dry properly by allowing air to circulate around them. Additionally, the extra storage space on top of the rack can be utilized for storing bike helmets, gloves, or other accessories neatly.
Hack an IKEA Cabinet for Small Entry Shoe Storage
If you have a small entry without a closet, this IKEA hack is perfect for you. The slim and stylish shoe cabinet showcased below fits into a wide variety of spaces and provides ample shoe storage. Its visual appeal and functionality make it a fashionable and practical addition to any entryway.
| Features | Benefits |
|---|---|
| Compact and Slim Design | Fits perfectly in small entryways without taking up too much space. |
| Multiple Shelves and Compartments | Offers ample storage for various shoe sizes and styles. |
| Sleek and Modern Aesthetic | Enhances the visual appeal of your entryway while keeping it clutter-free. |
| Easy Assembly and Installation | Convenient DIY project with clear instructions for hassle-free setup. |
This shoe cabinet can be easily customized to suit your style and needs. You can paint it in a color that matches your decor or add decorative elements to personalize it further.
By utilizing this IKEA hack, you can transform your small entry into an organized space where you can store and access your shoes with ease. Say goodbye to shoe clutter and hello to hassle-free mornings.
Customer Testimonial
“The slim shoe cabinet from IKEA is a game-changer for my small entryway. It fits perfectly, and I can finally keep all my shoes in one place. It’s a stylish and functional solution!” – Jane Smith
Now that you have discovered this IKEA hack for small entry shoe storage, it’s time to maximize the space in your entryway and say goodbye to the shoe chaos. Enjoy the benefits of this sleek and practical shoe cabinet while adding style and functionality to your home.
Conclusion
In conclusion, these DIY shoe storage ideas provide a multitude of creative solutions for decluttering your space and organizing your footwear. Whether you have a small apartment or a large closet, there are options to fit every style and space.
By utilizing cubbies and baskets, you can create a stylish and practical shoe storage solution in your entryway. You can also repurpose an Ikea TV stand into a mudroom bench to maximize storage space. For those who prefer hidden storage, building a concealed shoe cabinet with vertical shelves is a sleek and space-saving option.
If you’re looking for a simple and stylish approach, try constructing a DIY ladder shelf or a wall shelf for your shoe storage needs. Alternatively, maximize under bed space by using storage bins with wheels to keep your lesser-worn shoes easily accessible while minimizing clutter in your closet or entryway. Additionally, shoe enthusiasts can build their own customizable shoe cabinet for a personalized touch.
Lastly, incorporating pull-out trays in your closet or creating a DIY boot rack for boot storage and drying are practical solutions to keep your shoes organized and in good condition. These DIY shoe storage ideas offer versatility and creativity, allowing you to find the perfect solution for your shoe organization needs.
FAQ
What are some creative DIY shoe storage ideas?
Some creative DIY shoe storage ideas include using cubbies and baskets, hacking an Ikea TV stand for shoe storage, creating a hidden shoe cabinet, building a DIY ladder shelf, utilizing under bed storage with wheels, and more.
How can I use cubbies and baskets for shoe storage?
To use cubbies and baskets for shoe storage, you can use Ikea Kallax shelves as cubbies and fill half with decorative baskets for shoes, while using the other half for additional storage or decorations.
Is there a way to hack an Ikea TV stand for shoe storage?
Yes, you can turn a simple Ikea Hemnes TV unit into a mudroom bench with ample shoe storage by adding a wood panel and utilizing the large drawers and shelves of the TV stand.
Are there any hidden shoe storage solutions?
Yes, you can build a hidden shoe cabinet with vertical shelves concealed within drawers, providing ample storage for your entire shoe collection while keeping the shoes out of sight.
How can I optimize my space with a DIY ladder shelf for shoe storage?
A DIY ladder shelf can be a space-saving shoe storage solution. This vertical storage option allows you to place your shoes on the shelves as soon as you walk through the door, and you can also add decorations to make it multifunctional and visually appealing.
Is there a way to utilize under bed storage for shoe storage?
Yes, you can use storage bins with wheels and place them under the bed to store your lesser-worn shoes. This allows for easy access and eliminates the need for messy shoe piles.
Can I build my own shoe cabinet?
Yes, there are DIY tutorials available for building your own shoe cabinet, allowing you to customize it to your liking and even paint the interior in a fun color for added style.
Are there simple DIY shoe storage options available?
Yes, there are simple scrap wood shoe organizers that can be made in just 30 minutes, providing a quick and easy way to keep your shoes organized and accessible.
Can I create a shoe organizer with wood dowels and copper pipe fittings?
Yes, there is a DIY shoe organizer tutorial available that utilizes wood dowels and copper pipe fittings to create a unique and modern shoe storage solution with an industrial flair.
Is there a way to install a built-in shoe cabinet?
If you’re renovating or building, you can install a built-in shoe cabinet that seamlessly integrates into your home’s design. It appears like a regular wall until it is pulled out to reveal hidden shoe storage.
How can I turn a corner of my home into a shoe-storage masterpiece?
You can turn a corner of your home into a decorative and useful shoe-storage area by following a DIY wall shelf tutorial that serves as both a decorative element and a practical shoe-storage solution.
How can I optimize closet space for shoe storage?
To optimize closet space for shoe storage, you can install pull-out trays that allow for easy access to each pair of shoes, preventing messy shoe piles and keeping your shoes organized and visible.
Can I build a DIY boot rack for boot storage and drying?
Yes, there is a DIY tutorial available for building a boot rack that not only stores boots but also acts as storage for other accessories like bike helmets. This practical and versatile shoe-storage solution helps prolong the life of your boots.
Is there an IKEA hack for small entry shoe storage?
Yes, there is an IKEA hack for small entry shoe storage that involves using a slim and stylish shoe cabinet, which fits into a variety of spaces and provides ample shoe storage while adding a fashionable touch to your entryway.

