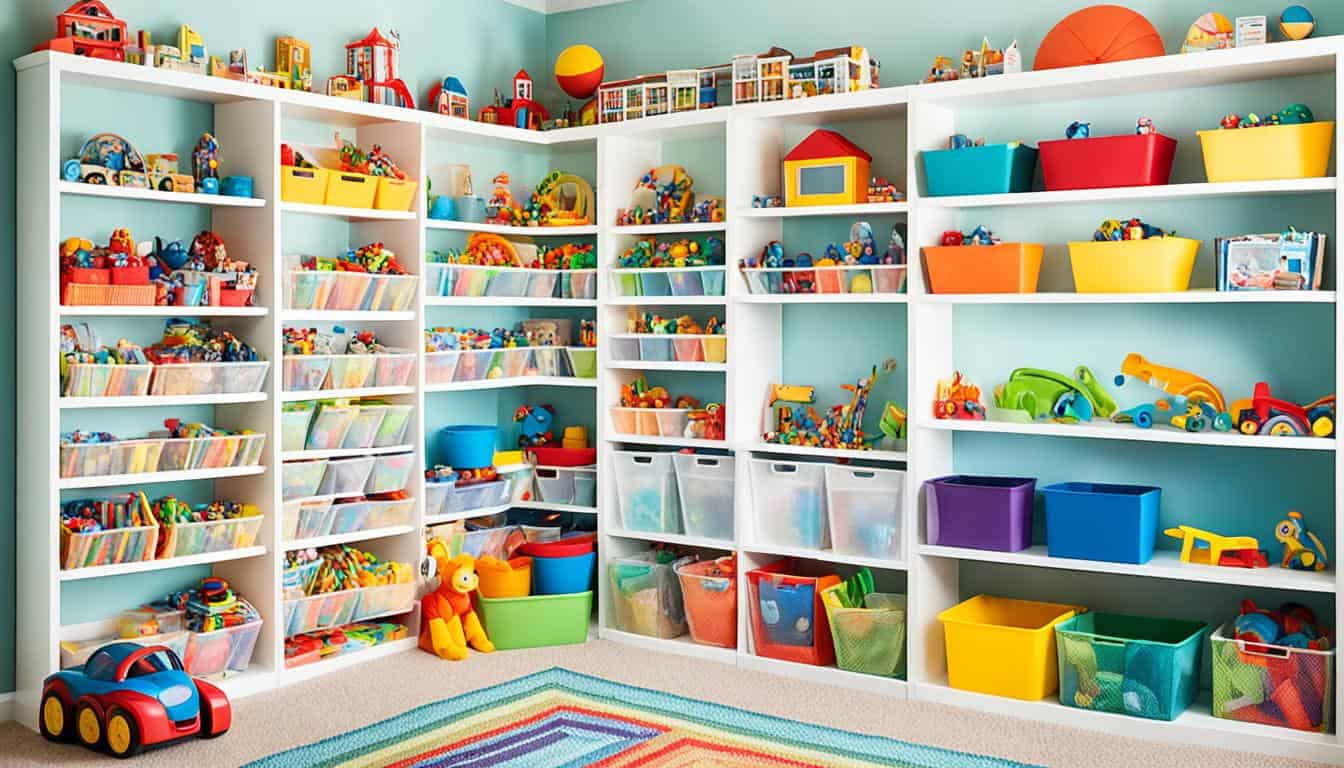
Are you tired of stepping on toys scattered all over your home? Do you struggle to find practical and stylish storage solutions for your child’s toys? Look no further! In this article, we will explore a variety of creative DIY toy storage ideas that will help you declutter your playroom and create an organized space for your little ones. From rustic toy storage units to homemade toy carts and shelves, these solutions are both functional and visually appealing, adding a touch of creativity to your home decor.
Get ready to discover innovative ways to keep your child’s toys organized and accessible, without compromising on style. Let’s dive in!
Key Takeaways:
- DIY toy storage solutions offer practical and functional organization for your child’s toys.
- These creative storage ideas add a touch of style and creativity to your home decor.
- From rustic toy storage units to homemade toy carts and shelves, there are various options to fit your space and style.
- By implementing DIY toy storage solutions, you can declutter your playroom and create a more organized space for your child’s toys.
- Stay tuned for step-by-step guides and inspiration to help you transform your playroom into a clutter-free paradise.
Rustic Toy Storage Unit Build Plans
If you’re tired of stepping on Legos, this DIY toy storage idea is for you. This rustic toy storage unit offers ample room to store all those Legos and more. The best part is that you can build it yourself using the provided build plans, saving you money and adding a unique touch to your playroom decor.
With its rustic charm, this toy storage unit not only organizes your child’s toys but also adds a touch of character to any room. Its sturdy design ensures durability and provides a practical storage solution for all the toys that tend to clutter your space. Say goodbye to toy mess and hello to a tidy and inviting playroom!
“This rustic toy storage unit is a game-changer! It not only keeps my kids’ toys organized but also creates a beautiful rustic focal point in our playroom.” – Sarah, mom of two
Build Plans
To get started on your DIY toy storage unit, simply follow these build plans:
- Gather the necessary materials and tools, including wood, screws, a saw, a drill, and sandpaper.
- Measure and cut the wood pieces according to the specified dimensions in the build plans.
- Assemble the frame of the storage unit using screws and a drill.
- Attach the shelves and dividers to the frame, ensuring they are secure and level.
- Sand the entire unit to smooth any rough edges or surfaces.
- Apply a coat of paint or stain to enhance the rustic look (optional).
- Allow the paint or stain to dry completely.
- Your rustic toy storage unit is now ready to be filled with toys!
With these simple steps, you can create a DIY toy storage solution that is not only functional but also adds a charming rustic touch to your playroom. So, roll up your sleeves, grab your tools, and start building your own rustic toy storage unit today!
Benefits of DIY Toy Storage
Building your own toy storage unit has several advantages:
- Cost-effective: Building it yourself can save you money compared to purchasing a pre-made storage unit.
- Customization: You have the freedom to customize the design, size, and finish of the storage unit to suit your individual needs and style preferences.
- Sense of accomplishment: Completing a DIY project can bring a sense of pride and accomplishment.
- Bonding activity: Involving your family members, especially children, in the building process can be a fun and educational bonding activity.
So, why settle for generic toy storage options when you can create a unique, rustic toy storage unit that reflects your personal style and meets your storage needs? Start building your own DIY toy storage unit today and enjoy a clutter-free playroom!
| Pros | Cons |
|---|---|
| Cost-effective | Requires time and effort |
| Customizable design | Requires basic woodworking skills |
| Sense of accomplishment | May require specialized tools |
| Bonding activity | May lack the convenience of ready-made options |
DIY Stuffed Animal Storage Bin with Macrame Net
Looking for a stylish and organized way to store your child’s stuffed animals? This DIY toy storage crate with a macrame net is the perfect solution. Not only does it provide a practical storage solution, but it also adds a modern feminine touch to your playroom decor.
The process of building this DIY toy storage crate is simple and can be customized to match your home decor. You can choose the size of the crate based on the number of stuffed animals you need to store. Additionally, the macrame net adds a unique texture and visual interest to the crate.
Using macrame techniques, you can create a net on the front and back of the crate, allowing you to easily see and access the stuffed animals. The net provides a secure storage solution while still adding a decorative element to the crate.
“The macrame net is not only functional but also adds a touch of boho-chic flair to the DIY toy storage crate.”
With the DIY stuffed animal storage bin with macrame net, you can keep your child’s stuffed animals organized and within reach. This project is a fun way to showcase your creativity while decluttering your playroom.
Materials You’ll Need:
- Wooden crate or box – Choose a size that fits your storage needs.
- Macrame cord or rope – Select a color that complements your home decor.
- Scissors – For cutting the macrame cord.
- Drill – To attach the macrame net to the crate.
- Wood glue or screws – To secure the crate together.
Step-by-Step Instructions:
- Start by assembling the wooden crate or box using wood glue or screws.
- Measure and cut four pieces of macrame cord or rope, ensuring they are long enough to create the desired net length.
- Using a drill, attach the macrame cord or rope to the front and back of the crate, creating a net pattern.
- Continue attaching the cord or rope across the crate until you have completed the macrame net.
- Trim any excess cord or rope and secure the ends to prevent fraying.
- Place your child’s stuffed animals inside the crate, using the macrame net to keep them organized and on display.
By following these simple steps, you can create a DIY stuffed animal storage bin with a macrame net that not only keeps your child’s toys organized but also adds a stylish touch to your playroom. Now you can enjoy a clutter-free and visually appealing space for your child to play and explore.
DIY Toy Cart
If you’re looking for an adorable and functional DIY toy storage idea, this toy cart is perfect for you. With its cool industrial vibe and wheels for easy mobility, this toy cart is a unique addition to your home. It not only provides storage for your child’s toys but also adds a touch of style to your playroom decor.
Imagine having a toy storage solution that not only keeps everything organized but also adds a trendy and industrial feel to your playroom. That’s exactly what this DIY toy cart offers. Its sleek design and sturdy wheels make it easy to move toys around, allowing your little one to play freely and keeping the clutter at bay.
“The toy cart is a game-changer for our playroom. It holds all of my child’s toys and looks amazing in our industrial-themed space. Plus, the wheels make it so convenient to move around!”
– Jane Smith, DIY Enthusiast
Creating your own toy cart is a simple process. You can customize it to match your playroom’s color scheme or add personal touches to make it unique. Plus, it’s a great project to involve your kids in, teaching them valuable DIY skills while creating a storage solution together.
Here’s a step-by-step guide to building your own DIY toy cart:
- Gather your materials: You’ll need a wooden cart frame, industrial-style wheels, screws, and paint or stain for finishing.
- Assemble the cart frame: Follow the instructions provided with the cart frame to put it together. Make sure it’s sturdy and secure.
- Attach the wheels: Use screws to attach the industrial-style wheels to the bottom of the cart frame. Ensure they are properly aligned and securely fastened.
- Paint or stain the cart: Add a pop of color or choose a stain that matches your playroom decor. Apply an even coat of paint or stain to the entire cart frame, allowing it to dry completely.
- Personalize the cart: Add any extra touches such as stickers, decals, or embellishments to make the cart unique and personalized.
- Organize your toys: Once the cart is dry and personalized, use it to store and organize your child’s toys. You can use bins, baskets, or even repurpose other containers to keep everything in its place.
With the DIY toy cart, toy organization becomes a breeze. Say goodbye to scattered toys and hello to a neat and stylish playroom. Your little ones will love having their toys easily accessible, and you’ll love the added charm this industrial-inspired storage solution brings to your space.
Summary:
| Benefits of DIY Toy Cart | |
|---|---|
| Adorable and functional toy storage | Adds an industrial touch to your playroom |
| Easy mobility with sturdy wheels | Customizable to match your playroom decor |
| Simple DIY project for all skill levels | Teaches kids valuable DIY skills |
DIY Vintage Rolling Toy Crate
Create a charming and organized playroom with these easy DIY vintage rolling toy crates. Not only do these storage bins have a vintage look that adds character to your space, but they also provide a convenient solution for keeping toys in order. Encourage your kids to take responsibility for their toys by giving them the opportunity to clean up their own mess.

These rolling toy crates can be effortlessly moved from room to room, allowing you to keep your playroom organized and clutter-free. With their functional design, these toy storage bins not only provide ample space for toys, but they also add a touch of nostalgia to your child’s play area. Say goodbye to scattered toys and embrace the charm and practicality of these vintage-inspired storage solutions.
How to Make a Wooden Box in Any Size
Wooden boxes are a cost-effective and versatile way to store toys. With a few simple steps, you can create your own DIY wooden toy box that perfectly fits your playroom decor and storage needs. Start by gathering the necessary materials:
- Wood boards
- Saw
- Screws or nails
- Screwdriver or hammer
- Wood glue
- Sandpaper
- Paint or stain (optional)
Once you have everything ready, follow these steps to make your own wooden toy box:
- Measure and cut the wood boards to the desired size for the box.
- Assemble the four sides of the box by attaching them with screws or nails, reinforcing the corners with wood glue for extra strength.
- If desired, sand the surface of the box to ensure a smooth finish.
- Apply paint or stain to the box to match your playroom decor, or leave it natural for a rustic look.
- Allow the paint or stain to dry completely before using the wooden toy box to store your child’s toys.
By making your own DIY wooden toy box, you can customize the size, design, and finish to suit your specific needs. Not only will it provide a practical storage solution for Legos, blocks, and other small toys, but it will also add a touch of warmth and natural beauty to your playroom.
Whether you choose to paint it in vibrant colors or leave it natural, the wooden toy box will blend seamlessly with any playroom decor. It’s a functional and stylish toy organizer idea that will keep your playroom neat and tidy.
DIY Treasure Chest Toy Box
Turn your child’s toys into buried treasure with this DIY treasure chest toy box. Perfect for both indoor and outdoor toy storage, this pirate-inspired toy box adds a playful touch to your playroom or backyard. It’s a fun and creative way to keep your child’s toys organized and easily accessible.
Materials Needed:
- Wooden chest
- Pirate-themed decorations (optional)
- Wood stain or paint
- Paintbrush
- Hinges
- Latch or lock
Instructions:
- Start by choosing a wooden chest that is spacious enough to hold your child’s toys. You can find affordable chests at craft stores or online.
- If desired, decorate the chest with pirate-themed items such as stickers, decals, or stencils. This will add a fun and adventurous element to the toy box.
- Next, apply a coat of wood stain or paint to the chest. Choose a color that complements the pirate theme or matches your playroom decor.
- Allow the stain or paint to dry completely before moving on to the next step.
- Attach hinges to the back of the chest using screws. This will allow the lid to open and close smoothly.
- Install a latch or lock on the front of the chest to ensure the toys stay securely inside.
- Place the finished treasure chest toy box in your playroom or outdoor space. Encourage your child to store their toys inside, turning cleanup time into a fun adventure.
Your DIY treasure chest toy box is now ready to be filled with your child’s favorite toys. Not only does it provide a unique storage solution, but it also sparks imagination and creativity during playtime.
DIY Toy Organizer – The Ultimate Toy Storage Solution
Tired of tripping over toys in your playroom? This DIY toy organizer is the perfect solution to keep your space neat and organized. With ample storage space for books, board games, and stuffed animals, it’s a versatile addition to your playroom decor.
You don’t have to be a DIY expert to build this toy organizer. The step-by-step instructions make it easy for beginners to follow along. Plus, you can customize it to fit your specific storage needs and playroom layout.
One of the key features of this toy organizer is its functionality. It offers multiple compartments and shelves, allowing you to categorize and store different types of toys. Say goodbye to the days of searching for that missing puzzle piece or favorite action figure.
In addition to providing ample storage, this DIY toy organizer adds style to your playroom. The clean lines and modern design complement any decor theme. Whether your playroom has a minimalist or eclectic vibe, this organizer fits right in.
Benefits of the DIY Toy Organizer
Here are some of the benefits of building this DIY toy organizer:
- Maximize storage space: The multiple compartments provide plenty of room for toys, books, and games.
- Customizable: Adjust the dimensions and number of shelves to fit your specific storage needs.
- Enhance organization: Categorize toys and keep them easily accessible for your child.
- Add style to your playroom: The sleek design and clean lines elevate the look of your playroom.
- Encourage cleanup: Teach your child the importance of tidiness by having designated spaces for their toys.
Ready to transform your playroom into an organized and clutter-free space? Let’s get started on building your own DIY toy organizer.
Materials Needed
| Materials | Quantity |
|---|---|
| 1×4 boards | 6 |
| 1×8 boards | 3 |
| Plywood | 1 sheet |
| L brackets | 12 |
| Screws | 24 |
| Wood glue | 1 bottle |
Step-by-Step Instructions
- Cut the 1×4 and 1×8 boards to the desired dimensions for the toy organizer.
- Attach the 1×4 boards together to create the sides and back of the toy organizer using wood glue and screws.
- Attach the plywood to the bottom of the toy organizer using screws.
- Attach the 1×8 boards as shelves inside the toy organizer using L brackets and screws.
- Paint or stain the toy organizer to match your playroom decor.
- Let it dry completely before filling it with toys and books.
Now you have a functional and stylish DIY toy organizer to keep your playroom tidy. Say goodbye to the days of searching for misplaced toys and hello to a clutter-free space.


DIY Painted Wood Crates
Looking for a budget-friendly and customizable toy storage option for your playroom? These DIY toy storage bins made from painted wood crates are the perfect solution. Not only do they provide practical storage space, but they also add a fun and creative touch to your playroom decor.
You can easily make these toy storage bins by repurposing old wooden crates and giving them a fresh coat of paint. The best part is that you can paint them in different colors to match your playroom or kids’ bedroom decor. Let your kids choose their favorite colors and get them involved in the painting process. It’s a great way to encourage their creativity and make organizing toys a fun activity.
These painted wood crates are not only versatile but also customizable. You can stack them vertically or horizontally, depending on your space and storage needs. They can be used to store a variety of toys, including stuffed animals, board games, building blocks, and more. You can even label each crate to make it easy for your kids to find and put away their toys.
| Benefits of DIY Painted Wood Crates | Useful Tips |
|---|---|
|
|
By repurposing and painting these wood crates, you not only create a functional toy storage solution but also contribute to a sustainable and eco-friendly lifestyle. It’s a win-win for both the environment and your playroom organization.
Get Inspired
“Painted wood crates are a versatile and customizable toy storage option that adds a pop of color and organization to your playroom.” – Amy, DIY enthusiast
Join Amy, and many others, who have taken their toy storage to the next level with DIY painted wood crates. Get inspired by their creativity and transform your playroom into an organized and vibrant space.
Rolling Storage from Upcycled Wine Crates
If you’re a fan of rustic vibes, this DIY toy storage idea is perfect for you. Made from upcycled wine crates, this rolling storage unit adds a touch of rustic charm to your playroom. It’s not only stylish but also practical with its rolling feature, allowing you to easily move it from room to room.
Upcycling wine crates into toy storage is a creative and sustainable way to repurpose materials and reduce waste. By giving new life to these wooden crates, you can create a unique and functional storage solution for your child’s toys.
With a few simple steps, you can transform wine crates into rolling toy storage:
- Start by cleaning and sanding the wine crates to remove any dirt and rough edges.
- Apply a coat of paint or stain to match your desired aesthetic. You can choose a bold color for a playful look or a natural wood finish for a more rustic vibe.
- Once the paint or stain is dry, attach casters to the bottom of each crate. This will allow the storage unit to roll effortlessly and provide easy access to toys in different areas of your home.
- For added organization, you can label each crate with the type of toys it contains. This will make it easier for your child to find their favorite toys and encourage them to tidy up after playtime.
Here’s an example of how you can set up your upcycled wine crate rolling storage:
| Wine Crate | Toy Category |
|---|---|
| 1 | Building Blocks |
| 2 | Stuffed Animals |
| 3 | Art Supplies |
| 4 | Board Games |
This rolling storage unit provides not only an organized space for toys but also a decorative element in your playroom. The rustic look of the upcycled wine crates adds character and warmth to the room, creating a cozy and inviting atmosphere for playtime.
HUGE Empty Wall Transformed into Pretty Game and Toy Storage!
If you have a large empty wall in your playroom, why not turn it into a functional and decorative storage space? This DIY toy storage idea transforms an empty wall into a pretty game and toy storage area. With shelves and hooks, you can create a customized storage solution for all your kids’ toys, books, and games.
One of the best ways to utilize an empty wall is by installing shelves. These shelves can be used to display and store board games, puzzles, and other small toys. By organizing the games and toys on the shelves, you not only create an attractive display but also make it easier for your kids to find and access their favorite games.
Furthermore, you can incorporate hooks into your wall storage system. These hooks are perfect for hanging toy storage bags, allowing you to store soft toys or smaller items such as action figures. This not only helps keep the toys off the floor but also adds a decorative element to the wall.
Here’s a step-by-step guide to help you create your DIY game and toy storage wall:
- Start by measuring the available space on your wall. This will help you determine the number and size of shelves you need.
- Choose the type of shelves you want to install. You can opt for floating shelves, wall-mounted cubbies, or even repurpose old bookshelves.
- Install the shelves according to the manufacturer’s instructions. Make sure they are securely mounted to the wall to ensure the safety of your kids.
- Next, add hooks to the wall beneath the shelves. These hooks can be used to hang storage bags or even backpacks for easy access.
- Label each storage bag or bin to help your kids quickly identify and put away their toys.
- Fill the shelves and storage bags with your kids’ favorite games, toys, and books.
With this DIY toy storage idea, you not only create a functional storage space but also add a decorative element to your playroom. The game and toy storage wall becomes a focal point, showcasing your kids’ favorite toys and allowing for easy organization.
Take a look at this visually appealing example of a game and toy storage wall:

By using your wall as a storage solution, you optimize space in your playroom and ensure that everything has its place. It’s a practical and stylish way to keep your playroom organized and clutter-free.
The Play Station: DIY Crate Toy Storage Shelf
If you’re searching for a cost-effective way to organize your kids’ toys, look no further than this DIY crate toy storage shelf. Not only is it easy on the wallet, but it also adds a charming rustic touch to your playroom. With ample storage space, this shelf provides the perfect solution for keeping your playroom clutter-free and organized.
Building your own crate toy storage shelf is a straightforward and enjoyable project. All you need are a few basic materials and tools:
- Wooden crates
- Nails or screws
- Hammer or drill
- Sandpaper
- Paint or stain (optional)
Begin by arranging the wooden crates in a configuration that suits your space and storage needs. Secure them together with nails or screws, ensuring stability and durability. If desired, you can sand the crates to create a smoother finish.
Next, you can choose to leave the crates as they are for a natural look or add a touch of color with paint or stain. This allows you to customize the shelf to match your playroom decor and personal style.
Once your crate toy storage shelf is complete, you can start organizing your kids’ toys. Use the separate compartments of the crates to group different types of toys together, making it easy for your children to find and put away their toys independently.
This DIY crate toy storage shelf is not only functional but also visually appealing. Its rustic charm adds character to your playroom while keeping all those toys neatly stored away. With this budget-friendly solution, you can create a play space that is both organized and stylish.
So, why not tackle this fun and practical project? Say goodbye to toy clutter and hello to a beautifully organized playroom with this DIY crate toy storage shelf.
DIY Window Bench with Storage
If you’re looking for a way to conceal less aesthetically pleasing toys, this DIY window bench with storage is the perfect solution. It not only adds a beautiful seating area to your playroom but also provides hidden storage for your child’s toys. The bench is designed at the perfect height for kids to access their toys easily.
With this DIY project, you can create a functional and stylish window bench that doubles as a toy storage solution. Your child can enjoy a cozy spot to sit and play, while you can keep the playroom neat and organized.
The Benefits of a DIY Window Bench with Storage
There are several advantages to incorporating a window bench with storage into your playroom:
- Space-saving: By utilizing the space beneath the bench, you can maximize storage without taking up extra floor space.
- Concealed storage: The toys will be neatly tucked away, maintaining a clean and clutter-free playroom.
- Seating area: The bench provides a comfortable seating area for your child to relax, read, or play.
- Easily accessible: The bench is designed at kid-friendly height, allowing your child to independently access their toys.
- Customizable: You can personalize the window bench with your preferred color, fabric, or design to match your playroom decor.
Building a DIY window bench with storage is a cost-effective and rewarding project that adds both functionality and aesthetics to your playroom. With basic carpentry skills and the right materials, you can create a beautiful and practical toy storage solution that meets your specific needs.
Materials and Steps
To build your own DIY window bench with storage, you will need the following materials:
- Wood boards or plywood
- Screws
- Wood glue
- Saw
- Measuring tape
- Screwdriver or drill
- Sandpaper
- Paint or stain
- Cushion or fabric
Once you have gathered the necessary materials, follow these general steps to create your DIY window bench with storage:
- Measure the area where the window bench will be placed and determine the dimensions.
- Cut the wood boards or plywood to the required measurements.
- Assemble the bench frame using screws and wood glue.
- Sand the surfaces to create smooth edges and remove any splinters.
- Apply paint or stain to the wood for a desired finish.
- Add a cushion or fabric to the top for comfortable seating.
Remember to take safety precautions and follow proper instructions when using tools and working with wood. It’s also important to supervise children when accessing the storage area to ensure their safety.
| Pros | Cons |
|---|---|
| Maximizes storage space | Requires basic carpentry skills |
| Conceals toys for a clean look | May require additional materials |
| Provides a comfortable seating area | Time-consuming project |
| Customizable to match playroom decor | Requires proper supervision of children |
By building a DIY window bench with storage, you can transform your playroom into a functional and organized space. The bench not only keeps toys out of sight but also enhances the overall aesthetic appeal of your playroom. Create a cozy and clutter-free play area for your child with this versatile DIY toy storage solution.
Organizing Playroom Toys
If you’re in need of toy storage furniture ideas, IKEA shelves are a great option. These shelves, combined with baskets, provide excellent storage for toys in a playroom or living room. You can use different baskets for different types of toys and even label them for added organization.
Here are some toy room tips to help you organize your toy cabinets:
1. Categorize and Label
Sort toys into categories such as puzzles, dolls, cars, and art supplies. Labeling the baskets or shelves with these categories will make it easier for your child to find and put away toys.
2. Utilize Vertical Space
Maximize your storage capacity by using wall-mounted shelves or bookcases. This will free up floor space and make it easier to access toys.
3. Rotate Toys
Keep the playroom fresh and exciting by rotating toys every few weeks. This not only helps to reduce clutter but also keeps your child engaged and interested in their toys.
4. Encourage Clean-Up Time
Set aside a specific time each day for your child to clean up their toys. Make it a fun activity by playing music or turning it into a game.
“A well-organized playroom not only makes it easier to find toys, but also encourages creativity and independence in children.” – Parenting Expert
5. Use Clear Bins
Opt for clear bins or containers to store toys, so your child can easily see what’s inside without making a mess. This also helps with finding specific toys quickly.
6. Create a Reading Nook
Designate an area in the playroom for reading. Install bookshelves or a bookcase where your child can access their favorite books and create a cozy reading nook.
By following these toy organization tips and utilizing IKEA toy storage solutions, you can create a well-organized and clutter-free playroom that sparks joy and promotes imaginative play.
Pros and Cons of IKEA Toy Storage
| Pros | Cons |
|---|---|
| Affordable | Some assembly required |
| Wide range of styles and sizes | May not be as sturdy as custom furniture |
| Modular and customizable options | Limited color choices |
| Easily accessible and adjustable shelves | May require additional storage bins or baskets for optimal organization |
| Presents a clean and organized aesthetic | May not fit all playroom decor styles |
Pipe Storage Shelf Tutorial
If you’re looking for a stylish and organized way to store your kids’ toys, this DIY pipe storage shelf is the perfect solution. Combining the industrial look of pipe shelves with the functionality of toy storage bins, this project is both practical and visually appealing.
The pipe shelf system provides a sturdy and durable framework for organizing your toy collection. You can customize the size and layout of the shelves to fit your space and storage needs. The addition of storage bins and shelves allows you to separate toys by category, making it easy for your kids to find what they’re looking for.
To make this pipe storage shelf, you’ll need the following materials:
- Pipe and fittings
- Wooden shelves
- Toy storage bins
- Screws
Start by assembling the pipe and fittings according to your desired shelf design. Secure the shelves to the pipe frame using screws, ensuring they are sturdy and level. Then, attach the toy storage bins to the shelves, making sure they are easily accessible for your kids.
This pipe storage shelf not only keeps your playroom tidy but also adds an industrial touch to your decor. It’s a functional and aesthetically pleasing solution for toy storage.
Benefits of a Pipe Storage Shelf:
“The pipe storage shelf offers a unique blend of style and functionality. It’s a versatile storage solution that can grow with your child, accommodating their changing toy collection. The combination of pipe shelves and toy storage bins creates a visually appealing and organized space for your kids’ toys.”
With this DIY toy storage idea, you can transform your playroom into a clutter-free and stylish space. Get creative with your pipe shelf design, and enjoy the benefits of a well-organized toy collection.
Whether you’re a beginner or an experienced DIY enthusiast, this pipe storage shelf tutorial is accessible to all skill levels. Start decluttering your playroom today and create a functional and attractive space for your kids’ toys.
| Materials | Instructions |
|---|---|
| Pipe and fittings | 1. Measure and cut the pipes to your desired length. 2. Assemble the pipes and fittings to create the frame of the shelf. |
| Wooden shelves | 3. Cut the wooden shelves to fit the size of your pipe frame. 4. Secure the shelves to the pipes using screws. |
| Toy storage bins | 5. Attach the toy storage bins to the shelves using screws or hooks. 6. Make sure the bins are easily accessible for your kids. |
| Screws | 7. Use screws to secure the shelves and bins in place. 8. Make sure everything is sturdy and level. |
Conclusion
Transform your playroom into an organized and clutter-free space with these creative DIY toy storage solutions. With options ranging from rustic toy storage units to DIY toy carts and shelves, there are endless possibilities to suit your style and storage needs. By utilizing these homemade toy storage ideas, you can declutter your playroom and create a more organized environment for your child’s toys.
DIY toy storage solutions not only provide practicality and functionality but also add a touch of creativity and style to your home. From building your own rustic toy storage unit to creating a macrame net storage crate for stuffed animals, you can find projects that match your skill level and aesthetic preferences.
Start your toy organization journey today, and enjoy the benefits of a tidy and well-organized playroom. With these DIY toy storage ideas, you’ll not only save money but also have fun while adding a personal touch to your space. Say goodbye to toy clutter and hello to a more organized and enjoyable playtime experience!
FAQ
Are the build plans for the rustic toy storage unit provided?
Yes, the build plans for the rustic toy storage unit are provided, allowing you to build it yourself and save money.
How can I store stuffed animals in a stylish and organized way?
You can create a DIY toy storage crate with an easy macrame net on the front and back, providing a stylish and organized solution for storing stuffed animals.
What is a DIY toy cart and how can it help with toy storage?
A DIY toy cart is a mobile storage unit that adds an industrial vibe and wheels for easy mobility. It provides storage for your child’s toys while also adding a touch of style to your playroom decor.
What is the benefit of using vintage rolling toy crates for toy storage?
Vintage rolling toy crates not only add charm to your playroom but also provide a convenient and portable way to store toys. They can be moved from room to room, keeping your playroom organized and clutter-free.
How can I create a custom wooden toy box?
You can easily make a wooden box in any size you need for toy storage. This DIY project allows you to create a custom toy storage solution that fits your playroom decor.
What is the advantage of using a treasure chest toy box for outdoor toy storage?
A treasure chest toy box is a fun and creative way to store toys both indoors and outdoors. It adds a playful touch to your playroom or backyard while keeping your child’s toys organized and easily accessible.
Can I build a DIY toy organizer that fits my specific storage needs?
Absolutely! The DIY toy organizer is a versatile storage solution that can be customized to fit your playroom’s specific storage needs. It provides ample room for books, board games, and stuffed animals.
How can I encourage my kids to clean up their toys?
By using easy DIY toy storage bins made from painted wood crates, you provide a vintage look that adds charm to your playroom. These rolling toy crates can be moved from room to room and encourage your kids to clean up their own mess.
What is a creative way to store toys using upcycled materials?
You can turn upcycled wine crates into a rolling storage unit, adding a touch of rustic charm to your playroom. This DIY project provides a stylish and practical way to store toys while repurposing materials.
How can I utilize an empty wall for toy storage?
You can transform an empty wall into a functional and decorative storage space by creating shelves and hooks. This DIY toy storage idea gives you a customized storage solution for all your kids’ toys, books, and games.
What is a crate toy storage shelf and how can it help with organization?
A crate toy storage shelf is an inexpensive and easy-to-build option for toy storage. It adds a rustic touch to your playroom and provides ample storage space for all your kids’ toys, keeping your playroom organized and clutter-free.
How can I add hidden storage for less aesthetically pleasing toys?
You can create a DIY window bench with storage, which not only adds a beautiful seating area to your playroom but also provides hidden storage for your child’s toys. It’s designed at the perfect height for easy access and helps conceal the toys you want to hide.
What are some toy storage furniture ideas?
IKEA shelves combined with baskets are a great option for toy storage. You can use different baskets to store different types of toys, keeping them organized. This provides excellent storage for toys in a playroom or living room.
How can I combine the industrial look of pipe shelves with toy storage bins?
With a DIY pipe storage shelf system, you can create a stylish and organized space for all your kids’ toys. The addition of storage bins and shelves adds functionality while maintaining a unique industrial look.
How can I transform my playroom into an organized space?
By using these creative DIY toy storage solutions, you can declutter your playroom and transform it into an organized and clutter-free space. These ideas range from rustic toy storage units to DIY toy carts and shelves, providing endless options to fit your style and storage needs.