Have you ever considered building your own bathroom vanity? It might seem like a daunting task, but with the right guidance and tips, you can create a unique and budget-friendly vanity that perfectly suits your style and needs. Say goodbye to generic store-bought vanities and hello to a creative and personalized bathroom centerpiece. So, are you ready to delve into the world of DIY bathroom vanities and discover the possibilities that await?
Key Takeaways:
- Building a DIY bathroom vanity allows you to customize the design and fit it perfectly into your space.
- A homemade vanity can save you money compared to store-bought alternatives.
- There are endless creative options for DIY vanity designs, from rustic to modern.
- Building your own vanity provides an opportunity to incorporate smart storage solutions.
- Regular maintenance and care are essential to keep your DIY vanity looking its best.
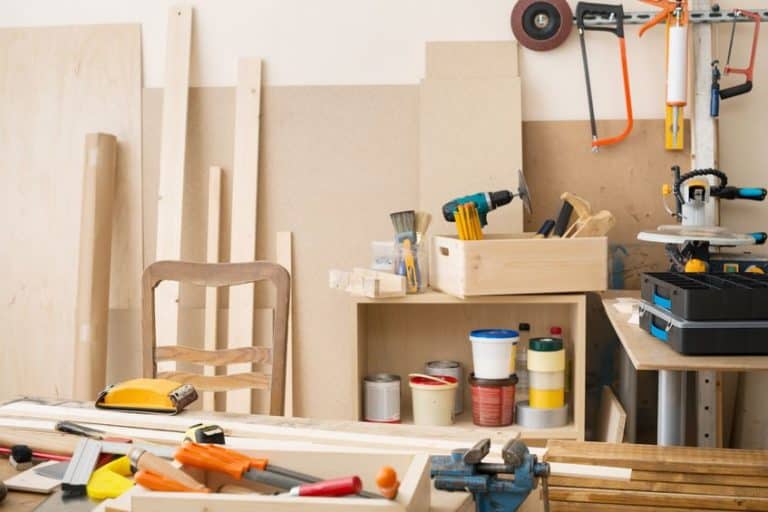
Materials and Tools Needed for DIY Bathroom Vanity
Before you start building your DIY bathroom vanity, it’s important to gather all the necessary materials and tools. Here is a list of materials and tools you will need for this project:
- Materials:
- – Plywood or alternative vanity top material
- – Cabinet-grade plywood or hardwood for the cabinet box and drawers
- – 1×2 and 1×3 boards for frame and trim
- – Countertop material (e.g., marble, granite, laminate)
- – Sink and faucet
- – Drawer slides
- – Pocket hole screws
- – Wood glue
- – Brad nails
- – Sandpaper
- – Stain, paint, or finish of your choice
- – Adhesive and silicone
- – Non-abrasive cleaner
- – Soft cloth
- – Coasters or mats
- Tools:
- – Circular saw or table saw
- – Drill and drill bits
- – Kreg Jig for pocket holes
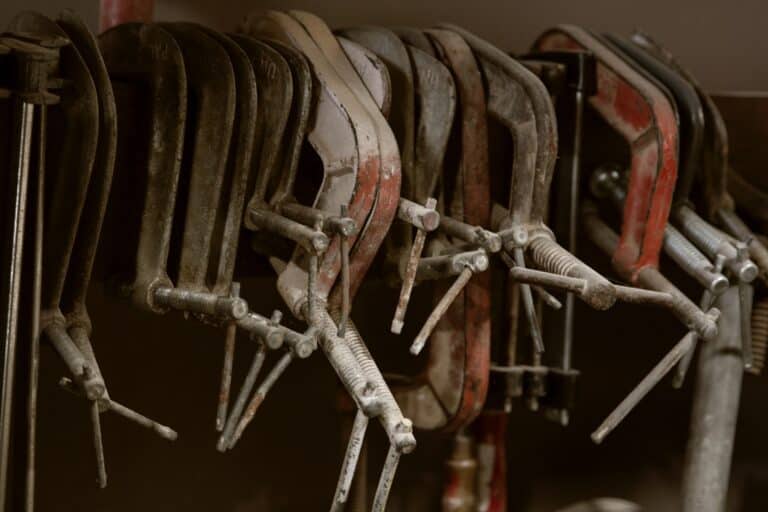
- – Clamps
- – Chisel
- – Measuring tape
- – Level
- – Paintbrushes or foam rollers
- – Utility knife
- – Pencil
- – Safety goggles
- – Dust mask
Make sure to gather all the necessary materials and tools before starting your DIY bathroom vanity project. Having everything you need on hand will make the construction process smoother and more efficient.
Building the Vanity Side Panels
The first step in building your DIY bathroom vanity is constructing the side panels. Follow these steps to create sturdy and stylish side panels for your vanity:
- Measure and cut the cabinet sides and bottom to your desired dimensions. Ensure that they are perfectly square for a clean and professional finish.
- Using a Kreg Jig, drill pocket holes on the inside edges of the cabinet sides and the bottom panel. These pocket holes will allow you to securely attach the side panels to the bottom.
- Apply wood glue to the edges of the bottom panel and align the cabinet sides with it. Make sure the bottom panel is positioned 2 1/4″ from the bottom of the side panels to create the base of the vanity.
- Secure the side panels to the bottom panel using pocket hole screws. Check for any gaps or misalignments and make adjustments as necessary to ensure a tight and sturdy connection.
- Allow the glue to dry completely before proceeding to the next steps of your DIY bathroom vanity project.
By following these steps, you can successfully construct the side panels of your DIY bathroom vanity. These panels will serve as the foundation for the rest of the vanity construction, providing stability and support.
Expert Tip:
When cutting the side panels and bottom panel, it’s important to use high-quality, sturdy materials. Opt for hardwood or plywood that is at least 3/4″ thick to ensure durability and longevity.
Building sturdy side panels is an essential step in creating a functional and visually appealing DIY bathroom vanity. It ensures the stability and strength of the overall structure, allowing for a long-lasting and reliable vanity in your bathroom.
Attaching the Middle Panels
In this step, you will be attaching the middle panels to the bottom of the vanity. By doing so, you’ll create dividers in the vanity, providing additional storage compartments for your bathroom essentials. Here’s how to proceed:
- Cut the middle cabinet pieces to size.
- Drill pocket holes on the front and bottom edges of the middle panels.
- Attach the middle panels to the bottom of the cabinet using pocket hole screws and wood glue.
This simple process ensures that the middle panels are securely attached, creating sturdy dividers within the vanity. It’s important to use pocket hole screws and wood glue to ensure a strong and durable connection.
With the middle panels in place, you can now enjoy the added organization and storage benefits they provide. Keep your bathroom essentials neatly sorted and easily accessible with the help of these dividers.
Tip: To maximize the functionality of your vanity, consider adding adjustable shelves or small drawers between the middle panels. This will allow you to customize the storage compartments according to your specific needs.
| Materials | Tools |
|---|---|
| – Middle cabinet pieces | – Drill |
| – Pocket hole screws | – Pocket hole jig |
| – Wood glue | – Screwdriver |
By following these instructions and using the recommended materials and tools, you’ll have no trouble attaching the middle panels to your DIY bathroom vanity. This step brings you one step closer to completing your customized vanity project, adding both functionality and style to your bathroom.
Attaching the Legs to the Aprons
Now that you have completed the side and middle panels of your DIY bathroom vanity, it’s time to attach the legs and aprons. This step will create the front frame of the vanity and provide structural support for the entire piece.
To begin, cut the legs and front, top, and bottom aprons to the appropriate size. This will ensure a precise fit and a sturdy construction. Next, use a drill to create pocket holes on both ends of the apron pieces. These pocket holes will allow you to securely attach the aprons to the legs.
Once you have prepared the aprons, position them at the desired height on the legs. Ensure that the top apron is flush with the top of the legs and that the bottom apron is attached 2 1/2″ from the bottom of the legs. This will create the front frame and provide consistent spacing for the remaining components.
With the aprons in position, use pocket hole screws and wood glue to attach them to the legs. The pocket hole screws will provide strong and durable connections, while the wood glue will enhance the overall stability of the vanity. Take care to align the pieces properly before tightening the screws to avoid any misalignment.
Once the legs and aprons are securely attached, you will have successfully created the front frame of your DIY bathroom vanity. This frame will serve as the foundation for the remaining components and ensure that your vanity is structurally sound.
| Materials Needed: | Tools Needed: |
|---|---|
|
|
With the legs and aprons securely attached, your DIY bathroom vanity is starting to take shape. The front frame provides a solid base for the rest of the components, ensuring stability and longevity. In the next section, we will explore how to attach the middle frame pieces, bringing your vanity one step closer to completion.
Attaching the Middle Frame Pieces
In this step, you will be attaching the middle frame pieces to your DIY bathroom vanity. The middle frame serves as a structural component, providing support and stability to your vanity.
To begin, cut the middle face frame pieces to the appropriate size. Ensure they are measured accurately to fit your vanity dimensions.
Next, use a drill to create pocket holes on the ends of the frame pieces. These pocket holes will allow you to securely attach the pieces to the vanity.
Once the pocket holes are drilled, it’s time to attach the vertical and horizontal frame pieces. Start by attaching the vertical pieces to the top and bottom of the vanity using pocket hole screws and wood glue. This will create the vertical structure of the frame.
Then, attach the horizontal pieces to the vertical pieces, also using pocket hole screws and wood glue. This will complete the assembly of the middle frame, providing essential support and reinforcement to your vanity.
By attaching the middle frame pieces to your DIY bathroom vanity, you not only enhance its strength and stability but also add a professional touch to the overall design. This frame will ensure that your vanity lasts for years to come and can withstand daily use.


Attaching the Face Frame
Once the face frame is assembled for your DIY bathroom vanity, it’s time to attach it to the cabinet. This step will provide a finished look to the vanity and add structural support. To attach the face frame, follow these steps:
- Place the face frame on the front of the cabinet, ensuring it is aligned properly.
- Using pocket hole screws, attach the face frame to the bottom, side, and middle panels of the cabinet. This will secure the frame in place.
- Apply wood glue along the edges where the face frame meets the cabinet for added strength and stability.
When attaching the face frame, make sure that the cabinet bottom is flush with the bottom apron. Also, the side panels should be flush with the top of the legs and inset 3/4″. This will ensure a seamless integration between the face frame and the rest of the vanity.
By attaching the face frame securely, you’ll not only achieve a polished and professional look for your DIY bathroom vanity but also enhance its overall durability and longevity.

Back Frame Assembly
In this step, you will be attaching the back frame to the DIY bathroom vanity. Follow these instructions to ensure a secure and sturdy back frame:
Cut the back apron pieces
Start by cutting the back apron pieces to the appropriate size. Measure and mark the dimensions according to your vanity design.
Tip: Ensure accurate measurements to ensure a proper fit.
Drill pocket holes
Next, drill pocket holes into the ends of the back apron pieces. These pocket holes will allow you to attach the frame securely to the two remaining legs.
Tip: Use a pocket hole jig for precise and efficient drilling.
Attach the back apron to the legs
Using pocket hole screws and wood glue, attach the top back apron to the top and front of the two remaining legs. Ensure that the top apron is flush with the top and front edges of the legs.
Tip: Clamp the pieces together while attaching to ensure a tight bond.
Then, attach the bottom back apron to the front of the legs, aligning it 2 1/2 inches from the bottom of the legs. Make sure it is flush with the front edges of the legs.
Tip: Use a level or square to ensure the apron is properly aligned.
By following these steps, you will successfully create the back frame of your DIY bathroom vanity, providing additional support and stability to your project.
Note: The image above illustrates the back frame assembly for visual reference.
Attaching the Sides to the Drawer Bottom
In this step, you will be constructing the drawers for the DIY bathroom vanity. Follow these instructions to attach the sides to the drawer bottom:
- Cut the drawer bottoms and side pieces to the appropriate size for your vanity.
- Using a drill, create pocket holes around the edges of the drawer bottoms and at both ends of the side pieces. These pocket holes will allow you to secure the pieces together.
- Position the side pieces perpendicular to the drawer bottom and align them accordingly.
- Using pocket hole screws and wood glue, attach the side pieces to the drawer bottom. Ensure that the pieces are securely fastened together.
This process will create the basic structure of the drawers, forming an essential component of your DIY bathroom vanity.
Craftsmanship Tip:
Before attaching the sides to the drawer bottom, double-check the measurements to ensure a precise fit. This will help you achieve professional-looking results.
Attaching the Front and Back to the Drawer
Now that the drawer sides are securely attached to the bottom, it’s time to complete the assembly by attaching the front and back pieces.
Begin by cutting the front and back pieces to the appropriate size. Make sure they match the width and height of the drawer sides.
Once the pieces are cut, you can attach them to the bottom and side pieces using pocket hole screws and wood glue. This will ensure a sturdy and durable drawer.
Pro Tip: Before attaching the front and back pieces, double-check that they are aligned properly with the sides to ensure a flush and seamless look.
After attaching the front and back pieces, it’s time to mark the positions for the drawer slides. Using the Kreg Drawer Slide Jig, mark the locations where the slides will be installed. This will help guide you in the proper placement of the slides.
Once the slides are marked, follow the manufacturer’s instructions to install them correctly. This step is crucial as it allows the drawer to glide smoothly in and out of the vanity.
Finally, it’s time to attach the drawer faces to the front of the drawers. Apply a thin layer of wood glue to the back of each drawer face and carefully position them onto the front of the drawers. Secure them in place with brad nails for added strength.
Once the drawer faces are attached, you can install the drawers into the vanity using the drawer slides. This will allow you to easily open and close the drawers, providing convenient storage for your bathroom essentials.
With the front and back attached and the drawers fully assembled, your DIY bathroom vanity is nearing completion. Take a moment to admire your handiwork and prepare for the final steps in the construction process.
Attach the Trim to the Side Panels
In this step, you will be attaching the trim to the side panels of the DIY bathroom vanity. The trim not only adds a decorative element but also creates a polished and finished look for your vanity.
Here’s how you can attach the trim:
- Cut the trim pieces to size, ensuring they fit perfectly along the sides of the vanity.
- Using brad nails and wood glue, attach the trim pieces to the sides of the vanity.
- Start by placing the trim from the inside of the cabinet and secure it into the back of the side panel trim.
- Make sure that the top and bottom of the side trim pieces are flush with the top and bottom of the vanity.
- Continue attaching the trim along the sides until all pieces are securely in place.
By attaching the trim, you enhance the overall aesthetic appeal of your DIY bathroom vanity. It adds a touch of elegance and sophistication to the final look of your project.
Take a look at the image below to see an example of how the trim can transform the appearance of your vanity:
Follow this step to complete your DIY bathroom vanity with a stunning trim that elevates its visual appeal.
Attaching the Sink Top and Faucets
After completing the construction of your DIY bathroom vanity, it’s time to add the finishing touches by attaching the sink top and faucets. This step will bring both functionality and style to your vanity.
To begin, carefully place the sink top onto the vanity, ensuring it is centered and aligned properly. Use adhesive or silicone to secure the sink top to the vanity surface, following the manufacturer’s instructions. This will provide a stable and secure attachment.
Once the sink top is securely in place, it’s time to install the faucets. Refer to the manufacturer’s instructions for specific installation steps and guidelines. Generally, you will need to position the faucets in the pre-drilled holes on the sink top and follow the provided instructions for connecting the water supply lines.
Ensure that all connections are tightened securely, but be careful not to overtighten and risk damaging the sink or faucets. Once the faucets are installed, turn on the water supply to test for any leaks.
Attaching the sink top and faucets completes the installation of your DIY bathroom vanity, giving it a functional and stylish finish. Take a moment to admire your handiwork and enjoy the satisfaction of a job well done!
Applying the Finish
Once the construction and installation of your DIY bathroom vanity are complete, it’s time to apply the finish. This final step will give your vanity a polished and professional appearance. You have two options for finishing your vanity: staining and polyurethaning the wood for a natural look or painting the vanity to match your bathroom decor.
If you prefer a natural and rustic look, staining is the way to go. Choose a stain color that complements your bathroom’s color scheme and apply it evenly to the wood. Follow the instructions on the stain can for the best results. Allow the stain to dry completely before applying a protective coat of polyurethane. The polyurethane will add durability and a glossy finish to the wood, protecting it from moisture and everyday wear and tear.
If you want to create a more personalized and colorful vanity, painting is a great option. Choose a paint color that matches your bathroom’s overall design aesthetic. Clean the vanity surface thoroughly and apply a primer before painting. Then, use a brush or paint sprayer to apply multiple coats of paint, allowing each coat to dry before applying the next one. Finally, seal the painted surface with a clear topcoat or polyurethane to protect the finish and provide a smooth and glossy appearance.
Remember to follow the instructions on the stain or paint can for specific application techniques and drying times. Take your time and apply the finish with care for a beautiful end result.

Adding Extra Storage Solutions
To make your DIY bathroom vanity even more functional, consider incorporating creative storage solutions. By maximizing storage space and keeping your bathroom organized, you can enhance the overall functionality and convenience of your vanity. Get inspired by these DIY bathroom vanity storage ideas:
- Open Shelving: Install open shelves beneath or beside the sink to display towels, toiletries, or decorative items. This not only adds storage, but also serves as an opportunity to showcase your personal style.
- Built-in Drawers: Add built-in drawers to your vanity design for storing smaller items like makeup, brushes, and accessories. Incorporating drawers allows for easy organization and accessibility.
- Hidden Compartments: Consider incorporating hidden compartments within your vanity design to discreetly store valuables or personal items. These can be hidden behind false drawer fronts or within a top-secret compartment.
These creative storage solutions provide you with endless possibilities for customizing your DIY bathroom vanity to fit your unique needs and style. Whether you prefer a minimalist approach or a more elaborate design, incorporating additional storage options will ensure your vanity serves its purpose efficiently.
Maintenance and Care Tips
To keep your DIY bathroom vanity looking its best, it’s important to follow some maintenance and care tips. Here are some essential tips to help you maintain the beauty and longevity of your vanity:
-
Clean regularly: Regularly clean the vanity surface with a non-abrasive cleaner and a soft cloth. This will help remove dirt, dust, and any other residue that might accumulate over time. Avoid using harsh chemicals or abrasive materials that can damage the finish.
-
Keep it dry: It’s important to keep your vanity dry to prevent water damage. Wipe up any spills or splashes immediately, and avoid letting water pool on the surface for extended periods. Excess moisture can cause warping, discoloration, or damage to the wood.
-
Use coasters or mats: To protect the surface from heat and moisture, use coasters or mats under hot objects like curling irons or wet items like toothbrush holders. This will help prevent any potential damage or stains.
By following these maintenance and care tips, you can ensure your DIY bathroom vanity remains in excellent condition, preserving its beauty and functionality for years to come.
Conclusion
Building your own DIY bathroom vanity is a satisfying and cost-effective project that allows you to customize your bathroom space according to your personal style. By following the step-by-step guide and utilizing the provided tips and ideas, you can create a vanity that fits perfectly in your bathroom and meets your storage needs.
Whether you’re a beginner or an experienced builder, this project can be accomplished with patience and attention to detail. With the right materials and tools, you can construct a beautiful and functional vanity that adds both aesthetic appeal and practicality to your bathroom.
By creating your DIY bathroom vanity, you have the freedom to choose the design, finish, and storage solutions that work best for you. You can maximize space with creative designs, such as incorporating open shelving, built-in drawers, or hidden compartments. This allows you to organize your bathroom essentials efficiently while maintaining a cohesive and stylish look.
In conclusion, a DIY bathroom vanity project is a fantastic way to transform your bathroom, adding personality and functionality. Whether you’re aiming for a sleek, modern design or a rustic, farmhouse-inspired look, building your own vanity gives you the opportunity to create a personalized space that you can be proud of.
FAQ
What materials and tools do I need for a DIY bathroom vanity?
For a DIY bathroom vanity project, you will need materials such as cabinet sides and bottoms, aprons, trim, and drawer components. Additionally, you will need tools like a saw, Kreg Jig, pocket hole screws, wood glue, brad nails, and a drawer slide jig.
How do I build the side panels of a DIY bathroom vanity?
To construct the side panels, you will need to cut the cabinet sides and bottom to size and use a Kreg Jig to drill pocket holes. Then, attach the bottom piece to the side panels with pocket hole screws and wood glue.
How do I attach the middle panels to a DIY bathroom vanity?
Cut the middle cabinet pieces to size, drill pocket holes on the front and bottom edges, and attach them to the bottom of the cabinet with pocket hole screws and wood glue. This will create dividers in the vanity and provide additional storage compartments.
What is the process for attaching the legs to the aprons of a DIY bathroom vanity?
Cut the legs and front, top, and bottom aprons to size. Drill pocket holes into both ends of the apron pieces and attach them to the legs with pocket hole screws and wood glue. Make sure the top apron is flush with the top of the legs and the bottom apron is attached 2 1/2″ from the bottom of the legs.
How do I attach the middle frame pieces to a DIY bathroom vanity?
Cut the middle face frame pieces to size, drill pocket holes on the ends, and attach the vertical and horizontal pieces with pocket hole screws and wood glue. This will create the middle frame of the vanity.
What is the process for attaching the face frame to a DIY bathroom vanity?
Attach the face frame to the cabinet with pocket hole screws and wood glue, connecting the bottom, side, and middle panels to the face frame. This will provide a finished look and added structural support to the vanity.
How do I assemble the back frame of a DIY bathroom vanity?
Cut the back apron pieces to size, drill pocket holes into the ends, and attach them to the remaining legs with pocket hole screws and wood glue. The top apron should be flush with the top and front of the legs, and the bottom apron should be flush with the front of the legs and 2 1/2″ from the bottom of the legs.
What is the process for constructing the drawers of a DIY bathroom vanity?
Cut the drawer bottoms and side pieces to size and drill pocket holes around the edges of the bottom pieces and at both ends of the side pieces. Attach the side pieces to the drawer bottom with pocket hole screws and wood glue. Then, attach the front and back pieces to the sides and bottom to complete the drawer assembly.
How do I attach trim to the side panels of a DIY bathroom vanity?
Cut the trim pieces to size and attach them to the sides of the vanity with brad nails and wood glue, from the inside of the cabinet and into the back of the side panel trim. The top and bottoms of the side trim pieces should be flush with the top and bottom of the vanity.
What is the process for installing the sink top and faucets on a DIY bathroom vanity?
Place the sink top on the vanity and secure it with adhesive and silicone. Then, install the faucets according to the manufacturer’s instructions.
How do I apply the finish to a DIY bathroom vanity?
After completing the construction of the vanity, you can choose to stain and polyurethane the wood surface or paint it to match your bathroom decor. Follow the instructions on the stain or paint can for the best results.
What are some ideas for adding extra storage to a DIY bathroom vanity?
You can incorporate open shelving, built-in drawers, or even a hidden compartment to maximize storage space in your DIY vanity. Get creative with the design to fit your unique needs and style.
How should I maintain and care for a DIY bathroom vanity?
Regularly clean the vanity surface with a non-abrasive cleaner and soft cloth. Avoid using harsh chemicals or abrasive materials that can damage the finish. Keep the vanity dry to prevent water damage and use coasters or mats to protect the surface from heat and moisture.