Looking to create a custom workspace without breaking the bank?
Building your own DIY computer desk is a cost-effective way to design a workspace that suits your needs. Whether you’re in search of simple and affordable designs or more creative and unique ideas, this article has got you covered. We’ll provide you with inspiration, step-by-step instructions, and build tips to help you get started on your DIY computer desk project. So, are you ready to unleash your creativity and elevate your home office?
If you’re ready to take your workspace to the next level, keep reading to discover the world of DIY computer desk ideas and build tips.
Key Takeaways:
- Building your own DIY computer desk is a cost-effective way to create a custom workspace.
- This article provides inspiration, step-by-step instructions, and build tips for DIY computer desks.
- Explore simple and affordable designs, as well as more creative and unique ideas.
- Discover the benefits of DIY desks, including cost-effectiveness and customization options.
- Get ready to unleash your creativity and design your dream home office!
How to Build an Easy DIY Computer Desk Under $50
Building a DIY computer desk doesn’t have to break the bank. This section will guide you through the process of creating a simple and affordable computer desk using minimal materials for under $50. From choosing the right desk dimensions to purchasing the necessary materials and tools, you’ll learn everything you need to know to build your own budget-friendly desk.
When it comes to building a budget-friendly DIY computer desk, simplicity is key. By using basic materials and tools, you can create a functional desk without spending a fortune. The key to keeping costs low is to focus on the essentials and avoid unnecessary embellishments.
To get started, let’s take a look at the materials and tools you’ll need for this project:
- Materials: 3/4-inch plywood, 2×4 boards, wood screws, sandpaper, wood stain or paint
- Tools: Circular saw or jigsaw, drill, screwdriver, sander
Now that you have your materials and tools ready, it’s time to move on to building your DIY computer desk. Follow these steps:
- Measure and mark the desired dimensions for your desk on the plywood. A standard desk width is around 48 inches and depth around 24 inches.
- Use a circular saw or jigsaw to cut the plywood along the marked lines. This will serve as the desktop.
- Measure, mark, and cut the 2×4 boards to create the frame and legs of the desk. Cut four equal-length pieces for the legs and additional pieces to form the frame.
- Assemble the frame using wood screws, ensuring it is sturdy and level.
- Attach the legs to the frame using wood screws.
- Sand the entire desk to smooth out any rough edges or surfaces.
- Apply a coat of wood stain or paint to protect and enhance the appearance of the desk.
And there you have it! A simple and affordable DIY computer desk that you can build for under $50. Customize your desk by adding additional shelves or drawers if desired, or keep it minimalist for a clean and sleek look.
Building your own desk not only saves you money but also allows you to create a workspace that suits your specific needs and style. Plus, the satisfaction of building something with your own hands is truly rewarding.
Pro Tip: If you have any leftover materials from previous projects, consider repurposing them to further reduce costs. For example, an old door can be transformed into a desktop, or sturdy crates can be used as storage shelves. Get creative with what you have!
How to Build a DIY Computer Desk From Scratch
If you’re looking for a more customized approach, this section will show you how to build a DIY computer desk from scratch. By starting with a blank canvas, you have the freedom to design a desk that perfectly fits your space and meets your specific needs.
When creating a custom desk design, the first step is to determine the size and dimensions that will work best for your workspace. Consider the available space, your preferred work area layout, and any specific requirements you have, such as additional storage or cable management.
Once you have your desired desk dimensions in mind, it’s time to select the right materials for your woodworking desk project. Common materials for DIY computer desks include plywood, solid wood, and MDF (medium-density fiberboard). Each material has its own benefits and considerations, such as cost, durability, and aesthetics.
After choosing the materials, it’s essential to gather the necessary tools for the project. A basic woodworking toolkit would typically include a saw, drill, tape measure, clamps, and sandpaper. Depending on the complexity of your custom desk design, you may also need additional tools such as a router or a Kreg Jig for joinery.
Steps for Building a DIY Computer Desk From Scratch:
- Begin by measuring and marking the dimensions of the desk on your selected material.
- Carefully cut the components of the desk, such as the tabletop, legs, and supports, according to your measurements.
- Using appropriate joinery techniques, assemble the various parts of the desk. This could involve gluing, screwing, or doweling the pieces together.
- Ensure that the desk is level and stable by using a level and adjusting the legs or supports if necessary.
- Sand the entire desk surface to smooth out any rough edges or imperfections.
- Apply the desired finish to protect and enhance the appearance of the desk. This can include staining, varnishing, or painting.
Adding finishing touches to your DIY computer desk can elevate its overall aesthetic and functionality. Consider incorporating features such as cable management solutions, keyboard trays, or storage compartments to suit your specific needs.
Remember, building a DIY computer desk from scratch allows you to unleash your creativity and design a desk that perfectly complements your workspace. Whether you prefer a minimalist, industrial, or rustic style, the possibilities are endless!
With a combination of careful planning, the right materials, and precise craftsmanship, you can create a one-of-a-kind desk that not only serves its purpose but also becomes a focal point of your home office or workspace.
| Pros | Cons |
|---|---|
| Freedom to design a desk that meets your specific needs | Requires more time and effort compared to buying a ready-made desk |
| Customizable features according to your workspace and preferences | Requires basic woodworking skills and tools |
| Cost-effective compared to high-end commercial desks | Potential for mistakes or imperfections during the construction process |
| Opportunity to use sustainable materials and reduce waste | May not have the same level of durability as commercial desks |
DIY Craft Room Desk Makeover
Are you in need of a craft room desk that provides ample storage and workspace? Look no further! In this section, we will showcase a DIY craft room desk makeover that will transform your small space into an organized and functional area. Learn how to utilize inexpensive kitchen base cabinets, plywood, laminate flooring, and trim to create a customized craft desk that meets all your crafting needs.
When it comes to crafting, having the right workspace is essential. It’s important to have enough storage to keep your supplies organized and enough workspace to spread out and work on your projects comfortably. With our DIY craft room desk makeover, you can have the best of both worlds.
To create this craft desk, we will be using kitchen base cabinets as the foundation. These cabinets are not only affordable but also provide ample storage for all your craft supplies. Additionally, we will be using plywood for the desktop, laminate flooring for a durable and easy-to-clean surface, and trim to give the desk a polished look.
Materials:
- Inexpensive kitchen base cabinets
- Plywood
- Laminate flooring
- Trim
- Screws
- Drill
- Saw
Steps:
- Measure your space and determine the dimensions of your craft desk.
- Assemble the kitchen base cabinets according to the manufacturer’s instructions.
- Cut the plywood to size for the desktop and attach it to the cabinets using screws.
- Install the laminate flooring on top of the plywood, following the manufacturer’s guidelines.
- Add trim to the edges of the desk to give it a finished look.
- Paint or stain the desk to suit your style.
With just a few simple steps, you can have a beautiful and functional craft room desk that is customized to your needs. Whether you’re working on scrapbooking, sewing, or any other craft, this DIY desk will provide you with the storage solutions and workspace you require.
“Creating a craft room desk that is both practical and stylish doesn’t have to be expensive. With some creativity and the right materials, you can transform any space into a crafting haven.” – Craft Enthusiast
| Advantages of DIY Craft Room Desk Makeover | Disadvantages of DIY Craft Room Desk Makeover |
|---|---|
| Customized storage solutions | Requires some woodworking skills |
| Cost-effective compared to buying a ready-made desk | Time-consuming process |
| Opportunity to personalize the design to fit your style | Potential for mistakes if measurements are not accurate |
| Ability to maximize the use of space in your craft room | May require assistance for heavy lifting |
By undertaking a DIY craft room desk makeover, you can create a workspace that not only meets your crafting needs but also reflects your personal style. Get ready to unleash your creativity and enjoy a functional and organized craft room!
Building a Large Surface Home Office Desk
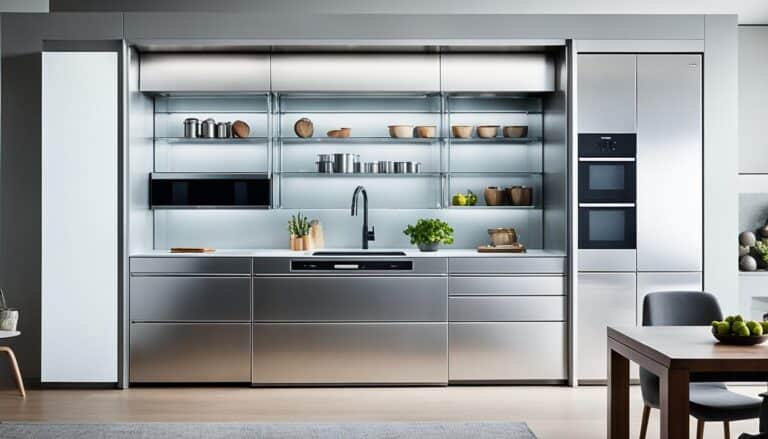
If you’re working from home and need a spacious desk for your home office, this section will guide you through the process of building a large surface desk using inexpensive MDF wood. With the addition of bracing, paint, molding, and cable wire grommets, you can create a functional and stylish desk that suits your work needs.
When it comes to home office desks, having enough space to spread out and work efficiently is essential. By building your own DIY desk, you can customize the size and layout to perfectly fit your workspace. Not only will this save you money compared to buying a pre-made desk, but it will also allow you to create a personalized and ergonomic setup.
Gathering the Materials
To start building your large surface home office desk, you’ll need the following materials:
- MDF wood or plywood for the desk surface
- 2×4 lumber for the desk frame and legs
- Braces and screws for added stability
- Paint or stain of your choice
- Molding to finish the edges
- Cable wire grommets for managing your cables neatly
- Wood glue and a brad nailer for assembly
Ensure that you measure your space carefully and purchase the correct amount of materials to avoid any delays or shortages during the construction process.
Building the Desk Frame
Start by constructing the frame of your desk using 2×4 lumber. Cut the lumber to the desired height for your desk, keeping in mind ergonomics and comfort. Use wood glue and a brad nailer to secure the pieces together, creating a sturdy frame. Make sure to add additional bracing along the length of the desk for added stability.
Attaching the Desk Surface
Once the frame is complete, cut your MDF wood or plywood to the desired dimensions for your desk surface. Attach the surface to the frame using screws, ensuring that it is securely fastened. Take the time to sand the edges of the desk surface for a smooth finish.

Image: A spacious DIY home office desk made from MDF wood.
Adding the Finishing Touches
To give your home office desk a polished look, apply paint or stain of your choice to the desk surface and frame. Add molding to the edges of the desk for a professional finish. Additionally, incorporate cable wire grommets into the desk to manage your cables neatly, keeping your workspace organized and clutter-free.
Materials Needed for Building a Large Surface Home Office Desk
| Materials | Description |
|---|---|
| MDF wood or plywood | Main desk surface |
| 2×4 lumber | Desk frame and legs |
| Braces and screws | For added stability |
| Paint or stain | To finish the desk |
| Molding | For edge finishing |
| Cable wire grommets | For cable management |
| Wood glue and brad nailer | For assembly |
By following these steps and utilizing affordable materials such as MDF wood, you can create a large surface home office desk that meets your needs without breaking the bank. Enjoy the satisfaction of building a functional workspace that enhances your productivity and adds a touch of personal style to your home office.
Tips for Choosing the Right Desk Dimensions
When building a DIY computer desk, it’s essential to consider the right dimensions for your space and specific needs. Choosing the correct desk measurements will ensure a comfortable and functional workspace that fits perfectly in your desired location. Factors such as ergonomics and customization play a vital role in determining the ideal desk dimensions.
1. Assess your available space
Start by measuring the area where you plan to place your desk. Consider the length, width, and height restrictions to determine the maximum desk size that will comfortably fit in the space. Additionally, take into account any obstacles or architectural features that may impact the desk’s placement.
2. Focus on ergonomics
Ergonomics is crucial for maintaining good posture and reducing strain on your body while working at your desk. Opt for a desk height that allows your elbows to rest comfortably at a 90-degree angle while sitting. Ensure that the desk depth provides enough space for your legs and allows you to position peripherals, such as a keyboard and mouse, at a comfortable distance.
3. Consider your work requirements
Think about how you intend to use your desk. If you need ample workspace for multiple monitors or documents, opt for a larger desk surface. For tasks that require less surface area, a compact desk may be more suitable. Take into account any specific equipment or tools you’ll need to accommodate, such as a printer, scanner, or drawing tablet.
4. Customize to your preferences
Personal customization allows you to tailor the desk dimensions to your liking. If you prefer an L-shaped desk or a corner desk, take the necessary measurements to ensure proper fit and functionality. Consider adding storage options, such as drawers or shelves, to keep your workspace organized and clutter-free.
5. Test before finalizing
If possible, try sitting at various desk heights and sizes to find the most comfortable and ergonomic setup for you. Visit furniture showrooms or try out desks at friends’ or colleagues’ workspaces. This hands-on approach will allow you to make more informed decisions regarding the ideal desk dimensions for your DIY project.
By following these tips and considering factors such as ergonomics, available space, and customization, you can choose the right desk dimensions for your DIY computer desk project. Creating a workspace that meets both your functional and aesthetic needs will result in a productive and comfortable environment for your home office.


Essential Materials and Tools for Building a DIY Desk
Building your own DIY computer desk requires the right materials and tools to ensure a successful construction process. To help you get started, we have compiled a comprehensive list of essential materials and highlighted the necessary tools that will make your DIY desk project easier and more efficient.
Materials
Here are the essential materials you will need:
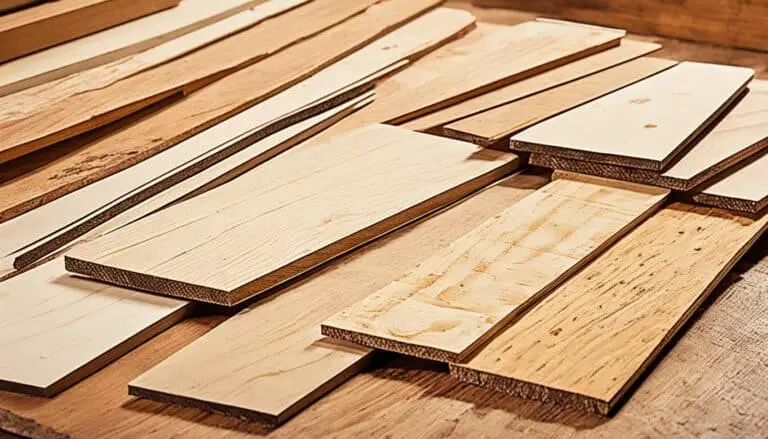
- Wood: Choose a durable and sturdy wood, such as pine or plywood, for the desk frame and surface. Measure and cut the wood according to your desired dimensions.
- Screws: Use screws to secure the different parts of the desk together. Make sure to choose the appropriate size and type of screws for your specific project.
- Glue: Apply wood glue to reinforce the joints and add strength to your desk assembly.
- Stain or Paint: Finish your desk with a stain or paint of your choice to protect the wood and add a stylish touch.
Tools
Here are the necessary tools you will need for your DIY desk project:
- Drill: Use a drill to create pilot holes and secure the screws.
- Saw: Depending on your design, you may need a circular saw, jigsaw, or miter saw to cut the wood to your desired dimensions.
- Kreg Jig: The Kreg Jig is a handy tool that helps create pocket holes, allowing for secure and hidden fastening of the desk components.
- Sander: Smooth out any rough edges or surfaces with a sander to achieve a polished finish.
With these essential materials and tools, you’ll have everything you need to start building your own DIY computer desk. Now let’s dive into the construction process and bring your desk to life!
Image: A selection of common DIY desk materials, including wood, screws, glue, and stain.
Step-by-Step Tutorial for Building a DIY Computer Desk
Are you ready to bring your DIY computer desk to life? This step-by-step tutorial will walk you through each woodworking step, ensuring a successful build from start to finish. Let’s dive in!
Gather Your Materials and Tools
Before you begin, make sure you have all the necessary materials and tools at hand. Here’s what you’ll need:
- 1-inch thick plywood for the desktop
- 2×4 lumber boards for the legs and support frame
- Screws, wood glue, and sandpaper
- Kreg Jig for drilling pocket holes
- Power drill, circular saw, and sander
Cut and Assemble the Legs
Start by cutting the 2×4 lumber into four equal pieces, each measuring the desired height of your desk. Sand the rough edges for a smooth finish. Then, attach the legs to the desktop frame using screws and wood glue, ensuring stability and durability.
Create the Desktop Support Frame
Cut additional 2×4 lumber pieces to create a support frame for the desktop. Measure and mark the placement of the support beams and attach them securely to the legs using screws and wood glue. This frame will provide the necessary strength and prevent sagging.
Attach the Top
It’s time to attach the plywood top to the support frame. Apply wood glue along the edges of the frame and carefully place the plywood on top. Secure it in place using screws, ensuring a tight fit. Use a level to check for any unevenness and make adjustments if necessary.
Finishing Touches
Once the top is attached, it’s time to add those final touches to enhance the aesthetics of your DIY computer desk. Sand the entire surface for a smooth finish, rounding the corners for added comfort. Apply your preferred stain or paint to achieve the desired look. Remember to let it dry completely before moving on.
Pro tip: Using a stain or paint with a protective finish will not only enhance the appearance but also protect the wood from scratches and stains.
Enjoy Your DIY Computer Desk
Congratulations! You’ve successfully built your own DIY computer desk. Place it in your desired location, set up your computer and accessories, and enjoy your new workspace.
Visual Inspiration
| Woodworking Steps | Attach the Top |
|---|---|
| Cut and sand the legs | Apply wood glue along the frame edges |
| Assemble the legs to the desktop frame | Place the plywood on top of the frame |
| Create the support frame | Secure the plywood with screws |
| Add finishing touches | Sand the surface and apply stain or paint |
Adding Finishing Touches to Your DIY Desk
Now that you’ve completed the construction of your DIY computer desk, it’s time to add those final finishing touches that will give your desk a polished and professional look. In this section, we’ll guide you through the steps of adding edges with trim, sanding the wood surface, and staining the desk to enhance its visual appeal. Follow our techniques and tips to achieve a beautiful finish on your DIY desk project.
Adding Edges with Trim
To give your desk a refined look, you can add edges using trim. Trim not only provides a decorative element but also helps protect the corners of your desk. Choose a trim that complements the style of your desk, whether it’s a sleek and modern design or a rustic and vintage-inspired piece. With precision cutting and careful installation, trim adds a professional touch to your DIY desk.
Sanding the Wood Surface
Sanding is a crucial step in preparing the wood surface for staining. It helps remove any rough edges, imperfections, or splinters, resulting in a smoother and more even finish. Begin with coarse-grit sandpaper to remove any noticeable blemishes and gradually progress to finer-grit sandpaper for a smooth touch. Remember to sand in the direction of the wood grain to achieve optimal results. After sanding, wipe away any dust using a clean cloth.
Staining the Desk
Staining the wood adds depth and richness to your DIY desk, showcasing its natural beauty. Choose a stain color that complements your space and personal style. Before applying the stain, ensure the wood surface is clean and free of dust. Use a brush, cloth, or sponge to apply the stain evenly, following the manufacturer’s instructions. Allow the stain to penetrate the wood for the recommended time and wipe off any excess stain. Let the desk dry completely before proceeding to the next step.
By adding edges with trim, sanding the wood surface, and staining the desk, you’ll elevate the visual appeal of your DIY computer desk. These finishing touches not only enhance the overall look but also protect and preserve the wood for long-lasting use. Take the time to execute these final steps with care, and you’ll be rewarded with a beautifully finished DIY desk that you can proudly display in your home office.
| Finishing Touches for Your DIY Desk | Benefits |
|---|---|
| Adding Edges with Trim |
|
| Sanding the Wood Surface |
|
| Staining the Desk |
|
Creative Ideas for DIY Computer Desks
If you’re looking to add a unique touch to your DIY computer desk, this section is for you. Explore creative design concepts and let your imagination run wild to create a desk that stands out. Whether you’re repurposing old furniture, using unconventional materials, or adding personalized touches, the possibilities are endless.
Repurposing Old Furniture
One way to get creative with your DIY computer desk is to repurpose old furniture. Consider using an old door as the desk surface or transforming a vintage trunk into a stylish desk with storage compartments. Not only will this give your desk a unique look, but it’s also an eco-friendly way to repurpose items you already have.
Incorporating Unconventional Materials
Another way to add creativity to your DIY computer desk is by incorporating unconventional materials. Think outside the box and consider using reclaimed wood, metal pipes, or even concrete to create a one-of-a-kind desk. These materials can add an industrial or rustic charm to your workspace and make a bold statement.
Adding Personalized Touches
To truly make your DIY computer desk unique, consider adding personalized touches. You can paint the desk in your favorite color or incorporate a pattern that reflects your style. Adding accessories like a corkboard, shelves, or a custom cable management system can also enhance the functionality and personalization of your desk.
Remember, the key to a creative DIY computer desk is to let your personal style shine through. Explore different design ideas, experiment with materials, and make it a reflection of your creativity and individuality.
| Design Idea | Description |
|---|---|
| Rustic Pallet Desk | Transform wooden pallets into a rustic desk with a natural and earthy feel. Sand and stain the pallets for a polished look. |
| Minimalist Floating Desk | Create a minimalist floating desk by installing a sturdy shelf as a desk surface. This sleek design is perfect for small spaces. |
| Vintage Suitcase Desk | Repurpose an old vintage suitcase by attaching legs and adding a glass or wooden top. This quirky desk design adds a touch of nostalgia to your workspace. |
| Standing Desk with Adjustable Heights | Build a standing desk using adjustable table legs, allowing you to switch between sitting and standing positions for better ergonomics. |
These creative DIY computer desk ideas will not only provide you with a functional workspace but also showcase your unique style and creativity.
Benefits of DIY Computer Desks
Building your own DIY computer desk offers several advantages over purchasing a pre-made desk. Not only does it allow you to save money, but it also provides you with the opportunity to customize your workspace according to your specific needs and preferences. Let’s take a closer look at the benefits of DIY computer desks:
1. Cost-Effectiveness
One of the main advantages of building your own desk is its cost-effectiveness. By using readily available materials and tools, you can create a functional workspace without breaking the bank. Unlike pre-made desks that often come with hefty price tags, DIY desks give you the flexibility to design and build within your budget.
2. Customization Options
When you build your own computer desk, you have complete control over its design and customization. You can choose the dimensions, style, and materials that best suit your needs and personal taste. Whether you prefer a minimalist and modern desk or a more traditional and rustic look, the possibilities are endless. Customizing your desk allows you to create a workspace that reflects your unique personality and enhances your productivity.
3. Satisfaction of Creating Something Unique
There is a sense of satisfaction that comes with building something from scratch, including your own computer desk. DIY projects provide a creative outlet and a chance to showcase your craftsmanship. As you design, measure, cut, and assemble each piece, you’ll experience a sense of accomplishment and pride in creating a one-of-a-kind desk that is tailored to your workspace.

“Building your own DIY computer desk allows you to unleash your creativity while saving money and achieving a workspace that is truly customized.”
In conclusion, building your own DIY computer desk offers numerous benefits, including cost-effectiveness, customization options, and the satisfaction of creating something unique. Whether you’re a budget-conscious individual, a DIY enthusiast, or someone who values personalized workspaces, building your own desk is a rewarding and practical choice. So, why settle for a generic desk when you can unleash your creativity and design the perfect workspace that suits your needs and style?
Tips for a Successful DIY Desk Project
To ensure a successful DIY desk project, it’s essential to follow some tips and guidelines. Here are some valuable pieces of advice to help you plan, measure accurately, prioritize safety, and troubleshoot common issues. By incorporating these tips into your DIY desk project, you can avoid mistakes and achieve the desired results.
1. Planning
Before starting your DIY desk project, take the time to plan effectively. Consider the following:
- Determine the purpose of the desk and the specific features or functions you need.
- Measure your space carefully to ensure the desk fits perfectly.
- Sketch out your design or find inspiration from existing desk plans.
- Create a detailed materials and tools list based on your design.
2. Accurate Measurements
Precision is crucial when it comes to building a DIY desk. Follow these tips for accurate measurements:
- Use a reliable tape measure and double-check all dimensions.
- Account for any angles, corners, or uneven surfaces in your workspace.
- Measure twice, cut once to avoid wasting materials.
- Consider ergonomics and adjust the desk height and depth to suit your needs.
3. Safety Precautions
When working with tools and materials, safety should be a top priority. Here are some essential safety precautions to follow:
- Wear appropriate safety gear, including goggles, gloves, and ear protection.
- Ensure your workspace is well-lit and ventilated.
- Keep tools and sharp objects out of the reach of children and pets.
- Follow tool manufacturer’s instructions and use tools correctly.
4. Troubleshooting Common Issues
Even with careful planning and execution, problems may arise during your DIY desk project. Here are some common issues and how to troubleshoot them:
“My desk wobbles.”
Ensure that all legs are properly leveled and stabilized. Use adjustable feet or shims to correct any unevenness in your workspace.
“The desk surface has scratches or imperfections.”
Sand the surface thoroughly before applying any finishes or stains. Fill in any gaps or imperfections with wood putty and sand again for a smooth finish.
Remember, every DIY project is unique, and it’s important to adapt these tips to suit your specific situation. With careful planning, accurate measurements, a focus on safety, and the ability to troubleshoot common issues, you’re well on your way to a successful DIY desk project.
Conclusion
Building your own DIY computer desk is a rewarding and cost-effective endeavor that allows you to create a workspace tailored to your needs. Whether you’re looking for a simple and affordable design or a more creative and unique idea, the possibilities are endless.
By following the tips and tutorials provided in this article, you can embark on your DIY desk project with confidence. From choosing the right dimensions and materials to step-by-step instructions on assembly and finishing touches, we’ve provided you with all the information you need to get started.
Not only will building your own DIY computer desk save you money compared to buying a pre-made desk, but it also gives you the opportunity to showcase your personal style and creativity. Whether you prefer a minimalist design or want to repurpose old furniture and add personalized touches, your DIY desk will be a reflection of your individuality.
So start your DIY computer desk journey today and enjoy the satisfaction of crafting a desk that is not only functional but also uniquely yours. Get crafting and create a workspace that inspires productivity and creativity in your home office.
FAQ
What are some DIY computer desk ideas?
Some DIY computer desk ideas include simple and affordable designs, creative and unique ideas, and custom desk designs.
How can I build an easy DIY computer desk under ?
To build an easy DIY computer desk under , you can use minimal materials and follow budget-friendly desk plans.
How do I build a DIY computer desk from scratch?
To build a DIY computer desk from scratch, you can start with a blank canvas and design a desk that fits your space and needs.
How can I do a craft room desk makeover?
You can do a craft room desk makeover by using inexpensive kitchen base cabinets, plywood, laminate flooring, and trim to create a customized desk with ample storage.
How do I build a large surface home office desk?
To build a large surface home office desk, you can use inexpensive MDF wood and add bracing, paint, molding, and cable wire grommets for a functional and stylish desk.
What are some tips for choosing the right desk dimensions?
Some tips for choosing the right desk dimensions include considering ergonomics, customization options, and the available space in your desired location.
What are the essential materials and tools for building a DIY desk?
The essential materials for building a DIY desk include wood, screws, glue, and stain. The necessary tools include a drill, saw, Kreg Jig, and sander.
How can I follow a step-by-step tutorial for building a DIY computer desk?
You can follow a step-by-step tutorial for building a DIY computer desk, which will guide you through cutting the wood, drilling pocket holes, and attaching the top.
How do I add finishing touches to my DIY desk?
You can add finishing touches to your DIY desk by adding edges with trim, sanding the wood, and staining it for a polished look.
What are some creative ideas for DIY computer desks?
Some creative ideas for DIY computer desks include repurposing old furniture, incorporating unconventional materials, and adding personalized touches.
What are the benefits of DIY computer desks?
DIY computer desks offer benefits such as cost-effectiveness, customization options, and the satisfaction of creating something unique.
What tips can help ensure a successful DIY desk project?
Some tips for a successful DIY desk project include proper planning, accurate measurements, safety precautions, and troubleshooting common issues.
How can I conclude my DIY computer desk project?
You can conclude your DIY computer desk project by enjoying the satisfaction of crafting a desk that is both functional and reflects your personal style and creativity.