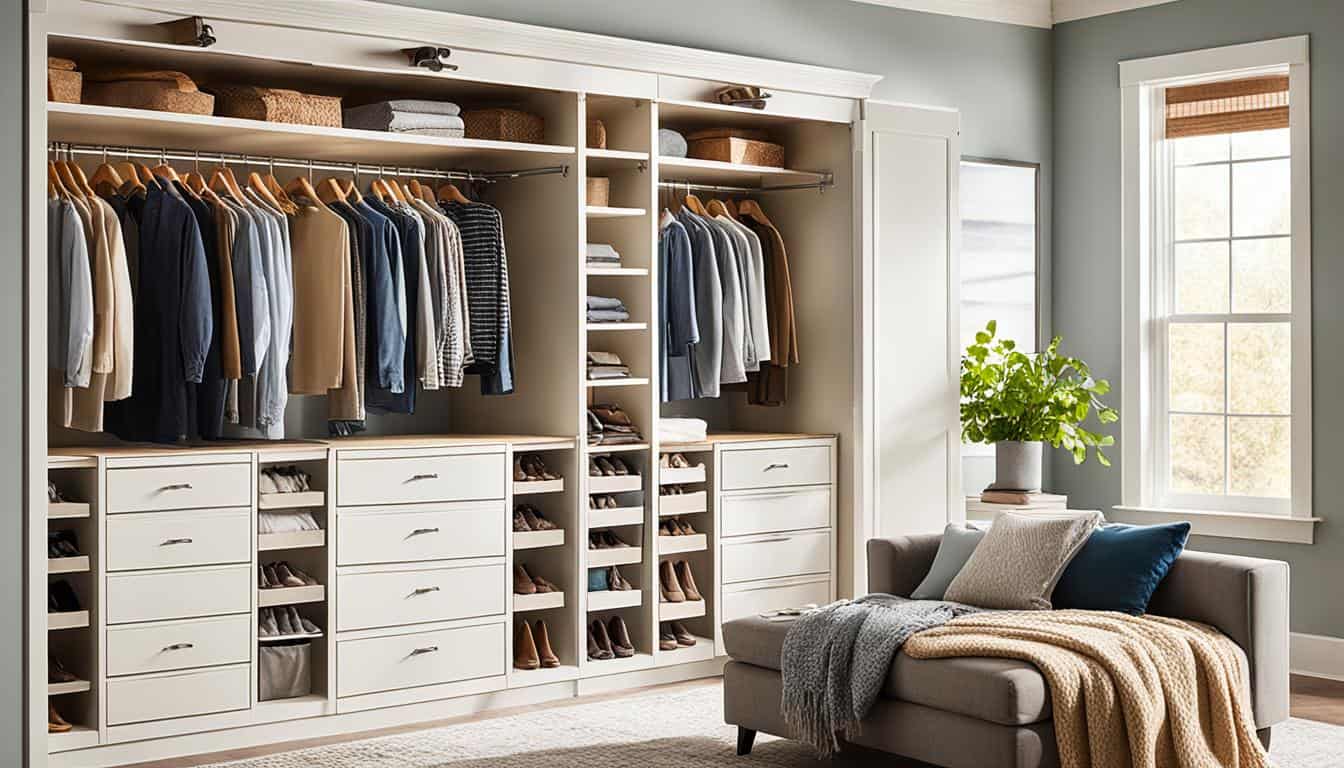
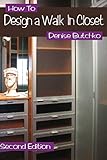
Are you tired of struggling to find space for your clothes and belongings in your current closet? Do you dream of a well-organized, stylish, and personalized storage solution? Look no further! In this DIY custom closet guide, we will show you step-by-step how to transform your storage space into a dream closet that perfectly suits your needs.
From removing the existing wire shelving to building the base, constructing the closet units, and adding shelving and adjustability, we will cover every aspect of creating your own custom closet. Not only will this project enhance the functionality of your space, but it will also elevate the style and organization of your home.
Key Takeaways:
- Building a custom closet allows you to maximize your storage space and create a personalized system for organization.
- Removing existing wire shelving is the first step in creating a clean slate for your custom closet.
- Proper planning and gathering of materials are essential for a successful DIY custom closet project.
- Building a solid base and structurally sound closet units are critical for stability and longevity.
- Designing the layout and adding shelving and adjustability contribute to a functional and efficient custom closet.
Removing the Existing Wire Shelving
Before you can start building your custom closet, you will need to remove any existing wire shelving. This step is important to create a clean slate for your new custom closet design and allow for a fresh start. Here’s a step-by-step guide to help you remove the wire shelving:
- Begin by removing any items or clothing from the wire shelving.
- Use a screwdriver to unscrew any screws securing the shelving to the walls.
- If the shelving is attached with brackets, pry them off using a crowbar or pliers.
- Remove any baseboards or trim pieces that may be covering the bottom of the shelving.
- Patch any holes or damage left behind from the shelving using spackle or putty.
Once the wire shelving has been successfully removed, you will have a blank canvas to work with for your custom closet makeover. This will allow you to design and install the new closet system according to your specific storage needs and style preferences.
Tip: Removing wire shelving is a great opportunity to declutter and reevaluate the items you want to keep in your closet. Take this time to sort through your belongings and donate or discard any items that you no longer need or use.
With the wire shelving out of the way, you’re one step closer to achieving the closet of your dreams. In the next section, we’ll dive into the planning and gathering materials phase of your custom closet project.
Planning and Gathering Materials
Before you begin building your custom closet, it’s crucial to plan your layout and gather the necessary materials. This step will ensure a smooth construction process and help you create a functional and organized storage space. Consider the dimensions of your closet and the specific storage needs you have in mind.
Planning Your Custom Closet:
Start by measuring the dimensions of your closet space, including the height, width, and depth. Take note of any obstacles such as windows, doors, or electrical outlets that may affect the layout of your custom closet. Consider the items you will be storing and their specific storage requirements. This will help you determine the number of shelves, hanging rods, and other storage elements needed for your design.
Take the time to sketch out your ideal custom closet layout, including the placement of different storage components. This will give you a visual representation of how your closet will look and function.
Gathering Materials:
One of the key materials you will need for your custom closet is plywood. To ensure durability and cost-effectiveness, choose 3/4″ paint-grade plywood. This type of plywood provides a smooth surface for painting or staining to match your desired aesthetic.
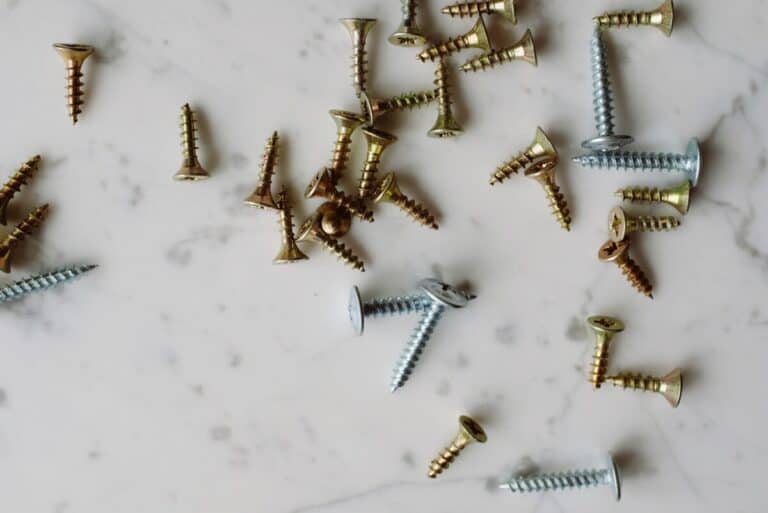
In addition to plywood, you will also need other materials such as 2x4s, wood glue, and construction screws. The 2x4s will be used to create a stable base for your custom closet units. Wood glue and construction screws will be used to secure the plywood pieces together and provide structural integrity to your closet.
Table: Materials for Custom Closet Construction
| Materials | Quantity |
|---|---|
| 3/4″ Paint-Grade Plywood | Based on closet dimensions |
| 2x4s | Depends on custom closet design |
| Wood Glue | 1 bottle |
| Construction Screws | Package of appropriate size |
By carefully planning your custom closet layout and gathering the necessary materials, you’ll be well-prepared to start the construction process. With plywood and other materials in hand, you can confidently move forward and build your dream custom closet.
Building the Base
To elevate your closet units and create a cohesive look, start by building a base using 2x4s. The base will provide stability and support for your custom closet system. Follow these steps to build the base:
- Measure the length and width of your closet to determine the dimensions for the base.
- Cut the 2x4s to the appropriate length for the base using a saw.
- Place the 2x4s parallel to each other along the length of the closet, ensuring they are level.
- Attach the 2x4s to the wall studs using screws or nails to secure the base in place.
- Add cross members at intervals where the edges of the upper units will sit. This will provide additional support and stability.
- Check that the base is level and secure before proceeding with the rest of your custom closet installation.
By building a solid base, you create a sturdy foundation for your closet units. This ensures that your custom closet system will be durable and reliable.
Remember, a strong base sets the stage for a well-built and functional custom closet. Take the time to build a solid foundation, and you’ll be on your way to creating a beautifully organized space.
Materials for Building the Base
| Materials | Quantity |
|---|---|
| 2x4s | Varies based on closet dimensions |
| Screws or nails | Varies based on closet dimensions |
| Saw | 1 |
Ensure that the base is securely attached to the wall studs to prevent any movement or instability. This will help support the weight of the closet units and ensure the longevity of your custom closet.
Building the Closet Units
Now that you have designed the layout and gathered all the necessary materials, it’s time to start building the individual closet units. This step will bring your custom closet vision to life. Follow these steps to ensure a sturdy and functional result.
Step 1: Cutting the Plywood
Begin by cutting the plywood to the appropriate depth using a table saw. The depth should allow for the full insertion of hangers and accommodate the addition of face trim. Measure and mark the plywood according to your design specifications.

Step 2: Vertical and Horizontal Sections
Next, use a miter saw to cut plywood pieces for the vertical and horizontal sections of the closet units. Consider the desired width and spacing for shelves and hanging rods. Take precise measurements and make clean cuts to ensure a seamless fit.
Pro Tip: Take your time when cutting the plywood to ensure accuracy. Accuracy at this stage will contribute to the overall quality and stability of your custom closet.
Step 3: Assembling the Units
Once all the necessary plywood pieces are cut, it’s time to assemble the closet units. Start by joining the vertical and horizontal sections using wood glue and finishing nails or screws. Use clamps to hold the pieces in place while the glue dries. Repeat this process for each unit.
Pro Tip: Pre-drill holes before inserting screws to prevent splitting the plywood and ensure a strong joint.
Step 4: Adding Shelving and Hanging Rods
With the basic structure of the units in place, it’s time to add shelves and hanging rods. Measure and cut plywood pieces for the shelves, allowing for adequate spacing. Secure the shelves using wood glue and screws, ensuring they are level and sturdy.
- Add the desired number of shelves, considering the height of the items you plan to store.
- Install hanging rods at a suitable height, ensuring they are securely attached to the vertical sections.
Remember to leave space for any drawers or other storage accessories you plan to include in your custom closet design.
Step 5: Finishing Touches
Once the units are assembled and shelving is in place, take the time to sand any rough edges and apply a finish of your choice. This will add a polished look to your custom closet units and protect the plywood from wear and tear.
With the closet units complete, you are one step closer to having a fully functional custom closet that meets your storage needs.
| Materials Needed | Tools Needed |
|---|---|
| 3/4″ plywood | Table saw |
| Wood glue | Miter saw |
| Finishing nails or screws | Clamps |
| Shelving | Screwdriver or drill |
| Hanging rods | Sandpaper |
| Finish of your choice |
Adding Stability and Structure
When building your custom closet units, it’s important to prioritize stability and ensure that they remain sturdy and secure. One effective way to achieve this is by adding back panels to each unit. These panels not only enhance stability but also contribute to the overall squareness of the units.
You can cut back panels to the appropriate width, considering the dimensions of your closet units. These panels can be attached to the back of each unit using wood glue and construction screws. By doing so, you create a solid and rigid structure that will withstand the weight of your clothes and accessories.
In addition to providing stability, these back panels serve as an excellent method for securing the units to the studs. This ensures that your custom closet remains securely in place, even with the weight of your belongings.
To further reinforce the stability of your closet units, you can also add smaller panels at the top and bottom of each unit. These panels will contribute to the overall structural integrity and prevent any flexing or instability.
Benefits of Adding Back Panels and Smaller Panels
By adding back panels and smaller panels to your custom closet units, you can:
- Enhance the stability and squareness of each unit
- Secure the units to the studs for added security
- Create a rigid structure that can withstand the weight of your belongings
- Prevent flexing or movement of the units
Overall, by incorporating back panels and smaller panels into your custom closet design, you can ensure that your units remain stable, secure, and structurally sound for years to come.
| Benefits of adding stability to closet units | |
|---|---|
| 1 | Enhances overall stability and squareness of the units |
| 2 | Secures units to the studs, providing added security |
| 3 | Creates a rigid structure, capable of withstanding weight |
| 4 | Prevents flexing or movement of the units |
Assembling the Units in the Closet
When it comes to building your custom closet, one important step is assembling the units. Instead of trying to maneuver pre-assembled units into the closet, it’s recommended to assemble them directly in the space. This approach allows for easier placement and ensures a precise fit.
To assemble the units, you’ll need wood glue and construction screws, along with some corner clamps to hold everything in place during assembly. Start by applying wood glue to the edges of the plywood pieces, then use the construction screws to attach them together securely.
During the assembly process, it’s essential to check the units’ alignment and squareness to ensure a professional-looking finish. Secure the units to the base and wall studs using construction screws for added stability and to prevent any movement.
“By assembling the units in the closet itself, you avoid the hassle of carrying large and bulky pieces through doorways and cramped spaces. It saves time, effort, and reduces the risk of damaging the units or the surrounding area.”
Remember to use the corner clamps to hold the units in place while the glue dries. This will ensure that the units maintain their proper alignment during assembly. Once the glue is fully cured, remove the corner clamps and check the stability of the units.
At this stage, the units should be securely assembled and ready for the next step of the custom closet installation process. By assembling the units in the closet, you’ll achieve a seamless and precise fit, resulting in a professional-looking custom closet.
| Benefits of Assembling Units in the Closet |
|---|
| Saves time and effort |
| Ensures a precise fit |
| Avoids potential damage to the units or surrounding area |
| Allows for easier placement |
| Creates a seamless and professional finish |
Adding Shelving and Adjustability
Now that you have built the main structure of your custom closet, it’s time to focus on adding shelving and making it adjustable to maximize your storage space. By incorporating adjustable shelves, you can customize the spacing to accommodate different types of items and make the most of your storage area.
To create adjustable shelving, designate one unit per side of the closet for shelving only. This will provide a dedicated area for folded clothes, shoes, and other items. It’s essential to add shelf pin holes to these units so that you can easily adjust the height of the shelves as needed.
For accurate hole placement, use a shelf pin jig, which ensures consistent and precise drilling. This tool is designed specifically for creating evenly spaced holes for shelf pins. By using a shelf pin jig, you can achieve a professional-looking finish and ensure that your shelves are sturdy and secure.
With adjustable shelves, you have the flexibility to customize the spacing based on the height of your items. Whether you need taller shelves for bulky items or shorter shelves for smaller items, you can easily adapt the configuration to suit your storage needs.
Tip: When designing your custom closet, consider adding extra shelves to maximize storage efficiency. You can use adjustable shelves to create smaller compartments within each unit, providing designated spaces for different types of items.


Securing the Units and Finalizing the Build
Now that all the units are in place, it’s time to secure them and finalize the construction of your custom closet. Taking the necessary steps to secure the units will ensure their stability and prevent any unwanted movement.
Start by using construction screws to secure the units to each other. This will create a strong and unified structure, making your custom closet a durable and long-lasting solution for your storage needs. By firmly attaching the units together, you eliminate the risk of them shifting or coming apart over time.
Next, it’s important to screw the units into the base and studs. This additional step adds extra stability and reinforces the overall structure of the closet. By anchoring the units to the base and studs, you can be confident that your custom closet will remain securely in place, even with heavy items on the shelves.
Before finalizing the build, double-check the alignment and squareness of the units. This ensures that everything is properly aligned and visually appealing. Make any necessary adjustments to ensure a balanced and aesthetically pleasing custom closet.
Your efforts in securing the closet units and finalizing the build are crucial in creating a functional and sturdy storage space. Once completed, you can proceed to the next steps in the custom closet construction process, such as adding finishing touches and organizing your belongings.

Tips for Securing Closet Units
- Use construction screws to secure the units together and attach them to the base and studs.
- Double-check the alignment and squareness of the units before finalizing the build.
- Consider using corner brackets or L-brackets for additional support and reinforcement.
- If necessary, use shims to level the units and ensure they are flush against the walls.
- Don’t forget to follow the manufacturer’s instructions when using screws and other fasteners.
By following these tips, you’ll create a custom closet that is not only visually appealing but also structurally sound and built to last.
Designing the Closet Layout
Before beginning your DIY custom closet project, it’s essential to have a clear layout in mind. By taking the time to carefully plan and design your closet, you can maximize the use of available space and create a storage solution that meets your specific needs.
Consider the specific requirements of your storage space, such as the types of items you need to store and any specific organizational systems you prefer. Take measurements of your closet space, including height, width, and depth, to ensure accurate planning.
You can use various tools and methods to design your custom closet layout. One option is to utilize software programs like Sketchup, which allows you to create a 3D model of your closet and experiment with different configurations.
Alternatively, you can use simple pencil and paper to sketch out different layout ideas. Start by dividing your closet into zones for different storage functions, such as hanging space, shelving, and drawers.
Optimizing Space and Creating Symmetry
When designing your custom closet layout, aim to optimize the use of available space. Consider incorporating features like double hanging rods or adjustable shelving to maximize storage capacity.
Creating a symmetrical design can enhance the overall aesthetic and functionality of your custom closet. Symmetry can help create balance and visual appeal, especially if you have a larger closet space. It can also provide a cohesive look and make it easier to locate items within your closet.
Designing a custom closet layout allows you to tailor the storage space to your specific needs. By optimizing space and creating a symmetrical design, you can maximize storage capacity and create a visually appealing and functional custom closet.
Taking Measurements and Gathering Materials
Now that you have a clear plan and design for your custom closet, it’s time to take accurate measurements to ensure a perfect fit. Start by measuring the dimensions of your closet space, including the height, width, and depth. These measurements will serve as the foundation for creating your custom closet units.
Consider any additional storage pieces you plan to incorporate into your design, such as dressers or shoe racks. Take their dimensions into account to ensure proper spacing and functionality within your custom closet.
Once you have the measurements in hand, it’s time to gather the necessary tools and materials for your custom closet project. Here are some essential items you’ll need:
- Plywood: Choose a high-quality plywood, preferably a 3/4″ paint-grade plywood for durability and cost-effectiveness.
- 2x4s: These will be used to build the base and provide structure to your custom closet.
- Brad Nailer: This tool will be handy for securely fastening the plywood and other materials.
- Cordless Drill: You’ll need a drill for pre-drilling holes and attaching screws.
- Wood Glue: Use wood glue to strengthen joints and ensure a sturdy construction.
- Construction Screws: These screws will be used to attach the plywood and 2x4s together.
- Saw: A table saw and miter saw will be necessary for cutting the plywood and other materials to the right dimensions.
These are just the basic tools and materials you’ll need for your custom closet project. Depending on your design plan, you may require additional items such as shelf pins, drawer slides, or trim pieces.
Now that you have everything you need, you’re ready to move on to the next steps in building your dream custom closet.
Removing Existing Closet Elements
When embarking on your custom closet project, it’s essential to start with a clean slate. This means removing any existing wire closet racks or other elements that may hinder the installation of your new custom closet. Follow these steps to clear out the existing closet and prepare the space for the transformation:
- Remove wire closet racks: Use tools such as hammers and drills to carefully remove nails and screws securing the wire closet racks. Take your time to avoid damaging the walls or base.
- Clear the space: Once the wire closet racks are removed, clear the closet of any other items or debris. This will make it easier to assess and work on the closet space.
- Consider carpet removal: If your closet has carpeting, consider removing it to create a clean surface. Removing the carpet will ensure a smooth installation of your custom closet system.
- Proper carpet removal techniques: If you decide to remove the carpet, follow proper techniques to avoid damaging the floor or leaving any residue. Use a utility knife to cut the carpet into manageable sections, roll them up, and dispose of them appropriately.
By removing the existing wire closet racks and clearing the space, you’ll have a blank canvas to create your dream custom closet. This step sets the foundation for a seamless installation and allows you to maximize the functionality and aesthetics of your new storage solution.
Tips:
If you’re unsure about carpet removal or need assistance, it’s always a good idea to consult a professional carpet removal service to ensure the job is done correctly and efficiently.
Preparing the Closet Space and Creating a Platform
Before you start building your custom closet, it’s important to prepare the closet space and create a platform for your design. Follow these steps to ensure a clean and elevated foundation for your custom closet:
Cleaning and Leveling the Floor
Begin by thoroughly cleaning the closet space. Remove any debris, dust, or existing flooring to create a clean surface. This will ensure that your custom closet sits securely and free from any obstructions.
Pro Tip: Check the floor for any unevenness or dips. If necessary, use a leveling compound to smooth out the surface and create an even foundation for your custom closet.
Creating a Platform
Creating a platform for your custom closet not only adds visual appeal but also provides a stable base for your design. Determine the dimensions of the platform based on the depth of any dressers or storage pieces you plan to incorporate.
To create the platform, follow these steps:
- Measure the depth of the dressers or storage pieces.
- Cut plywood to the appropriate dimensions to form the top and sides of the platform.
- Attach the plywood pieces together using wood glue and construction screws.
- Place the platform in the closet space and ensure it is level.
Creating a platform not only enhances the aesthetics of your custom closet but also provides additional storage space underneath.
Materials for Creating a Platform
| Material | Quantity |
|---|---|
| Plywood | 2 sheets |
| Wood glue | 1 bottle |
| Construction screws | 1 box |
Installing Vertical Plywood Supports
Now that you have planned and gathered all the necessary materials, it’s time to begin the installation process of your custom closet. This section will guide you through the steps of installing vertical plywood supports to the walls and base, ensuring the structural integrity and stability of your custom closet.
Here’s how to proceed:
- Start by measuring and cutting the plywood into vertical support pieces that will fit snugly against the walls and align with the base of your custom closet.
- With the support pieces ready, use a level to ensure they are perfectly vertical, and mark their positions on the walls and base.
- Apply a generous amount of liquid nails adhesive to the back of each support piece, following the marked positions on the walls and base.
- Press the support pieces against the walls and base, making sure they are securely attached.
- To provide additional stability, drill pocket holes into the support pieces and screw them into both the base and top shelf of your custom closet.
- Repeat these steps for each vertical support piece, evenly spacing them along the walls to ensure proper weight distribution.
By installing vertical plywood supports, you guarantee that your custom closet is well-supported and able to handle the weight of your clothing and other items. The combination of liquid nails adhesive and screws will provide a strong and secure hold, ensuring that your custom closet remains stable over time.
Now that the vertical plywood supports are in place, your custom closet is ready for the next phase of the installation process. The following sections will guide you through the remaining steps, including adding shelves, finalizing the build, and designing the layout of your dream closet.
Conclusion
Congratulations on completing your DIY custom closet project! By following the step-by-step instructions in this guide, you have successfully built a personalized and functional storage space that meets your specific needs.
Now that the basic construction, shelving, and support systems are in place, it’s time to add the finishing touches to your custom closet. Trim the units and ensure they blend seamlessly into your existing decor. If desired, install drawers or other accessories to further enhance the functionality of your closet.
With your custom closet complete, you can now enjoy the satisfaction of a well-organized and stylish storage solution. Take a moment to organize your belongings and see how the custom shelving and adjustable features can accommodate your clothing, accessories, and other items.
Remember, this DIY custom closet guide has provided you with the knowledge and inspiration to create a truly personalized space. Whether you choose to replicate the design showcased in this guide or use it as a foundation for your own unique vision, your custom closet is sure to bring both practicality and style to your home.
FAQ
What is a DIY custom closet?
A DIY custom closet is a project where you design and build your own personalized storage system for your closet space.
Why should I build a custom closet?
Building a custom closet allows you to transform your storage space, create a personalized system for organization, and add style to your home.
What materials do I need to build a custom closet?
To build a custom closet, you will need plywood, 2x4s, wood glue, construction screws, and other tools specified in your design plan.
How do I remove existing wire shelving?
To remove existing wire shelving, you may need to unscrew or pry off the shelving, remove baseboards, and patch any holes left behind.
How do I plan my custom closet layout?
To plan your custom closet layout, consider the dimensions of your closet space, your specific storage needs, and use programs like Sketchup or simple pencil and paper to visualize different layouts.
How do I build the base for my custom closet?
To build the base for your custom closet, use 2x4s to create a sturdy base that runs the full length of the closet and has cross members for upper units to sit on.
How do I build the closet units?
To build the closet units, use a table saw to cut plywood to the appropriate depth and a miter saw to cut plywood pieces for vertical and horizontal sections.
How do I add stability to the closet units?
You can add stability to the closet units by incorporating back panels or smaller panels at the top and bottom of each unit. These panels will also help secure the units to the studs.
Should I assemble the units outside the closet or inside?
It is recommended to assemble the units directly in the closet for easier placement and proper fit.
How do I secure the units and finalize the build?
Secure the units to each other using construction screws and attach them to the base and studs for stability. Double-check alignment and squareness before proceeding.
How do I design the layout for my custom closet?
Consider your storage needs and available space, and use programs like Sketchup or simple pencil and paper to create a clear layout plan for your custom closet.
What tools and materials do I need for a custom closet installation?
For a custom closet installation, you will need plywood, 2x4s, a brad nailer, cordless drill, and other tools specified in your design plan.
How do I remove existing closet elements?
To remove existing closet elements such as wire closet racks, use tools like hammers and drills to remove nails and screws. If there is carpeting, consider removing it as well.
How do I prepare the closet space and create a platform?
Prepare the closet space by cleaning and leveling the floor if necessary. You can create a platform for the custom closet to sit on by determining the dimensions based on the depth of any storage pieces and the design of your custom closet.
How do I install vertical plywood supports?
Install vertical plywood supports by attaching them to the walls and base using liquid nails and screws. Make sure the supports fit snugly against any existing storage pieces and drill pocket holes for added stability.
What can I do to finish off my custom closet build?
After securing the units and supports, you can trim the units, install drawers if desired, and add finishing touches to complete your custom closet build.