Are you tired of your outdated kitchen cabinets? Do you want to enhance the functionality and aesthetics of your kitchen? Look no further! In this DIY guide, we will provide you with step-by-step instructions on how to build kitchen cabinets using free plans. Whether you’re a seasoned woodworker or a beginner, this guide is tailored for you. Get ready to embark on a satisfying woodworking project and create your own custom kitchen cabinets.
Key Takeaways:
- Learn how to build kitchen cabinets with detailed step-by-step instructions.
- Customize your cabinets to suit your specific needs and design preferences.
- Save money by building your own cabinets instead of purchasing pre-made ones.
- Discover the essential tools and materials required for cabinet construction.
- Enhance the functionality and aesthetics of your kitchen with your handcrafted cabinets.
Introduction to Building Kitchen Cabinets
Building your own kitchen cabinets can be a rewarding and cost-effective alternative to purchasing pre-built cabinets. Not only does it allow you to customize the design and layout to fit your specific needs, but it can also save you money compared to buying pre-made cabinets.
When you take on the task of building your own cabinets, you have the freedom to create a kitchen that is perfectly tailored to your style and requirements. You can choose the materials, finishes, and hardware that match your vision and complement the overall aesthetics of your home.
DIY cabinetry empowers you to make the most efficient use of your space by customizing the cabinet dimensions, depths, and organization. Whether you need extra storage for your cooking utensils, special compartments for spices, or adjustable shelves to accommodate different-sized items, building your own cabinets allows you to create solutions that perfectly suit your needs.
Another advantage of DIY cabinetry is the cost savings it offers. By cutting out the middleman and constructing the cabinets yourself, you can significantly reduce expenses. You have full control over the materials you use, allowing you to prioritize quality within your budget. Additionally, you can save on labor costs and take pride in the fact that you built something valuable with your own hands.
So, if you’re ready to embark on a rewarding woodworking project and create beautiful, functional kitchen cabinets that reflect your personal style, follow our step-by-step guide to cost-effective cabinet construction.
| Benefits of DIY Cabinetry | Cost-Effective Cabinet Construction |
|---|---|
| Customization | Savings on materials and labor |
| Optimized space utilization | Control over quality and budget |
| Pride in craftsmanship | Ability to prioritize your needs |
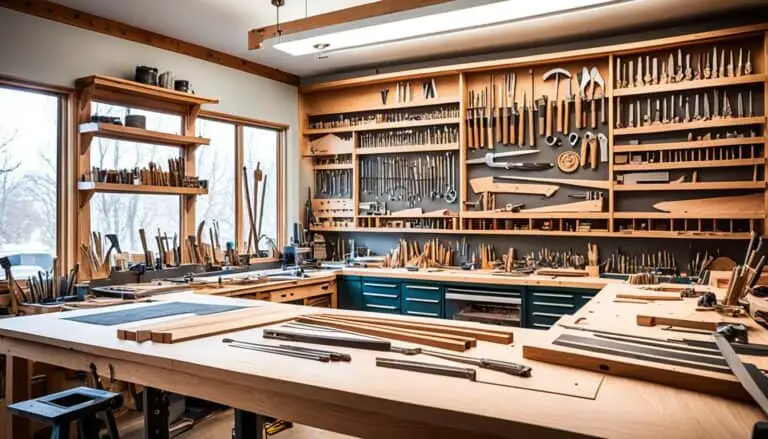
Gathering Materials and Tools
Before you begin building your kitchen cabinets, it’s important to gather all the necessary materials and tools. Having everything prepared will ensure a smooth and efficient construction process. Below is a comprehensive list of the materials and tools you’ll need:
Materials
- Plywood sheets
- Screws
- Edge banding
- Wood glue
- Drawer slides
- Cabinet knobs or handles
- Hinges
Tools
- Circular saw
- Drill
- Measuring tape
- Clamps
- Pocket hole jig
- Screwdriver
- Sanding block or electric sander
These are the essential tools and materials you’ll need to get started on your kitchen cabinet building project. Ensure you have all the necessary supplies before you begin, as it’s much easier to work with everything at hand.
Now that you have your materials and tools ready, let’s move on to preparing the plywood panels.
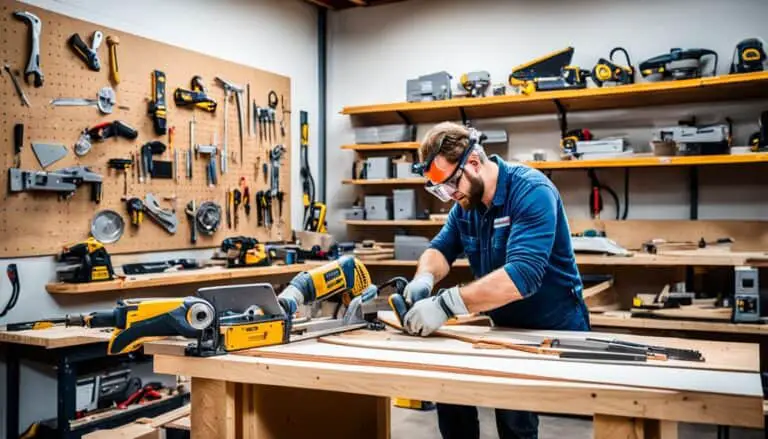
Preparing the Plywood Panels
To start building your kitchen cabinets, it’s crucial to prepare the plywood panels properly. This involves cutting the plywood to the appropriate size and joining the pieces together using pocket holes and screws. Additionally, you’ll learn how to apply edge banding to conceal the plywood edges and create a finished look.
Cutting plywood to size is a fundamental step in cabinet construction. It ensures that your cabinets will have precise dimensions and fit seamlessly in your kitchen. Using a circular saw or a table saw, carefully measure and mark the plywood according to your cabinet plans. Take your time to ensure accuracy, as any discrepancies can affect the overall quality and functionality of your cabinets.
Once you have cut the plywood panels to size, the next step is joining them together. This is typically done using pocket holes and screws for a sturdy and secure connection. Pocket holes are small, angled holes drilled into the plywood edges, allowing the screws to be hidden and providing a clean finish. Use a pocket hole jig to create precise and evenly spaced holes for optimal results.
After joining the plywood panels, it’s essential to apply edge banding. Edge banding is a thin strip of veneer or PVC that is adhered to the exposed edges of the plywood. This not only protects the plywood from moisture but also gives the cabinets a polished and professional appearance. Apply the edge banding using a hot iron or a specialized edge banding tool, following the manufacturer’s instructions carefully.
Building the Cabinet Carcass
Now that the plywood panels are prepared, it’s time to start building the cabinet carcass. This crucial step lays the foundation for your kitchen cabinets and sets the stage for the rest of the construction process. In this section, we will guide you through the assembly techniques, including attaching the sides, bottom panel, and support strips, to create a sturdy and functional cabinet structure.
When building the cabinet carcass, it’s important to ensure precise measurements and accurate assembly. This will guarantee that your cabinets are properly aligned and provide a solid base for the doors, shelves, and other components. By following these step-by-step instructions, you’ll be able to build a professional-quality cabinet carcass.
Assembly Techniques
Assembling the cabinet carcass requires careful attention to detail and the use of appropriate assembly techniques. Here are the key steps involved in constructing a strong and durable carcass:
- Attach the sides: Begin by aligning the side panels with the bottom panel and securing them using screws or nails. Ensure proper alignment and flush edges to achieve a seamless appearance.
- Install the bottom panel: Once the sides are in place, attach the bottom panel securely to create the base of the cabinet structure. Use screws or nails to secure the panel to the sides.
- Add support strips: To provide additional strength and stability, install support strips along the top edges of the cabinet carcass. These strips will help reinforce the cabinet and prevent sagging over time.
Installing Back Panels
Back panels play a crucial role in enhancing the structural integrity of your cabinet carcass. They provide support, prevent dust and debris from entering the cabinet, and help maintain its shape. Here’s how you can install back panels:
- Measure and cut the back panels: Using the dimensions of your cabinet carcass, measure and cut the back panel(s) from plywood or other suitable material.
- Attach the back panels: Position the back panels against the back of the cabinet carcass and secure them using screws, nails, or a staple gun. Ensure proper alignment and ensure that the panels are flush with the edges of the carcass.
Once the cabinet carcass is built and the back panels are installed, you’ll have a solid foundation for the rest of the cabinet construction process. The next step will involve constructing the cabinet doors, which will add the finishing touch to your DIY kitchen cabinets.

Constructing the Cabinet Doors
In order to complete your kitchen cabinets, constructing the doors is a crucial step. Follow these steps to ensure your doors are made to the correct size, have a polished look with edge banding, and incorporate concealed hinges for a seamless finish.
1. Sizing the Doors
The first step in constructing your cabinet doors is determining the correct size. Measure the openings of your cabinets carefully, accounting for any overlay you desire, and add allowances for the hinges. Use these measurements to cut the door panels from your chosen material, such as plywood or MDF.
2. Applying Edge Banding
To give your cabinet doors a finished appearance, apply edge banding to conceal the exposed edges of the door panels. Measure the length of each edge, and cut the edge banding tape to size. Use a hot iron to adhere the tape to the edges, ensuring a secure bond. Trim any excess banding using a utility knife, and sand the edges smooth.
3. Installing Concealed Hinges
For a clean and professional look, install concealed hinges on your cabinet doors. These hinges are hidden from view when the doors are closed, giving your cabinets a sleek and seamless appearance. Follow the manufacturer’s instructions to accurately install the hinges, ensuring proper alignment and functionality.
Pro Tip: When installing concealed hinges, make sure to carefully measure and mark the door and cabinet frame to ensure accurate positioning. Use a hinge drilling template or a Forstner bit to create the perfect mortise for the hinge. Take your time to achieve precise results and test the door’s swing before final installation.
With these steps, you can confidently construct and install cabinet doors that fit perfectly, have a polished look, and operate smoothly. Following these guidelines will help you achieve professional and durable results for your kitchen cabinets.
| Steps | Summary |
|---|---|
| Sizing the Doors | Measure the door openings, cut the door panels to size, and account for any overlays and hinge allowances. |
| Applying Edge Banding | Cover the exposed edges of the door panels with edge banding tape for a polished and finished look. |
| Installing Concealed Hinges | Attach concealed hinges to the doors and cabinet frames for a clean and seamless appearance, following manufacturer instructions. |
Adding Shelves and Adjustable Shelving
To maximize the storage capacity of your kitchen cabinets, incorporating shelves is essential. In this section, we will guide you on how to add shelves to the cabinet carcasses using a shelf pin jig, allowing for adjustable shelving. By being able to adjust the height of your shelves, you can accommodate various items of different sizes and optimize the organization of your kitchen. Let’s dive into the process!
Firstly, you will need a shelf pin jig to accurately position and install the shelf pins. A shelf pin jig is a handy tool that ensures consistency and precision in creating evenly spaced holes where the pins will be inserted.
Start by measuring and marking the desired locations for your shelves within the cabinet carcasses. Take into consideration the height requirements for the items you plan to store. Once you have marked the positions, it’s time to use the shelf pin jig.
Here’s a step-by-step guide on adding shelves and using a shelf pin jig:
- Position the shelf pin jig on the inside of the cabinet carcass, aligning it with the marked locations.
- Image:
- Secure the jig in place using clamps or other appropriate means.
- Using a drill with an appropriate drill bit, carefully drill holes through the jig and into the cabinet carcass. Ensure that you maintain a straight and perpendicular angle while drilling.
- Repeat the drilling process for each marked location.
- Once all the holes are drilled, remove the shelf pin jig.
- Insert the shelf pins into the drilled holes. Test the fit and adjust the height if necessary.
- After confirming the desired positions of the shelf pins, you can start placing your shelves on top of the pins. Make sure the shelves fit snugly and are level.
By incorporating adjustable shelving, you can easily adapt the internal space of your kitchen cabinets as your storage needs change over time. This flexibility allows you to efficiently utilize the available space while maintaining an organized and functional kitchen.
Remember, when adding shelves, it’s important to consider the weight and load capacity of the materials you plan to store. Ensure that the shelves and pins can support the items without sagging or causing any damage to the cabinet carcass.
Now that you know how to add shelves and create adjustable shelving, let’s move on to the next section, where we will discuss the process of installing the cabinets in your kitchen.
Installing the Cabinets
Now that you have the cabinet carcasses and doors constructed, it’s time to bring your kitchen to life by installing the cabinets. This section will provide you with step-by-step instructions on how to properly level the cabinets and securely attach them to the wall. Follow these guidelines to ensure a seamless installation that will stand the test of time.
Leveling the Cabinets
Before attaching the cabinets to the wall, it’s crucial to ensure that they are level. This will not only enhance the functionality of your cabinets but also improve the overall aesthetic appeal. Here’s how you can achieve a level installation:
- Start by placing a level across the top of the cabinet carcass. Adjust the position of the cabinet using shims until the bubble in the level is centered.
- Check the levelness from front to back and side to side. Make any necessary adjustments using shims until the cabinet is perfectly level.
- Repeat this process for each cabinet, ensuring that they are all level and aligned with each other.
Attaching the Cabinets to the Wall
Once the cabinets are leveled, it’s time to securely attach them to the wall. Follow these steps for a secure installation:
- Locate the wall studs using a stud finder. Mark the stud locations on the wall.
- Place the first cabinet against the wall, making sure it is aligned with the level line. Use a drill to secure the cabinet to the studs with screws through the back panel.
- Continue installing the remaining cabinets, ensuring that they are level and properly aligned.
- For added stability, use cabinet clamps to hold adjacent cabinets together while attaching them to the wall.
- Once all the cabinets are securely attached to the wall, double-check their levelness and alignment.
And there you have it! By following these steps, you can confidently install your kitchen cabinets and transform your space into a functional and stylish culinary haven.


Adding Toe Kicks and Trim
To complete the look of your kitchen cabinets, it’s important to pay attention to the finishing touches. Adding toe kicks and trim not only enhances the aesthetic appeal of your cabinets but also provides a polished and professional look. In this section, we will guide you through the process of installing toe kicks and cabinet trim to give your newly constructed cabinets that perfect final touch.
Installing Toe Kicks
Toe kicks are the panels installed at the bottom of your cabinets, covering the recessed area between the cabinet base and the floor. They not only add a finished appearance but also protect the base of your cabinets from dirt and moisture. Follow these steps to install toe kicks:
- Measure and cut the toe kick panels to the appropriate length.
- Attach the panels using screws, ensuring they are securely fastened to the cabinet base.
- Adjust the height of the toe kicks to create a seamless transition with the floor using shims if necessary.
- Make sure the toe kicks are level and aligned with the cabinets.
- Secure the toe kicks in place, ensuring they are flush with the cabinet fronts.
Installing Cabinet Trim
Cabinet trim adds a decorative element to your kitchen cabinets, elevating their visual appeal. It can be installed along the edges of the cabinets, as well as on the top and bottom surfaces. Follow these steps to install cabinet trim:
- Measure and cut the trim pieces to the appropriate length.
- Attach the trim using finishing nails or adhesive, depending on the type of trim and your preferred method of installation.
- Ensure the trim is aligned and flush with the edges and surfaces of the cabinets.
- Fill any nail holes or gaps with wood filler and sand the trim for a smooth finish.
- Apply paint or stain to match the color of your cabinets, or leave the trim unfinished for a natural wood look.
With toe kicks and trim installed, your kitchen cabinets will have that professional and refined appearance you desire. Take the time to execute these finishing touches meticulously, and you’ll be rewarded with cabinets that not only function well but also enhance the overall beauty of your kitchen.

Customizing Cabinet Design
When it comes to building your own kitchen cabinets, one of the biggest advantages is the ability to customize the design to fit your unique needs and preferences. Whether you’re looking to incorporate additional drawers or specialized storage solutions, this section will guide you through the process of customizing your cabinet design.
“Customization is the key to creating cabinets that perfectly complement your kitchen and enhance its functionality.”
By adapting the provided plans, you can create a cabinet layout that maximizes storage space and suits your individual requirements. Here are some ideas for customizing your cabinet design:
1. Incorporating Drawers
Drawers are an excellent addition to any kitchen cabinet as they provide easy access to smaller items and help keep your kitchen organized. Consider adding drawers to your cabinet design for storing utensils, cutlery, or even spices.
2. Specialized Storage Solutions
To optimize the functionality of your cabinets, consider incorporating specialized storage solutions. This could include features such as pull-out shelves, lazy Susans, or built-in wine racks. These additions can make it easier to access your kitchen items and maximize the use of available space.
Remember, the key to successful customization is careful planning and considering your specific needs. By taking the time to assess your storage requirements and incorporating tailored solutions, you can create cabinets that not only look great but also offer optimal functionality.
With the ability to customize your cabinet design, you can create a kitchen that reflects your personal style and meets your storage needs. Take advantage of the flexibility offered by building your own cabinets and make them truly your own.
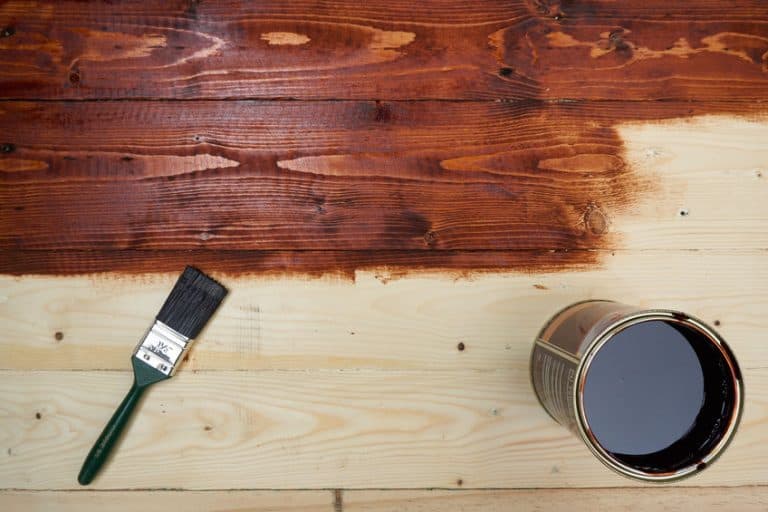
Finishing and Painting Options
After the construction phase, it’s time to consider the finishing touches for your kitchen cabinets. The right finish can enhance the overall look and durability of your cabinets. This section will cover different finishing and painting options, including staining the wood cabinets or painting the cabinet doors. You’ll learn tips and techniques for achieving a professional and long-lasting finish.
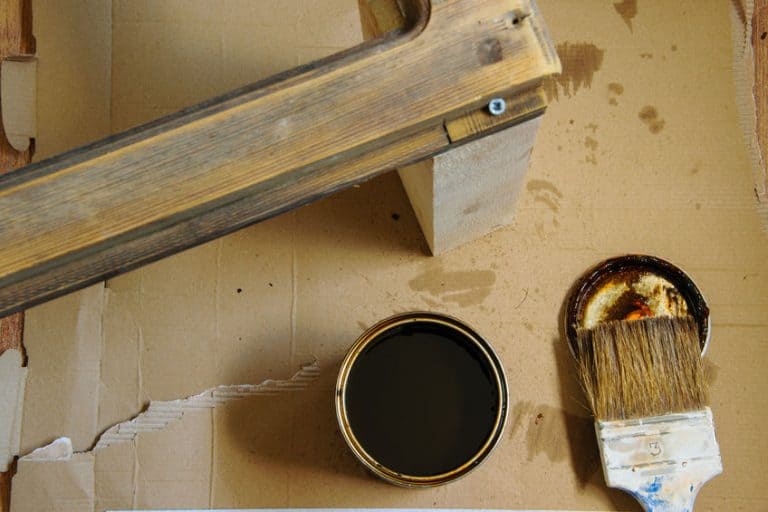
Staining Wood Cabinets
If you prefer to highlight the natural beauty of the wood, staining is an excellent option. Stains come in a variety of shades, allowing you to achieve the desired color and tone for your cabinets. Follow these steps to stain your wood cabinets:
- Begin by thoroughly sanding the cabinets to create a smooth surface for the stain to adhere to. Use fine-grit sandpaper and sand in the direction of the wood grain.
- Remove any dust or debris from the surface using a tack cloth.
- Apply the wood stain using a brush or a clean, lint-free cloth. Work in small sections, following the grain of the wood. Allow the stain to penetrate the wood for the recommended time specified by the manufacturer.
- Wipe off the excess stain using a clean cloth, again following the grain of the wood. Ensure that the cabinets have an even and consistent color.
- Allow the stain to dry completely before applying a clear protective finish, such as polyurethane, to seal and protect the wood.
Staining wood cabinets can enhance the natural characteristics of the wood and create a warm and inviting look in your kitchen.
Painting Cabinet Doors
If you prefer a more customized look, painting the cabinet doors can provide endless options for color and style. Follow these steps to paint your cabinet doors:
- Start by removing the cabinet doors from the cabinets. Mark the doors and corresponding cabinets to ensure proper alignment during reinstallation.
- Clean the doors thoroughly to remove any grease or dirt. Use a mild detergent and warm water, and dry them completely.
- Apply a coat of primer to the doors to create a smooth base for the paint. Allow the primer to dry according to the manufacturer’s instructions.
- Choose your desired paint color and apply it to the doors using a brush or a roller. Work in thin, even coats, allowing each coat to dry before applying the next. This will help you achieve a smooth and professional finish.
- Once the paint has dried completely, you can optionally apply a clear protective topcoat to protect the painted surface from wear and tear.
Painting cabinet doors allows you to express your personal style and create a unique look for your kitchen cabinets.
Maintenance and Care Tips
To ensure the longevity and functionality of your kitchen cabinets, it’s important to properly maintain and care for them. By following these maintenance tips and implementing preventative measures, you can keep your cabinets in top condition for years to come.
Cleaning and Care Instructions
Regular cleaning is essential to maintain the cleanliness and appearance of your kitchen cabinets. Use a soft, damp cloth or sponge with a mild, non-abrasive cleaner to wipe down the cabinet exteriors and interiors. Avoid using harsh chemicals or abrasive scrubbers, as they can damage the finishes or surfaces of the cabinets.
For stubborn grease or grime, you can mix a solution of warm water and gentle dish soap. Gently scrub the affected areas using a soft-bristle brush or sponge. Be sure to rinse off any soap residue with clean water and dry the cabinets thoroughly afterwards.
When cleaning cabinet hardware, such as handles or knobs, remove them from the cabinets and clean them separately. This will ensure a thorough cleaning and prevent any damage to the cabinets.
Pro Tip: Avoid using excessive water or allowing water to sit on the cabinet surfaces for an extended period. Excess water can penetrate the wood or laminate, causing swelling or warping.
Preventative Measures
Prevention is key to maintaining the quality and functionality of your kitchen cabinets. By taking a few simple preventative measures, you can avoid common issues and extend the lifespan of your cabinets.
- 1. Avoid placing hot objects directly on the cabinet surfaces, as they can cause heat damage or discoloration. Use trivets or heat-resistant pads to protect the cabinets from hot pots, pans, or appliances.
- 2. Wipe up spills and splatters immediately to prevent liquids from seeping into the wood or laminate. This will help prevent staining or warping of the cabinet surfaces.
- 3. Use cabinet liners or mats in high-traffic areas, such as under the sink or next to the stove, to protect the cabinets from water damage or scratches.
- 4. Avoid exposing the cabinets to extreme temperature or humidity fluctuations, as this can cause the wood or laminate to expand or contract. Maintain a consistent temperature and humidity level in your kitchen by using proper ventilation and controlling moisture levels.
Common Cabinet Maintenance Issues and Solutions
| Issue | Solution |
|---|---|
| 1. Warping or Swelling | Ensure proper ventilation and control moisture levels to prevent excessive humidity. If warping occurs, consult a professional for repair or replacement. |
| 2. Scratches or Nicks | Use touch-up kits or fillers to repair minor scratches or nicks. For deeper damage, consult a professional for refinishing or replacement. |
| 3. Loose or Misaligned Hardware | Tighten loose screws or hardware using a screwdriver or appropriate tools. Adjust misaligned hardware by loosening the screws and repositioning them. |
| 4. Fading or Discoloration | Avoid prolonged exposure to direct sunlight, which can cause fading or discoloration. Use curtains or blinds to protect the cabinets from excessive sunlight. |
By following these maintenance and care tips, you can keep your kitchen cabinets looking beautiful and functioning smoothly. Regular cleaning, preventative measures, and timely repairs will help preserve the quality and lifespan of your cabinets, ensuring your kitchen remains a visually appealing and functional space.
Advantages of DIY Kitchen Cabinets
Building your own kitchen cabinets goes beyond just cost savings. It offers a range of benefits that make it a worthwhile endeavor. From customization options to the satisfaction of creating something with your own hands, DIY cabinets provide a unique and rewarding experience. Let’s explore the advantages in detail:
1. Customization Options
With DIY kitchen cabinets, you have the freedom to customize every aspect of the design. From the size and layout to the materials and finishes, you can create cabinets that perfectly match your style and functional needs. Whether you prefer sleek modern designs or classic traditional ones, DIY cabinets allow you to bring your vision to life.
2. Cost Savings
Building your own cabinets can save you a significant amount of money compared to purchasing pre-made ones. While the initial investment in tools and materials may be required, the long-term cost savings are substantial. Plus, by shopping for materials yourself and selecting budget-friendly options, you have more control over the overall cost of the project.
3. Sense of Achievement
There’s a unique sense of pride and satisfaction that comes from creating something with your own hands. Building your own kitchen cabinets allows you to showcase your craftsmanship and woodworking skills. Every time you step into your kitchen, you’ll be reminded of your hard work and the beautiful cabinets you built.
4. Quality and Durability
When you build your own cabinets, you have complete control over the quality of the materials used and the construction techniques employed. This means you can choose high-quality materials that will stand the test of time and ensure your cabinets are durable and reliable.
5. Personalized Storage Solutions
DIY cabinets provide the opportunity to create personalized storage solutions that cater to your specific needs. You can incorporate adjustable shelves, innovative drawer configurations, and specialized organizational features. This level of customization allows you to maximize storage space and improve the functionality of your kitchen.
“DIY cabinets offer endless possibilities for customization, cost savings, and a sense of accomplishment.”
By building your own kitchen cabinets, you can enjoy the advantages of customization, cost savings, and a sense of achievement. Whether you’re a seasoned woodworker or a beginner, DIY cabinets empower you to create a space that reflects your unique style and meets your practical needs.
Conclusion
Building your own kitchen cabinets can be a rewarding and cost-effective project. With the right guidance and tools, anyone can successfully construct custom cabinets to enhance their kitchen’s functionality and aesthetics.
Whether you’re a seasoned woodworker or a beginner, this DIY guide has provided you with the knowledge and step-by-step instructions to embark on your cabinet-building journey. From gathering materials and tools to adding the finishing touches, you now have the skills to create beautiful and functional cabinets for your kitchen.
Enjoy the process of building your own cabinets and take pride in the finished results of your handcrafted kitchen cabinets. Not only will you have cabinets that perfectly suit your needs and style, but you’ll also have the satisfaction of knowing you accomplished this project with your own two hands.
FAQ
What are the advantages of building your own kitchen cabinets?
Building your own kitchen cabinets allows you to customize the design and layout, saving you money compared to buying pre-made cabinets.
What materials and tools do I need to build kitchen cabinets?
You will need materials such as plywood, screws, and edge banding, as well as woodworking tools like a circular saw, drill, and pocket hole jig.
How do I prepare the plywood panels for the cabinets?
You will need to cut the plywood to the appropriate size, join the pieces together using pocket holes and screws, and apply edge banding to create a finished look.
How do I build the cabinet carcass?
The cabinet carcass is constructed by attaching the sides, bottom panel, and support strips, as well as installing back panels for stability.
What is the process for constructing the cabinet doors?
The cabinet doors can be made by measuring and cutting them to size, applying edge banding, and installing concealed hinges.
How do I add shelves to the cabinets?
Shelves can be added using a shelf pin jig for adjustable shelving, allowing you to position and install the shelf pins for various heights and sizes.
How do I install the cabinets in my kitchen?
The cabinets should be leveled and securely attached to the wall, using shims for proper alignment and various methods for securing them in place.
How do I add toe kicks and trim to the cabinets?
Toe kicks are installed at the bottom of the cabinets for a finished appearance, and cabinet trim can be added to enhance the overall aesthetic appeal.
Can I customize the design of my kitchen cabinets?
Yes, you can personalize your cabinet design by incorporating drawers or specialized storage solutions, adapting the plans to suit your specific needs and preferences.
What are the finishing options for kitchen cabinets?
You can choose to stain the wood cabinets or paint the cabinet doors, employing tips and techniques for achieving a professional and durable finish.
How do I maintain and care for my kitchen cabinets?
Proper maintenance includes regular cleaning and care, as well as implementing preventative measures to avoid issues like warping or water damage.
What are the benefits of building your own kitchen cabinets?
Building your own kitchen cabinets offers the ability to customize the design, the satisfaction of creating something with your own hands, and potential cost savings compared to pre-made cabinets.