Are you looking to add a touch of elegance and charm to your home? Have you considered board and batten? This classic architectural feature has been making a comeback in modern interior design, and it’s easier to achieve than you might think. Whether you’re a seasoned DIY enthusiast or a beginner looking to embark on your first home improvement project, this step-by-step guide on how to board and batten will have you transforming your walls in no time.
Key Takeaways:
- Learn how to add a touch of elegance and sophistication to your home with board and batten.
- Discover the step-by-step process for DIY board and batten installation.
- Understand the advantages and benefits of board and batten, as well as its historical significance.
- Find out which materials and tools you’ll need for a successful board and batten project.
- Get expert tips and tricks for achieving a professional and flawless finish.
Understanding the Basics of Board and Batten
What is Board and Batten?
Board and batten is a traditional wall paneling technique that features alternating wide boards (boards) and narrow strips (battens) applied vertically to create a visually appealing and durable wall treatment. This architectural style dates back centuries and has evolved over time to suit various design aesthetics.
Historical Significance and Modern Applications
The history of board and batten can be traced back to medieval Europe, where it was used as a construction technique to provide structural support to the exterior walls of buildings. Over time, it has become a popular design choice, especially in rustic and farmhouse-style homes.
In modern applications, board and batten is used both indoors and outdoors to add charm and character to a space. It can be applied to entire walls or used as an accent feature, providing a visually interesting backdrop for furniture and decor. Board and batten is commonly seen in entryways, living rooms, bedrooms, and even bathrooms.
The Advantages of DIY Board and Batten
One of the biggest advantages of DIY board and batten is the cost-effectiveness it offers. By taking on the project yourself, you can save on labor costs and customize the design to suit your preferences. Additionally, DIY board and batten allows for creativity and flexibility in terms of board and batten spacing, board widths, and paint colors.
Another benefit of DIY board and batten is the pride of accomplishment that comes with completing a home improvement project on your own. It allows you to showcase your skills and adds a personal touch to your home. Furthermore, the durability and timeless appeal of board and batten make it a worthwhile investment for any homeowner.
| Advantages of DIY Board and Batten |
|---|
| Cost-effectiveness |
| Customization options |
| Creative flexibility |
| Pride of accomplishment |
| Durability |
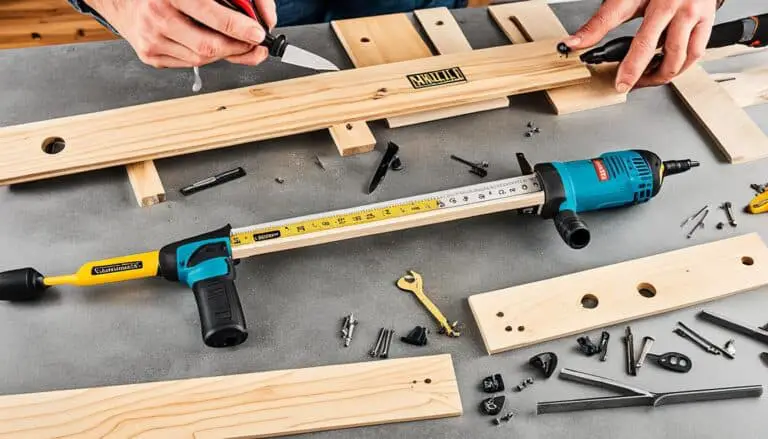
Materials and Tools You’ll Need for Board and Batten
To successfully complete your board and batten project, you will need a range of materials and tools. Here is a comprehensive list of everything you’ll need:
Materials:
- Primed MDF boards
- Caulk
- Spackle
- Liquid nails
- Paint
Tools:
- Miter saw
- Nail gun
- Stud finder
- Level
- Tape measure
With these materials and tools on hand, you’ll be well-equipped to tackle your board and batten project with confidence. Having everything ready will ensure a smoother installation process and a more professional end result.
How to Prepare Your Space for Installation
Clearing the Room and Protecting Furniture
Before you begin the board and batten installation, it’s important to clear the room of any furniture or obstacles that may hinder your progress. Remove any items that could be damaged during the process, such as fragile decorations or valuable possessions. By creating a clear and open space, you’ll have ample room to work and ensure a seamless installation.
To protect your furniture from dust, debris, and potential damage, consider covering them with drop cloths or plastic sheets. This simple precaution will safeguard your belongings and prevent any unwanted mess. It’s better to be proactive and take the necessary steps to protect your furniture before starting the board and batten project.
Measuring and Marking Your Walls
Precision is key when it comes to board and batten installation. Before you start attaching any boards or battens, it’s crucial to measure and mark your walls accurately. Use a tape measure to measure the height and width of your walls, ensuring you have the correct dimensions for the boards and battens.
Once you have measured the walls, mark the desired placements of the boards and battens using a pencil or painter’s tape. This step will act as a guide during installation and ensure that everything is aligned and evenly spaced. Take your time with this step to avoid any mistakes or inconsistencies in your board and batten design.
Ensuring a Level Line for a Professional Look
Achieving a level line is essential for a professional-looking board and batten installation. Start by using a level to determine if your walls are plumb (vertically straight). If you notice any inconsistencies or discrepancies, use shims or spacers to correct them and create a level surface.
Once your walls are plumb, use a level or a laser level to draw a straight line on the walls where the boards will be installed. This line will serve as a reference point for attaching the boards and battens, ensuring they are all parallel and level. Double-check the levelness of the line before proceeding with the installation.
By properly preparing your space for board and batten installation, you’ll set a solid foundation for a successful project. Clearing the room, protecting furniture, measuring and marking your walls, and achieving a level line will ensure that your board and batten installation is both visually appealing and structurally sound.
How to Board and Batten
To successfully install board and batten, follow these step-by-step instructions:
- Start by removing the existing baseboards. Use caution and appropriate tools to safely remove them without damaging the walls.
- Next, determine the spacing for your board and batten. Measure the wall and evenly distribute the battens based on your desired layout.
- Attach the horizontal base and top boards to the wall using a nail gun or screws. Make sure they are level and securely fastened.
- Now it’s time to install the vertical battens. Measure and cut them to the appropriate length, then attach them to the wall using a nail gun or screws.
Throughout the installation process, ensure that everything is level and aligned. Use a level and a tape measure to double-check your work as you go.
Pro Tip: To achieve a professional look, consider using liquid nails along with nails or screws for added strength and stability.
Once you have installed all the battens, step back and admire your newly transformed space. The board and batten installation adds depth and architectural interest to any room.
Removing Existing Baseboards
In order to install board and batten, it is necessary to remove existing baseboards. This section will guide you through the process, providing information on the tools required for safe removal and techniques to minimize wall damage.
Tools for Safe Removal
Before you begin removing the baseboards, gather the following tools:
- A pry bar or a flathead screwdriver
- A hammer
- A putty knife
- A utility knife
- A cordless drill or screwdriver (if baseboards are nailed and screwed)
These tools will allow you to safely and efficiently remove the baseboards without causing unnecessary damage to your walls.
Techniques to Minimize Wall Damage
When removing baseboards, it’s important to use techniques that minimize wall damage. Follow these steps to help preserve the integrity of your walls:
- Start by using a putty knife or utility knife to score along the top edge of the baseboard where it meets the wall. This will help prevent any paint or wallpaper from peeling.
- Next, use the pry bar or flathead screwdriver to gently pry the baseboard away from the wall. Start at one end and work your way along the length of the baseboard. Use caution to avoid excessive force, which can lead to wall damage.
- If the baseboard is secured with nails, use the hammer to carefully tap the pry bar or screwdriver behind the baseboard to loosen it. Take care not to pound too hard, as this can cause damage to the drywall.
- If the baseboard is secured with screws, use the cordless drill or screwdriver to remove the screws, taking care not to strip them.
- Once the baseboard is loosened, continue to pry it away from the wall, working your way along the length. Use the putty knife or utility knife to gently separate any caulking or adhesive that may be holding the baseboard in place.
- If any nails or screws remain in the wall after the baseboard is removed, use pliers or a claw hammer to pull them out.
By using these techniques, you can remove the existing baseboards with minimal damage to your walls, ensuring a clean and smooth surface for the board and batten installation.
Choosing the Right Board and Batten Spacing
When it comes to board and batten, one of the essential factors to consider is the spacing between the boards. The proper board and batten spacing is crucial for achieving a visually pleasing and balanced look.
The first step in determining the spacing is to measure the walls where you plan to install the board and batten. Measure the height and width of each wall and take note of these measurements. This will serve as the basis for calculating the spacing.
Next, consider the overall aesthetic you want to achieve. Are you aiming for a more traditional look with wider spacing, or a more modern and streamlined look with narrower spacing? Think about the style of your home and the effect you want to create.
Once you have an idea of the desired spacing, it’s time to do some calculations. Divide the width of the wall by the number of boards you want to install horizontally. This will give you the approximate spacing between each board.
For example, if you have a wall that is 120 inches wide and you want to install six boards horizontally, the spacing between each board would be 20 inches (120 divided by 6).
Keep in mind that the spacing may need to be adjusted slightly to account for wall imperfections or to create a more visually pleasing arrangement. It’s always a good idea to use a level to ensure that the boards are straight and even.
| Wall Width | Number of Boards | Spacing (Approximate) |
|---|---|---|
| 120 inches | 6 | 20 inches |
| 96 inches | 5 | 19.2 inches |
| 72 inches | 4 | 18 inches |
Attaching the Horizontal Base and Top Boards
Once you have removed the existing baseboards and determined the appropriate spacing for your board and batten installation, it’s time to attach the horizontal base and top boards. This step is crucial for creating a sturdy framework for your project. Follow these step-by-step instructions to ensure a smooth process:
- Start by measuring the length of the baseboards needed for each wall. Cut the boards to size using a miter saw, ensuring clean and precise cuts.
- Apply a thin line of liquid nails or construction adhesive to the back of each baseboard. This will provide additional stability and help secure the boards to the wall.
- Position the baseboards on the wall, aligning them with the level line you previously marked. Using a nail gun, secure the baseboards to the wall by driving nails through the top edge of the boards into the wall studs. Repeat this process for each baseboard.
- Next, measure and cut the top boards to fit the length of the wall. Apply liquid nails or construction adhesive to the back of each top board and attach them to the wall using the same method as the baseboards.
- Ensure a secure fit by double-checking that the boards are level and flush with the wall. Use a level to make any necessary adjustments and ensure a professional finish.
By following these step-by-step instructions, you can achieve a secure and visually appealing installation of the horizontal base and top boards for your board and batten project.


Ensuring a Secure Fit to the Wall
Attaching the base and top boards securely to the wall is essential for the stability and longevity of your board and batten installation. Here are some tips to ensure a secure fit:
- Use construction adhesive or liquid nails in addition to nails when attaching the boards to the wall. This will provide extra reinforcement and help prevent any movement over time.
- Make sure to drive nails into wall studs for optimal support. Use a stud finder to locate the studs before securing the boards.
- Double-check that the boards are level and flush with the wall surface. This will ensure a professional-looking finish and eliminate any gaps or unevenness.
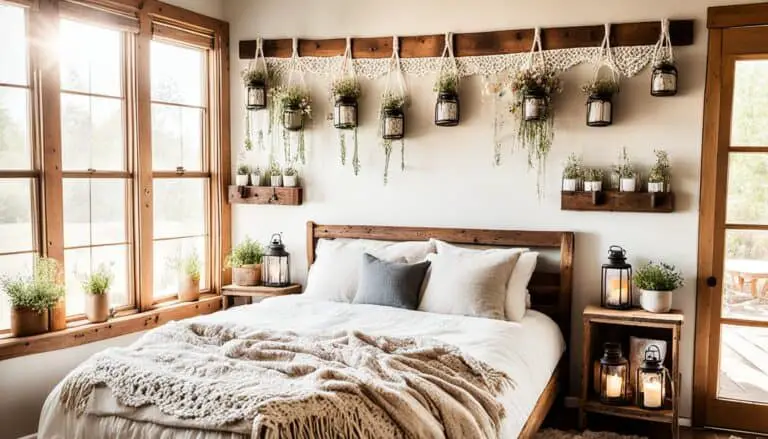
Image:
The image above illustrates the process of attaching the horizontal base and top boards for board and batten. It visually demonstrates the steps outlined in the instructions and serves as a helpful reference to ensure a secure and precise installation.
Installing Vertical Battens with Precision
Now that you have attached the horizontal base and top boards, it’s time to focus on installing the vertical battens for your board and batten project. This step is crucial in achieving a visually appealing and professional finish.
Calculating Even Distribution Across Your Wall
Before you start installing the vertical battens, it’s important to calculate and plan for an even distribution across your wall. This will help ensure that the battens are spaced properly and create a cohesive look.
You can use a tape measure to measure the distance between the horizontal boards and divide it by the number of battens you plan to install. This will give you the spacing between each batten. Make sure to adjust the calculation if you want a wider or narrower spacing for aesthetic purposes.
Necessary Adjustments for Wall Imperfections
When working with older homes or walls that may have imperfections, it’s important to make necessary adjustments to accommodate these irregularities. This will help ensure that your board and batten installation looks seamless and professional.
If you come across any bumps, dips, or uneven surfaces on your wall, consider using shims or additional strips of wood to level out the area before installing the vertical battens. This will help maintain consistency and prevent any gaps or misalignments.
By calculating the even distribution of your vertical battens and making necessary adjustments for wall imperfections, you can achieve a flawless board and batten installation. Take your time during this step to ensure precision and a visually pleasing result.
Finishing Touches: Caulking and Spackling
When it comes to achieving a polished and professional look for your board and batten project, the finishing touches are crucial. Two essential components of these finishing touches are caulking and spackling. These simple yet effective techniques help to fill gaps, hide imperfections, and create a seamless finish.
To start, caulk is used to fill any gaps between the boards and the wall or between the joints of the boards themselves. This not only enhances the overall appearance but also helps to prevent drafts and moisture from entering. Use a caulk gun to apply a thin and even line of caulk along the gaps, and then smoothen it out with a caulk smoothing tool or your finger. Be sure to choose a caulk color that matches your paint color for a seamless blend.
Once the caulk has dried, it’s time to move on to spackling. Spackle is a putty-like substance that is used to fill nail holes and small imperfections on the boards. Apply a small amount of spackle using a putty knife or your finger, and then smoothen it out to create a flat surface. Allow the spackle to dry completely before sanding it lightly to achieve a smooth finish.
Remember to wipe away any excess caulk or spackle with a damp cloth before it dries to ensure a clean and professional look. Once the caulk and spackle have dried and been sanded, you can proceed to paint your board and batten installation to complete the transformation.

| Caulking | Spackling |
|---|---|
| Fill gaps between boards and walls | Fix nail holes and small imperfections |
| Prevent drafts and moisture | Create a smooth surface |
| Choose a caulk color that matches paint | Allow spackle to dry completely |
| Apply caulk with a caulk gun | Smooth out spackle with putty knife |
Picking the Perfect Paint for Board and Batten
Choosing the right paint for your board and batten project is crucial to achieving a beautiful and durable finish. The paint you select will not only enhance the aesthetic appeal of your boards but also provide protection against everyday wear and tear. Here are some tips to help you choose the perfect paint colors and finishes for your board and batten installation:
Tips for Choosing Colors and Finishes
When it comes to color selection, consider the overall style and theme of your space. Are you aiming for a classic and timeless look or a more contemporary and bold feel? Neutral colors such as white, cream, or gray are popular choices for board and batten, as they provide a clean and versatile backdrop. If you want to add a pop of color, consider using a bold hue on the battens while keeping the baseboards neutral.
Once you have settled on a color palette, consider the finish of your paint. Eggshell and satin finishes are commonly used for board and batten as they offer a subtle sheen and are easy to clean. However, if you prefer a more matte or glossy look, you can opt for flat or semi-gloss finishes respectively. Keep in mind that a higher gloss finish may highlight imperfections, so ensure your surface is properly prepared and smoothed before applying the paint.
Applying Paint for Long-lasting Results
Before applying the paint, make sure to thoroughly clean the surface of your boards and battens to remove any dirt, dust, or debris. Prime the boards with a suitable primer to promote adhesion and ensure a smooth and even paint application. Use a high-quality brush or roller for the best results. Apply thin, even coats of paint, allowing each coat to dry completely before applying the next. This will help prevent drips and ensure a professional finish.
Remember, the quality of your paint and the attention to detail during the application process will greatly impact the longevity and appearance of your board and batten installation. By choosing the right colors and finishes and applying the paint correctly, you can create a stunning and durable result that will enhance the beauty of your space for years to come.
Board and Batten Installation Tips and Tricks
When it comes to board and batten installation, incorporating professional tips and tricks can make all the difference. Drawing from the expertise of seasoned professionals in the industry, here are some insider secrets and valuable advice to ensure a successful and flawless installation.
Secrets from the Pros
Seasoned professionals have honed their skills over years of experience, and sharing their secrets can help beginners and DIY enthusiasts elevate their board and batten projects. Here are some professional tips to consider:
- Use a level at every step: Ensuring level lines throughout the installation process will result in a polished and professional finish.
- Opt for quality materials: Investing in high-quality boards and battens will not only enhance the overall aesthetic but also contribute to the durability of your installation.
- Take your time with measurements: Accurate measurements are crucial for achieving balanced spacing and achieving the desired visual impact.
- Pre-paint your boards and battens: Painting them before installation makes it easier to achieve a uniform and finished look.
Avoiding Common Mistakes
Learning from the mistakes of others can save you time, effort, and potential headaches during your board and batten installation. Here are some common mistakes to avoid:
- Skipping the proper prep work: Preparing your space, ensuring clean walls, and protecting furniture are vital steps often overlooked. Avoid the temptation to rush and take the time to properly prepare your space.
- Neglecting to test your measurements: Failing to test your measurements before beginning the installation can lead to uneven spacing and an unbalanced appearance. Be sure to double-check your measurements before making any cuts or attaching boards.
- Using inadequate bonding agents: Choosing the wrong adhesive or nails can compromise the strength and security of your boards and battens. Always use the recommended bonding agents for a long-lasting installation.
- Forgetting to caulk and spackle: Neglecting to fill gaps or holes between boards can result in an unfinished look. Be meticulous with caulk and spackle to create a seamless and professional appearance.
| Mistake | Solution |
|---|---|
| Skipping proper prep work | Devote time to room clearance, furniture protection, and wall measurements. |
| Neglecting to test measurements | Double-check measurements to ensure proper spacing and a balanced appearance. |
| Using inadequate bonding agents | Choose high-quality adhesive and nails to ensure a stable and secure installation. |
| Forgetting to caulk and spackle | Fill gaps and holes between boards for a polished and seamless finish. |
Board and Batten Guide: Adding Additional Features
Customization options play a key role in enhancing the design of your board and batten installation. By adding additional features, you can personalize the style to suit your individual preferences. Here are some ideas and guidance on how to take your board and batten project to the next level:
“The beauty of board and batten lies in its versatility and adaptability. With a few creative touches, you can transform the look and feel of any space in your home.”
1. Accent Colors
Add visual interest to your board and batten by incorporating accent colors. Paint the battens or top board in a contrasting color to create a striking effect. Experiment with bold hues or subtle shades to achieve the desired ambiance.
2. Decorative Molding
Elevate the elegance of your board and batten by integrating decorative molding. Crown molding or chair rail molding can be applied above or below the top board to enhance the overall aesthetic. Choose a style that complements your existing decor.
3. Shelf Integration
Maximize functionality by integrating shelves into your board and batten installation. This can be achieved by adding a horizontal shelf in between battens or incorporating floating shelves above the top board. Utilize these shelves to display decorative items or store everyday essentials.
4. Wainscot Paneling
Expand upon the classic board and batten style by combining it with wainscot paneling. Install panels below the top board to create a sophisticated and timeless look. This combination adds depth and dimension to your walls, making them an eye-catching focal point in any room.
“Customizing your board and batten allows you to infuse your personality into your living space. Explore various options to create a design that reflects your unique style and taste.”
Board and Batten for Different Room Types
Adapting the Style for Bathrooms, Living Rooms, and More
Board and batten is a versatile design element that can be applied in various types of rooms to add visual interest and character. By incorporating board and batten in different rooms, you can create unique and personalized spaces that reflect your style and taste. Let’s explore how you can adapt the style of board and batten for specific rooms and customize it according to your preferences.
Customizing Board Width and Batten Height Per Room
When incorporating board and batten in different rooms, it’s essential to consider the size and scale of the space. By customizing the board width and batten height for each room, you can create a harmonious and proportionate look. For example, in larger rooms such as living rooms, you can opt for wider boards and taller battens to create a bold and dramatic effect. In smaller rooms like bathrooms, narrower boards and shorter battens can make the space feel more intimate and cozy.
Customizing the board and batten design by room also allows you to enhance the overall aesthetic and functionality. For instance, in bathrooms, you can incorporate additional details such as hooks, shelves, or mirrors within the board and batten panels to add storage and utility. In living rooms or dining areas, you can experiment with different paint colors or finishes to create focal points and highlight specific architectural features.
By adapting the style of board and batten to different room types and customizing the board width and batten height, you can create visually appealing and cohesive designs throughout your home. Whether you’re looking to add a touch of elegance to your bathroom or make a statement in your living room, board and batten offers endless possibilities for customization.
Board and Batten Maintenance: Ensuring Durability
Once you have installed your beautiful board and batten walls, it’s important to properly maintain them to ensure their durability and longevity. By following a few simple tips and advice, you can keep your board and batten installation looking its best over time.
Regular cleaning is essential to maintain the appearance of your board and batten. Use a soft cloth or sponge with mild soap and water to gently wipe away any dirt or stains. Avoid using harsh chemicals or abrasive cleaners that can damage the finish.
Inspect your board and batten regularly for any signs of damage or wear. Look for cracks, chips, or peeling paint, and address them promptly to prevent further deterioration. Repair any damaged areas by filling them with spackle or wood filler, then sand and repaint as necessary.
Protect your board and batten from excessive moisture, particularly in high-humidity areas such as bathrooms or kitchens. Consider applying a moisture-resistant sealant or paint to safeguard against water damage.
As with any painted surface, your board and batten may require periodic repainting. This can help refresh the appearance and extend the lifespan of your installation. Before repainting, make sure to clean the surface thoroughly and apply a primer for better adhesion.
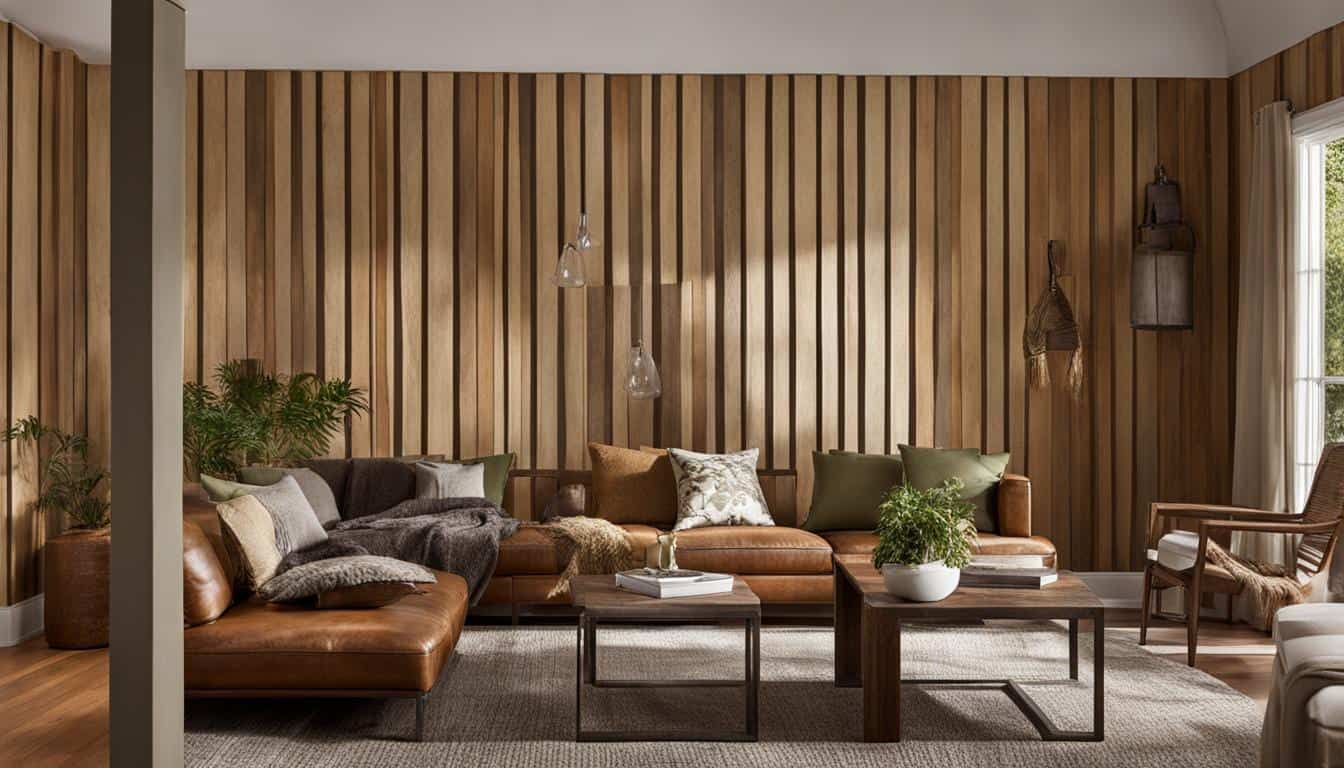
Before and After: The Impact of Board and Batten
Visual Transformations with Simple Changes
Witness the remarkable visual transformations that can be achieved through the use of board and batten in your home. This classic architectural feature has the power to elevate the aesthetic appeal of any space, bringing a touch of sophistication and character to your walls.
By adding board and batten, you can instantly create a sense of depth and dimension that enhances the overall visual impact of your interior design. The combination of vertical battens and horizontal boards adds texture and interest, making your walls a focal point in any room.
With its clean lines and timeless charm, board and batten has the ability to effortlessly elevate the style of your home. Whether you choose a traditional or modern approach, the impact of this architectural feature is undeniable.

Testimonials and Reader Submissions
“I never realized the difference that board and batten could make in a space until I tried it myself. The before and after transformation was astonishing. It completely changed the look and feel of my living room. It’s now my favorite spot in the house!” – Sarah, Los Angeles
“Board and batten turned my dull, plain hallway into a stunning gallery-style passage. The visual impact is incredible, and it’s a project I’m proud to have done myself. The added architectural interest makes my home feel unique and personalized.” – Mark, New York
These testimonials from readers who have completed their own board and batten projects speak to the transformative power of this design element. Their firsthand experiences highlight the positive impact it has had on their homes, both in terms of visual appeal and personal satisfaction.
Whether you’re seeking a subtle upgrade or a bold statement, board and batten can make a significant difference in your living space. The visual transformations achieved with this simple yet impactful design technique are sure to impress.
Conclusion
Congrats! You’ve reached the end of our DIY guide on how to board and batten easily. We hope this article has provided you with the knowledge and confidence to tackle this home improvement project on your own. Board and batten is a versatile technique that can elevate the aesthetic of any room while adding a touch of architectural interest.
By understanding the basics, gathering the necessary materials and tools, and following our step-by-step instructions, you’ll be able to achieve professional-looking results. The benefits of DIY board and batten include cost-effectiveness, customization options, and the satisfaction of completing a project with your own hands.
Now, it’s time for you to put your newfound skills to the test. Start by preparing your space, removing existing baseboards, and measuring the walls accurately. Then, follow the installation steps, making sure to calculate the board and batten spacing and secure the boards and battens properly.
Remember to take your time and pay attention to the finishing touches, such as caulking, spackling, and painting, which will give your project a polished look. Don’t forget to explore additional features and customize the design to suit your preferences. With proper maintenance, your board and batten installation will stand the test of time and continue to enhance the beauty of your home.
FAQ
What is board and batten?
Board and batten is a type of wall paneling that involves alternating wide boards (the “boards”) with narrow strips (the “battens”) to create a visually appealing and textured finish.
What are the benefits of DIY board and batten?
DIY board and batten is cost-effective, customizable, and relatively easy to install. It allows you to transform the look of a room without breaking the bank and gives you the freedom to choose your own style and design.
What materials and tools do I need for board and batten?
To complete a board and batten project, you will need primed MDF boards, caulk, spackle, liquid nails, paint, a miter saw, nail gun, stud finder, level, and tape measure.
How do I prepare my space for board and batten installation?
To prepare your space, clear the room of furniture, protect any remaining furniture, measure and mark the walls, and ensure a level line for a professional finish.
How do I remove existing baseboards before installing board and batten?
Use a pry bar, putty knife, and a hammer to remove the baseboards. Start at one end and work your way along, using the putty knife to protect the wall and minimize damage.
How do I choose the right spacing for board and batten?
The spacing of your board and batten depends on the size of your wall and personal preference. Measure the wall and divide the available space evenly to ensure a uniform and balanced look.
How do I attach the horizontal base and top boards for board and batten?
Use a nail gun and liquid nails to secure the base and top boards to the wall. Make sure the boards are level and securely attached for a professional finish.
How do I install vertical battens for board and batten?
Calculate the distribution of your vertical battens, making sure they are evenly spaced across the wall. Adjust for any wall imperfections, such as uneven surfaces or crooked lines.
What finishing touches do I need for board and batten?
Caulk and spackle are essential for filling in gaps and nail holes and creating a seamless finish. Apply caulk to the joints and spackle to the holes, then sand smooth before painting.
How do I pick the perfect paint for board and batten?
Consider the color scheme and style of the room when choosing paint for your board and batten. Opt for a paint specifically designed for trim and use a high-quality brush for smooth application.
Are there any additional tips and tricks for a successful board and batten installation?
Seek insights from professionals in the field and learn from common mistakes to avoid. Pay attention to the details, take your time, and make adjustments as needed for the best results.
Can I customize board and batten by adding additional features?
Absolutely! Board and batten can be customized by adding additional features such as decorative moldings, hooks, or shelving. Get creative and make it your own!
How can I adapt board and batten for different room types?
You can adapt the style of board and batten for different rooms by customizing the board width and batten height to suit the space. This allows you to achieve the desired look and proportions for each room.
How do I maintain board and batten for durability?
Regularly clean the surfaces with a damp cloth and mild detergent to remove dust and dirt. Inspect for any damage or signs of wear and touch up as necessary to keep it looking its best.
What impact can board and batten have on a room?
Board and batten can have a transformative effect on a room, enhancing its visual appeal and creating a sense of character and charm. It can make a space feel more inviting and stylish.