Have you ever looked at your plain bathroom mirror and wished it had a little more character? Perhaps you’ve considered replacing it altogether, but the cost and effort involved made you think twice. What if we told you there’s an easy and budget-friendly way to transform your mirror into a stunning focal point? Yes, you heard it right! In this article, we will guide you through the process of framing a mirror, allowing you to add style and personality to your space without breaking the bank. So, are you ready to learn how to frame a mirror yourself?
Key Takeaways:
- Learn how to frame a mirror in just a few simple steps
- Elevate the look and feel of your bathroom with a custom mirror frame
- Save money by avoiding the need for a full mirror replacement
- Discover creative mirror framing ideas for a unique and personalized touch
- Transform your plain mirror into a beautiful focal point with easy mirror frame ideas
Why Frame a Mirror?
Framing a mirror is a brilliant way to transform your bathroom and infuse it with style and personality. Builder-grade mirrors can often look bland and lack visual interest. However, by adding a frame, you can instantly elevate the appearance of the mirror and the entire space. Whether you’re aiming for a rustic, coastal, or traditional look, framing a mirror allows you to customize it to match your desired aesthetic. Moreover, opting to frame a mirror is a cost-effective alternative to replacing the entire mirror or embarking on a costly bathroom renovation. With just a few supplies and simple techniques, you can achieve a beautiful and polished result.
Nothing defines the bathroom’s aesthetic quite like the mirror. By framing it, you can create a focal point that effortlessly enhances the overall design. The frame acts as a border that draws attention to the mirror, elevating it from a functional item to a true piece of decor. With endless possibilities for mirror framing ideas, you can unleash your creativity and tailor the frame to suit your personal style and the ambiance of your bathroom.
Inspiration is at the heart of DIY mirror framing. By framing your mirror, you have the freedom to design a unique statement piece that perfectly complements your bathroom decor.
Furthermore, framing a mirror is an affordable way to update your bathroom without spending a fortune. Instead of replacing the entire mirror, which can be expensive, framing allows you to refresh its look with minimal investment. With readily available mirror frame kits and a variety of molding options, you can easily find the materials that suit your taste and budget.
Whether you’re seeking a simple and sleek frame or a more intricately designed one, there are mirror frame options to suit every preference and skill level. From pre-made kits that make the process a breeze to custom framing using molding or trim, the choice is yours. You can even experiment with unconventional materials to create a truly unique frame that showcases your individuality.
Supplies Needed to Frame a Mirror
Before you begin framing your mirror, it’s important to gather all the necessary supplies. Here’s a list of the common supplies used in mirror framing projects:
- Mirror frame kit
- Mirror frame molding
- Mirror framing techniques
Having a mirror frame kit on hand will provide you with pre-cut molding and all the necessary hardware for a hassle-free framing process. However, if you prefer a more customized approach, you can opt for mirror frame molding and use different techniques to achieve the desired result. Whichever option you choose, these supplies will ensure that you have everything you need to frame your mirror successfully.
Preparing the Mirror
Before you start framing your mirror, proper preparation is key to ensure a successful result. Follow these steps to get your mirror ready for framing:
- If your mirror has clips or brackets holding it to the wall, carefully remove them. This will allow you to work with the mirror surface more easily.
- Take precise measurements of your mirror’s dimensions. Knowing the size and shape of your frame beforehand will help you cut the mirror frame molding or trim to the correct size.
Once you have removed any clips or brackets and have the measurements in hand, you are ready to proceed with framing your mirror.
Why Preparation Matters
Properly preparing your mirror ensures that the frame will fit securely and enhances the overall appearance of the finished product.
By removing any clips or brackets, you eliminate potential obstacles and create a clean surface to work with. Additionally, measuring the mirror’s dimensions allows you to cut the mirror frame molding or trim accurately, resulting in a frame that fits perfectly around the mirror.
| Benefits of Preparing the Mirror | How It Helps |
|---|---|
| Smooth installation process | Removing clips or brackets eliminates interference during framing |
| Precise fit | Accurate measurements ensure the frame matches the mirror dimensions |
| Professional and polished look | Proper preparation creates a seamless integration between the frame and mirror |
Cutting and Assembling the Frame
Now that you have the measurements for your frame, it’s time to start cutting and assembling the mirror frame molding or trim. To achieve a professional-looking result, follow these step-by-step instructions:
Cutting the Mirror Frame Molding
Using a miter saw or other appropriate tools, cut the mirror frame molding or trim at a precise 45-degree angle. This angle will ensure that the corners of the frame align properly, creating a seamless appearance. Take your time and double-check the measurements before making any cuts to avoid mistakes.
Pro tip: It’s always a good idea to practice cutting a few test pieces to get comfortable with the saw and ensure accurate cuts.
Assembling the Frame
If you’re using a mirror frame kit, carefully follow the manufacturer’s instructions for assembly. These kits typically come with pre-cut pieces that easily fit together, making the process straightforward and hassle-free.
If you’re creating your own frame using molding or trim, apply wood glue or another appropriate adhesive to attach the pieces together. Make sure to align the corners precisely and use corner connectors or nails to secure them for added stability. Pro tip: Clamping the corners while the adhesive dries can help ensure a tight bond.
Whether you’re using a mirror frame kit or creating your own frame, it’s essential to pay attention to detail during the assembly process. Take your time to ensure that everything fits together snugly and that the frame is sturdy and well-constructed.
Once the frame is assembled, you’re ready to move on to the next step: adding finishing touches to enhance its appearance and completing the mirror framing process.

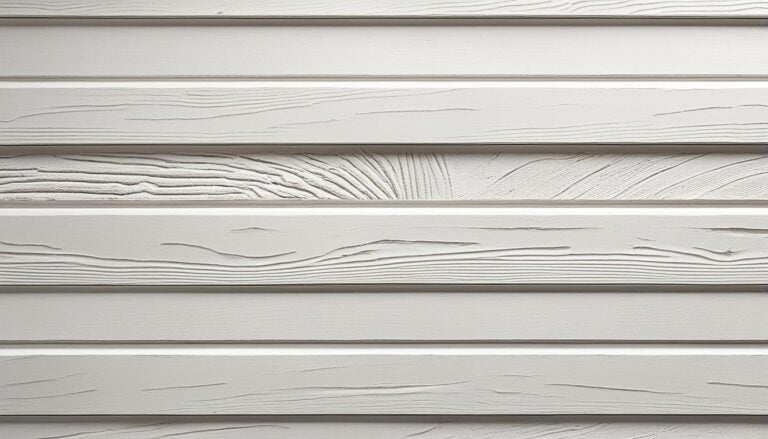
**Note:** The image above showcases a visual representation of mirror frame molding, highlighting its texture and design.
Adding Finishing Touches
Once the frame is assembled, it’s time to add those final touches that will enhance the appearance of your mirror frame. Consider staining or painting the frame to match the decor of your bathroom and create a cohesive look. Before applying the finish, lightly sand the frame to remove any rough edges or imperfections, ensuring a smooth surface for the paint or stain to adhere to.
Using a brush or foam roller, apply the stain or paint evenly across the frame, making sure to cover all surfaces. Take your time to achieve the desired color and coverage, paying attention to the details. Allow the finish to dry completely before moving on to the next step.
To get a better idea of how your finished frame will look, refer to the mirror framing techniques you’ve employed so far. Consider the overall style and aesthetic you’re going for, whether it’s classic, modern, or rustic, and choose the finishing touches that will complement your design choices.
Adding the perfect finishing touches will elevate your DIY mirror frame and give it that professional touch, enhancing the overall appearance of your bathroom.
Tips for Finishing Your Mirror Frame
Here are a few tips to keep in mind when adding the finishing touches to your mirror frame:
- Choose a stain or paint color that complements your bathroom decor and personal style.
- Apply the finish in thin, even coats to achieve a smooth and professional look.
- Consider using a clear protective coat to seal and protect the finish.
- Use a fine-grit sandpaper to lightly sand between coats for a smoother finish.
- Allow ample drying time between coats to prevent smudging or smearing.
By following these tips, you can ensure that your mirror frame looks polished and professional, adding the perfect finishing touch to your bathroom.
Attaching the Frame to the Mirror
Now that you have assembled your mirror frame, it’s time to attach it securely to the mirror surface. To ensure a strong and durable bond, follow these steps:
- Select a strong adhesive specifically designed for glass surfaces to ensure a secure attachment.
- Apply the adhesive along the back of the frame, leaving a small gap near the inside edge. This will prevent the adhesive from being visible in the mirror’s reflection.
- Press the frame firmly against the mirror, aligning it carefully. Make sure to apply even pressure to ensure a uniform bond.
- Hold the frame in place for the recommended drying time specified by the adhesive manufacturer. This will ensure that the adhesive sets properly and creates a strong bond.
- If desired, use clamps or tape to further secure the frame while it dries. This will help prevent any shifting or movement that could compromise the bond.
Once the adhesive has fully cured, your mirror frame will be securely attached and ready for the finishing touches.

Helpful Tip:
When applying the adhesive, take care to avoid any excess that may seep out between the frame and the mirror. This can be unsightly and difficult to remove, so it’s best to clean up any excess adhesive immediately with a damp cloth.


Recommended Adhesives for Attaching Mirror Frames
| Adhesive Type | Recommended Brand | Application Method |
|---|---|---|
| Epoxy | Loctite Epoxy Glass Bond | Applicator or mixing cup |
| Mirror Adhesive | Hangman Heavy-Duty Mirror and Picture Hanger | Tube or caulking gun |
| Double-Sided Tape | Gorilla Heavy Duty Mounting Tape | Pre-cut strips or custom cut |
Final Touches and Cleanup
After the adhesive has fully cured, it’s time to add the final touches to your mirror frame and clean up any leftover residue. Follow these steps to ensure a seamless finish:
1. Remove Excess Glue or Adhesive
Using a scraper or a damp cloth, carefully remove any excess glue or adhesive that may have squeezed out during the framing process. Be gentle to avoid scratching the frame or the mirror surface.
2. Fill Gaps with Caulk or Putty
Inspect the edges of the frame and the mirror for any gaps or spaces. Fill these gaps with caulk or putty to achieve a seamless look. Use a caulk gun or putty knife to apply the caulk or putty evenly, ensuring it blends well with the frame and the mirror.
3. Allow Caulk or Putty to Dry
Give the caulk or putty sufficient time to dry according to the manufacturer’s instructions. This will ensure that it sets properly and provides a secure bond between the frame and the mirror. Avoid touching or moving the frame during the drying process.
4. Apply Touch-Up Paint or Stain
If necessary, you can apply touch-up paint or stain to the frame to match your desired finish or cover any blemishes. Use a small brush or foam applicator to ensure precise application. Allow the paint or stain to dry completely before proceeding to the next step.
5. Clean the Mirror Surface and Frame
Once all the final touches are complete, it’s time to give your mirror a sparkling finish. Use a glass cleaner and a soft, lint-free cloth to clean both the mirror surface and the frame. Wipe gently to remove any fingerprints, smudges, or dust, ensuring a crystal-clear reflection.
By following these final cleaning and touch-up steps, you’ll achieve a professional-looking mirror frame that enhances your bathroom decor. Now, step back and admire your beautifully framed mirror!

| Benefits | Details |
|---|---|
| Seamless Appearance | The caulk or putty fills any gaps between the frame and the mirror, creating a smooth and cohesive look. |
| Protects the Mirror | The frame acts as a protective barrier, preventing damage to the edges of the mirror and prolonging its lifespan. |
| Personalized Style | With various paint or stain options, you can customize the frame to match your bathroom decor and express your personal taste. |
| Enhanced Durability | The frame adds strength and stability to the mirror, reducing the risk of cracks or breakages. |
| Budget-Friendly | Framing a mirror is a cost-effective alternative to buying a new mirror or undergoing a complete bathroom renovation. |
Expert Tip: When cleaning the mirror surface, spray the glass cleaner on the cloth rather than directly on the mirror to avoid any liquid seeping behind the frame.
Benefits of Framing a Mirror
Framing a mirror offers several benefits for your bathroom decor. First and foremost, it adds a touch of elegance and style to your space, instantly transforming a plain mirror into a beautiful focal point.
Framing a mirror also allows you to customize the design to match your personal taste and the overall aesthetic of your bathroom. Whether you prefer a sleek and modern look or a rustic and vintage vibe, there are endless options for mirror framing ideas. You can choose from a variety of frame materials, finishes, and colors to create a mirror that perfectly complements your bathroom decor.
Another advantage of framing a mirror is that it is a cost-effective way to update your bathroom without the need for a full renovation or expensive replacement. Instead of investing in a new mirror, you can simply purchase a mirror frame kit or easily create your own frame using molding or trim. This will not only save you money but also allow you to achieve a customized look without the hassle of a major project.
Key Benefits of Framing a Mirror:
- Adds elegance and style to your bathroom decor
- Allows customization to match your personal taste
- Offers a wide range of mirror framing ideas
- Cost-effective alternative to replacing the entire mirror
By framing your mirror, you can create a stunning visual impact in your bathroom and elevate the overall design. Whether you opt for a classic frame, a trendy design, or a unique and creative approach, framing a mirror is an easy and effective way to transform your space. Take a look at the examples and inspirations below to kick-start your mirror framing project.

Tips for Successful Mirror Framing
To ensure successful mirror framing, follow these tips:
- Plan and measure: Before you start framing your mirror, take accurate measurements of the mirror’s dimensions. This will help you determine the size and shape of the frame you need to create.
- Choose the right frame: Consider the style and aesthetic of your bathroom when selecting a frame for your mirror. Whether you opt for a sleek metal frame, a rustic wooden frame, or a decorative molding, choose a frame that complements the overall design of your space.
- Prepare the mirror: Clean the surface of the mirror thoroughly before applying the frame. Remove any dust, dirt, or grease to ensure proper adhesion.
- Use proper tools and materials: Invest in quality tools and materials specifically designed for mirror framing. This includes the appropriate adhesive, miter saw for cutting the frame, and any other supplies recommended for your chosen framing technique.
- Secure the frame: Ensure that the frame is securely attached to the mirror. Use a strong adhesive or mounting hardware that is suitable for glass surfaces to prevent the frame from coming loose over time.
- Pay attention to details: Take your time to align the corners of the frame properly for a seamless look. Sand and paint or stain the frame as desired to achieve the desired finish.
- Consider professional help: If you lack the necessary tools or feel unsure about tackling the framing process yourself, consider hiring a professional to assist you. They have the expertise and experience to ensure a flawless result.
By following these tips, you’ll be on your way to successfully framing your mirror and enhancing the overall look and feel of your bathroom.
Mirror Framing Tools and Materials
| Tools | Materials |
|---|---|
| Miter saw | Mirror frame molding or trim |
| Measuring tape | Adhesive |
| Sandpaper | Nails or corner connectors (if applicable) |
| Paintbrush or foam roller | Stain or paint (optional) |
| Scrapers | Caulk or putty |
| Level | Glass cleaner |
With these essential tools and materials, you’ll have everything you need to embark on your mirror framing project with confidence.
Creative Mirror Framing Ideas
If you’re looking to add a unique touch to your mirror frame, here are some creative mirror framing ideas to inspire you:
- Use reclaimed wood: Give your mirror a rustic and vintage look by using reclaimed wood as the frame. This adds character and charm to your mirror while also being an eco-friendly option.
- Create a mosaic frame: Use small pieces of colored glass, ceramic tiles, or mirror fragments to create a mosaic frame around your mirror. This adds a pop of color and texture to your mirror and can be customized to match your bathroom decor.
- Add a decorative border: Use decorative molding, trim, or even wallpaper borders to create a unique frame around your mirror. This allows you to incorporate different patterns and designs into your mirror frame.
- Incorporate natural elements: Bring the outdoors in by using natural elements like driftwood, seashells, or branches to create a frame around your mirror. This adds a touch of nature and creates a beachy or organic vibe in your bathroom.
- Paint or stencil the frame: Get creative with paint or stencils to add a personal touch to your mirror frame. Use bold colors, patterns, or even metallic paints to create a statement piece.
- Go vintage with antique frames: Hunt for antique frames at flea markets or thrift stores and repurpose them as mirror frames. This adds a touch of history and nostalgia to your mirror.
These are just a few ideas to get you started. Feel free to mix and match or come up with your own unique mirror framing ideas. The key is to add your personal style and create a mirror frame that complements your bathroom decor.
Budget-Friendly Mirror Makeover Ideas
If you’re on a tight budget, don’t worry! There are plenty of creative and wallet-friendly ways to give your mirror a stunning makeover. Here are some easy mirror frame ideas that won’t break the bank:
- 1. Repurpose old picture frames: Look around your house or local thrift stores for old picture frames. Remove the glass and use the frame to create a unique border for your mirror.
- 2. Use adhesive tiles: Peel-and-stick adhesive tiles are an affordable and versatile solution for transforming your mirror. Choose from a wide variety of styles, colors, and patterns to suit your taste.
- 3. Decorate with washi tape: Washi tape is a colorful and inexpensive option for adding a pop of design to your mirror. Cut the tape into different shapes and patterns, then stick them to the edges of your mirror for a fun and trendy look.
- 4. Create a rope frame: Use natural or colored rope to form a decorative border around your mirror. Simply glue the rope around the edges, securing it tightly for a nautical or rustic touch.
- 5. Add a fabric border: Choose a fabric that complements your bathroom decor and wrap it around the edges of your mirror. Secure it with adhesive or push pins for a soft and stylish frame.
- 6. Apply a decal: Vinyl decals come in a variety of designs and can be easily applied to your mirror to create an instant makeover. Choose a pattern or motif that resonates with your personal style.
“With these budget-friendly mirror makeover ideas, you can give your mirror a fresh new look without spending a fortune. Get creative and have fun transforming your mirror into a statement piece that reflects your unique style.”
Remember, the key to an easy mirror frame makeover on a budget is to think outside the box and explore unconventional materials and techniques. With a little imagination and some simple DIY skills, you can transform your mirror into a stylish focal point for your bathroom.
Now that you have some budget-friendly mirror makeover ideas, you’re ready to get started on your own mirror transformation. Choose a technique that speaks to you, gather your supplies, and enjoy the process of giving your mirror a stunning new look!
Embrace Your Creativity with Mirror Framing
Mirror framing is not limited to traditional materials and techniques. Feel free to explore your creativity and think outside the box when it comes to framing a mirror. You can repurpose materials like old picture frames, driftwood, or even salvaged architectural elements to create a unique and one-of-a-kind frame.
Don’t be afraid to experiment with different finishes, colors, and textures to achieve the desired look. The beauty of DIY mirror framing is that it allows you to express your personal style and add a personal touch to your bathroom decor.
Repurposed Materials for Mirror Framing
If you’re looking for unconventional mirror framing ideas, consider these repurposed materials:
- Old picture frames: Give new life to vintage frames by repurposing them as mirror frames. You can paint them in a color that complements your bathroom decor or leave them in their original finish for a rustic look.
- Driftwood: Create a coastal or beachy vibe by using driftwood as a mirror frame. Arrange the driftwood pieces around the mirror, securing them with adhesive or nails for a natural and organic look.
- Salvaged architectural elements: Explore salvage yards or antique shops for interesting architectural pieces like moldings, corbels, or pediments. These unique elements can add character and charm to your mirror frame.
By using these unconventional materials, you can transform your mirror into a statement piece that reflects your creativity and individuality.
| Material | Style | Advantages |
|---|---|---|
| Old picture frames | Vintage | Easy to find and customizable with paint |
| Driftwood | Coastal | Natural and unique look |
| Salvaged architectural elements | Eclectic | Character and charm |
Don’t restrict yourself to traditional mirror frame materials. Let your imagination run wild and create a mirror frame that truly represents your personal style and adds a touch of creativity to your bathroom decor.
Conclusion
Framing a mirror is a simple and cost-effective way to upgrade the look of your bathroom. Whether you choose to use a mirror frame kit, create your own frame using molding or trim, or get creative with unconventional materials, the possibilities for mirror framing are endless. By following the step-by-step guidance provided in this article, you can effortlessly transform your plain mirror into a stylish and personalized piece that reflects your personal style and enhances the overall aesthetic of your bathroom.
With the right supplies and a little creativity, you’ll be able to frame a mirror easily and achieve stunning results. The process of mirror framing can be enjoyable and rewarding, as you witness the dramatic difference it makes in your bathroom. So, why wait? Get started on your mirror framing project today and enjoy the satisfaction of creating a beautiful and customized mirror that adds character and sophistication to your space.
Whether your bathroom design calls for a sleek and modern frame, a rustic and vintage touch, or something completely unique, mirror framing offers limitless opportunities for expressing your creativity. With easy mirror frame ideas and a variety of tools and materials available, you can turn an ordinary mirror into a striking focal point that gives your bathroom a touch of elegance and charm. So go ahead, explore the world of mirror framing, and transform your bathroom into a space that truly reflects your personal style and taste.
FAQ
Why should I frame a mirror?
Framing a mirror adds style and character to your bathroom, transforming a plain mirror into a beautiful focal point. It allows you to customize the design to match your personal taste and the overall aesthetic of your bathroom. Additionally, framing a mirror is a cost-effective way to update your bathroom without the need for a full renovation or expensive replacement.
What supplies do I need to frame a mirror?
Common supplies used in mirror framing projects include a mirror frame kit or mirror frame molding, a miter saw or appropriate cutting tools, wood glue or adhesive, corner connectors or nails for stability, a brush or foam roller for finishing, glass cleaner, and a scraper or damp cloth for final touch-ups.
How do I prepare the mirror for framing?
To prepare the mirror for framing, remove any clips or brackets temporarily holding it to the wall. Measure the dimensions of the mirror and determine the size and shape of the frame you want to create. This will help you cut the mirror frame molding or trim to the correct size.
How do I cut and assemble the frame?
Once you have the measurements for your frame, use a miter saw or appropriate tools to cut the mirror frame molding or trim at a 45-degree angle. Make sure the corners of the frame align properly for a clean and seamless look. If you’re using a mirror frame kit, follow the manufacturer’s instructions for assembly. If you’re creating your own frame using molding or trim, use wood glue or adhesive to attach the pieces together and secure the corners with corner connectors or nails for added stability.
What are the finishing touches for the frame?
To enhance the appearance of the frame, you can stain or paint it to match the bathroom decor. Sand the frame lightly to remove any rough edges or imperfections before applying the finish. Use a brush or foam roller to apply the stain or paint evenly. Allow the finish to dry completely before proceeding.
How do I attach the frame to the mirror?
Use a strong adhesive rated for glass surfaces to attach the frame to the mirror. Apply the adhesive along the back of the frame, leaving a gap near the inside edge to avoid it being visible in the mirror’s reflection. Press the frame firmly against the mirror and hold it in place for the recommended drying time specified by the adhesive manufacturer. You can use clamps or tape to secure the frame while it dries.
How do I complete the final touches and cleanup?
Once the adhesive has fully cured, remove any excess glue or adhesive from the frame using a scraper or damp cloth. Use caulk or putty to fill any gaps between the frame and the mirror for a seamless look. Allow the caulk or putty to dry before applying any touch-up paint or stain. Finally, clean the mirror surface and the frame using a glass cleaner to remove any fingerprints or smudges.
What are the benefits of framing a mirror?
Framing a mirror adds elegance and style to your bathroom, instantly transforming a plain mirror into a beautiful focal point. It allows you to customize the design to match your personal taste and the overall aesthetic of your bathroom. Additionally, framing a mirror is a cost-effective way to update your bathroom without the need for a full renovation or expensive replacement.
What are some tips for successful mirror framing?
Some tips for successful mirror framing include gathering all the necessary supplies before starting, measuring and preparing the mirror surface properly, cutting and assembling the frame with precision, adding finishing touches to enhance its appearance, using a strong adhesive to attach the frame to the mirror, and ensuring a thorough cleanup for a polished result.
What are some creative mirror framing ideas?
Some creative mirror framing ideas include using repurposed materials like old picture frames, driftwood, or salvaged architectural elements, experimenting with different finishes, colors, and textures, and thinking outside the box to create a unique and personalized frame that complements your bathroom decor.
How can I give my mirror a makeover on a tight budget?
If you’re on a tight budget, you can still give your mirror a makeover by using affordable methods. Consider painting the frame, using adhesive-backed peel-and-stick tiles, or applying wallpaper to create a new look. You can also add decorative elements like rope, ribbon, or removable adhesive decals to enhance the mirror’s appearance.
How can I embrace my creativity with mirror framing?
Mirror framing allows you to embrace your creativity by exploring unconventional materials and techniques. You can repurpose materials like old picture frames, driftwood, or salvaged architectural elements to create a unique and one-of-a-kind frame. Don’t be afraid to experiment with different finishes, colors, and textures to achieve the desired look and add a personal touch to your bathroom decor.