Are you tired of your old, worn-out kitchen countertops? Do you want to add a touch of warmth and charm to your kitchen? If so, installing butcher block countertops may be the perfect solution for you. But where do you start? How do you ensure a seamless and professional installation?
In this comprehensive guide, we will walk you through the step-by-step process of installing butcher block countertops. From preparation and measurements to cutting techniques and finishing, we will provide you with expert advice and best practices for a successful DIY project. Whether you’re a seasoned DIY enthusiast or a beginner, you’ll find all the information you need to transform your kitchen with beautiful butcher block countertops.
Key Takeaways:
- Installing butcher block countertops is an affordable and stylish way to upgrade your kitchen.
- Proper preparation, measurements, and cutting techniques are crucial for a seamless installation.
- Prefinishing and finishing your butcher block countertops will protect the wood and enhance their longevity.
- Regular maintenance and care will keep your butcher block countertops looking their best.
- Whether you choose to make your own or purchase pre-made, the choice depends on your DIY skills and preference.
Why Butcher Block is a Great Countertop Material
Butcher block is a popular choice for countertops, and for good reason. This unique countertop material offers a range of advantages and benefits that make it an excellent option for your kitchen.
Advantages of Butcher Block Countertops
- Affordability: One of the primary advantages of butcher block countertops is their affordability compared to other countertop materials. If you’re working within a budget, butcher block can be a cost-effective option.
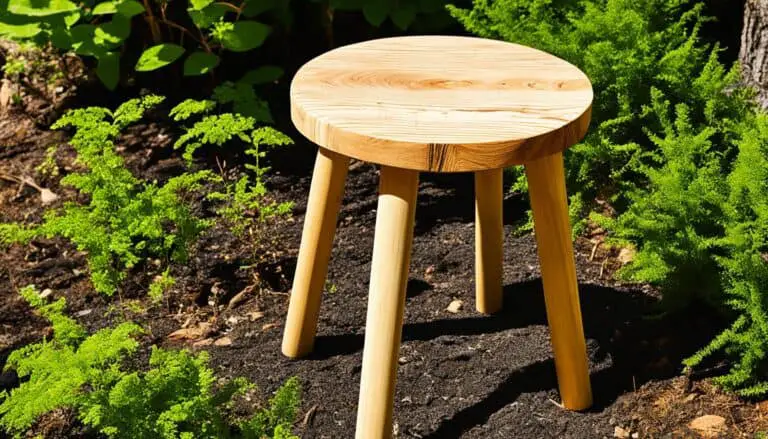
- Natural Warmth and Appeal: Butcher block brings a natural warmth and charm to any kitchen. With its beautiful wood grain and warm tones, it adds a touch of elegance and character to the space.
- Durability: Crafted from straight pieces of wood glued together, butcher block creates a strong and durable work surface that can withstand the demands of daily use. It is highly resistant to cutting, chopping, and other food preparation tasks.
- Variety of Wood Species: Butcher block countertops are available in various wood species, each with its own unique aesthetic and durability. Whether you prefer the light tones of birch, the rich hues of walnut, or the classic appeal of maple, there is a wood species to suit your taste.
Benefits of Butcher Block Countertops
In addition to its advantages, butcher block countertops offer several benefits that make them an attractive choice for homeowners:
“Butcher block countertops are a versatile and functional addition to any kitchen. They provide a reliable and durable work surface, while adding warmth and character to the space.”
- Easy Maintenance: While wood is a porous material, proper maintenance can keep your butcher block countertops in great condition. Regular sealing and periodic oiling will protect them from water absorption, prevent the growth of mold and bacteria, and prolong their lifespan.
- Customization: Butcher block countertops can be customized to fit your kitchen’s specific dimensions and style. You can choose the wood species, grain pattern, and finish that best suits your preferences and complements your overall design aesthetic.
- Timeless Appeal: Butcher block countertops have a timeless appeal that can enhance any kitchen style, from traditional to modern. They provide a warm and inviting atmosphere that never goes out of fashion.
With its affordability, durability, natural warmth, and customization options, it’s clear why so many homeowners choose butcher block for their countertops. Whether you’re renovating your kitchen or building a new home, butcher block countertops offer a beautiful and practical solution that will stand the test of time.
Prepare for a Butcher Block Countertop Installation
Preparing the space properly before installing a butcher block countertop is essential to ensure a smooth and successful installation process. By following a few pre-installation steps, you can save time and avoid any potential issues along the way.
Step 1: Remove Doors, Drawers, and Appliances
Prior to installation, remove all doors and drawers from the kitchen base cabinets. This will prevent any damage that may occur during the installation process. Additionally, if necessary, remove appliances such as stoves and refrigerators to provide more space and flexibility during the installation.
Step 2: Take Out the Sink and Water Lines
Next, remove the sink, garbage disposal, and water lines to allow for easy access to the countertop area. Carefully disconnect the plumbing and ensure that all connections are safely sealed off to prevent any leaks.
Step 3: Acclimate the Butcher Block Material
Proper acclimation of the butcher block material is crucial to ensure accurate sizing and prevent warping. Leave the butcher block material in the room where it will be installed for at least 72 hours before beginning the installation process. Make sure to keep the material away from damp areas and extreme heat, as these conditions can negatively affect the wood.
By following these pre-installation steps, you can ensure that your space is properly prepared for the installation of a butcher block countertop. Taking the time to remove doors, drawers, appliances, and sink, as well as acclimating the material, will contribute to a successful installation and help you achieve the beautiful and functional kitchen countertop you desire.
Make Your Butcher Block Countertop Measurements
Accurate measurements are essential for a successful butcher block countertop installation. By taking precise measurements, you can ensure a proper fit and minimize gaps and potential issues during the installation process.
Here are the steps to measure for butcher block countertops:
- Start by drawing the countertop on a sheet of paper. This will serve as a visual reference for your measurements.
- Measure the cabinet width at the front, middle, and back of the counter. This will help you account for any variations in width.
- Measure the cabinet depth along the walls and at the center points. Take these measurements both horizontally and vertically to ensure accuracy.
- Measure the cabinet height to determine the appropriate size for your butcher block countertop.
If the butcher block is replacing an existing countertop, make sure to measure the height of the existing countertop, especially if there is already a backsplash in place. This will ensure that the new countertop matches the height of the existing one.
Taking your time and double-checking your measurements will ensure that the butcher block countertop fits perfectly and looks seamless in your kitchen.
| Measurement | Description |
|---|---|
| Cabinet Width | Measure front, middle, and back of the counter |
| Cabinet Depth | Measure along the walls and at center points (horizontally and vertically) |
| Cabinet Height | Measure the height of the existing countertop if replacing |
Accurate measurements are essential for a successful butcher block countertop installation. Taking your time and double-checking your measurements will ensure that the butcher block countertop fits perfectly and looks seamless in your kitchen.
Make a Template for Your Butcher Block Countertop
Once you have taken accurate measurements for your butcher block countertop, the next step is to create a template that will ensure a precise fit for your actual kitchen countertop space. Crafting a template is essential for determining where to fit the pieces of the butcher block together, how much overhang to allow, and how to accommodate any curved back walls.
You can create a template using materials such as cardboard or thin wood like tempered hardboard. Piece together multiple sheets of paper if needed to create a continuous template that accurately represents the shape and size of your countertop.
The template serves as your guide during the installation process, ensuring that the butcher block pieces fit seamlessly and minimizing the need for adjustments. It will help you visualize the placement of the blocks and understand how they will come together to form the final countertop surface.
By referring to the template, you can determine the exact cutting sizes and angles required for the butcher block slabs, ensuring a precise fit within your kitchen space. Additionally, the template helps you determine the appropriate amount of overhang for your countertop, providing an aesthetic balance and functionality for your workspace.
Remember to account for any curved back walls or irregularities in your kitchen when creating the template. These details are important to ensure that your butcher block countertop fits snugly against the walls and complements the overall design of your kitchen.
Take your time when creating the template, as accuracy is key to achieving a successful installation. With a well-crafted template, you can confidently proceed to the next step of cutting and installing your butcher block countertop.
Cutting Your Butcher Block
When it comes time to cut your butcher block, it’s important to follow proper cutting techniques for a clean and accurate result. Here’s a step-by-step guide to help you achieve a precise fit for your countertops.
- Start by placing the butcher block with side A facing up. Lay the template on top, aligning it with the lines or patterns in the wood.
- Trace the template onto the wood with a pencil, including the seams where two pieces will meet.
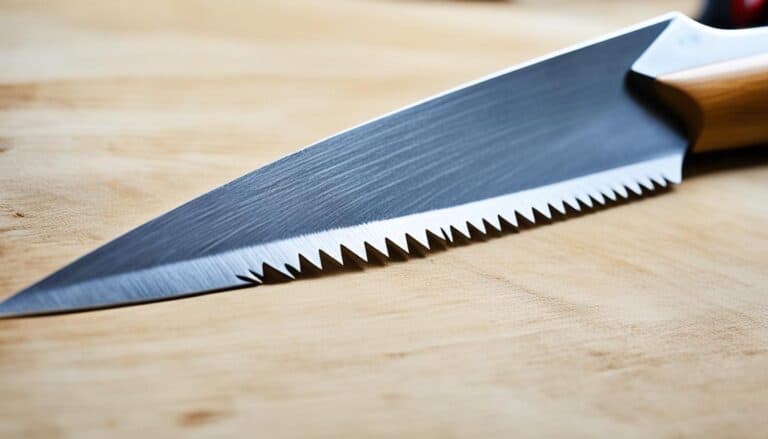
- Use a circular saw to cut one edge at a time, taking into account the distance from the saw shoe to the side of the blade to ensure accuracy between each cut.
- Slide the cut piece of butcher block into place to check the fit.
- For sink cutouts, drill starter holes and use a jigsaw to make precise cuts.
- If you need to turn a corner, it may be necessary to join two pieces of butcher block. Utilize a miter joint or a butt joint depending on the countertop configuration.
By following these cutting techniques, you can ensure a precise fit and seamless installation for your butcher block countertops.

| Tools for Cutting Butcher Block Countertops | Pros | Cons |
|---|---|---|
| Circular saw | Provides a straight and precise cut | Can be noisy and produce sawdust |
| Jigsaw | Allows for curved cuts and sink cutouts | May require more skill and practice |
| Miter saw | Creates accurate miter joints for turning corners | Requires additional tools and setup |
| Drill | Facilitates sink cutouts and pilot holes for jigsaw | Can be time-consuming for larger projects |
How to Join Butcher Block Countertops
Joining two pieces of butcher block together is a crucial step in the installation process. There are various methods for joining butcher block countertops, allowing you to choose the one that best suits your countertop configuration and personal preference.
Biscuit Joints
One common method for joining butcher block countertops is using biscuit joints. This technique involves cutting small oval-shaped slots into the wood and using biscuits as links between the two pieces. Biscuit joints provide added stability and help align the pieces accurately, resulting in a seamless and sturdy joint.
Pocket Holes
Another method for joining butcher block countertops is through the use of pocket holes. This technique involves drilling angled holes into the underside of the butcher block to secure it to another piece of wood. Pocket holes offer a strong and concealed joint that is ideal for joining corner pieces or connecting countertop sections.
Miter Bolts
Miter bolts are commonly used to connect two pieces of countertop together at an angle. This method is especially useful when turning a corner and requires a secure and sturdy joint. Miter bolts provide stability and ensure a tight connection between the countertop sections.
When joining butcher block countertops, it’s essential to properly secure the seams to achieve a seamless and sturdy result. Consider the specific countertop configuration and choose the joining method that best fits your needs. Properly joining the butcher block countertops will enhance their durability and structural integrity, ensuring a long-lasting and beautiful addition to your kitchen.
| Joining Method | Advantages |
|---|---|
| Biscuit Joints | – Provides added stability – Helps align the countertop pieces accurately – Creates a seamless joint |
| Pocket Holes | – Offers a strong and concealed joint – Ideal for joining corner pieces or connecting countertop sections |
| Miter Bolts | – Used to connect countertop sections at an angle – Provides stability and a secure joint |


Prefinish Your Butcher Block Countertop
Before installing your butcher block countertops, it’s essential to prefinish them to protect and enhance their beauty. The prefinishing process involves several steps to ensure a durable and long-lasting finish.
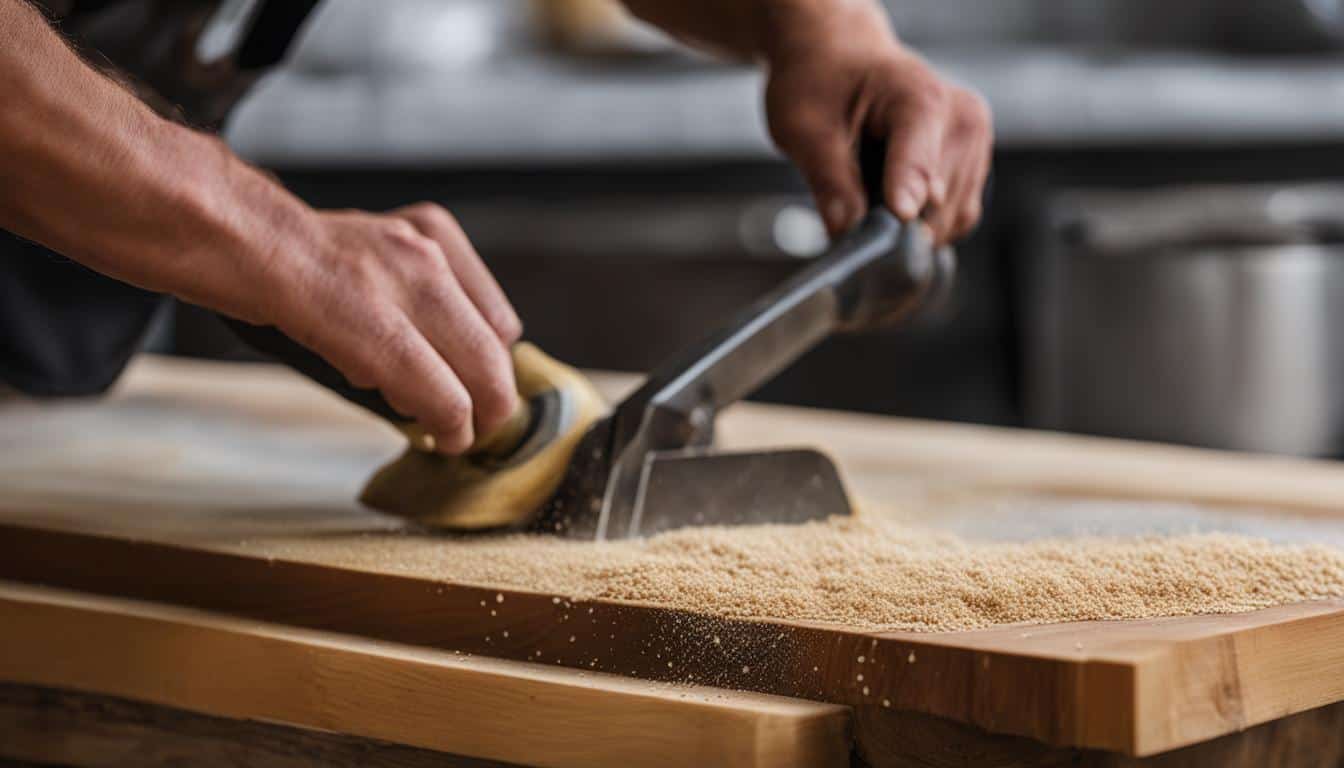
1. Sanding
Start by sanding the top surface, sides, and edges of the butcher block using fine-grade sandpaper. Work in the same direction as the wood grain to achieve a smooth and even surface. This step helps to remove any rough patches or imperfections.
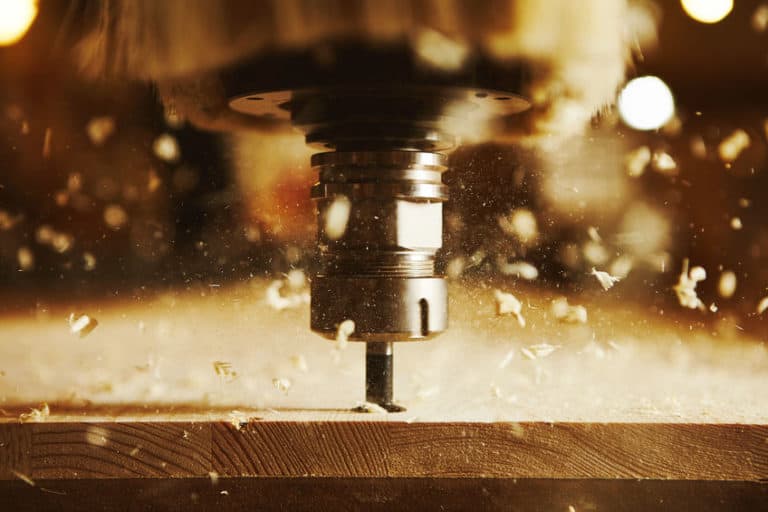
2. Beveled Edge (Optional)
If desired, you can create a slightly beveled edge using a router. This adds a decorative touch to the edges of your countertops and can complement the overall design of your kitchen.
3. Cleaning
After sanding, wipe down all sides of the butcher block with a slightly damp cloth. This will remove any dust or debris and prepare the wood for the application of the protective finish.
4. Applying the Protective Finish
There are a few options for protective finishes that you can use on your butcher block countertops. One popular choice is blended tung oil finishes, which are food-safe and provide a waterproof and durable seal. Another option is polyurethane, which is also food-safe when fully cured.
Apply the protective finish to all bare wood surfaces, including the underside of the countertops. Follow the manufacturer’s instructions for the specific product you choose, as application techniques may vary.
Allow the finish to dry completely before proceeding with the installation of your butcher block countertops.
5. Benefits of Prefinishing
Prefinishing your butcher block countertops before installation offers several advantages. It helps to protect the wood from moisture, stains, and daily wear and tear. A well-applied finish can enhance the natural beauty of the wood, bringing out its unique grains and colors. Additionally, prefinishing saves time and effort as you won’t need to apply the finish after installation, allowing you to enjoy your new countertops sooner.
6. Finishing Touches
Once your prefinished butcher block countertops are installed, ensure proper maintenance by regularly applying maintenance coats of the protective finish and keeping the surfaces clean and dry.
| Benefits of Prefinishing Your Butcher Block Countertops |
|---|
| Protects the wood from moisture, stains, and everyday use |
| Enhances the natural beauty of the wood |
| Saves time and effort by prefinishing before installation |
| Allows for easier maintenance and upkeep after installation |
By following these steps to prefinish your butcher block countertops, you can ensure their longevity, durability, and aesthetic appeal, making them a beautiful and functional addition to your kitchen.
Finish Your Butcher Block Countertops
Properly finishing your butcher block countertops is essential for long-lasting beauty and protection. There are several finishes to choose from, including tung oil, which provides a food-safe, waterproof seal. Tung oil finishes can be blended with additives to enhance durability and speed up the curing process. Pure tung oil takes longer to cure and requires more coats, but it dries to a clear, honey color. Dark tung oil provides a darker finish. Polyurethane is another option, offering a food-safe finish once fully cured.
When applying a finish to your butcher block countertops, it’s important to follow a few key steps. Firstly, sand the surface, sides, and edges of the countertops using fine-grade sandpaper, working in the same direction as the wood grain. This will create a smooth and even surface for the finish to adhere to. Next, wipe all sides of the wood with a slightly damp cloth to remove any dust or debris.
Apply the chosen finish using a brush, ensuring even coverage across the entire countertop surface. It’s recommended to apply multiple coats of the finish to ensure full protection. Allow each coat to dry according to the manufacturer’s instructions before applying the next coat. This will ensure that the finish cures properly and provides long-lasting durability.
Don’t forget to apply finish to the end grain of the countertop as well, as it absorbs more oil and requires extra protection. The end grain can be easily identified as the exposed edges of the wood.
Install the Butcher Block Countertops
Once you have prepared and measured your kitchen space for butcher block countertops, it’s time to move on to the installation process. Follow these steps to ensure a successful and secure installation:
- Apply construction adhesive along the top edge of the cabinets to create a strong bond between the countertops and the cabinets.
- Slide the pre-cut butcher block countertops into place, making sure that the front of the countertop is aligned with the cabinets.
- Secure the countertops by screwing and bolting them together. If needed, use countertop support brackets for additional stability.
- Allow the adhesive to dry according to the manufacturer’s instructions before removing any clamps or supports.
- Apply clear silicone caulk along the walls and the sink area to create a finished look and to prevent water damage.
- Reconnect the plumbing and appliances that were temporarily removed during the installation process.
By following these steps, you will ensure a secure and durable installation of your butcher block countertops. Enjoy your newly transformed kitchen space!
Expert Tip:
For added stability, consider installing countertop support brackets in areas where the countertop extends over cabinets without direct support. These brackets will prevent any sagging or potential damage to your countertops over time.
Installation Steps for Butcher Block Countertops
| Step | Instructions |
|---|---|
| 1 | Apply construction adhesive along the top edge of the cabinets. |
| 2 | Slide the countertops into place, aligning the front with the cabinets. |
| 3 | Screw and bolt the countertops together. |
| 4 | Allow the adhesive to dry and remove clamps or supports. |
| 5 | Apply clear silicone caulk along walls and sink area. |
| 6 | Reconnect plumbing and appliances. |
Installing butcher block countertops is a gratifying process that will enhance the look and functionality of your kitchen. Once completed, your countertops are ready to be used and enjoyed for years to come.
Butcher Block Countertop Maintenance
Proper maintenance is crucial to keep your butcher block countertops looking and functioning their best. Follow these care tips for maintaining the beauty and longevity of your countertops:
- Reapply butcher block oils: Every few months, reapply butcher block oils such as tung oil or mineral oil to keep the wood moisturized and prevent dry spots. Apply the oil evenly and wipe off any excess.
- Regular cleaning: Clean your butcher block countertops regularly with a mild soap and water solution. Use a soft cloth or sponge to gently scrub the surface, removing any dirt or stains. Avoid using harsh or abrasive cleaners that can damage the finish.
- Dry thoroughly: After cleaning, make sure to wipe the countertops dry to prevent water absorption. Excessive moisture can cause the wood to swell and lead to damage over time.
- Protect from heat, spills, and stains: To prevent damage to your butcher block countertops, always use cutting boards, trivets, and hot pads when placing hot pots and pans, cutting, or preparing food. Wipe up spills immediately to prevent staining.
By following these care tips and regularly maintaining your butcher block countertops, you can ensure their beauty and functionality for years to come.
| Maintenance Tips | Benefits |
|---|---|
| Reapply butcher block oils | Preserves the wood’s moisture and sheen |
| Regular cleaning | Keeps the countertops hygienic and free from dirt and stains |
| Dry thoroughly | Prevents water absorption and swelling |
| Protect from heat, spills, and stains | Prevents damage and maintains the appearance of the countertops |
Quote:
“Proper maintenance and care are essential for preserving the beauty and longevity of butcher block countertops.”
Is It More Affordable to Buy or Make Butcher Block Countertops?
When it comes to choosing butcher block countertops for your kitchen, you have two options: buying pre-made countertops or making them yourself. Both choices have their advantages and can be affordable in their own way. Let’s take a closer look at the cost comparison of buying vs making butcher block countertops to help you make an informed decision.
Buying Pre-Made Butcher Block Countertops
If you prefer a convenient solution and don’t have the time or tools for a DIY project, purchasing pre-made butcher block countertops can be a great option. The cost of pre-made countertops will vary depending on factors such as wood species, size, and finish. However, compared to other countertop materials like granite or quartz, butcher block countertops are generally more affordable.
When purchasing pre-made countertops, you’ll also save on labor costs. You won’t have to spend time cutting, shaping, and finishing the butcher block slabs yourself, as this work is done by the manufacturer. This can be a significant time and energy saver, especially if you’re not experienced with woodworking.
Making Your Own Butcher Block Countertops
On the other hand, if you enjoy DIY projects and have the necessary tools and skills, making your own butcher block countertops can save you even more money. By sourcing the wood yourself and customizing the size, wood species, and finish, you have greater control over the cost and final result.
However, it’s important to consider the labor involved in making butcher block countertops. Cutting, shaping, and finishing the slabs requires time, patience, and woodworking expertise. If you’re a beginner, there may be a learning curve and a potential for mistakes, which can add to the overall cost if you need to redo any steps.
Ultimately, the decision of whether to buy or make butcher block countertops depends on your budget, time availability, and DIY skills. Assess your resources and preferences to determine which option is best for you. Regardless of your choice, butcher block countertops can add charm and functionality to your kitchen, creating a warm and inviting space for all your culinary adventures.

What Kind of Wood Do You Use to Make a Butcher Block?
When it comes to making a butcher block countertop, choosing the right wood species is crucial for achieving your desired aesthetic, durability, and food safety. Certain woods contain natural toxins that can contaminate food, so it’s best to avoid exotic woods and instead opt for trees with edible nuts, leaves, fruit, or sap, as they are typically considered food safe.
Harder woods like maple and beech are popular choices for butcher block countertops due to their resistance to denting and their ability to withstand the rigors of food preparation tasks. These woods provide a sturdy and reliable surface that can handle heavy chopping and cutting without compromising durability.
Porosity is another factor to consider when selecting wood species for butcher block countertops. Close-grain woods like beech, maple, and birch are preferable over open-grain woods like ash, as they are less likely to absorb water and stains. The close-grain structure helps to prevent moisture penetration and makes cleaning and maintenance easier.
It’s worth noting that certain woods, such as pine, can leave a resinous taste on food, so it’s best to avoid them for countertop use. Choose woods that are known for their neutral flavors to ensure that your food remains unaffected by any residual tastes.
| Wood Species | Aesthetic | Durability | Food Safety |
|---|---|---|---|
| Maple | Light to medium tone with subtle grain patterns | Highly durable, resistant to dents and scratches | Considered food safe |
| Beech | Light to medium tone with a straight and consistent grain | Durable and dent-resistant | Considered food safe |
| Cherry | Rich reddish-brown color that darkens with age | Softer wood that can be prone to dents and scratches | Considered food safe |
| Walnut | Dark brown to black with a striking grain pattern | Durable and resistant to dents and scratches | Considered food safe |
In the end, choosing the right wood species for your butcher block countertop depends on your personal preferences, budget, and the specific requirements of your kitchen. By considering the aesthetic, durability, and food safety aspects of different wood species, you can make an informed decision that will result in a beautiful and functional addition to your kitchen.
Butcher Block Countertop Pros and Cons
Butcher block countertops offer several advantages and have a few considerations to keep in mind. Here are the pros and cons of choosing butcher block for your kitchen:
Advantages of Butcher Block Countertops
- Natural warmth and appeal: Wood brings a warm and inviting atmosphere to the kitchen, creating a cozy and timeless aesthetic.
- Affordability: Compared to other countertop materials like granite or quartz, butcher block is more budget-friendly, making it an attractive option for cost-conscious homeowners.
- Wood species variety: Butcher block allows you to choose from a wide range of wood species, each with its own unique graining, coloring, and visual appeal.
- Customization options: Butcher block countertops can be customized to fit different kitchen styles and sizes, providing flexibility in design and layout.
- Ease of cleaning: With regular maintenance, butcher block is relatively easy to clean using mild soap and water, keeping your countertops in top shape.
Disadvantages of Butcher Block Countertops
- Porous material: Wood is naturally porous, which means it requires periodic sealing to prevent water absorption, staining, and the growth of mold and bacteria.
- Sensitivity to temperature changes: Wood can expand or contract with fluctuations in temperature and humidity, so it’s important to ensure proper installation and maintenance.
- Susceptibility to heat damage: Butcher block is vulnerable to heat damage from hot pots, pans, and other kitchen utensils. Using trivets and hot pads can help protect the surface.
While there are a few considerations with butcher block countertops, proper care and maintenance can help mitigate these potential issues, ensuring the durability and beauty of your countertops for years to come.
Conclusion
Installing butcher block countertops offers a cost-effective and visually appealing way to enhance your kitchen’s charm and functionality. By following the step-by-step guide provided in this article, you can achieve a seamless and sturdy installation. Proper preparation, accurate measurements, and careful cutting techniques, combined with appropriate joining methods, ensure a precise fit and a professional finish.
Prefinishing and finishing your butcher block countertops is crucial for protecting the wood and extending its lifespan. Regular maintenance, such as reapplying butcher block oils and cleaning with a mild soap solution, will keep your countertops looking their best for years to come. Remember to use cutting boards, trivets, and hot pads to protect the wood from heat and stains.
Whether you decide to make your own butcher block countertops or purchase pre-made ones, it ultimately comes down to your DIY skills, budget, and personal preference. Making your own countertops allows for customization, while purchasing pre-made ones offers convenience. By considering the pros and cons, you can make an informed decision that suits your needs.
With the timeless beauty of butcher block countertops and proper care, your kitchen will not only be functional but also a welcoming space that exudes warmth and character.
FAQ
What are butcher block countertops made of?
Butcher block countertops are crafted from straight pieces of wood glued together into thick slabs.
What are the different wood options available for butcher block countertops?
Some common wood options for butcher block countertops include birch, hevea, teak, acacia, maple, walnut, and cherry.
How thick are butcher block countertops?
Butcher block countertops usually come in a 25-inch depth, which includes a standard 24-inch-deep cabinet with room for an overhang.
What are the two sides of a butcher block countertop?
Butcher block has side A, which is the countertop side, and side B, which shows more knots.
Why are butcher block countertops a popular choice?
Butcher block countertops offer a natural warmth and appeal, affordability, and customization options.
How should I prepare for a butcher block countertop installation?
Remove doors, drawers, and appliances from the kitchen base cabinets and acclimate the butcher block material for at least 72 hours in the room where it will be installed.
How do I measure for butcher block countertops?
Take accurate measurements of the cabinet width, depth, and height, as well as any existing backsplash.
How do I make a template for my butcher block countertop?
Use cardboard or thin wood to create a template that fits the actual kitchen countertop space.
What are the cutting techniques for butcher block countertops?
Place the butcher block with side A facing up, trace the template onto the wood, and use a circular saw and jigsaw for precise cuts and sink cutouts.
How do I join two pieces of butcher block together?
Various methods can be used, such as biscuit joints, pocket holes, or miter bolts.
How do I prefinish my butcher block countertops?
Sand the surfaces, wipe clean, and apply a protective finish, such as blended tung oil or polyurethane.
What is the installation process for butcher block countertops?
Apply adhesive to the top edge of the cabinets, slide the countertops into place, secure them with screws or bolts, and apply clear silicone caulk along the walls and sink area.
How do I maintain butcher block countertops?
Reapply butcher block oils every few months, clean with mild soap and water, and protect the wood from heat, spills, and stains.
Is it more affordable to buy or make butcher block countertops?
Both options have affordability factors, but making your own can potentially save you more money if you already have the necessary tools.
What kind of wood should I use to make a butcher block?
Choose wood species from trees with edible nuts, leaves, fruit, or sap, such as maple or beech, for food safety.
What are the pros and cons of butcher block countertops?
Pros include natural warmth, affordability, and customization options, while cons include the need for periodic sealing and susceptibility to heat damage.
What is the bottom line on installing butcher block countertops?
Installing butcher block countertops can enhance the charm and functionality of your kitchen when done correctly and with proper care and maintenance.