Are you tired of your entryway being cluttered and disorganized? Do you struggle to find a place for coats, bags, and shoes? It’s time to consider building a DIY hall tree. Not only will it add a stylish touch to your entryway, but it will also provide much-needed storage and organization. No matter your skill level or design preference, there’s a DIY hall tree project that’s perfect for you.
From rustic farmhouse-style hall trees to modern hall trees with shoe storage, our comprehensive guide covers it all. We’ll walk you through the process, providing step-by-step instructions, helpful tips, and inspiring ideas to get your creative juices flowing. So, are you ready to transform your entryway and create a functional and stylish space? Let’s dive in!
Key Takeaways:
- Building a DIY hall tree can enhance the functionality and organization of your entryway.
- There are various DIY hall tree plans and ideas available to suit your style and space.
- DIY hall trees can be customized to include storage benches, shoe storage, chalkboards, and more.
- With step-by-step instructions and detailed plans, you can confidently tackle your own DIY hall tree project.
- Start building your DIY hall tree today to create a welcoming and organized entryway.
Easy DIY Hall Tree Ideas and Plans
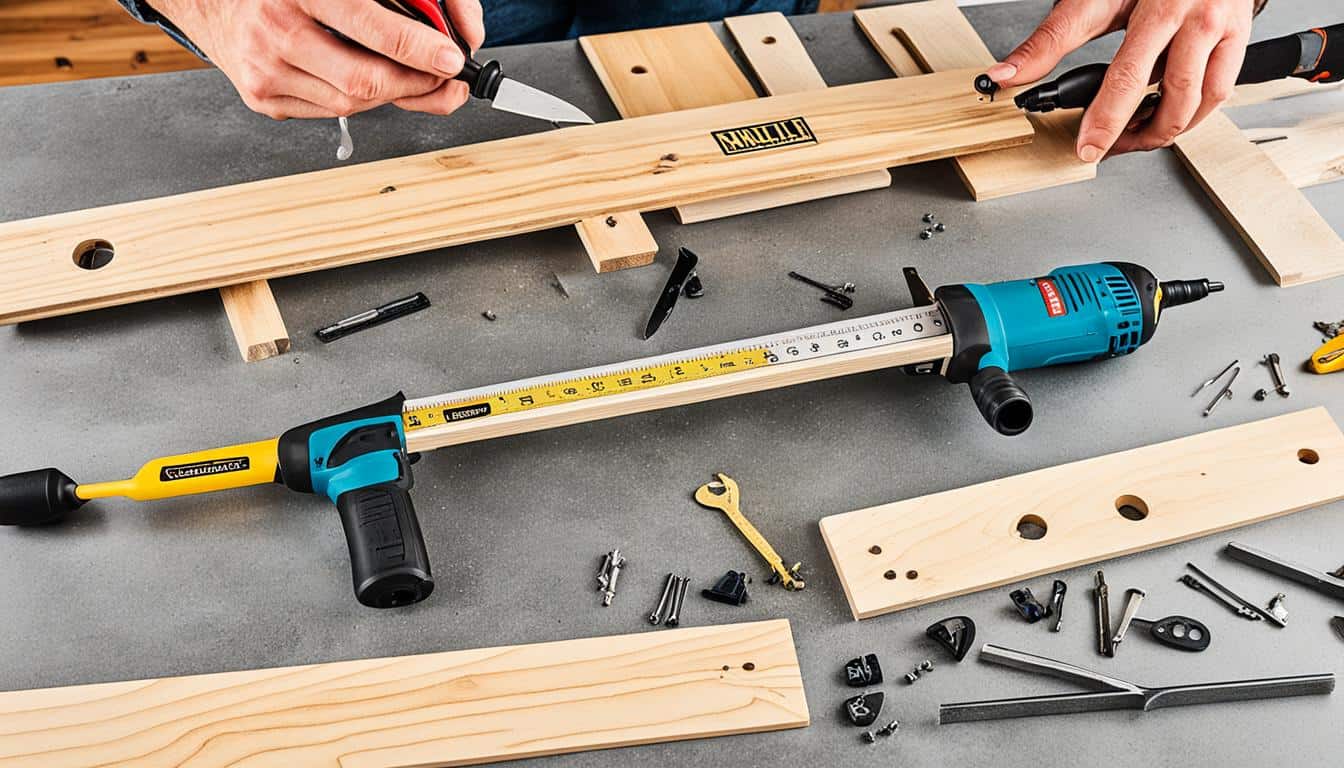
Looking to add a stylish and functional touch to your entryway? Our collection of 25 easy DIY hall tree ideas and plans is here to inspire you. Whether you want extra storage space, a chalkboard for notes, or a place to store your shoes, we’ve got you covered. These hall tree projects are perfect for beginners and experienced DIY enthusiasts alike.
With our detailed instructions and free PDF downloads, you can confidently embark on your DIY hall tree journey. Choose from various designs and features to find the perfect fit for your space and style. Let’s take a look at some of the exciting options:
Storage Benches
Add functionality to your hall tree with built-in storage benches. These benches not only provide a cozy spot to sit but also offer ample space to store shoes, bags, and other essentials. Stay organized while enhancing the aesthetics of your entryway.
Chalkboards
Want to leave messages or reminders for your family? Incorporate a chalkboard into your hall tree design. This versatile feature allows you to add a personal touch to your entryway while keeping everyone informed and organized.
Drawers
Optimize your storage options with hall trees featuring drawers. From gloves and hats to scarves and keys, keep everything neatly tucked away. Say goodbye to clutter and hello to an organized entryway.
Shoe Storage
Avoid tripping over shoes scattered around your entryway by incorporating dedicated shoe storage in your hall tree. These compartments and racks ensure that shoes are easily accessible while maintaining a tidy and clutter-free space.
No matter which feature you choose, these easy DIY hall tree projects will enhance the functionality and style of your entryway. Get ready to impress your guests with a personalized creation that perfectly suits your needs.
So, grab your tools and let your creativity shine. Discover the joy of building your own hall tree and transform your entryway into a welcoming and organized space.
| Hall Tree Feature | Description |
|---|---|
| Storage Benches | Add functionality and extra storage space to your entryway with hall trees featuring built-in storage benches. |
| Chalkboards | Incorporate a chalkboard into your hall tree to leave messages or reminders for your family. |
| Drawers | Optimize your storage options with hall trees featuring convenient drawers for small items. |
| Shoe Storage | Keep your entryway tidy by incorporating dedicated shoe storage compartments and racks into your hall tree design. |
“Transform your entryway into a welcoming and organized space with these easy DIY hall tree ideas and plans.”
Stay tuned for the rest of our DIY hall tree project guide, where we’ll explore various designs and styles to help you create the perfect entryway masterpiece.
DIY Farmhouse-Style Hall Tree
Embrace the opportunity to enhance your home with a personalized DIY farmhouse-style hall tree. These versatile pieces, simple to construct, can find a place in almost any area of your home. With basic materials like 2x4s and pocket hole screws, you’ll achieve a sturdy hall tree that will stand the test of time. Add finishing touches like staining and whitewashing to achieve a rustic, beachy feel.
When it comes to creating a farmhouse-style hall tree, simplicity is key. You’ll want to use traditional farmhouse elements such as natural wood, distressed finishes, and rustic accents to achieve that rustic charm. Start by gathering your materials, including:
- 2×4 lumber
- Pocket hole screws
- Sanding materials
- Wood stain and/or whitewash
- Coat hooks
- Bench cushion or upholstery fabric
Once you have your materials ready, follow these steps to construct your farmhouse-style hall tree:
- Measure and cut the 2×4 lumber to create the frame of the hall tree. Use pocket hole screws to secure the pieces together.
- Sand the frame to smooth out any rough edges or imperfections.
- Apply wood stain or whitewash to achieve the desired finish. Allow it to dry completely.
- Attach the coat hooks to the frame, evenly spaced, to create the hanging area.
- If desired, add a bench cushion or upholster the seat area with fabric for added comfort.
Once your DIY farmhouse-style hall tree is complete, place it in your desired location, whether it’s your entryway, mudroom, or hallway. The rustic charm of the hall tree will add a touch of warmth and character to your space, while also providing a practical storage solution for coats, bags, and accessories.
Remember, the beauty of DIY projects is that you can customize them to fit your taste and style. Feel free to experiment with different finishes, colors, and accessories to create a farmhouse-style hall tree that perfectly complements your home.
DIY Hall Tree Storage Bench
Transform your entryway with clever DIY hall tree ideas featuring storage benches. These functional pieces not only enhance the style of your home but also provide efficient organization for a chic first impression. Crafted with basic materials like plywood and screws, DIY hall tree storage benches offer ample space to keep your bags, keys, and shoes in order while efficiently managing your space.
Benefits of DIY Hall Tree Storage Benches
Adding a DIY hall tree storage bench to your entryway offers several benefits:
- Efficient organization: Keep your entryway clutter-free by providing designated storage for everyday essentials like bags, keys, and shoes.
- Maximize space: The combination of a storage bench with a hall tree allows you to efficiently utilize your entryway, making it both functional and visually appealing.
- Personalization: Customize the design and finish of your DIY hall tree storage bench to match your home’s décor and create a unique piece that reflects your personal style.
Are you ready to create a stylish and organized entryway? Check out the simple step-by-step guide below to build your own DIY hall tree storage bench.
DIY Hall Tree Storage Bench: Materials and Tools
Before you start your DIY project, gather the following materials and tools:
| Materials | Tools |
|---|---|
|
|
DIY Hall Tree Storage Bench: Step-by-Step Guide
- Measure and cut the plywood to create the backboard, sides, and storage bench components.
- Assemble the storage bench by attaching the sides to the backboard using screws and wood glue.
- Add a hinged top to the storage bench to create easy access to the storage compartment.
- Attach coat hooks to the backboard at a convenient height for hanging coats and bags.
- Sand the entire hall tree storage bench to create a smooth surface.
- Apply paint or stain to achieve your desired finish.
- Allow the paint or stain to dry completely before placing the hall tree storage bench in your entryway.
By following these simple steps, you can create a stylish and functional DIY hall tree storage bench for your entryway. Get creative and choose colors and finishes that complement your home’s décor and make a statement.
DIY Hall Tree Bench with Shoe Storage
Looking to add functionality and style to your mudroom, entryway, or hallway? Build your own DIY hall tree bench with shoe storage and create a practical addition that serves multiple purposes. This project not only provides a convenient spot to rest and remove shoes but also offers a space to hang coats and store other essentials.
Customize the size and style of your DIY hall tree bench to match your home decor, whether you prefer a farmhouse, modern, or traditional aesthetic. With a few key tools and materials like pocket holes, screws, and brad nails, this intermediate-level project is perfect for those with some basic DIY skills.
Here’s a quick rundown of the process:
- Start by gathering all the necessary materials and tools.
- Measure and cut the wood according to your desired dimensions.
- Assemble the bench seat and shoe storage compartments using pocket holes and screws.
- Add hooks or a rod for coat hanging.
- Apply a finish or paint to match your desired look.
Remember, safety should be a priority throughout the project. Wear appropriate protective gear and follow the manufacturer’s instructions for any tools or materials used.
Get inspired by this visual representation of a DIY hall tree bench with shoe storage:

| Materials | Tools |
|---|---|
|
|
With your DIY hall tree bench complete, you’ll have a functional and stylish piece that helps keep your entryway organized and clutter-free. Enjoy the convenience of having a dedicated space for coats, shoes, and other items, all while adding a touch of your personal style to your home.
DIY Rustic Hall Tree with Chalkboard
Add a touch of rustic charm to your entryway with a DIY hall tree featuring a built-in chalkboard. This project combines organization with fun and practicality, providing a spot for bags, keys, and shoes while offering a space for leaving notes or reminders. Follow the step-by-step instructions below to transform your entryway into a functional and stylish space.
Gather the Materials
- 2×4 lumber
- Pocket hole screws
- Chalkboard
- Bench seat
- Shelf supports
- Drill
- Saw
- Sandpaper
- Wood glue
- Paint or stain (optional)
Construct the Frame
- Measure and cut the 2×4 lumber to create the frame for the hall tree. The dimensions will depend on the size of your entryway and personal preferences.
- Use pocket hole screws to join the pieces together, creating a sturdy frame.
- Sand the frame to ensure a smooth finish and remove any rough edges.
- If desired, apply paint or stain to achieve the rustic look.
Add the Bench Seat
- Create a seat by attaching a bench to the frame. Make sure it is securely fastened with screws or bolts.
- Sand the bench seat to ensure a comfortable and smooth surface.
- If desired, add a cushion to enhance comfort and style.
Install Shelf Supports and Chalkboard
- Attach shelf supports to the frame, creating a space to store bags, keys, or décor items.
- Secure the chalkboard to the back of the hall tree, providing a convenient spot for writing notes, reminders, or greetings.
Once complete, your DIY rustic hall tree with a built-in chalkboard is ready to be placed in your entryway. Enjoy the functional organization it offers, while adding a rustic touch to your home decor.
DIY Hall Tree Inspired by Pottery Barn
Experience the Pottery Barn charm in your home with a DIY hall tree project. Constructed from 2x4s and essential tools, this hall tree offers a stylish and functional storage solution for coats, backpacks, and shoes. Tailor the dimensions to fit your space and enjoy the benefits of a clutter-free and organized entryway.
When creating a DIY hall tree inspired by Pottery Barn, you can achieve the same elegant and timeless look at a fraction of the cost. By using 2x4s and following the provided hall tree plans, you can build a high-quality piece of furniture that perfectly suits your entryway.
Emulate the Pottery Barn aesthetic by paying attention to the details. Consider adding hooks, shelves, and a bench for maximum functionality. Choose a finish that complements your home decor, whether it’s a classic white paint or a warm, rustic stain.
With a Pottery Barn inspired hall tree, you can create a welcoming entryway that exudes style and sophistication. This DIY project allows you to customize the design and dimensions to fit your specific space, ensuring a seamless integration into your existing decor.
Take pride in your craftsmanship and enjoy the satisfaction of creating a beautiful and functional hall tree that rivals the look of a Pottery Barn original. With the right tools, materials, and attention to detail, you can transform your entryway into a stylish and organized space.
Whether you’re a beginner or an experienced DIY enthusiast, building a Pottery Barn inspired hall tree is a rewarding project that will enhance the aesthetic appeal and functionality of your home. Start planning and gather the necessary materials to embark on this DIY adventure.
DIY Hall Tree Bench with Mirror
Revamp your entryway with a DIY hall tree bench featuring a stylish mirror. This elegant addition offers great organizational value for compact spaces, with a bench for sitting and storage, a mirror for final checks before stepping out, and coat hooks for hanging essentials. Follow the detailed guide to build the bench, attach the mirror, and create a sophisticated hall tree bench.
Materials:
- Wood planks
- Screws
- Wood glue
- Mirror
- Coat hooks
- Paint or stain
Instructions:
- Measure and cut the wood planks to the desired dimensions for the bench and frame.
- Assemble the bench by attaching the planks together using screws and wood glue.
- Attach the frame to the bench using screws to create the structure of the hall tree.
- Secure the mirror to the back of the frame using mirror adhesive or clips.
- Install coat hooks on the frame at the desired height.
- Apply a coat of paint or stain to the entire hall tree bench for a finished look.
Enjoy the functionality and style of your newly built DIY hall tree bench with mirror. This versatile piece of furniture will not only provide storage and organization but also serve as a stylish focal point in your entryway.


DIY Leaning Hall Tree
Enhance your home’s organization with a DIY leaning hall tree. This intermediate-level project offers a practical and stylish solution for storing backpacks, coats, keys, and accessories.
Utilizing simple supplies like 2×4 planks and hooks, you can build a sturdy and lightweight hall tree that fits your space and meets your organizational needs.
Follow the free plan and step-by-step tutorial video to create an efficient entryway storage system.

Why Choose a Leaning Hall Tree?
A leaning hall tree is a versatile option for entryway organization. Its unique design leans against the wall, making it suitable for smaller spaces or areas where you cannot install permanent fixtures. It provides storage and organization for your belongings while adding a touch of style to your entryway.
Materials You’ll Need
To build a DIY leaning hall tree, gather the following materials:
- 2×4 planks
- Hooks
- Screws
- Drill
- Measuring tape
- Saw
- Sandpaper
- Paint or stain (optional)
Step-by-Step Instructions
- Measure the space where you plan to place the leaning hall tree.
- Cut the 2×4 planks to the desired height and width.
- Sand the cut edges to ensure a smooth finish.
- Position the planks against the wall, leaning at a slight angle.
- Secure the planks to the wall using screws.
- Attach hooks at appropriate intervals for hanging coats, bags, and accessories.
- Add additional shelves or storage options if desired.
- Paint or stain the hall tree to match your decor.
Benefits of a DIY Leaning Hall Tree
“A DIY leaning hall tree is not only a functional storage solution but also a stylish addition to your entryway.”
1. Space-saving: The leaning design allows you to maximize space, making it ideal for small entryways or narrow hallways.
2. Easy installation: Unlike traditional hall trees that require wall mounting or floor installation, a leaning hall tree can be set up quickly and effortlessly.
3. Versatile: Customize your leaning hall tree with additional hooks, shelves, or even a mirror to fit your specific organizational needs.
4. Budget-friendly: Building your own leaning hall tree allows you to save money compared to purchasing a pre-made one, while still achieving a high-quality and personalized result.
Start your DIY leaning hall tree project today to transform your entryway into a functional and organized space.
DIY Wooden Hall Tree for Mudrooms
Transform your mudroom into a functional and stylish space with a DIY wooden hall tree. This project is designed to meet the needs of compact spaces, offering clever storage solutions while adding rustic charm to your mudroom. By following the comprehensive tutorial below, you can create a customized hall tree that perfectly complements your entryway.
Essential Features
- Spacious bench drawer for storing shoes
- Coat hooks for convenient hanging
- Overhead cabinet for discreetly hiding clutter
Utilizing basic woodworking skills and materials, you’ll quickly bring this functional and aesthetically pleasing hall tree to life.
Materials
| Wood | Metal coat hooks | Screws | Drawer slides | Hinges |
|---|---|---|---|---|
| 1″ x 8″ pine boards | 5 | Various sizes | 1 pair | 2 |
| ¾” plywood |
Step-by-Step Tutorial
- Begin by cutting the pine boards and plywood to the desired dimensions.
- Construct the bench and attach the drawer slides for the spacious shoe storage drawer.
- Assemble the frame for the hall tree, including the bench, coat hooks, and overhead cabinet. Secure all components with screws.
- Attach the hinges to the cabinet door for easy access.
- Finish the hall tree by sanding and staining or painting it to match your mudroom’s aesthetic.
Add this DIY wooden hall tree to your mudroom to create a welcoming and organized space. It not only provides convenient storage options but also adds rustic appeal to your home’s entryway. Take pride in building this functional and charming hall tree yourself.
DIY Entryway Command Center
Create a custom DIY entryway command center to keep your family organized. Design a system to manage daily, weekly, and monthly items like mail, calendars, messages, keys, and coats. Incorporate elements like a mail sorter, calendar, message center, key holder, and coat rack to create a functional and tidy space that meets your family’s organizational needs.
Key Components of a DIY Entryway Command Center
When designing your DIY entryway command center, consider including the following components:
- Mail Sorter: Keep your mail organized with a designated area for incoming and outgoing mail. Use labeled slots or folders to separate different types of mail.
- Calendar: Display a monthly calendar to keep track of important dates, appointments, and events. Use a whiteboard or chalkboard for added versatility.
- Message Center: Create a space for leaving notes and reminders for family members. This can be a small whiteboard, corkboard, or even a magnetic surface.
- Key Holder: Prevent misplaced keys by installing a key holder near the entryway. Choose a design that suits your style and has enough hooks for everyone’s keys.
- Coat Rack: Keep coats, jackets, and bags organized with a coat rack or hooks. Make sure there are enough hooks for each family member’s belongings.
By incorporating these key components into your DIY entryway command center, you’ll create a functional and organized space that helps streamline your family’s daily routines.
“A DIY entryway command center provides a centralized location for managing important items and messages, reducing clutter and ensuring everyone in the family stays organized.”
Here’s an example of how a DIY entryway command center could be set up:
| Component | Description |
|---|---|
| Mail Sorter | A wall-mounted wooden organizer with labeled slots for incoming and outgoing mail. |
| Calendar | A framed monthly calendar with enough space to write down important dates and appointments. |
| Message Center | A small whiteboard or corkboard with pins or magnets to leave notes and reminders. |
| Key Holder | A decorative key holder with multiple hooks for holding keys for each family member. |
| Coat Rack | A wall-mounted coat rack with several hooks for hanging coats, jackets, and bags. |
With a well-designed DIY entryway command center, you’ll be able to efficiently manage your family’s daily necessities while keeping your entryway neat and organized.
Simple DIY Organizational Wall System
Transform your home into a clutter-free oasis with a simple DIY organizational wall system. By combining various elements such as mail sorters, file folder holders, bulletin boards, and chalkboards, you can create a personalized command center that not only keeps your space tidy but also reflects your unique style and meets your specific needs.
“A clutter-free space is a peaceful space.”
With this DIY project, you have the freedom to customize your organizational wall system using materials you already have and adding additional items to make it truly one-of-a-kind. Whether you want to create a designated spot for important documents, display cherished photographs and artwork, or jot down daily reminders and to-do lists, this organizational wall system caters to your organizational and decorative desires.
Elements to Consider
When designing your DIY organizational wall system, consider incorporating the following elements:
- Mail Sorters: Keep your incoming and outgoing mail in order with designated slots for each category.
- File Folder Holders: Store important documents, bills, or paperwork neatly and within easy reach.
- Bulletin Boards: Pin up notes, reminders, invitations, and inspirational quotes to keep your schedule and goals on track.
- Chalkboards: Write down daily to-do lists or leave messages for your family members in a charming and nostalgic way.
Taking advantage of these elements will help you create an efficient and functional organizational wall system that enhances your productivity and reduces unnecessary stress.
Your Personalized Command Center
By designing and implementing your own organizational wall system, you can turn any blank wall into a centralized hub of organization. Consider your needs and style preferences to determine the best placement and arrangement of each element. This DIY project empowers you to create a space that seamlessly integrates with your existing décor while promoting order and efficiency.
| Element | Function |
|---|---|
| Mail Sorters | Organize incoming and outgoing mail |
| File Folder Holders | Store important documents and paperwork |
| Bulletin Boards | Display notes, reminders, and inspirational quotes |
| Chalkboards | Write down to-do lists or leave messages |
With a personalized command center, you can easily manage your daily tasks, effectively communicate with your household, and maintain a clutter-free environment. Say goodbye to misplaced documents, forgotten appointments, and chaotic spaces.
Bring harmony and organization to your home with a simple DIY organizational wall system. Embrace the opportunity to create a personalized command center that reflects your unique style and caters to your specific needs. Start your DIY project today and experience the joy of a clutter-free and harmonious living space.
Conclusion
Building a DIY hall tree project is a fantastic way to enhance the functionality of your home’s entryway while adding a personalized touch and organizational value. By exploring the various DIY hall tree ideas and plans, you have the opportunity to find the perfect project that suits your space and style.
With the detailed instructions provided and the flexibility to customize the design, you can create a hall tree that not only meets your needs but also reflects your unique taste. Whether you’re looking for a farmhouse-style hall tree, a storage bench solution, or a hall tree with shoe storage, there are numerous options available for you to choose from.
Start your DIY hall tree project today and transform your entryway into a functional and stylish space. With careful planning and the right materials, you’ll be able to enjoy the benefits of an organized entryway, where you can easily store coats, bags, shoes, and other essentials. Embrace the creativity and satisfaction that comes with crafting a hall tree that is tailored to your home, and enjoy the convenience it brings to your everyday life.
FAQ
What is a DIY hall tree?
A DIY hall tree is a piece of furniture consisting of a bench or seat, hooks, and often additional storage, designed to be placed in an entryway or hallway for organizing coats, shoes, and other items.
Why should I build a hall tree myself?
Building a hall tree yourself allows you to customize the design to match your home’s décor and personalize it to your specific needs. It can also be a cost-effective option compared to purchasing a ready-made hall tree.
Are there different types of DIY hall trees?
Yes, there are various types of DIY hall trees, including those with storage benches, chalkboards, drawers, and shoe storage. You can choose the design and features that best suit your organizational needs.
Do I need advanced woodworking skills to build a DIY hall tree?
The level of woodworking skills required can vary depending on the design you choose. Some hall tree plans are suitable for beginners, while others may require intermediate or advanced skills. Choose a plan that matches your skill level.
What materials are typically used to build a DIY hall tree?
Most DIY hall trees are constructed using basic materials like wood, such as 2x4s and plywood, screws, and nails. The specific materials needed will depend on the design and features of the hall tree you choose to build.
Where can I find DIY hall tree plans?
DIY hall tree plans can be found online on websites that specialize in woodworking projects, home improvement blogs, and even video tutorials on platforms like YouTube. Some plans may be available for free, while others may require a purchase.
How long does it typically take to build a DIY hall tree?
The time required to build a DIY hall tree will vary depending on the complexity of the design and your experience level. It can range from a few hours to a few days. Make sure to set aside enough time to complete the project.
Can I customize the size and style of a DIY hall tree?
Yes, one of the benefits of building a DIY hall tree is the ability to customize the size and style to match your specific needs and preferences. You can adjust the dimensions and choose finishes that complement your home’s décor.
Is building a DIY hall tree cost-effective?
Building a DIY hall tree can often be more cost-effective than purchasing a ready-made one. However, the overall cost will depend on the materials you choose and any additional features or hardware you decide to incorporate into the design.
How durable are DIY hall trees?
The durability of a DIY hall tree will depend on the quality of the materials used and the construction techniques implemented. By using sturdy materials and following the plans carefully, you can create a hall tree that is durable and able to withstand regular use.
Can I use a DIY hall tree in a small entryway?
Yes, there are DIY hall tree plans designed specifically for smaller spaces. These plans typically offer compact designs and efficient storage solutions to make the most of limited space in entryways and hallways.