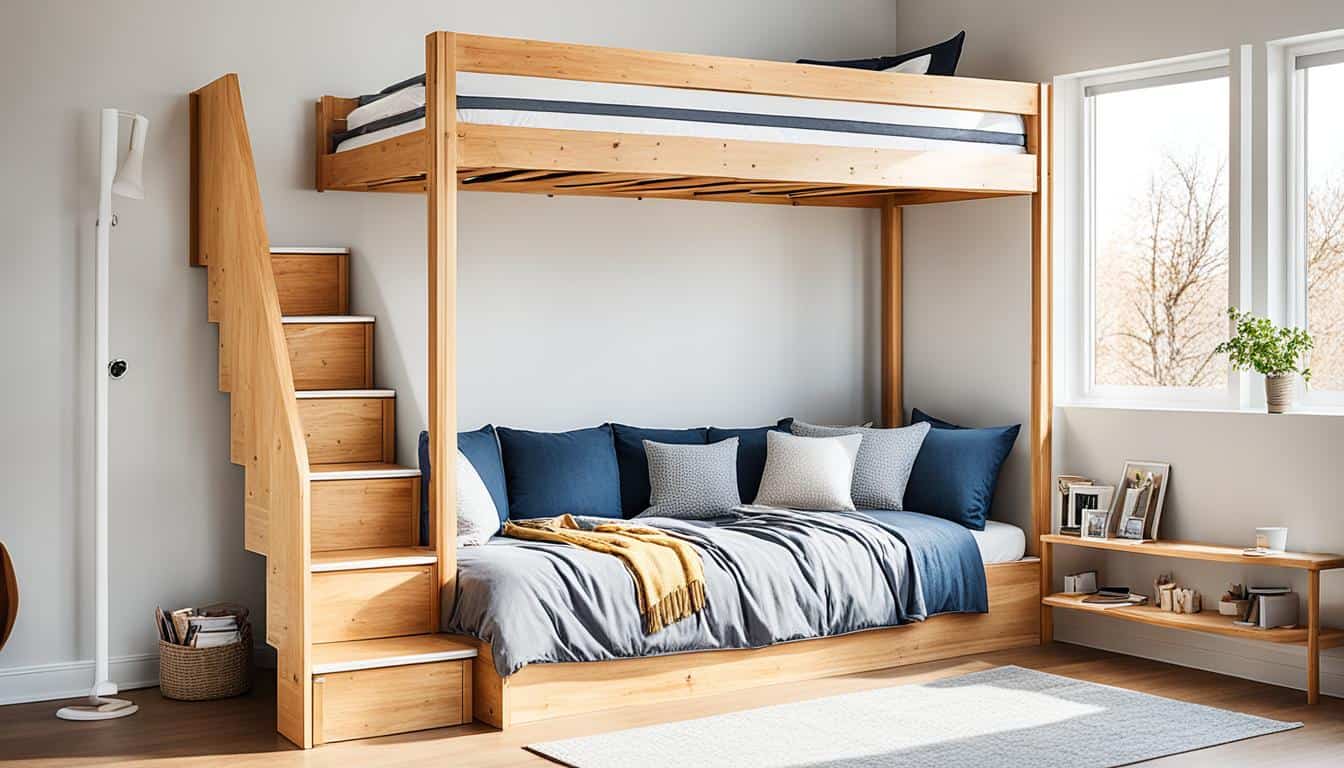
Are you looking to maximize space and add functionality to your home? Have you considered building your own loft bed with stairs? It’s a project that can transform any room into a multi-purpose space while providing a cozy sleeping area. With our comprehensive guide, you’ll learn how to construct a DIY loft bed with stairs from start to finish. Get ready to elevate your space and unleash your inner carpenter!
Key Takeaways:
- Create a custom loft bed with stairs to maximize space in your home.
- Follow our step-by-step instructions and plans to build your DIY loft bed.
- Consider the design, materials, and safety aspects of your loft bed.
- Customize your loft bed with storage nooks, electrical outlets, and other features.
- Maintain and care for your loft bed to ensure its longevity and safety.
Designing Your Loft Bed
Before you start building your loft bed, it’s important to consider the design aspects. By carefully planning and designing your loft bed, you can create a stylish and functional space-saving solution that perfectly suits your needs and preferences.
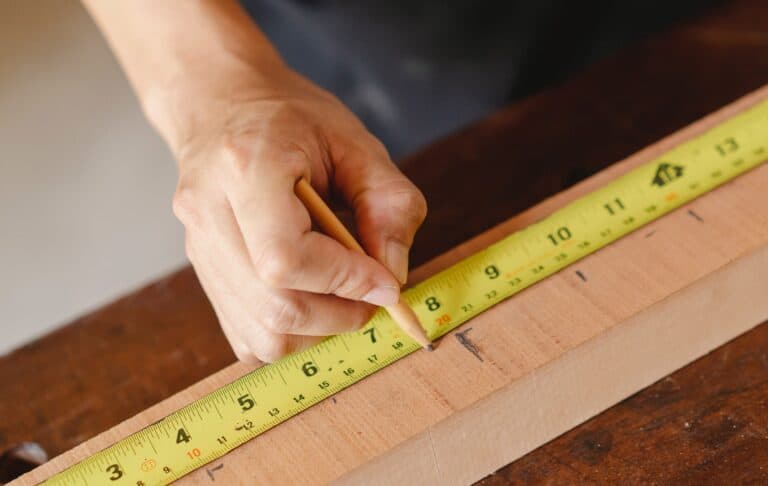
Determining Loft Bed Dimensions
Start by determining the dimensions of your loft bed. Consider the available space in your room and the size of your mattress. Measure the width, length, and height of your desired loft bed to ensure a proper fit. Remember to account for any additional features or storage that you plan to incorporate.
Choosing Loft Bed Materials
Next, choose the materials for your loft bed frame. Common materials include 2×4 and 2×6 lumber, which provide strength and stability. Select high-quality materials that can support the weight of the sleeper and withstand regular use. Consider the aesthetic appeal and durability of the materials as well.
When choosing the materials, remember that the loft bed needs to be sturdy and safe. The quality of the materials used will directly impact the overall stability and durability of the bed.
Incorporating Loft Bed Features
Think about the features you want to incorporate into your loft bed design. Whether you desire storage nooks, a reading nook, or even electrical outlets, plan out these features during the design phase. This will help ensure that your loft bed not only maximizes space but also provides added functionality and convenience.
Creating a Design Plan
Once you have determined the dimensions, selected the materials, and decided on the features, it’s time to create a design plan. Sketch out your ideas and make sure the design meets your needs and style preferences. Consider the placement of the stairs, the location of storage spaces, and the overall aesthetic appeal of the bed.
To help you visualize your design, here is an example of a loft bed dimension table:
| Description | Value |
|---|---|
| Overall Length | 78 inches |
| Overall Width | 42 inches |
| Overall Height | 72 inches |
| Mattress Size | Twin |
Next Steps
With a clear design plan, you are now ready to move on to the next steps, which involve gathering the necessary materials and tools for your loft bed project. Stay tuned for the upcoming section on gathering materials and tools, where we will provide you with a detailed guide to ensure you have everything you need to bring your loft bed design to life.
Gathering Materials and Tools
When embarking on your DIY loft bed project, it’s important to gather all the necessary materials and tools beforehand. This will ensure that you have everything you need to complete the construction smoothly and efficiently.
Materials
Here are some of the essential loft bed materials you’ll need:
- Lumber: Choose high-quality 2×4 and 2×6 lumber for the bed frame and other structural components.
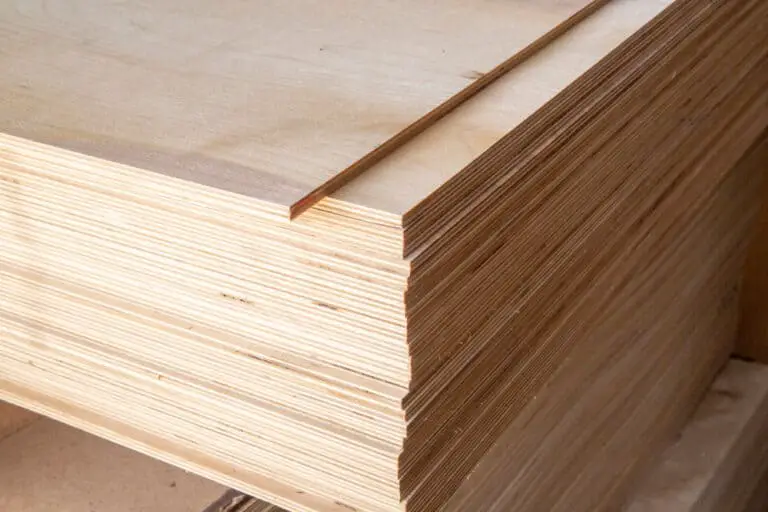
- Plywood: Select plywood sheets, preferably 3/4 inch thick, for the mattress base, backboard, and any storage components.
- Screws and Nails: Get a variety of screws and nails suitable for woodworking, including deck screws, wood screws, and finishing nails.
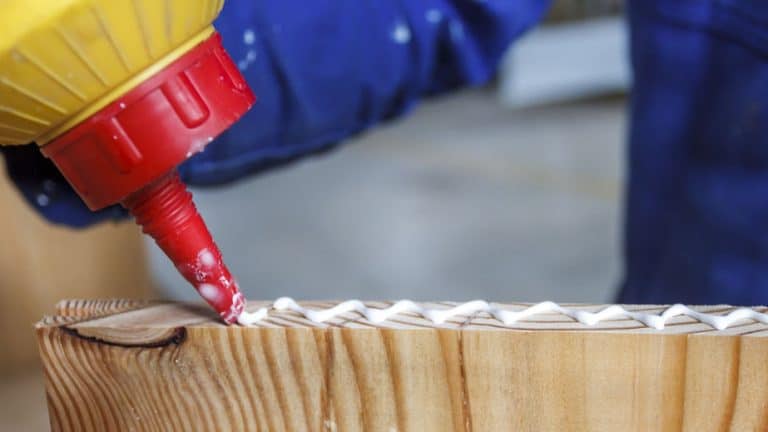
- Finishing Supplies: Consider any additional finishing supplies you might need, such as wood glue, sandpaper, and paint or stain for a polished look.
Keep in mind that the specific quantities and sizes of these materials will depend on the dimensions of your bed and the design you choose, so take accurate measurements before making your purchases.
Tools
To effectively build your loft bed, you’ll need a range of tools. Here are some of the essential ones:
- Saw: A circular saw or miter saw will be handy for cutting lumber and plywood to the desired dimensions.
- Drill: You’ll need a power drill with an assortment of drill bits and screwdriver bits for assembling the bed and attaching hardware.
- Tape Measure: An accurate tape measure is essential for measuring and marking dimensions.
- Level: Use a level to ensure that your loft bed is properly aligned and balanced.
- Various Hand Tools: Keep a collection of essential hand tools like a hammer, screwdriver set, wrenches, and pliers on hand for various tasks.
Having these tools readily available will make the construction process much easier and more efficient.
Now that you have your materials and tools ready, you can move on to the exciting part – building the bed frame! Stay tuned for the next section where we’ll guide you through the step-by-step process.
Building the Bed Frame
Now that you have planned out the design and gathered all the necessary materials and tools, it’s time to start building the bed frame for your loft bed. The bed frame is the foundation that will support the mattress and the stairs, so it needs to be strong and secure.
For the bed frame, you will be using 2×4 and 2×6 lumber. These sturdy materials will provide the necessary support for your loft bed. Begin by following the detailed plans and step-by-step instructions to ensure that your bed frame is constructed properly.
When attaching the bed frame to the walls, make use of joist hangers, lag screws, and washers. These hardware pieces will help secure the frame to the walls and provide additional support. It’s important to ensure that the frame is securely attached to prevent any accidents or instability.
As you build the bed frame, pay attention to the measurements and ensure that everything is level and properly aligned. This will ensure that your bed frame is strong and stable, providing a safe and comfortable sleeping space.
Pro tip: Check that all the joints and connections are tight and secure. This will help prevent any wobbling or movement of the bed frame.

Once your bed frame is complete and securely attached to the walls, you’re ready to move on to the next step – installing the mattress base and backboard.
Installing the Mattress Base and Backboard
After completing the construction of your sturdy bed frame, it’s time to install the mattress base and backboard to create a comfortable sleeping surface. This step involves using high-quality materials such as plywood, bed slats, and beadboard or tongue and groove boards for added aesthetics.
First, you’ll need one or two sheets of plywood to cover the entire bed frame. Measure the dimensions of your frame and cut the plywood accordingly. Place the plywood onto the frame, ensuring it fits snugly and covers the entire surface. Use screws to securely attach the plywood to the frame, creating a solid foundation for your mattress.
Now it’s time to add the bed slats for additional support. Measure the length and width of your bed frame, then cut the slats to fit across the width of the frame. Space them evenly, ensuring proper support for the mattress. Place the slats onto the plywood base and secure them with screws or brackets. These slats will provide extra stability and prevent sagging of the mattress.
To enhance the aesthetic appeal of your loft bed, you can add beadboard or tongue and groove boards to the backboard. These decorative elements not only add charm but also provide subtle texture and visual interest. Cut the beadboard or tongue and groove boards to size and attach them to the backboard of the bed frame using screws or nails.
Remember, it’s essential to ensure that everything is level and securely attached. This will create a comfortable and supportive surface for your mattress, allowing you to sleep soundly and enjoy your DIY loft bed with stairs to the fullest.
Materials Needed:
- Plywood sheets
- Bed slats
- Beadboard or tongue and groove boards
- Screws or nails
Instructions:
- Cut plywood sheets to fit the bed frame.
- Secure the plywood sheets to the frame with screws.
- Measure and cut bed slats to fit across the width of the frame.
- Place the bed slats onto the plywood base and secure them with screws or brackets.
- Cut beadboard or tongue and groove boards to size for the backboard.
- Attach the beadboard or tongue and groove boards to the backboard using screws or nails.
| Materials | Quantity |
|---|---|
| Plywood sheets | 1-2 |
| Bed slats | As needed to cover the width of the frame |
| Beadboard or tongue and groove boards | As needed to cover the backboard |
| Screws or nails | As needed for secure attachment |
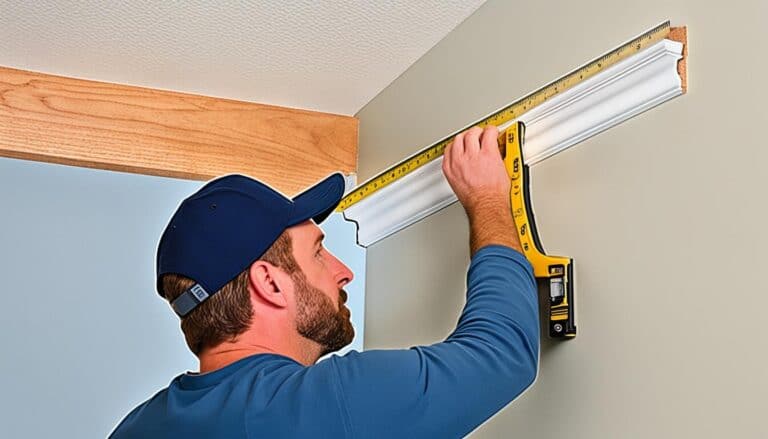
Adding the Safety Railing and Finishing Touches
Once you have completed the main structure of your loft bed, it’s time to enhance its safety and aesthetics by adding a sturdy safety railing and finishing touches. The safety railing will provide essential protection and stability for the sleeper, ensuring a secure sleeping experience.
To create a reliable safety railing, you can use 2×4 lumber and additional supports to reinforce the structure. This will add strength and durability to the railing system, giving you peace of mind while using the loft bed.
In addition to the safety railing, consider incorporating trim and paint to give your bed a polished and finished look. Adding trim will not only enhance the overall appearance of the loft bed but also provide a smooth and seamless transition between different components.
| Railing Material | Finishing Material | Other Components |
|---|---|---|
| 2×4 lumber | Trim | Spacers |
Using spacers is another essential aspect of the finishing touches. Spacers are beneficial for covering any exposed screws or gaps between materials, ensuring a neat and visually appealing final result. They create a clean and professional look, enhancing the overall aesthetic value of your loft bed.
Remember to pay attention to details during this phase and ensure that all components, including the safety railing, trim, paint, and spacers, are properly installed and finished. This will guarantee the longevity and functionality of your DIY loft bed, allowing you to enjoy a safe and beautiful sleeping space.
Building and Installing the Stairs
When it comes to building the stairs for your loft bed, meticulous planning and execution are essential. The design of your stairs should take into account the available space and your desired functionality. To ensure sturdy and reliable stairs, opt for 1×4 lumber as the main material.
Securing the stairs properly is crucial for safety and stability. Use hooks and wood screws to firmly attach the stairs to the loft bed frame. For added strength, consider incorporating lag screws and additional supports.
During the installation process, it’s vital to ensure that the stairs are level, secure, and easy to use. Following the detailed instructions and diagrams provided will help you build and install the stairs correctly.
Remember, safety should always be a priority when constructing and assembling your loft bed. Properly built and installed stairs will not only enhance your bed’s functionality but also provide peace of mind.

| Materials | Quantity |
|---|---|
| 1×4 lumber | Varies based on design |
| Hooks | Depends on the number of steps |
| Wood screws | Depends on the size and structure of the stairs |
| Lag screws | Varies based on design |
Creating Storage Nooks and Shelves
When designing your DIY loft bed, incorporating storage solutions such as storage nooks and shelves can help maximize space and enhance the functionality of your bed. These additional features provide convenient storage space for books, toys, clothing, and other items, allowing you to keep your bedroom organized and clutter-free.
To create storage nooks and shelves, you’ll need to determine the dimensions and location that best suit your needs and available space. Consider the specific items you intend to store and plan the size and layout accordingly. This will ensure that you optimize the storage capacity of your loft bed to its fullest potential.
For constructing the storage components, you’ll need the following materials:
- Plywood: Use sturdy plywood as the base material for the shelves and storage compartments.
- 1×2 Boards: These boards will serve as the framework for the shelves and provide support.
- Trim: Add decorative trim to enhance the aesthetics of the storage components.
Once you have gathered the necessary materials, you can begin constructing and installing the storage nooks and shelves. Follow these steps:
- Measure and mark the dimensions of the storage compartments on the plywood sheets.
- Cut the plywood according to the marked measurements using a saw.
- Attach the 1×2 boards to the edges of the plywood using screws to create the framework for the shelves.
- Install the shelves into the designated spaces, ensuring they are securely attached to the bed frame.
- Add trim to the edges of the shelves to give them a finished look.
By incorporating storage nooks and shelves into your DIY loft bed, you can create a functional and organized space that meets your storage needs. These additional features provide easy access to your belongings while keeping them neatly arranged. Make the most of your loft bed by customizing it with practical storage solutions.
To gain a better understanding of how storage nooks and shelves can enhance your loft bed, take a look at this example:
| Storage Solution | Description | Benefits |
|---|---|---|
| Nooks | Small built-in compartments within the bed frame | Convenient storage for frequently used items |
| Shelves | Additional platforms attached to the bed frame | Display and organization of books, toys, and decorative items |
Enhance the functionality of your loft bed by incorporating storage solutions like storage nooks and shelves. These practical features provide easy access to your belongings while keeping your bedroom organized. With the right materials and careful construction, you can create a customized and efficient storage system for your DIY loft bed.
Electrical Outlets and Lighting
If desired, you can incorporate electrical outlets and lighting into your loft bed design. This can provide convenience and functionality, allowing you to charge devices or have adequate lighting in the sleeping area. However, it is essential to prioritize safety and comply with local building codes. Electrical work should be done by a licensed professional to ensure proper installation and minimize the risk of electrical hazards.
Consulting with an electrician is crucial for determining the best approach for adding outlets and lighting to your loft bed. They can assess your specific needs and guide you in choosing the appropriate wiring, switches, outlets, and light fixtures.
When planning the electrical aspects of your loft bed, consider the following safety considerations:
- Use appropriate electrical wiring based on the load requirements and local regulations.
- Install ground fault circuit interrupters (GFCIs) on all outlets near water sources to protect against electrical shocks.
- Place electrical outlets in convenient locations for easy access and ensure they are not obstructed by furniture or other objects.
- Choose light fixtures that are suitable for enclosed spaces and provide adequate illumination without causing glare or discomfort.
Remember to prioritize safety at every step of the process. By working with a licensed electrician and following proper safety guidelines, you can ensure a secure and functional electrical system for your loft bed.
Painting and Finishing
Once the construction of your DIY loft bed with stairs is complete, it’s time to add the finishing touches that will bring your project to life. Painting and finishing not only enhance the aesthetic appeal of your loft bed but also protect the wood and ensure its durability over time. Here’s a step-by-step guide to help you achieve a professional-looking finish:
Choosing the Right Paint
First, choose a paint color that complements your style and matches the overall theme of your room. Consider using a paint that is specifically formulated for wood surfaces, as it will adhere better and provide long-lasting protection. Look for paints that are low in volatile organic compounds (VOCs) to minimize any potential harmful emissions.
Priming the Surfaces
Before applying the paint, it’s important to prime the wood surfaces to ensure proper adhesion and a smooth finish. Use a wood primer that is compatible with your chosen paint type. Apply the primer evenly with a brush or roller, following the manufacturer’s instructions. Allow the primer to dry completely before moving on to the next step.
Sanding for Smoothness
After the primer has dried, sand the surfaces with fine-grit sandpaper to achieve a smooth and even finish. Sand in the direction of the wood grain, using light pressure. This will help remove any imperfections, such as brush strokes or rough spots, and create a surface that is ready for paint.
Filling Nail Holes and Imperfections
Inspect the wood surfaces for any nail holes, gaps, or imperfections. Use a wood filler that matches the color of your wood to fill in these areas. Apply the wood filler with a putty knife, following the manufacturer’s instructions. Once the filler is dry, sand it lightly to achieve a seamless appearance.
Applying the Paint
When the surfaces are smooth and prepared, it’s time to apply the paint. Use a brush or roller, depending on your preference and the size of the surface. Apply thin, even coats of paint, allowing each coat to dry completely before applying the next. This will help you achieve a flawless and professional-looking finish.
Applying Finishes and Sealants
Consider applying finishes or sealants to further protect the wood and enhance its appearance. Finishes can add depth and richness to the color of the wood, while sealants provide an extra layer of protection against moisture and everyday wear and tear. Choose finishes and sealants that are compatible with the type of paint you used.
Remember to follow the manufacturer’s instructions when applying finishes and sealants, and allow sufficient drying time before using or placing any objects on the surfaces.
Completing the painting and finishing process will transform your DIY loft bed with stairs into a stunning centerpiece for your bedroom or living space. Take your time and pay attention to detail to achieve the desired look and ensure long-lasting durability. Now that your loft bed is ready, you can enjoy the comfort and style it brings to your home.
Safety Considerations
When building and using a loft bed, your top priority should be safety. Taking the necessary precautions will ensure a secure and reliable sleeping space for the occupant. Here are some essential safety considerations to keep in mind:
1. Strong and Stable Bed Frame
Ensure that the bed frame is constructed with sturdy materials and solid craftsmanship. The frame should be able to withstand the weight of the sleeper without any risk of collapsing. Consider using high-quality lumber and reliable hardware for optimal stability.
2. Appropriate Weight Capacity
Make sure the loft bed has a weight capacity suitable for the sleeper. Check the manufacturer’s guidelines or consult with a professional to determine the maximum weight the bed can safely support. Exceeding the weight capacity can compromise the structural integrity of the bed and pose a safety risk.
3. Use of Guardrails
Install guardrails on all sides of the loft bed to prevent falls during sleep. The guardrails should be sturdy and extend at least 5 inches above the mattress surface. This will provide a secure barrier and minimize the risk of accidental falls, especially for children or individuals who move frequently during sleep.
4. Minimize Hazards during Assembly and Installation
During the assembly and installation process, take precautionary measures to minimize any potential hazards. Follow the provided instructions carefully, ensuring that all components are securely fastened. Avoid sharp edges, protruding nails, or any other potential dangers that could cause injury. Double-check the stability and safety of the bed before use.
5. Regular Inspection and Maintenance
Regularly inspect the loft bed to ensure its safety and stability. Check for any loose screws, damaged parts, or signs of wear. Tighten any loose hardware promptly and replace any worn-out or damaged components. Additionally, periodically assess the overall structural integrity of the bed to identify any potential issues that may compromise safety.
6. Follow Safety Guidelines
It is crucial to follow all safety guidelines and recommendations provided by the manufacturer. These guidelines are designed to ensure the safe use of the loft bed. Adhering to these instructions will help minimize the risk of accidents or injuries during assembly, installation, and use.
Remember, each loft bed is unique, and safety considerations may vary depending on the design and construction. Take into account the age, capabilities, and needs of the bed occupant to ensure their safety and well-being. By prioritizing safety throughout the entire process, you can enjoy a secure and comfortable loft bed experience.
Maintenance and Care
To ensure the longevity and functionality of your loft bed, it’s important to perform regular maintenance and care. By keeping your bed clean and conducting structural integrity checks, you can prevent potential issues and ensure the safety of your sleep space. Follow these guidelines to properly maintain your DIY loft bed with stairs.
Cleaning
Regular cleaning is essential to keep your loft bed free from dust and debris. Use a soft cloth or a vacuum cleaner with a brush attachment to remove any dirt or allergens. Pay special attention to areas that are hard to reach, such as corners, crevices, and underneath the bed. For stubborn stains, use a mild detergent and warm water solution, making sure to dry the affected areas thoroughly to prevent moisture buildup.
Structural Integrity Checks
Periodically inspecting the structural integrity of your loft bed is crucial for identifying any signs of wear, damage, or compromised stability. Start by examining the bed frame, checking for cracks, loose joints, or weakened connections. Pay close attention to the stairs, ensuring they are secure and stable. Inspect the railing for any looseness or wobbliness. If you notice any issues during your assessment, address them promptly to prevent further damage and potential safety hazards.
Pro tip: It’s recommended to conduct structural integrity checks at least once every six months to ensure the ongoing stability and safety of your loft bed.
Additionally, here’s a simple table summarizing the key steps for loft bed maintenance and care:
| Task | Frequency |
|---|---|
| Clean bed frame, stairs, and railing | Weekly |
| Inspect structural integrity | Every 6 months |
| Address any issues promptly | As needed |
By following these maintenance practices, you can ensure the longevity and safety of your DIY loft bed with stairs. Regular cleaning and structural integrity checks will help preserve your bed’s functionality and give you peace of mind while enjoying your elevated sleeping space.
Troubleshooting and Common Issues
While building and using your loft bed, you may encounter some common issues and challenges. It’s important to be aware of these potential problems and have solutions ready to address them. Here are a few common problems you might face and some practical troubleshooting tips:
Stability Concerns
If you notice that your loft bed is not as stable as you’d like it to be, there are a few steps you can take to improve its stability:
- Check all the connections and make sure all the screws and bolts are tightened properly.
- Add additional support by installing diagonal bracing or corner brackets to reinforce the structure.
- Consider using furniture straps or wall anchors to secure the bed frame to the wall for added stability.
Squeaks or Creaks
If your loft bed starts making squeaking or creaking noises, it can be quite annoying. Here’s how you can eliminate or minimize these noises:
- Identify the source of the noise by checking all the connections, joints, and moving parts of the bed.
- Tighten any loose screws or bolts that may be causing the noise.
- Apply a lubricant, such as wax or silicone spray, to reduce friction between the moving parts.
Storage Organization
Keeping your loft bed organized and maximizing storage space can sometimes be a challenge. Here are a few ideas to help you with storage organization:
- Consider adding additional shelves, hooks, or baskets to the sides or underneath the bed for extra storage options.
- Utilize space-saving storage containers or bins that can fit neatly within the available storage areas.
- Implement a labeling system to make it easier to find and access items stored in various compartments.
Design Adjustments
If you find that certain aspects of your loft bed design are not meeting your needs or preferences, you can make adjustments to enhance its functionality and aesthetics:
- Assess your design and identify areas that need improvement or modification.
- Consult design resources or seek advice from experienced builders to explore alternative design solutions.
- Consider making design adjustments based on your specific requirements and personal style preferences.
Remember, troubleshooting common issues is a normal part of the building process. Don’t hesitate to reach out to experts or experienced builders for guidance and support. By addressing these challenges head-on, you’ll be able to make the necessary adjustments and ensure that your DIY loft bed with stairs meets your expectations.
Conclusion
Building your own DIY loft bed with stairs is a rewarding and practical project that allows you to create a functional and stylish space-saving solution. By following the step-by-step instructions, considering the design and safety aspects, and using the necessary skills and materials, you can embark on your loft bed construction journey with confidence.
Whether you’re a beginner or an experienced builder, this comprehensive guide provides all the information you need to successfully build your own loft bed with stairs. From designing the bed and gathering materials to constructing the frame, installing the mattress base, adding safety features, and finishing touches, each step is covered in detail.
By building your own loft bed, you not only have the satisfaction of creating something with your own hands, but you also have the opportunity to customize it to suit your needs and style. This space-saving solution is perfect for small bedrooms or shared spaces, allowing you to maximize the available space while providing a comfortable sleeping area and storage options.
So, why wait? Get started on your DIY loft bed project today and enjoy the benefits of having a custom-built loft bed with stairs in your home. Whether it’s for yourself, your children, or your guests, this practical and stylish addition will undoubtedly enhance the functionality and aesthetics of your space.
FAQ
What should I consider when designing a loft bed with stairs?
When designing a loft bed with stairs, you should consider the dimensions of your bed, the available space, the materials for the frame, and any additional features you want to incorporate.
What materials and tools do I need to build a loft bed with stairs?
The materials you’ll need include lumber, plywood, screws, nails, and finishing supplies. The tools you’ll need include a saw, drill, tape measure, level, and hand tools.
How do I build the bed frame for a loft bed with stairs?
To build the bed frame, you’ll use 2×4 and 2×6 lumber and attach it to the walls with joist hangers, lag screws, and washers for added support.
How do I install the mattress base and backboard of a loft bed with stairs?
You’ll use plywood for the base and bed slats for support, securing them with screws. Beadboard or tongue and groove boards can be added for a decorative touch.
How do I add the safety railing and finishing touches to a loft bed with stairs?
The safety railing can be constructed using 2×4 lumber and additional supports. Trim and paint can be added for a finished look, using spacers to cover any exposed screws or gaps.
How do I build and install the stairs for a loft bed with stairs?
The stairs can be built using 1×4 lumber, hooks, and wood screws. Lag screws and additional supports can be used for added strength.
Can I incorporate storage nooks and shelves in a loft bed with stairs?
Yes, you can incorporate storage nooks and shelves in a loft bed with stairs. Determine the dimensions and location based on your needs and use materials such as plywood and 1×2 boards to construct them.
Can I add electrical outlets and lighting to a loft bed with stairs?
Yes, you can add electrical outlets and lighting to a loft bed with stairs, but it’s important to consult with a licensed electrician to ensure safety and compliance with building codes.
How do I paint and finish a loft bed with stairs?
Choose a paint color that matches your aesthetic and apply it evenly. Use primers and sanding techniques, fill any imperfections with wood filler, and consider using finishes or sealants for added protection.
What safety considerations should I keep in mind when building and using a loft bed with stairs?
Safety considerations include ensuring the bed frame is strong and stable, using guardrails on all sides, and following all safety guidelines. Regular inspections and maintenance are also important.
How do I perform maintenance and care for my loft bed with stairs?
Regularly clean the bed and check for any signs of wear or damage. Address any issues promptly to prevent further damage or safety hazards.
What are some common issues I may encounter when building or using a loft bed with stairs?
Common issues include stability concerns, squeaks or creaks, storage organization, or design adjustments. Troubleshoot these problems and seek advice from experts or experienced builders for solutions.
Is building a DIY loft bed with stairs a worthwhile project?
Absolutely! Building your own loft bed with stairs allows you to maximize space and add functionality to your home while adding your personal touch to the design. It can be a rewarding and practical project for anyone, regardless of experience level.