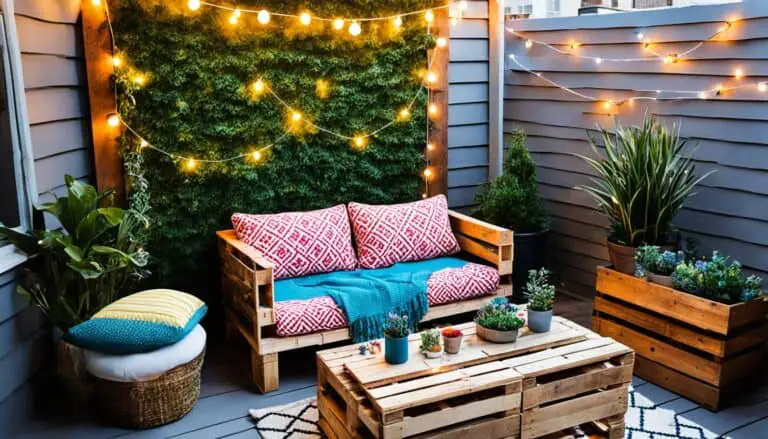
If you’re looking to transform your patio with unique and stylish DIY outdoor furniture projects, you’ve come to the right place. In this article, we’ll provide you with easy and budget-friendly ideas to make your own outdoor furniture. Whether you’re a beginner or an experienced DIYer, these projects will add comfort and style to your outdoor space.
But have you ever wondered if you can create beautiful, functional outdoor furniture on your own without breaking the bank? Is it really possible to build your own patio furniture without any woodworking skills or expensive tools?
In this article, we will explore a variety of DIY outdoor furniture projects that are not only easy to build but also stylish and affordable. From outdoor sofas and benches to coffee tables and chairs, we’ll guide you through the process of creating your own unique pieces. Get ready to unleash your creativity and make your outdoor living space the envy of your neighborhood!
Key Takeaways:
- Transform your outdoor space with DIY outdoor furniture projects
- Discover easy and budget-friendly ideas to make your own outdoor furniture
- Add comfort and style to your patio or backyard
- Build beautiful and functional pieces with minimal woodworking skills
- Create unique outdoor furniture without breaking the bank
Build a DIY Outdoor Sofa
If you’re looking to create a comfortable and stylish seating area for your backyard, building your own outdoor sofa is an excellent DIY project to undertake. With the right plans and materials, you can design a beautiful sofa that perfectly suits your outdoor space. Ana White offers a range of plans and tutorials for building a rustic outdoor sofa using cedar 2x4s, ensuring durability and a touch of natural beauty.
To get started, gather the materials needed for the project:
- Cedar 2x4s
- Screws
- Wood glue
- Stain
- Cushions
Follow the step-by-step instructions provided by Ana White to assemble the outdoor sofa. The plans are detailed and beginner-friendly, making it accessible for DIY enthusiasts of all skill levels. By customizing the stain and cushions, you can match the sofa to your preferred outdoor aesthetic, whether it’s rustic, modern, or eclectic.
Once completed, your DIY outdoor sofa will provide a cozy and inviting seating area for you, your family, and your guests. It’s the perfect spot to relax and unwind, enjoying the beauty of your outdoor space.
Benefits of Building a DIY Outdoor Sofa
There are several advantages to building your own outdoor sofa:
- Cost Savings: Building the sofa yourself allows you to save a significant amount of money compared to purchasing a pre-made one. You can use quality materials while staying within your budget.
- Customization: DIY projects give you the freedom to customize every aspect of the sofa. From choosing the type of wood to selecting the stain color and cushions, you can design a sofa that fits your personal style and preferences.
- Quality and Durability: By using high-quality materials and following a reputable plan, you can ensure that your DIY outdoor sofa is built to last. It will withstand outdoor elements and provide long-lasting comfort.
- Sense of Achievement: Completing a DIY project, such as building a sofa, offers a sense of accomplishment and pride. You’ll have a unique piece of furniture that showcases your craftsmanship.
With these benefits in mind, start your DIY outdoor sofa project today and transform your backyard into a cozy and inviting oasis.
| Advantages of Building a DIY Outdoor Sofa | |
|---|---|
| Cost Savings | Save money by building the sofa yourself and using high-quality but affordable materials. |
| Customization | Create a sofa that matches your preferred style, from the type of wood to the stain color and cushions. |
| Quality and Durability | Build a long-lasting sofa that can withstand outdoor elements and provide comfort for years to come. |
| Sense of Achievement | Experience pride and accomplishment by completing a DIY project that showcases your craftsmanship. |
Make a Faux Vintage Galvanized Planter
If you love the vintage farmhouse style but can’t find affordable pieces, consider making your own. Create a faux vintage galvanized planter using simple DIY techniques. This project will give you that distressed, antique look without breaking the bank.
With just a few supplies and a little creativity, you can transform an ordinary planter into a charming vintage-inspired piece for your outdoor space. Follow a tutorial that shows you how to achieve the desired effect and use the planter to display your favorite flowers on your porch or patio.
“I wanted a vintage-style planter for my front porch, but everything I found was either too expensive or not quite right. So, I decided to try making my own using some basic materials. The result exceeded my expectations, and now I have a unique and beautiful planter that perfectly complements my farmhouse decor.” – Jane Smith
Materials:
- Plain planter
- Water-based paint in gray or silver
- Spray bottle with water
- Sandpaper or sanding block
- Paintbrush
- Clear protective finish
Instructions:
- Start by cleaning the planter to ensure a smooth surface.
- Apply a base coat of water-based paint in a gray or silver color. Allow it to dry completely.
- Fill a spray bottle with water and lightly mist the painted surface.
- Using sandpaper or a sanding block, gently sand the planter, focusing on areas where natural wear and tear would occur over time. This will create a distressed look.
- Wipe away any dust or debris and let the planter dry.
- Apply a clear protective finish to seal the paint and protect the faux vintage finish.
- Once the protective finish is dry, your faux vintage galvanized planter is ready to use!
Place your faux vintage galvanized planter in your desired outdoor space, fill it with your favorite flowers, and enjoy the rustic charm it brings to your home.
Make a Potting Bench from Pallets & an Antique Window
A potting bench is a practical addition to any garden. Instead of buying one, make your own using pallets and an antique window. Upcycle these materials to create a rustic and shabby chic potting bench. This functional piece of furniture will provide storage and workspace for all your gardening needs. Follow a step-by-step tutorial to build your own unique potting bench.
Why Choose a Potting Bench?
A potting bench is a valuable addition to your outdoor space, especially if you enjoy gardening. This dedicated work surface provides a convenient place to pot plants, sow seeds, and organize gardening tools. With a potting bench, you can keep all your essentials within arm’s reach, making your gardening tasks more efficient and enjoyable.
Materials Needed
To create your own potting bench from pallets and an antique window, you’ll need the following materials:
- Wooden pallets
- An antique window
- Screws
- Drill
- Saw
- Sandpaper
- Paint or stain (optional)
Step-by-Step Instructions
- Prepare the pallets: Dismantle the pallets and remove any nails or staples. Sand the wood to create a smooth surface, and cut the pallets to your desired size for the bench.
- Build the frame: Use the pallet boards to construct the base frame of the bench. Attach the boards securely with screws, ensuring stability.
- Add the top: Place the antique window on top of the frame, using screws to secure it. Make sure to position the window in a way that allows for easy access to the storage space below.
- Create additional storage: Use the remaining pallet boards to build shelves or hooks on the sides or back of the potting bench. This will provide extra storage for gardening tools and supplies.
- Finishing touches: Sand any rough edges and surfaces of the bench. If desired, paint or stain the wood to match your outdoor decor.
Benefits of a DIY Potting Bench
By building your own potting bench, you can customize it to fit your specific needs and style. It’s a cost-effective solution that allows you to repurpose materials, adding a unique touch to your outdoor space. Plus, the satisfaction of creating something useful with your own hands is truly fulfilling.
How to Build an Easy DIY Pallet Bar
Create a DIY pallet bar for your backyard using reclaimed materials. This simple and cost-effective project can be built using pallets, giving you a unique and rustic piece of outdoor furniture. Use the bar for holding snacks and drinks during outdoor gatherings or as a focal point on your patio.
Building your own pallet bar is a straightforward process that requires minimal tools and materials. Follow a tutorial that provides easy-to-follow instructions and step-by-step guidance. With a few simple steps, you’ll have a functional and stylish addition to your outdoor space.
Here is what you’ll need to get started:
- Pallets
- Hammer
- Nails or screws
- Saw
- Sandpaper
- Paint or stain (optional)
- Bar top and accessories (optional)
Start by preparing the pallets. Remove any nails or screws and sand down any rough edges or splinters. Cut the pallets to the desired size and shape, considering the height and length of your bar. Next, assemble the base of the bar using nails or screws to secure the pallets together.

Once the base is constructed, you can add additional pallets vertically to create a decorative backdrop for your bar. This will give it a more polished and finished look. Secure the pallets in place and reinforce with additional nails or screws.
After assembling the bar structure, sand down the entire surface to ensure a smooth finish. Apply paint or stain of your choice to enhance the appearance and protect the wood from outdoor elements. Allow the paint or stain to dry completely before moving on to the next step.
Finally, you can add a bar top and accessories to complete the look of your DIY pallet bar. Consider using a reclaimed door, wooden plank, or even a concrete slab as your bar top. Attach it securely to the base and add finishing touches such as a bottle opener, hooks for hanging tools, or shelves for storage.
With your DIY pallet bar complete, you’ll have a functional and stylish addition to your outdoor space. It’s the perfect spot to gather with friends and family, enjoy a refreshing drink, and create lasting memories.
How to Build a DIY Rustic Bench – Free Building Plans
Building a rustic bench is a great beginner’s woodworking project. With just a few 2x4s and 2x6s, you can create a simple and inexpensive outdoor coffee table or seating area. This DIY project requires minimal tools and materials, making it accessible to anyone.
Follow these free building plans to construct your own rustic bench:
- Start by gathering the necessary materials for the project:
- 2×4 boards
- 2×6 boards
- Screws
- Wood glue
- Saw
- Drill
- Sandpaper
- Measuring tape
- Measure and cut the boards according to the desired dimensions of your bench. Make sure to account for the height, width, and length of the bench based on your outdoor space and personal preferences.
- Using a drill and screws, assemble the bench frame by attaching the 2×4 boards together to form the legs and supports. Be sure to reinforce the joints with wood glue to ensure stability.
- Attach the 2×6 boards to the top of the frame, creating the seating area of the bench. Use screws to secure the boards in place.
- Sand the bench to smooth out any rough edges or surfaces. This step is important to prevent splinters and ensure a comfortable seating experience.
- Apply a protective finish to the bench, such as a weather-resistant stain or sealant, to safeguard it from outdoor elements and prolong its lifespan.
Once your rustic bench is complete, you can customize it to fit your outdoor space. Consider adding cushions, pillows, or a coat of paint to match your existing decor. This versatile piece of furniture can serve as a coffee table, seating area, or even a plant display. Let your creativity run wild!
“Building a rustic bench is not only a rewarding DIY project but also a practical and stylish addition to your outdoor space. With some basic woodworking skills and a little time, you can create a piece of furniture that adds charm and functionality to your patio or garden.”
Make Wooden Lanterns for Under $10
Add a touch of rustic charm to your outdoor decor by making wooden lanterns. These affordable and easy-to-make lanterns can be created using spruce wood. With just a few pieces of wood and some simple assembly, you can have beautiful lanterns to light up your outdoor space. Customize them with flameless candles and faux flowers for a summery look.
Wooden lanterns are a versatile and inexpensive way to add warmth and ambiance to any outdoor setting. Whether you’re hosting a backyard gathering or enjoying a quiet evening on your patio, these lanterns will create a cozy atmosphere.
To make your own wooden lanterns:
Gather the Materials:
- Spruce wood boards
- Saw
- Sandpaper
- Nails or screws
- Flameless candles
- Faux flowers or greenery
- Optional: Stain, paint, or wood sealer
Measure and cut the wood boards into the desired size for your lanterns. Sand the edges and surfaces to create a smooth finish. Assemble the pieces using nails or screws, ensuring that the lantern is sturdy and secure. If desired, apply a stain, paint, or wood sealer to protect the wood from weathering.


Once the lanterns are assembled and finished, place flameless candles inside for a safe and flickering light source. Add faux flowers or greenery to enhance the rustic look and bring a touch of nature to your lanterns.
Display your wooden lanterns on your outdoor dining table, hang them from tree branches, or line them up along your garden path. Their soft glow will create a cozy and inviting atmosphere for evenings spent outdoors.
Materials and Steps to Make Wooden Lanterns
| Materials | Steps |
|---|---|
| Spruce wood boards | 1. Measure and cut the wood boards into desired sizes |
| Saw | 2. Sand the edges and surfaces of the wood |
| Sandpaper | 3. Assemble the wood pieces using nails or screws |
| Nails or screws | 4. Apply stain, paint, or wood sealer (optional) |
| Flameless candles | 5. Place flameless candles inside the lanterns |
| Faux flowers or greenery | 6. Add faux flowers or greenery for decoration |
| Optional: Stain, paint, or wood sealer | 7. Display the wooden lanterns in your outdoor space |
Cheerful Front Porch Makeover with DIY Outdoor Chairs
Give your front porch a cheerful makeover with DIY outdoor chairs. By adding planter boxes and modern outdoor furniture, you can transform your porch into a welcoming space. Use bright spring colors as inspiration and choose chairs that complement your yellow door. This project is an easy way to add style and functionality to your outdoor living area.
Enhancing Your Front Porch
Your front porch is the first impression your guests have of your home. It’s the perfect place to relax and enjoy the outdoors, so why not make it inviting with DIY outdoor chairs? Whether you have a small or large space, there are plenty of creative ideas to create a cozy and cheerful atmosphere.
“A front porch makeover can significantly improve the curb appeal of your home. It’s a great opportunity to showcase your personal style and create a warm and inviting entryway.”
DIY Outdoor Chairs
When it comes to outdoor furniture, DIY chairs are a fun and budget-friendly option. You can choose from a variety of designs, materials, and colors to match your porch’s style. Whether you prefer a modern or rustic look, these chairs will provide both comfort and aesthetic appeal.
Here are some popular DIY outdoor chair ideas:
- Adirondack chairs: These classic, slatted-back chairs are perfect for a traditional porch. They are comfortable and can be easily customized with paint or stain.
- Pallet chairs: Upcycle wooden pallets to create unique and eco-friendly chairs. Add cushions for extra comfort and style.
- Rope chairs: Combine a wooden frame with sturdy rope to create a sleek and modern chair. This minimalist design will add a contemporary touch to your porch.
- Folding chairs: If you have limited space, folding chairs are a great option. They can be easily stored when not in use and provide flexibility for entertaining guests.
Planter Boxes
Complement your DIY outdoor chairs with planter boxes filled with colorful flowers or greenery. These boxes will add height and visual interest to your porch, creating a vibrant and inviting environment.
| DIY Outdoor Chairs | Materials | Difficulty Level |
|---|---|---|
| Adirondack Chairs | Wood, screws, paint or stain | Intermediate |
| Pallet Chairs | Wooden pallets, cushions | Easy |
| Rope Chairs | Wood, rope | Intermediate |
| Folding Chairs | Wood, hinges | Easy |
Creating a Colorful Oasis
Choose vibrant colors for your outdoor chairs and planter boxes to create a cheerful and lively atmosphere on your front porch. Bright yellows, blues, and pinks are popular choices for a spring makeover. Coordinate these colors with your yellow front door for a cohesive look.
Remember to consider the weather resistance of the materials you choose. Opt for outdoor paints, stains, and cushions that will withstand the elements and retain their color over time.
Complete your front porch makeover with some decorative items such as outdoor rugs, throw pillows, and lanterns, all of which will contribute to a welcoming and comfortable space.
Give your front porch a fresh new look with DIY outdoor chairs. This simple and affordable project will not only enhance the appearance of your home but also provide a cozy spot to relax and enjoy the outdoors.
Build a DIY Planter Box with Only 2 Tools! (Free Plan)
If you’re looking for a simple weekend DIY project, a planter box is a great option. With just a miter saw and a finishing nail gun, you can create a beautiful planter box for your outdoor space. The free plan includes a cut list and step-by-step instructions, making it accessible to beginners. Use the planter box to display flowers and plants on your deck or front porch.

Create Your DIY Planter Box
- Gather the materials needed for the planter box: 4 pieces of cedar wood, a miter saw, a finishing nail gun, nails, wood glue, a pencil, a tape measure, and sandpaper.
- Measure and cut the cedar wood pieces according to the provided cut list.
- Assemble the planter box by applying wood glue to the edges of the wood and securing them with nails using the nail gun.
- Sand the edges and surfaces of the planter box to create a smooth finish.
- Optional: Apply a protective sealant or paint to enhance the durability and aesthetics of the planter box.
- Place your favorite plants or flowers inside the planter box, and enjoy the beauty it adds to your outdoor space!
Benefits of DIY Planter Boxes
Building your own planter box has several advantages:
- Cost-effective: DIY planter boxes can be made from affordable materials, saving you money compared to buying pre-made planters.
- Customizable: You have complete control over the size, shape, and design of the planter box, allowing you to tailor it to your specific needs and style.
- Personal touch: By creating a planter box with your own hands, you add a unique and personal touch to your outdoor decor.
- Satisfaction of DIY: Building something with your own skills and creativity brings a sense of accomplishment and pride.
So, grab your tools and start building your own DIY planter box. It’s the perfect addition to elevate the beauty of your outdoor space while showcasing your green thumb!
Easy DIY Rustic Log & Reclaimed Wood Garden Bench
Looking for a creative way to repurpose unused items and add a rustic touch to your garden? Why not build an easy DIY garden bench using logs from your log pile and vintage scrap wood? This project is not only environmentally friendly but also budget-friendly, as it can be completed with salvaged materials.
To create this unique piece of outdoor furniture, gather logs of similar heights from your log pile and clean them thoroughly. Next, find reclaimed wood pieces such as old planks or barn boards that can be used for the bench seat and backrest. These aged materials will add character and charm to your garden bench.
Once you have your materials ready, follow a tutorial with step-by-step instructions on how to assemble the bench. Secure the logs together using screws or strong adhesive, and attach the reclaimed wood pieces as the seat and backrest.
The result will be a beautiful and rustic garden bench that seamlessly blends into your outdoor space. The natural textures and colors of the logs and reclaimed wood will create a visually appealing focal point in your garden.
Not only does this DIY project allow you to repurpose unused materials, but it also provides a cozy spot to relax and enjoy your garden. Pair the bench with cushions and pillows for added comfort and style.
With its unique design and sustainable materials, this easy DIY rustic log and reclaimed wood garden bench will surely impress your guests and add a touch of natural beauty to your outdoor oasis.
Benefits of Building a DIY Rustic Log & Reclaimed Wood Garden Bench
- Environmentally friendly: Repurpose unused logs and vintage wood to reduce waste.
- Budget-friendly: Use salvaged materials to create a unique piece of furniture without breaking the bank.
- Customizable: Adjust the size and design of the bench to fit your outdoor space and personal style.
- Natural beauty: The combination of rustic logs and reclaimed wood adds a charming and natural touch to your garden.
- Durable and sturdy: Logs provide a strong base, while the reclaimed wood ensures a comfortable seating area.
- Unique focal point: Stand out from generic outdoor furniture with a one-of-a-kind bench that showcases your creativity.
| Materials | Tools |
|---|---|
|
|
By building your own DIY rustic log and reclaimed wood garden bench, you not only create a unique and charming piece of outdoor furniture but also contribute to a more sustainable and eco-friendly lifestyle.
Upcycle Your Ottoman
Give new life to an old ottoman by upcycling it into outdoor furniture. Using materials you already have, such as an old tire, rope, and furniture legs, you can create a stylish and functional ottoman. For a more personalized touch, sew your own ottoman pouf using outdoor fabric and polystyrene beads. This project is a budget-friendly way to add extra seating to your outdoor space.
Materials Needed:
- Old ottoman
- Old tire
- Rope
- Furniture legs
- Outdoor fabric
- Polystyrene beads

Instructions:
- Remove the cushion from the old ottoman.
- Clean and paint the ottoman frame, if necessary, for a fresh look.
- Attach the old tire to the ottoman frame using screws or adhesive, creating a sturdy base.
- Wrap the rope tightly around the tire, securing it with hot glue as you go. This will give the ottoman an attractive nautical vibe.
- Attach furniture legs to the bottom of the ottoman to elevate it off the ground.
- For the ottoman pouf, cut two identical circles from outdoor fabric, ensuring they are slightly larger than the ottoman’s diameter.
- Sew the fabric circles together, leaving a small opening for stuffing.
- Fill the pouf with polystyrene beads, creating a comfortable and plush seating cushion.
- Close the opening with a strong stitch or with a sewing machine.
- Place the pouf on top of the ottoman base, securing it with Velcro or heavy-duty adhesive to prevent sliding.
This upcycled ottoman is not only eco-friendly but also adds a unique and personalized touch to your outdoor space. It can serve as extra seating for gatherings or as a comfortable footrest while you relax in your backyard. Get creative with colors, fabrics, and patterns to match your existing outdoor furniture and decor.
| Advantages | Disadvantages |
|---|---|
| – Budget-friendly alternative to buying new outdoor furniture | – May require some DIY skills and tools |
| – Gives new life to an old ottoman | – May take some time and effort to complete |
| – Customizable to match your outdoor decor | – May require additional materials not already on hand |
| – Adds extra seating and functionality to your outdoor space | – May not be as durable as commercially manufactured outdoor furniture |
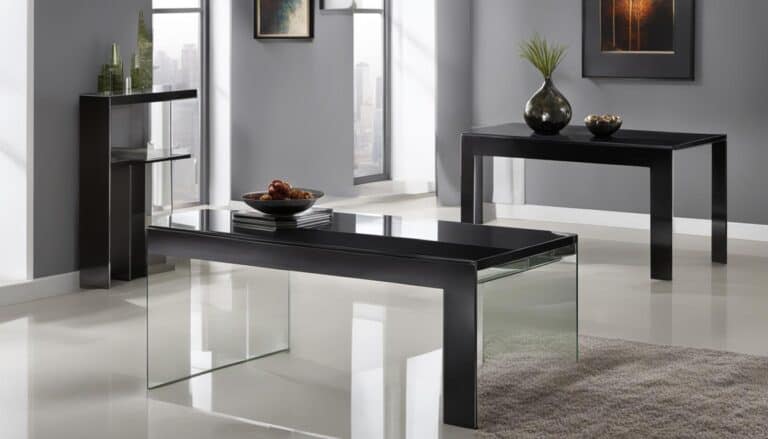
Build a DIY Coffee Table
Provide a convenient place for your guests to set down beverages and snacks with a DIY coffee table. Using wooden boards, you can create a simple and inexpensive coffee table for your outdoor living room. Customize it with your favorite stain to match your outdoor decor. For a more unique design, consider using pallets, concrete blocks, or a planter box.
Creating a DIY coffee table is a fun and rewarding project that allows you to showcase your creativity while adding functionality to your outdoor space. Whether you’re a seasoned DIY enthusiast or just starting out, building a coffee table is a great way to enhance your outdoor furniture collection.
Materials You’ll Need:
- Wooden boards
- Saw
- Screwdriver
- Screws
- Drill
- Sandpaper
- Stain or paint
- Brush or roller
Step-by-Step Instructions:
- Measure and cut the wooden boards according to your desired coffee table size.
- Assemble the tabletop by attaching the boards together using screws.
- Create the table legs using additional wooden boards or repurposed materials like pallets, concrete blocks, or a planter box.
- Attach the legs to the tabletop securely using screws.
- Sand the entire coffee table to ensure smooth edges and surfaces.
- Apply the stain or paint of your choice using a brush or roller. Allow it to dry thoroughly.
Once your DIY coffee table is complete, you can place it in your outdoor living room area, patio, or deck. It will provide a functional and stylish surface for placing drinks, snacks, and decor items. Don’t forget to add some cozy outdoor chairs or a sofa to create a welcoming and comfortable outdoor seating area.
With a little creativity and some basic woodworking skills, you can build a DIY coffee table that perfectly suits your outdoor space. Whether you prefer a rustic, modern, or eclectic design, the possibilities are endless. Start your next outdoor furniture project today and enjoy the satisfaction of enjoying your handcrafted coffee table all summer long.
Put Together a Patio Chair
Ensure there is ample seating on your patio by building DIY accent chairs. With lumber, wood filler, and stain, you can create your own outdoor chairs that complement your existing furniture. Add cushions and pillows to showcase your style and provide extra comfort for your guests. This project allows you to customize the size and style of the chairs to fit your outdoor space.
Materials Needed:
- Lumber
- Wood filler
- Stain
- Cushions
- Pillows
Step-by-Step Instructions:
- Measure and cut the lumber according to your desired chair size.
- Assemble the chair frame using screws and wood glue.
- Fill any gaps or imperfections with wood filler and sand smooth.
- Apply stain to the chair, following the manufacturer’s instructions.
- Add cushions and pillows to the seat and backrest for added comfort.
Benefits of DIY Patio Chairs:
Building your own patio chairs allows you to create furniture that perfectly fits your outdoor space. You can customize the design, size, and finish to match your existing style. Additionally, DIY patio chairs can be a cost-effective alternative to store-bought options, saving you money while still providing a comfortable and stylish seating solution.
| Pros | Cons |
|---|---|
| Customizable to fit your space | Requires woodworking skills |
| Cost-effective compared to store-bought chairs | Time-consuming to build |
| Opportunity to showcase your DIY skills | May require additional tools |
By building your own patio chairs, you not only create a functional seating area but also have the satisfaction of completing a handmade project. With a little time and effort, you can enjoy the comfort and style of DIY outdoor furniture.
Make DIY Adirondack Chairs
Show off your DIY skills by assembling classic Adirondack chairs. These comfortable and stylish chairs can be created using 2x4s and upcycled pallet wood. Stain the chairs to protect them from the elements and consider painting them fun colors. These DIY Adirondack chairs are a great addition to any outdoor space and can be customized to match your style.
| Materials | Tools | Time | Cost |
|---|---|---|---|
|
| 1-2 days | $50-$100 |
Building your own Adirondack chairs allows you to create a personalized seating option for your outdoor space. These chairs are known for their wide armrests, slanted back, and low-to-the-ground design, providing optimal comfort for lounging and soaking up the sun.
To get started, gather the necessary materials, including 2×4 boards and upcycled pallet wood. The 2×4 boards will form the frame of the chairs, while the pallet wood can be used to create the slats for the seat and backrest.
Next, use a saw to cut the 2×4 boards into the desired lengths for the chair frame, following a pre-designed plan or template. Once the frame pieces are cut, assemble them using a drill and screws to secure the joints.
After the frame is assembled, use a sanding block to smooth any rough edges or surfaces. This will ensure a comfortable seating experience. You can also paint or stain the chair to protect it from the outdoor elements and add a pop of color or a natural wood finish.
For the seat and backrest, cut the upcycled pallet wood into slats of appropriate length and width. Attach the slats to the frame using screws or nails, spacing them evenly for a visually appealing and comfortable seating surface.
Once your DIY Adirondack chairs are complete, place them in your outdoor space, whether it’s a patio, deck, or garden. You can add cushions or pillows for extra comfort and style.
In conclusion, building DIY Adirondack chairs is a rewarding and budget-friendly project that allows you to showcase your craftsmanship and create custom outdoor seating. Enjoy relaxing in your comfortable and stylish chairs while soaking up the beauty of your outdoor oasis.
Include a Rocking Chair
Add a touch of relaxation to your outdoor space with a DIY rocking chair. Whether you choose to build one using old pallets or cedar, be sure to treat the wood to protect it from weather damage. Use the rocking chair as a statement piece on your porch, patio, or by a fire table. Create a cozy ambiance by adding a throw and colorful pillows.
Conclusion
Transforming your outdoor living space with DIY outdoor furniture projects is a cost-effective and customizable way to add style and functionality. Whether you’re new to DIY or have plenty of experience, there are a plethora of project ideas available to suit your taste and skill level.
From building outdoor sofas and benches to crafting coffee tables and chairs, the possibilities for creating your own unique pieces are endless. By incorporating DIY outdoor furniture into your space, you can customize the design, materials, and finishes to perfectly fit your needs and personal style.
So, why wait? Get inspired and start your own DIY outdoor furniture journey today. With a little creativity and some handy tools, you can elevate your outdoor living experience and enjoy the satisfaction of creating something beautiful and functional with your own hands.
FAQ
What are some DIY outdoor furniture project ideas?
Some DIY outdoor furniture project ideas include building a DIY outdoor sofa, making a faux vintage galvanized planter, creating a potting bench from pallets and an antique window, building an easy DIY pallet bar, constructing a DIY rustic bench using free building plans, making wooden lanterns for under , giving a front porch a cheerful makeover with DIY outdoor chairs, building a DIY planter box with only 2 tools, creating a DIY rustic log and reclaimed wood garden bench, upcycling an ottoman, assembling a DIY coffee table, putting together a patio chair, making DIY Adirondack chairs, and including a rocking chair.
What materials are needed for these DIY outdoor furniture projects?
The materials needed for these DIY outdoor furniture projects can vary depending on the specific project. However, some common materials include lumber (such as 2x4s and 2x6s), pallets, cedar wood, spruce wood, logs, vintage scrap wood, an old tire, rope, furniture legs, wooden boards, and concrete blocks. You may also need additional materials such as screws, nails, wood glue, stain, paint, cushions, and pillows.
Are these DIY outdoor furniture projects suitable for beginners?
Yes, many of these DIY outdoor furniture projects are suitable for beginners. They often require basic woodworking skills and can be completed with a minimal amount of tools. Some projects even provide free building plans and step-by-step tutorials to guide you through the process. Whether you’re a beginner or experienced DIYer, there are project ideas that can be tailored to your skill level.
How much does it cost to build DIY outdoor furniture?
The cost of building DIY outdoor furniture can vary depending on the specific project and the materials used. However, many of these projects can be done on a budget, utilizing reclaimed or salvaged materials. By repurposing items you already have or using affordable materials, you can create custom outdoor furniture for a fraction of the cost of buying it pre-made.
Can I customize the DIY outdoor furniture to match my style?
Absolutely! One of the advantages of DIY outdoor furniture projects is the ability to customize them to match your style and outdoor decor. You can choose different stains or paints, add cushions and pillows in your preferred colors and patterns, and even modify the dimensions or design to fit your specific space. Adding personal touches to the projects allows you to create unique and personalized outdoor furniture.
Where can I find more information and tutorials for these DIY outdoor furniture projects?
For more information and tutorials on these DIY outdoor furniture projects, you can refer to websites and blogs that specialize in DIY and woodworking. Some reputable sources include Ana White, DIY Network, and The Spruce. These websites often provide detailed plans, step-by-step instructions, and even video tutorials to guide you through the process of building your own outdoor furniture.