Are you ready to unleash your inner DIY enthusiast? Look no further than Fix This Build That, your go-to resource for all your home project needs. Whether you’re a seasoned DIY pro or just starting out, Fix This Build That offers easy-to-follow guides, tips, and inspiration to help you confidently tackle any project.
With Fix This Build That, you’ll find a wide range of DIY projects to choose from. Whether you want to build furniture, upgrade your home decor, or enhance your outdoor space, they’ve got you covered. Their step-by-step instructions and detailed plans make it easy for anyone to create beautiful and functional pieces for their home.
Not only does Fix This Build That provide clear instructions, but they also empower you with the knowledge and skills to take on your DIY projects with confidence. You’ll learn valuable tips and tricks along the way, ensuring that your creations turn out just the way you envision.
Don’t let the fear of the unknown hold you back from pursuing your DIY dreams. With Fix This Build That, you’ll gain the confidence and expertise needed to tackle any home project, big or small. Say goodbye to expensive store-bought items and hello to personalized, handmade pieces that reflect your style and creativity.
Key Takeaways:
- Fix This Build That is your ultimate resource for DIY projects
- Easy-to-follow guides and tips for home projects
- Build furniture, create home decor, or tackle outdoor projects
- Gain confidence and expertise with step-by-step instructions
- Create personalized, handmade pieces for your home
Build Your Own DIY Smokeless Fire Pit
If you love spending time outdoors and enjoy the cozy ambiance of a fire pit, why not take it a step further and build your own DIY smokeless fire pit? With the help of Fix This Build That’s instructions and plans, you can create a super efficient fire pit that will enhance your outdoor space.
Building your own smokeless fire pit is not only a fun and rewarding project, but it’s also surprisingly easy to do. You don’t need a lot of technical skills or specialized tools to get started. Follow Fix This Build That’s step-by-step guide, and you’ll be enjoying cozy evenings around the fire in no time.
Why Choose a DIY Smokeless Fire Pit?
Traditional fire pits can often produce a lot of smoke, which can be unpleasant and bothersome, especially if you’re trying to enjoy a meal or conversation outdoors. A smokeless fire pit, as the name suggests, significantly reduces smoke production, allowing you to have a more enjoyable and comfortable experience around the fire.
“A DIY smokeless fire pit is not only a practical and efficient solution, but it also adds a touch of sophistication to your outdoor space.”
Furthermore, building your own fire pit allows you to customize it to your preferences and create a unique design that complements your outdoor aesthetic. Whether you prefer a sleek modern look or a rustic backyard vibe, you have the freedom to tailor your DIY smokeless fire pit to match your style.
Benefits of a DIY Smokeless Fire Pit
There are several benefits to building your own DIY smokeless fire pit:
- Cost-effective: Building your own fire pit can be a more affordable option compared to purchasing a pre-made one.
- Customizable: You have full control over the design, size, and materials used in your fire pit.
- Easy maintenance: DIY fire pits are typically easy to clean and maintain, making them a hassle-free addition to your outdoor space.
- Outdoor entertainment: A smokeless fire pit provides a focal point for outdoor gatherings and creates a warm and inviting atmosphere.
Get Started on Your DIY Smokeless Fire Pit
If you’re ready to embark on this easy and rewarding outdoor project, head over to Fix This Build That’s website to access their detailed instructions and plans. Follow their step-by-step guide, and in no time, you’ll have your own efficient and smokeless fire pit to enjoy with family and friends.
Make a Simple Wooden Jewelry Box
Looking for an easy DIY project that will add a personal touch to your home decor? Look no further than making a simple wooden jewelry box. With just a few materials and some basic woodworking skills, you can create a beautiful and functional piece to store and display your favorite jewelry.
Follow the step-by-step instructions from Fix This Build That to craft your very own DIY wooden jewelry box. Not only will you have a unique and customizable storage solution, but you’ll also have the satisfaction of creating something with your own hands.

Gather Your Materials
Before you begin, gather the following materials:
- Wood – Choose a sturdy and aesthetically pleasing wood such as oak, cherry, or mahogany
- Saw – A miter saw or circular saw for cutting the wood
- Sandpaper – Different grits for sanding the wood to a smooth finish
- Wood glue – High-quality adhesive for joining the pieces together
- Clamps – To hold the pieces in place while the glue dries
- Hinges – For attaching the lid to the box
- Latch or lock – To secure the box
- Wood stain or paint – Optional for adding color or enhancing the natural wood grain
Follow the Step-by-Step Guide
Once you have all the necessary materials, it’s time to start building your wooden jewelry box. Follow these steps:
- Cut the wood into the desired dimensions for the box and lid.
- Sand all the surfaces of the wood until smooth.
- Apply wood glue to the edges of the box pieces and assemble them, using clamps to hold them in place.
- Allow the glue to dry according to the manufacturer’s instructions.
- Attach the hinges to the back of the box and the lid.
- Secure the latch or lock to the front of the box, ensuring it closes properly.
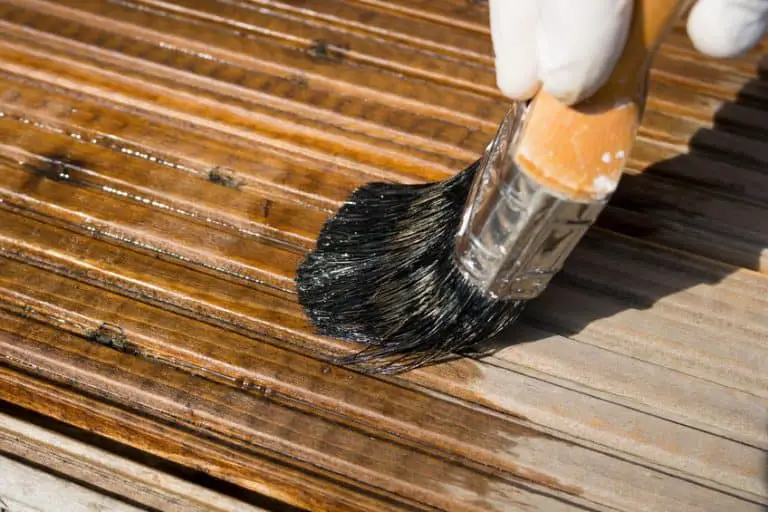
- If desired, apply wood stain or paint to the box to add color or enhance the natural beauty of the wood.
- Allow the stain or paint to dry completely.
- Your DIY wooden jewelry box is now ready to use! Fill it with your favorite pieces and proudly display it in your home.
Materials for Making a Simple Wooden Jewelry Box
| Materials | Description |
|---|---|
| Wood | Choose a sturdy and aesthetically pleasing wood such as oak, cherry, or mahogany. |
| Saw | A miter saw or circular saw for cutting the wood. |
| Sandpaper | Different grits for sanding the wood to a smooth finish. |
| Wood glue | High-quality adhesive for joining the pieces together. |
| Clamps | To hold the pieces in place while the glue dries. |
| Hinges | For attaching the lid to the box. |
| Latch or lock | To secure the box. |
| Wood stain or paint | Optional for adding color or enhancing the natural wood grain. |
By following this DIY project, you can create a beautiful and functional wooden jewelry box that will showcase your favorite pieces and add a personal touch to your home decor. Enjoy the satisfaction of crafting something with your own hands while also organizing and displaying your jewelry in style.
DIY Entryway Shoe Storage Bench
Create a functional and stylish entryway with a DIY shoe storage bench. Fix This Build That offers a detailed guide on how to build your own entryway shoe storage bench, ensuring organization and efficiency in your home. This project allows you to keep your shoes neatly arranged while adding a beautiful piece of furniture to your space.
By following the step-by-step instructions provided by Fix This Build That, you can create a customized shoe storage bench that fits perfectly in your entryway. The bench not only provides a convenient place to sit while putting on or taking off your shoes but also offers ample storage space to keep your footwear organized and easily accessible.
With this DIY project, you can say goodbye to cluttered entryways and hello to a more organized and inviting space. The entryway shoe storage bench is not only practical but also adds a touch of style to your home decor. You can choose the materials and finishes that best match your existing furniture and personal aesthetic.
Invest your time and creativity into building your own entryway shoe storage bench and enjoy the benefits of an organized and efficient space. From sneakers to sandals, heels to boots, every pair of shoes can have its designated spot, allowing you to find what you need quickly and effortlessly.
“A clutter-free entryway sets the tone for an organized home. With a DIY entryway shoe storage bench, you can keep your footwear neatly arranged and create a stylish space.”
The table below highlights the key benefits of building a DIY entryway shoe storage bench:
| Benefits of DIY Entryway Shoe Storage Bench |
|---|
| 1. Efficient organization of shoes |
| 2. Convenient seating while putting on or taking off shoes |
| 3. Ample storage space for footwear |
| 4. Customizable design to match your home decor |
| 5. Clutter-free entryway |
Take control of your entryway and create a functional and stylish space with a DIY entryway shoe storage bench. Follow the detailed instructions provided by Fix This Build That and enjoy the benefits of an organized and inviting home.


Build a DIY Stone Fire Pit
Transform your outdoor space into a cozy gathering place with a DIY stone fire pit. This easy project from Fix This Build That will add warmth and ambiance to your backyard, making it the perfect spot for relaxing evenings or hosting outdoor get-togethers.
Creating your own stone fire pit is simple with the step-by-step guide provided by Fix This Build That. You’ll be able to customize the design to suit your style, and the result will be a stunning centerpiece that enhances the beauty of your outdoor area.
Whether you’re a seasoned DIY enthusiast or just starting out, this project is achievable and rewarding. Follow the instructions carefully, and you’ll soon have a stone fire pit that will become a favorite spot for making memories with family and friends.
“A stone fire pit brings warmth and beauty to any outdoor space. It’s a gathering place where stories are shared and laughter fills the air.”
Materials You’ll Need
- Stone blocks or pavers
- Fire pit ring or liner
- Sand or gravel
- Fire bricks
- Masonry adhesive
- Shovel
- Tape measure
- Level
- Rubber mallet
Step-by-Step Instructions
- Choose a suitable location in your outdoor space for the fire pit.
- Prepare the area by clearing away any debris or vegetation.
- Mark the dimensions of the fire pit using stakes and string.
- Dig a shallow trench within the marked area for the first layer of stones.
- Fill the trench with a layer of sand or gravel for stability.
- Begin laying the first layer of stones, ensuring they are level and secure with masonry adhesive.
- Continue adding layers of stones, staggering the joints for stability.
- Place the fire pit ring or liner in the center of the structure.
- Add a layer of fire bricks to the interior of the fire pit for heat resistance.
- Complete the final layer of stones, ensuring a secure and even surface.
Now that your DIY stone fire pit is complete, you can add some charm and functionality to your outdoor space. Arrange comfortable seating around the fire pit and create a cozy atmosphere with outdoor pillows and blankets. Get ready to enjoy evenings filled with the crackling of the fire and the warmth of camaraderie.

Easy DIY Patio Chair from 2x4s
If you’re looking to create comfortable and stylish outdoor furniture, building your own DIY patio chair is an easy project that you can take on. With the help of Fix This Build That’s plans and instructions, you can bring your vision to life using simple 2x4s.
This DIY patio chair project is perfect for those who want to customize their outdoor space with furniture that suits their style and needs. By building your own chair, you have the freedom to choose the design, size, and finish that best complements your patio or backyard.
The materials for this project are easily accessible and affordable. 2x4s are widely available at home improvement stores, making it convenient to gather everything you need to get started. Plus, working with 2x4s is beginner-friendly, so even if you’re new to DIY projects, you can confidently tackle this endeavor.
Fix This Build That provides comprehensive plans and step-by-step instructions to guide you through the construction process. Their easy-to-follow tutorials ensure that you can complete the project without any hassle. Whether you prefer written instructions or visual guidance, their resources cater to different learning styles.
By building your own patio chair, you not only save money compared to buying pre-made furniture but also have the satisfaction of creating something with your own hands. It’s a fulfilling DIY project that allows you to showcase your craftsmanship and creativity.
DIY patio chairs are a fantastic addition to any outdoor space. Not only are they functional and comfortable, but they also add a personal touch that can’t be found in store-bought furniture. With Fix This Build That’s plans and instructions, you’ll be able to create a stylish and customized patio chair that is perfect for lounging and entertaining outdoors.
Choosing the Right Design
When building your DIY patio chair from 2x4s, you have the flexibility to choose from various designs and styles. Whether you prefer a classic Adirondack chair or a modern sling chair, there’s a design out there that suits your taste.
Consider the overall aesthetic of your outdoor space and the level of comfort you desire. Some designs feature contoured seats and backrests for enhanced comfort, while others prioritize a sleek and minimalist look.
Furthermore, you can customize the chair by adding cushions or pillows to make it even more inviting. This allows you to create a cozy seating area that reflects your personal style.
Building Process
The building process for a DIY patio chair from 2x4s involves cutting and assembling the wooden pieces to form the chair’s frame. Fix This Build That provides detailed measurements and diagrams to ensure accuracy and a smooth assembly process.
The tutorial will guide you through each step, including techniques for cutting the wood, drilling pilot holes, and attaching the pieces securely. If you don’t have all the necessary tools, the tutorial also suggests alternative methods to help you complete the project.
Once the frame is assembled, you can add finishing touches such as sanding and staining to protect the wood and enhance its appearance. The tutorial provides recommendations for finishes that are suitable for outdoor use, ensuring the longevity of your DIY patio chair.
With Fix This Build That’s plans and instructions, you’ll have all the guidance you need to successfully build your own DIY patio chair. Get ready to relax and enjoy the outdoors with a chair that’s not only functional but also showcases your DIY skills.
DIY Sofa with Modern Styling
Looking to add a sleek and stylish piece of furniture to your home? With Fix This Build That’s guide on how to build a DIY sofa with modern styling, you can create a stunning centerpiece for your living room or lounge area. This project combines the satisfaction of DIY with the allure of modern design, allowing you to customize every aspect of your sofa to suit your taste and space.
Building your own sofa not only gives you a sense of accomplishment but also allows you to save money compared to buying a brand new piece. You’ll also have the advantage of designing a sofa that perfectly matches your aesthetic preferences and space requirements.
With Fix This Build That’s detailed instructions and plans, you can confidently take on this DIY project, even if you’re a beginner. The step-by-step guide provides clear and easy-to-follow directions, ensuring that you achieve professional-level results.
Why Choose a DIY Sofa?
“A DIY sofa provides a unique opportunity to create a one-of-a-kind piece tailored to your specific needs and preferences.”
Not only does building your own sofa offer creative freedom, but it also allows you to select high-quality materials that ensure durability and longevity. By using premium materials such as solid wood for the frame and high-density foam for the cushions, you can create a sofa that will stand the test of time.
Additionally, building a DIY sofa can be a fun and rewarding project for individuals or couples who enjoy working with their hands and appreciate the satisfaction of completing a tangible creation. It’s an opportunity to showcase your craftsmanship and add a personal touch to your living space.
Materials and Tools Needed
To successfully build your own DIY sofa, you will need the following materials and tools:
- Wood for the frame
- Foam for the cushions
- Fabric for upholstery
- Screws and nails
- Wood glue
- Saw
- Sander
- Drill
- Staple gun
Follow the Modern Sofa Building Guide
To begin your DIY sofa project, follow Fix This Build That’s comprehensive guide on how to build a DIY sofa with modern styling. The guide provides step-by-step instructions, accompanied by detailed diagrams and photographs, ensuring that you can visualize each stage of the process.
By following the guide, you’ll learn how to:
- Choose the right materials for your sofa
- Take accurate measurements
- Construct a sturdy frame
- Create comfortable and stylish cushions
- Upholster your sofa with precision
Throughout the guide, you’ll find tips and tricks to help you overcome any challenges that may arise during the building process. Whether you’re a seasoned DIY enthusiast or a newcomer to furniture construction, Fix This Build That’s guide will provide the guidance you need to bring your DIY sofa to life.
So why wait? Unleash your creativity and build a modern DIY sofa that will impress your guests and provide a comfortable and stylish seating option for years to come.

A Better DIY Cordless Tool Storage Cabinet
Are you tired of digging through a cluttered workshop to find your cordless tools? It’s time to bring some organization into your workspace with a DIY tool storage cabinet. With the help of Fix This Build That, you can create a custom storage solution that not only keeps your tools neatly arranged but also maximizes efficiency in your workshop.
Follow these step-by-step instructions to build your own DIY tool storage cabinet:
Gather Your Materials
Before you begin, gather all the necessary materials for this project. Here’s what you’ll need:
- 1/2″ plywood
- 2×4 boards
- Wood screws
- Hinges
- Drawer slides
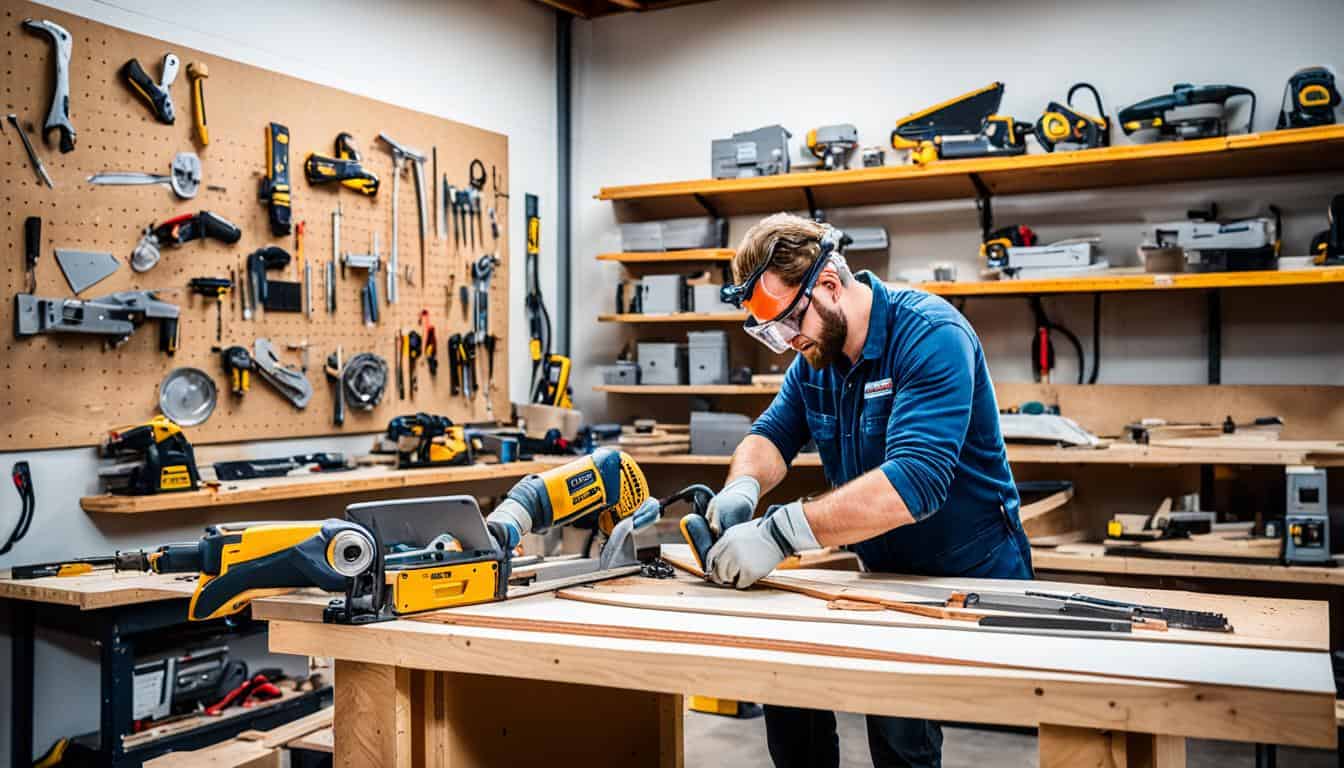
- Power tools (such as a saw, drill, and sander)
Measure and Cut
Measure your workshop space to determine the dimensions of your tool storage cabinet. Mark the measurements on the plywood, and use a saw to cut the pieces to size. Cut the 2×4 boards to create the frame and shelves for your cabinet.
Assemble the Cabinet
Begin by assembling the frame of the cabinet using the cut 2×4 boards. Secure the corners with wood screws for added stability. Next, attach the plywood panels to the frame using screws.
Add Shelves and Drawers
Install shelves within the cabinet, ensuring they are spaced appropriately for your cordless tools. For added convenience, incorporate drawers with drawer slides to store smaller accessories and parts.
Mount the Cabinet
Find a suitable location in your workshop to mount the tool storage cabinet. Use sturdy wall anchors or attach it to the wall studs to ensure stability. Install hinges on the cabinet doors to allow for easy access.
Organize and Enjoy
Once your DIY tool storage cabinet is complete, it’s time to organize your cordless tools. Designate specific areas for each tool and make use of bins or dividers to keep everything in order. With your tools neatly arranged and easily accessible, you can now enjoy a more efficient and productive workshop.
| Benefits: |
|
|---|---|
| Tips: |
|
Build Modern DIY Storage Cabinets for your Home Office!
Are you tired of cluttered and disorganized spaces in your home office? It’s time to take matters into your own hands and create stylish and functional storage solutions with DIY storage cabinets. With Fix This Build That’s expert guidance, you can easily build modern storage cabinets that will transform your home office into an organized and inspiring workspace.
Building your own storage cabinets allows you to customize the design, size, and layout according to your specific needs. Whether you require spacious shelving for books and files or convenient drawers for smaller office supplies, DIY storage cabinets offer endless possibilities.
Why Choose DIY Storage Cabinets?
DIY storage cabinets are not only cost-effective but also provide a sense of fulfillment and pride as you create something functional and beautiful with your own hands. Additionally, by building your own cabinets, you have complete control over the materials used, ensuring durability and longevity.
“Creating DIY storage cabinets for your home office is a game-changer. You’ll have a designated place for all your essentials, eliminating clutter and increasing productivity.”
Moreover, DIY storage cabinets allow you to design the cabinets to complement your existing home office decor. You can choose the perfect color, finish, and hardware that aligns with your personal style.
Building Modern DIY Storage Cabinets
To get started on your DIY storage cabinets, follow these easy steps by Fix This Build That:
- Gather all the necessary materials, including wood, screws, hinges, and drawer slides.
- Measure your available space and plan the dimensions of your cabinets.
- Cut the wood pieces according to your measurements.
- Assemble the cabinets using the provided step-by-step instructions.
- Add finishing touches such as paint, stain, or varnish to achieve a professional look.
Remember to prioritize organization and functionality when designing your storage cabinets. Incorporate adjustable shelving, wire management solutions, and compartments for different-sized items to maximize storage efficiency.
| Benefits of DIY Storage Cabinets for your Home Office |
|---|
| Customizable designs tailored to your specific needs |
| Cost-effective compared to pre-built storage options |
| Sense of accomplishment and pride in creating something yourself |
| Complete control over materials and durability |
| Ability to match cabinets with your home office decor |
Building modern DIY storage cabinets for your home office is a rewarding project that will elevate your workspace, improve organization, and boost your productivity. Visit Fix This Build That’s website today for detailed instructions, plans, and inspiration to get started on transforming your home office into an organized haven.
How To Build Built-in Bookshelves with a Desk
Transform your workspace with DIY built-in bookshelves and a desk. This project allows you to create a functional and stylish workspace with ample storage. Follow the step-by-step instructions provided by Fix This Build That to build your own built-in bookshelves with a desk.
Materials You Will Need:
- Wood boards
- Screws
- Drill
- Saw
- Sanding tools
- Paint or stain
Step 1: Plan and Measure
Start by planning the design and layout of your built-in bookshelves and desk. Measure the available space in your room and determine the dimensions for the bookshelves and desk area. This will help you create a customized solution that fits perfectly in your workspace.
Step 2: Cut and Assemble
Using the measurements, cut the wood boards according to the dimensions of the bookshelves and desk. Assemble the bookshelves first, attaching the boards together with screws. Then, build the desk by connecting the appropriate boards to create a sturdy surface.
Step 3: Sand and Finish
After assembling the bookshelves and desk, sand the surfaces to ensure a smooth finish. Pay attention to the edges and corners to create a polished look. Once sanded, apply a coat of paint or stain to protect the wood and enhance the overall aesthetic of the built-in bookshelves and desk.
Step 4: Install
Finally, install the built-in bookshelves and desk in your workspace. Secure them to the wall for added stability and safety. Arrange your books, decorations, and office supplies on the shelves to create an organized and visually appealing workspace.
Benefits of DIY Built-in Bookshelves with a Desk
“Creating built-in bookshelves with a desk provides multiple benefits for your workspace. Not only does it optimize storage and organization, but it also adds a professional and customized touch to your office. With everything within reach, you’ll experience improved productivity and efficiency.”
Now you have the knowledge and instructions to build your own built-in bookshelves with a desk. Follow the expert guidance from Fix This Build That and transform your workspace into a functional and stylish haven of organization. Get started on this DIY project today!
How to Build a DIY Bike Stand
If you’re tired of your bikes cluttering up your outdoor space, creating a DIY bike stand is the perfect solution. With a DIY bike stand, you can keep your bikes organized and maximize your outdoor area. Follow the step-by-step instructions below to build your own bike stand and enjoy a well-organized and tidy outdoor environment.
Materials Needed:
- 2×4 lumber
- Plywood
- Screws
- Screwdriver
- Saw
Instructions:
- Measure and cut the 2×4 lumber according to the desired dimensions of your bike stand. Consider the number of bikes you want to store and leave enough space between each bike.
- Assemble the base by attaching the cut pieces of 2×4 lumber together using screws.
- Create the vertical supports by cutting the 2×4 lumber to the desired height. Attach the supports to the base using screws.
- Measure and cut the plywood to create the top support for your bikes. Attach it to the vertical supports using screws.
- Optional: Add additional hooks or storage compartments to hang helmets or other bike accessories.
- Place your bikes on the stand, ensuring they are stable and secure.
A DIY bike stand is not only a practical solution for bike storage but also adds a touch of organization and tidiness to your outdoor space. With just a few materials and some basic carpentry skills, you can create a bike stand that meets your specific needs and keeps your bikes easily accessible. Get ready to enjoy a clutter-free outdoor area and have your bikes ready for your next adventure.
Benefits of a DIY Bike Stand
A DIY bike stand offers several advantages for bike enthusiasts:
- Organization: Keep your bikes neatly stored and easily accessible, preventing them from cluttering your outdoor space.
- Space-saving: A bike stand allows you to utilize vertical space, freeing up valuable floor space in your garage or shed.
- Protection: By keeping your bikes off the ground, a bike stand helps prevent scratches and damage.
- Easy maintenance: A bike stand makes it easier to clean, repair, and maintain your bikes, as they are at a comfortable height and easily reachable.
DIY Raised Garden Bed Backyard Makeover
Transform your backyard into a stunning oasis of greenery and fresh produce with a DIY raised garden bed. This project is perfect for gardening enthusiasts who want to make the most of their outdoor space and enjoy the benefits of growing their own fruits, vegetables, and herbs.
Building a raised garden bed not only adds aesthetic appeal to your backyard but also provides a practical and efficient way to cultivate plants. With a raised bed, you have more control over the soil quality, drainage, and overall maintenance of your garden.
Follow the expert instructions provided by Fix This Build That to create your own raised garden bed. Whether you have a small patio or a spacious backyard, building a DIY raised garden bed is a versatile project that can be customized to fit your specific needs and space constraints.
By elevating your garden, you create a barrier between your plants and potential pests such as rabbits and snails. This elevated position also helps to prevent common issues like waterlogging and soil erosion, ensuring that your plants thrive.
Benefits of a DIY Raised Garden Bed:
- Optimized Growing Conditions: You have control over the quality, composition, and drainage of the soil, providing the ideal conditions for your plants to flourish.
- Extended Growing Season: Raised garden beds warm up faster in the spring, allowing you to start planting earlier and extend your growing season into the fall.
- Improved Accessibility: The raised height of the bed makes it easier to tend to your plants, reducing strain on your back and knees.
- Efficient Use of Space: Raised beds maximize the use of limited space in your backyard, allowing you to grow more plants in a smaller area.
Take inspiration from the image below and start planning your DIY raised garden bed project:
With a DIY raised garden bed, you can transform your backyard into a picturesque haven of greenery and enjoy the satisfaction of growing your own food. Get started on your backyard makeover today!
Conclusion
Fix This Build That is the ultimate destination for all DIY enthusiasts seeking to embark on exciting home improvement projects. With their extensive collection of easy-to-follow guides and tips, you’ll be equipped with the knowledge and confidence to bring your creative ideas to life. Whether you’re a seasoned DIYer or just starting out, Fix This Build That offers a wealth of resources to help you successfully complete your DIY projects.
From building your own furniture to transforming your outdoor space, Fix This Build That provides step-by-step instructions and plans that make DIY projects a breeze. Their meticulous attention to detail ensures that you can confidently tackle any project, no matter the complexity. And with their emphasis on user-friendly guides, you’ll be able to navigate each step with ease.
So why wait? Visit the Fix This Build That website today to discover a wide range of DIY project ideas that will inspire your next creative endeavor. Unleash your inner craftsman, enhance your home, and experience the satisfaction of completing projects that truly reflect your personal style. With Fix This Build That by your side, the possibilities for home improvement are endless.
FAQ
What kind of projects does Fix This Build That provide guides for?
Fix This Build That offers a range of easy-to-follow guides and tips for various DIY projects, including building furniture, creating home decor, and tackling outdoor projects.
How can Fix This Build That help me with my DIY projects?
By providing step-by-step instructions and plans, Fix This Build That helps you complete your DIY projects with confidence, unlocking your DIY potential.
What is a DIY smokeless fire pit, and how can I build one?
A DIY smokeless fire pit is a super efficient outdoor fire pit that minimizes smoke. Fix This Build That offers a detailed guide on how to build your own smokeless fire pit, enhancing your outdoor space and creating cozy evenings around the fire.
How can I make a simple wooden jewelry box?
Fix This Build That provides a guide on how to make a simple wooden jewelry box, perfect for adding a personal touch to your home decor. Follow their instructions to create a beautiful and functional jewelry box.
How can I build a DIY shoe storage bench for my entryway?
Fix This Build That offers a detailed guide on building a DIY shoe storage bench for your entryway. This project will help you keep your shoes organized and create a functional and stylish piece of furniture. Follow their step-by-step instructions to create your own entryway shoe storage bench.
What is a DIY stone fire pit, and how can I build one?
A DIY stone fire pit is a project that enhances your outdoor space and creates a gathering place for friends and family. Fix This Build That provides a step-by-step guide on building your own stone fire pit, allowing you to enjoy cozy evenings and create lasting memories.
How can I build an easy DIY patio chair using 2x4s?
Fix This Build That offers plans and instructions for building a DIY patio chair using 2x4s. This project is a great way to create comfortable and stylish outdoor furniture. Follow their guide to build your own patio chair.
How can I build a DIY sofa with modern styling?
Fix This Build That provides a guide on how to build a DIY sofa with modern styling, helping you create a sleek and stylish piece of furniture for your home. Follow their instructions to build your own modern sofa.
How can I build a better DIY cordless tool storage cabinet?
Fix This Build That offers plans and instructions for building a better DIY cordless tool storage cabinet. This project will help you keep your cordless tools organized and create an efficient workspace in your workshop. Follow their step-by-step guide to build your own tool storage cabinet.
How can I build modern DIY storage cabinets for my home office?
Fix This Build That provides a guide on how to build modern DIY storage cabinets for your home office. This project will help you create a functional and organized workspace. Follow their instructions to build your own storage cabinets.
How can I build built-in bookshelves with a desk?
Fix This Build That provides a detailed guide on how to build built-in bookshelves with a desk. This project is perfect for creating a functional and stylish workspace with plenty of storage. Follow their step-by-step instructions to build your own built-in bookshelves with a desk.
How can I build a DIY bike stand?
Fix This Build That offers a guide on how to build a DIY bike stand, helping you keep your bikes organized and create a clutter-free outdoor space. Follow their instructions to build your own bike stand.
How can I build a DIY raised garden bed?
Fix This Build That provides instructions for building a DIY raised garden bed, perfect for transforming your backyard into a beautiful and functional space for gardening. Follow their guide to create your own raised garden bed.
Q. How can Fix This Build That help me with my DIY projects?
Fix This Build That is a valuable resource for DIY enthusiasts looking to tackle a variety of projects. Their easy-to-follow guides and tips will equip you with the knowledge and confidence to complete your home improvement projects.