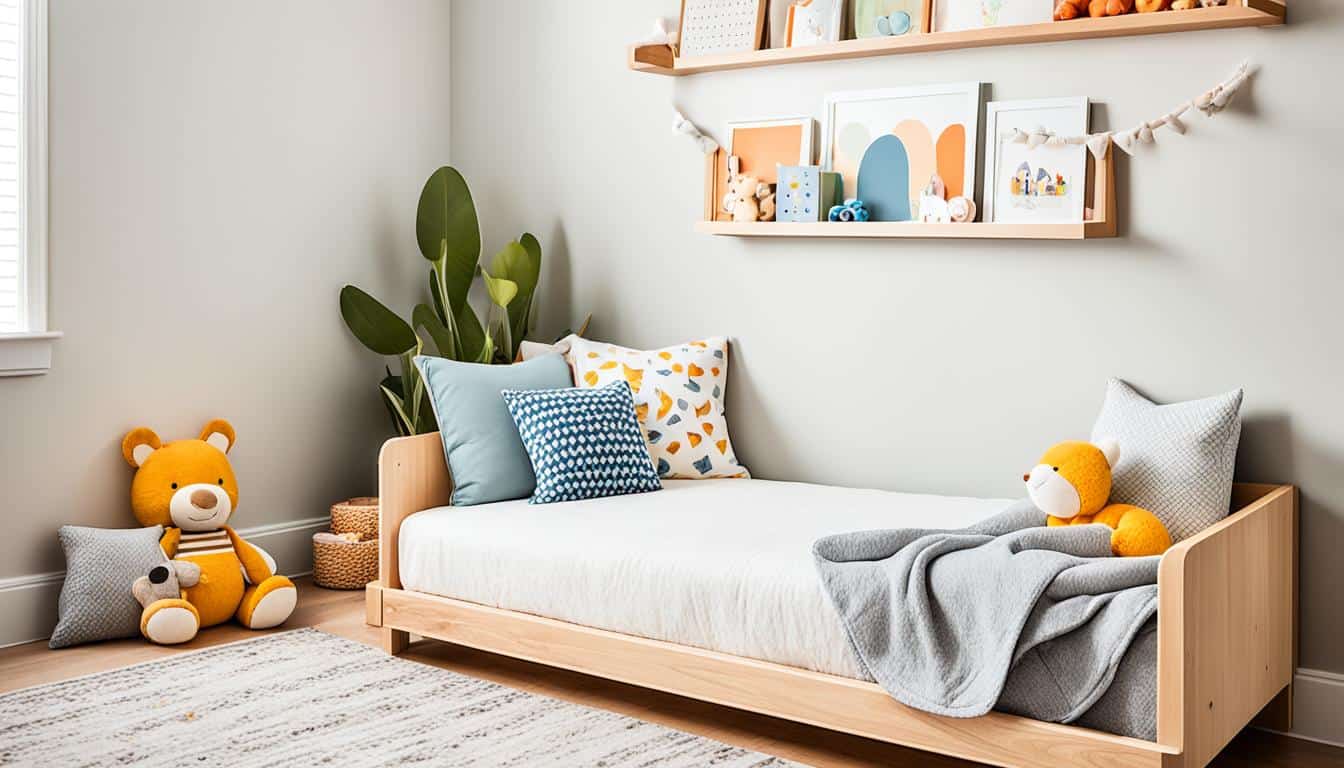
Are you looking to create a secure and charming DIY toddler bed? In this comprehensive guide, we will provide you with easy and safe steps to build your own toddler bed. Whether you’re a beginner or an experienced DIY enthusiast, you’ll find the instructions and materials you need to create a beautiful bed for your little one’s dreamy slumber.
Key Takeaways:
- Learn how to build a DIY toddler bed using simple and safe steps.
- Customize the design and appearance of the bed to suit your preferences and your child’s interests.
- Save money by building your own toddler bed instead of buying a pre-made one.
- Maintain the bed properly to ensure its longevity and safety.
- Building a DIY toddler bed can create a sense of pride and accomplishment.
Materials and Tools
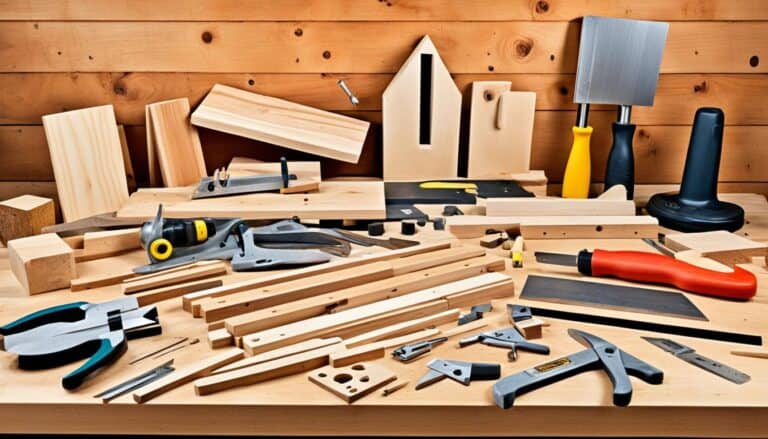
In order to build your own DIY toddler bed, you’ll need the following materials and tools:
- Materials:
- 2x4x8 boards
- 2x2x8 boards
- 2x3x8 boards
- ¾” diameter x 48″ long dowel rods
- 2 ½” pocket hole screws
- 2 ½” wood screws
- 2 ⅞” timber screws (optional)
- Wood glue
- Sandpaper
- Tools:
- Miter saw
- Drill/driver
- Pocket hole jig
- ¾” forstner bit
- Kreg Multi-Mark (helpful, not required)
- Various clamps (helpful, not required)
- Rubber mallet (helpful, not required)
These materials and tools will provide you with everything you need to successfully complete your wooden toddler bed project. With these resources at hand, you’ll have the necessary foundation to build your own toddler bed and create a cozy sleeping space for your little one.
Dimensions and Bed Rail Spacing
If you’re considering building a DIY bed for your kids, it’s important to have the right dimensions and bed rail spacing. The design provided in this guide is specifically made for a standard twin-size mattress, ensuring a perfect fit for your little one’s sleeping space. The dimensions for this DIY toddler bed project are as follows:
| Dimension | Measurement |
|---|---|
| Height | 21 ½ inches |
| Width | 44 inches |
| Length | 81 inches |
This DIY bed design is not intended to follow crib standards, as it is specially designed for older toddlers. However, you have the freedom to customize the bed to your liking. This includes adjusting the spacing between the bed rails or adding solid panels or bumpers for added safety and style.
To have a better idea of the dimensions and bed rail spacing, take a look at the image below:
Remember, when adjusting the bed rail spacing, always prioritize your child’s safety. Ensure that the spacing is not too wide, preventing the toddler from getting stuck or falling through, and not too narrow, reducing the risk of entrapment or injury.
Lumber Sizing and Rounded Board Edges
When it comes to building a toddler bed, there are a few considerations to keep in mind to ensure both safety and cost efficiency. In this section, we’ll explore an alternative approach to lumber sizing and highlight the importance of rounded board edges for your homemade toddler bed.
Lumber Sizing
Instead of using pre-cut 2x2s and 2x3s, you have the option to rip 2x4s into 1 ½” wide and 2″ wide pieces. This can be a cost-saving measure without compromising the structural integrity of the bed. By repurposing wider lumber and resizing it to fit the dimensions of the bed, you can economize on materials while maintaining a sturdy and reliable construction.
Rounded Board Edges
Given that a toddler bed is intended for young children, it is crucial to prioritize safety by rounding the corners of the boards. This prevents sharp edges that could potentially cause harm to your child. To achieve rounded edges, you can use sandpaper to smooth down any sharp corners or invest in a router with a rounded edge bit for a more precise finish.
By taking these steps to resize the lumber and ensure rounded board edges, you’ll create a safe and comfortable environment for your child to sleep soundly in their homemade toddler bed.
| Lumber Sizing | Rounded Board Edges |
|---|---|
| Cost-effective alternative Resizing 2x4s Structural integrity maintained | Prevents sharp edges Enhances safety for toddlers Sanding or router for rounded finish |
Assembling the Side Panels
Now that you have the necessary materials and tools, it’s time to start assembling the side panels of your DIY toddler bed. Follow these simple steps to ensure a sturdy and secure construction:
- Cut the 2×2 and 2×4 boards to the appropriate lengths according to your toddler bed design.
- Using a Kreg Multi-Mark tool, mark the center and dowel hole locations on the boards.
- Drill out the dowel holes using a ¾” forstner bit.
- Apply wood glue to the dowel holes and insert the dowels.
- Clamp the boards together and secure them using clamps and wood screws.
- Repeat the process to create two identical side panels for your toddler bed.
Your assembled side panels form the foundation of your toddler bed’s structure. Ensure that the boards are aligned correctly and tightly secured to provide a safe and sturdy sleeping area for your little one. Take a look at the image below to visualize the assembly process:
Building the Back and Front Panels
Once you have successfully assembled the side panels of your DIY toddler bed, it is time to move on to building the back and front panels. This step will bring you closer to completing your very own toddler bed that your little one will love. Follow these simple steps to continue the construction process.
Cutting the Lumber
To begin, carefully measure and cut the 2×2 and 2×4 pieces to the appropriate lengths for the back and front panels. Use a miter saw or a similar cutting tool to ensure accurate and clean cuts. Remember to take necessary safety precautions while operating power tools.
Marking and Drilling Dowel Holes
Once the lumber is cut, mark the locations for the dowel holes on the boards. Use a pencil or a marking tool to make accurate marks. These dowel holes will be used to join the rails and panels together securely. Next, use a drill and a ¾” forstner bit to carefully drill out the dowel holes. Take your time and ensure the holes are aligned properly.
Securing the Rails and Panels
After the dowel holes are drilled, it’s time to assemble the back and front panels. Apply a generous amount of wood glue to the ends of the rails and insert the dowels into the drilled holes. Make sure the dowels are fully inserted and seated properly. To provide additional strength and stability, you can also secure the rails and panels together using timber screws or pocket holes and screws.
Here is an example of how the back and front panels should look once assembled:
| Back Panel | Front Panel |
|---|---|
| Gently secure the back panel to the assembled side panels using wood glue and timber screws. | Follow the same process to attach the front panel to the side panels. |
| Ensure all joints are tight and secure for added stability. | Double-check the alignment and make any necessary adjustments before proceeding to the next step. |
Remember, precision is key during this step to ensure the panels are properly aligned and securely attached. Take your time to achieve the best results.
With the back and front panels in place, your DIY toddler bed will start taking shape. The next step will focus on adding the top rails, which will provide a finished look to your project. Stay tuned!
Adding the Top Rails
The final step in constructing the toddler bed is adding the top rails along the edges to cover the pocket holes and create a clean look. These rails not only provide additional support but also enhance the aesthetic appeal of the bed.
Start by cutting the 2×3 boards to the appropriate length to fit along the edges of the bed. Make sure to measure and cut accurately for a precise fit.
Once the boards are cut, apply wood glue to the top edges of the side and front panels of the bed. This will help secure the top rails in place.
Next, position the 2×3 boards on top of the panels, aligning them with the edges. Use wood screws to attach the top rails to the panels. Make sure to pre-drill pilot holes to prevent splitting the wood.
For added stability, you can also install the top rails from the bottom side of the panels. This method will hide the screws, creating a seamless look on the top side of the bed.
Ensure that the top rails are securely attached to provide a sturdy and safe sleeping environment for your child. Double-check the alignment and stability of the rails before moving on to the next step.
As a final touch, sand down any rough edges or splinters on the top rails to ensure a smooth and comfortable surface.
With the top rails in place, your DIY toddler bed is now complete! The addition of these rails not only adds structural support but also enhances the overall appearance of the bed. Your little one will love their new bed, custom-built with love and care.
Tips:
- Consider painting or staining the top rails to match the color scheme of your child’s room.
- Ensure that the top rails are installed securely to prevent any wobbling or movement.
- Regularly inspect the bed for any signs of wear and tear, especially on the top rails, and make necessary repairs or adjustments.
- Personalize the top rails by adding decorative elements, such as adhesive decals or stencils, to create a unique and customized look.
Finishing and Painting
Once the construction is complete, it’s time to add the finishing touches to your DIY toddler bed. By sanding the entire bed, you’ll create a smooth surface that is both comfortable and safe for your little one.
Now comes the fun part – painting! Choose a child-safe paint that is non-toxic, ensuring the health and well-being of your child. Consider using multiple coats of paint for added durability and a vibrant finish. Remember to sand down any rough edges after painting to maintain a safe sleeping environment.
Benefits of Finishing and Painting:
- Enhances the aesthetics of the toddler bed, matching your child’s room decor.
- Provides a protective layer, increasing the bed’s lifespan.
- Adds personalization and uniqueness to the bed.
Tip: For added creativity, consider using stencils or decals to create fun designs or patterns on the bed.
| Step | Action |
|---|---|
| 1 | Sand the entire bed with medium-grit sandpaper to create a smooth surface. |
| 2 | Clean the bed thoroughly to remove any dust or debris. |
| 3 | Apply a primer coat if desired, allowing it to dry completely. |
| 4 | Apply the first coat of child-safe paint, following the manufacturer’s instructions. |
| 5 | Allow the paint to dry and apply additional coats as needed. |
| 6 | Once the final coat is dry, sand any rough edges for a seamless finish. |
| 7 | Inspect the bed for any touch-ups or areas that may need additional paint. |
| 8 | Enjoy the beautiful, personalized look of your DIY toddler bed! |
Step-by-Step Tutorial
To assist you in visualizing the process, we have provided a step-by-step tutorial with detailed instructions and accompanying images. This tutorial will guide you through each stage of building the DIY toddler bed, from cutting the lumber to assembly and finishing touches. Follow along to ensure a successful and satisfying construction project.
- Gather the Materials: Before starting, make sure you have all the necessary materials and tools mentioned in Section 2. Having everything ready will ensure a smooth and uninterrupted building process.
- Cut the Lumber: Begin by cutting the 2x2s, 2x3s, and 2x4s according to the dimensions specified in Section 3. Use a miter saw to achieve accurate and clean cuts.
- Create the Side Panels: Assemble the side panels as described in Section 5. Use a pocket hole jig to create strong and seamless joints. Don’t forget to insert the dowel rods for added stability.
- Build the Back and Front Panels: Move on to constructing the back and front panels of the toddler bed. Follow the instructions provided in Section 6, ensuring that the dowel rods are securely in place.
- Add the Top Rails: Attach the top rails along the edges of the bed, covering the pocket holes for a neat finish. Use wood glue and screws to secure the rails, referring to Section 7 for more details.
- Sand and Finish: Once the main construction is complete, sand the entire bed, including all the edges and corners, to create a smooth surface. Apply your chosen paint or finish, following the guidelines in Section 8.
- Assemble the Bed: Carefully assemble all the components together, starting with the side panels and attaching the back and front panels. Use wood screws and clamps for added support during the assembly process.
- Double-Check Stability: Before allowing your child to use the bed, ensure that all screws are tightened and that the bed is stable. Test its stability by applying gentle pressure to different parts of the bed.
- Add Finishing Touches: Finally, personalize the bed by adding any additional features or decorative elements that you desire. Consider adding safety rails or unique designs to make the bed even more special.
By following this step-by-step tutorial, you’ll be able to build a sturdy and beautiful toddler bed that your little one will love. Take your time, follow the instructions carefully, and enjoy the process of creating a custom bed for your child.
Safety Considerations
When embarking on a DIY toddler bed project, safety should be your top priority. By taking the necessary precautions, you can ensure that the bed is secure and provides a safe sleeping environment for your child. Here are some important safety considerations to keep in mind:
- Secure fastening: It is crucial to ensure that all components of the toddler bed are securely fastened. Double-check the tightness of screws and joints to prevent any instability.
- Stability: Before allowing your child to use the bed, thoroughly test its stability. Shake the bed gently to ensure that it remains sturdy and level.
- Child-safe materials: Consider using child-safe materials to construct the bed. Opt for non-toxic paint and finishes to minimize any potential health risks.
- Regular inspections: Regularly inspect the toddler bed for any signs of wear and tear. Check for loose screws, splintered wood, or any other potential hazards. Address any issues promptly to maintain a safe sleep environment.
By following these safety guidelines, you can have peace of mind knowing that your DIY toddler bed is built with your child’s safety in mind.

Table of Common Safety Considerations
| Safety Aspect | Importance |
|---|---|
| Secure fastening | Crucial to ensure stability and prevent accidents. |
| Stability | Essential for a secure and level sleeping surface. |
| Child-safe materials | Protects your child from potential health risks. |
| Regular inspections | Maintains a safe sleep environment by identifying and addressing potential hazards. |
Benefits of a DIY Toddler Bed
Building a DIY toddler bed offers several benefits. First, it allows you to customize the design and appearance according to your preferences and your child’s interests. With a DIY bed, you have the freedom to choose the colors, patterns, and themes that will make your child excited about bedtime.
Second, creating a homemade toddler bed can be a cost-effective alternative to purchasing a pre-made bed. By using readily available materials and tools, you can save money while still providing a safe and comfortable sleeping space for your little one.
Finally, the act of building a bed for your child can create a sense of pride and accomplishment. It is a tangible way to show your love and care, and it can strengthen the bond between parent and child. Every time your child sleeps peacefully in the bed you built, you’ll feel a deep sense of fulfillment.
So why not embark on this rewarding DIY project? By building a DIY toddler bed, you can unleash your creativity, save money, and create lasting memories with your child.
Maintenance and Longevity
In order to ensure the longevity of your DIY toddler bed, performing regular maintenance is essential. By taking proactive steps to inspect, tighten, and clean your bed, you can ensure that it provides a safe and comfortable sleeping environment for your child for years to come.
Inspection and Repairs
It is important to regularly inspect your toddler bed for any signs of damage or wear. Check for loose screws, cracked boards, or any other structural issues that may compromise the bed’s stability. If you notice any problems, make the necessary repairs promptly to maintain the bed’s integrity and safety.
Tightening Screws and Fasteners
As your child uses the bed over time, screws and fasteners may loosen. It is important to periodically check and tighten them to prevent any wobbling or instability. Use a screwdriver or appropriate tool to tighten all the screws and fasteners securely, ensuring that the bed remains sturdy and safe.
Keeping the Bed Clean
A clean sleeping environment is vital for your child’s health and well-being. Regularly remove dust and debris from the bed to prevent allergens from accumulating. Use a soft brush or vacuum cleaner to clean the surface and crevices of the bed, paying special attention to areas where dust tends to gather.
| Steps for Maintaining Your DIY Toddler Bed |
|---|
| 1. Inspect the bed for any signs of damage. |
| 2. Make necessary repairs promptly. |
| 3. Check and tighten all screws and fasteners. |
| 4. Remove dust and debris regularly. |
By following these maintenance practices, you can ensure that your DIY toddler bed remains in excellent condition, providing a safe and comfortable sleeping space for your child.
“Regular maintenance helps keep your DIY toddler bed safe and durable, giving you peace of mind as your child sleeps soundly.”
Tips and Inspiration
If you’re embarking on a wooden toddler bed project and seeking additional tips and inspiration, you’re in the right place. We understand that building a DIY toddler bed requires creativity and insight to make it truly unique. Here are some valuable resources to help you along the way:
- Online forums: Joining online forums dedicated to DIY projects can provide you with a wealth of knowledge and advice from experienced builders. Participate in discussions, ask questions, and learn from the experiences shared by fellow DIY enthusiasts.
- Social media platforms: Explore hashtags related to DIY toddler beds on social media platforms like Instagram and Pinterest. You’ll find a treasure trove of inspiration and creative ideas from individuals who have already completed their own projects. Don’t forget to follow relevant accounts for ongoing inspiration.
- Home improvement websites: Check out popular home improvement websites that offer detailed guides, tutorials, and step-by-step instructions for building various projects, including toddler beds. These websites often feature user reviews and comments, giving you an insight into the challenges and successes faced by others who have taken on similar projects.
By tapping into the collective wisdom of DIY communities, you’ll be able to gather inspiration, gain valuable insights, and receive practical advice that can help you create a one-of-a-kind toddler bed. Let your imagination run wild and consider incorporating unique features like built-in storage or decorative elements that reflect your child’s personality and interests.
Conclusion
Congratulations on completing your DIY toddler bed! By following the step-by-step guide and utilizing the provided materials and tools, you have successfully created a secure and charming bed for your little one. Building a personalized piece of furniture not only saves money but also allows you to customize it according to your preferences and your child’s interests.
Your little one will now have a comfortable and safe place to sleep, ensuring sweet dreams every night. This DIY toddler bed provides a cozy haven where your child’s imagination can flourish. It’s truly a labor of love that will bring joy to both you and your little one.
As you watch your child sleep peacefully in their new DIY toddler bed, you can take pride in your accomplishment. You’ve provided them with a unique and special sleeping space that will nurture their growth. Building your own toddler bed is not just about the end result but also about the experience and memories you create together.
FAQ
What materials and tools do I need to build a DIY toddler bed?
To build a DIY toddler bed, you will need 2x4x8 boards, 2x2x8 boards, 2x3x8 boards, ¾” diameter x 48″ long dowel rods, 2 ½” pocket hole screws, 2 ½” wood screws, 2 ⅞” timber screws (optional), wood glue, sandpaper, a miter saw, drill/driver, pocket hole jig, ¾” forstner bit, and additional helpful tools like a Kreg Multi-Mark, clamps, and a rubber mallet.
What are the dimensions of the DIY toddler bed and can I customize it?
The DIY toddler bed design provided in this guide is made for a standard twin size mattress and has dimensions of 21 ½” tall, 44″ wide, and 81″ long. You can customize the bed by adjusting the spacing between the rails or adding solid panels or bumpers for added safety.
Can I use ripped 2x4s instead of precut 2x2s and 2x3s?
Yes, you can rip 2x4s into 1 ½” wide and 2″ wide pieces as a cost-saving measure. This will not affect the structural integrity of the bed.
How should I round the board edges for a toddler bed?
Since this is a toddler bed, it is important to keep the rounded corners on the boards to prevent sharp edges. You can sand down any sharp corners to ensure safety for your child.
How do I assemble the side panels of the toddler bed?
To assemble the side panels, cut 2×2 and 2×4 pieces to the appropriate lengths, mark dowel hole locations, drill out the holes, apply wood glue, insert dowels, clamp and secure the rails together. Repeat this process to create two identical side panels.
How do I build the back and front panels of the toddler bed?
To build the back and front panels, cut 2×2 and 2×4 pieces to the appropriate lengths, mark dowel hole locations, drill out the holes, apply wood glue, insert dowels, and secure the rails and panels together using timber screws or pocket holes and screws.
How do I add the top rails to the toddler bed?
Cut 2x3s to fit and attach them using wood glue and wood screws. These rails can be installed from the bottom side or top side of the bed, depending on your preference. Ensure they are securely attached for additional support.
How should I finish and paint the DIY toddler bed?
Once construction is complete, sand the bed, apply child-safe paint with multiple coats, and sand down any rough edges after painting to provide a safe sleeping environment.
Is there a step-by-step tutorial available to help me build the DIY toddler bed?
Yes, we have provided a step-by-step tutorial with detailed instructions and accompanying images to guide you through each stage of building the DIY toddler bed.
What safety considerations should I keep in mind when building a toddler bed?
It is important to ensure all components are securely fastened, double-check the stability of the bed, use child-safe materials and non-toxic paint, regularly inspect the bed for wear and tear, and maintain a safe sleep environment for your toddler.
What are the benefits of building a DIY toddler bed?
Building a DIY toddler bed allows you to customize the design, can be a cost-effective alternative to purchasing a pre-made bed, and creates a sense of pride and accomplishment.
How do I maintain and prolong the life of my DIY toddler bed?
Regular maintenance includes inspecting the bed for any damage, tightening screws and fasteners as needed, and keeping the bed clean and free from dust and debris.
Where can I find additional tips and inspiration for my DIY toddler bed project?
Online forums, social media platforms, and home improvement websites can provide ideas and advice from other DIY enthusiasts. You can also modify the design to incorporate unique features.


