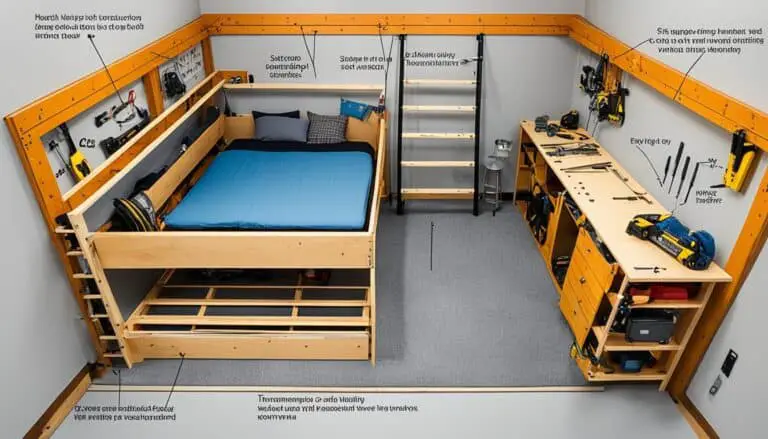
Are you in need of a versatile and space-saving solution for your home? Look no further than a DIY trundle bed. Not only does it provide a comfortable sleeping space for your family and guests, but it also offers the flexibility to tuck away during the day, maximizing the use of your room. So, why settle for a standard bed when you can build your own trundle bed that perfectly suits your style and needs?
Whether you’re a seasoned DIY enthusiast or new to woodworking, this article will guide you through the process of building a trundle bed step by step. From understanding the benefits and essential materials to choosing the right tools and customizing the dimensions, we’ve got you covered. Get ready to unleash your creativity and craftsmanship as you embark on a journey to create a stylish and functional trundle bed for your space.
Key Takeaways:
- Building a DIY trundle bed provides a flexible and space-saving sleeping solution.
- Essential materials for your trundle bed project include plywood, boards, drawer pulls, casters, pocket screws, wood glue, and wood filler.
- Choosing the right tools, such as measuring tools, cutting tools, screws, glue, and safety gear, is crucial for successful trundle bed construction.
- Customizing trundle bed dimensions allows you to adapt the bed to fit your space and accommodate different mattress sizes.
- Accessorizing and maintaining your trundle bed adds the finishing touches and ensures its longevity and functionality.
Understanding the Benefits of a DIY Trundle Bed
A DIY trundle bed offers several benefits for homeowners. Firstly, it helps maximize space in small rooms, as the trundle bed can be tucked away during the day and pulled out at night to provide extra sleeping space.
Maximizing Space in Small Rooms
This space-saving bed solution is especially useful in children’s rooms or guest bedrooms where every square inch counts. By utilizing the trundle bed, you can optimize the available space and create a more functional and spacious environment.
Accommodating Guests with Ease
When guests come over, a trundle bed becomes a convenient guest bed solution. Instead of dedicating a whole room to a guest bed that is rarely used, a trundle bed allows you to have a comfortable sleeping solution that can be stored away when not in use. This frees up the room for other purposes and provides flexibility in how you use your space.
Personalization and Creativity
Building your own trundle bed gives you the opportunity to unleash your creativity and personalize the design according to your preferences. You can choose the materials, colors, and finishes that match your style and create a unique bed customized for your home. This allows you to have a bed that not only serves its purpose but also adds aesthetic value to your space.
Essential Materials for Your Trundle Bed Project
To build a trundle bed, you will need several essential materials. These include:
| Materials |
|---|
| 4 ft. x 8 ft. sheet of 3/4-inch plywood |
| 1 x 8 x 8 ft. boards |
| 1 x 10 x 8 ft. boards |
| 1 x 2 x 8 ft. boards |
| Drawer pulls |
| 2-inch rigid casters |
| 1 1/4-inch pocket screws |
| Wood glue |
| Wood filler |
These materials will form the foundation and structure of your trundle bed and ensure its stability and functionality.
Choosing the Right Tools for Trundle Bed Construction
When embarking on a trundle bed construction project, it is important to have the right tools at hand. These tools will help you accurately measure and cut the materials, join them securely using screws and glue, and ensure your safety throughout the construction process.
Measuring and Cutting Tools
To ensure precise measurements and clean cuts, the following measuring and cutting tools are essential:
- Tape measure
- Pencil
- Carpenter’s square
- Circular saw
With a tape measure, you can accurately measure the dimensions of the trundle bed components. A pencil is necessary for marking the measurements on the materials. A carpenter’s square helps ensure that your cuts are perfectly square, which is crucial for a stable and well-built trundle bed. A circular saw enables you to make straight and smooth cuts on the plywood and boards.
Joining Methods: Screws and Glue
To securely join the trundle bed components, you will need the following tools:
- Cordless drill/driver
- Pocket hole jig
- Brad nailer or hammer
A cordless drill/driver with appropriate drill bits allows you to drill pilot holes for screws and attach the components together. A pocket hole jig is handy for creating strong and hidden joints using pocket screws. A brad nailer or hammer can be used for additional reinforcement, such as attaching trim or securing certain parts of the trundle bed.
The Importance of Safety Gear
When working with tools and materials, it is essential to prioritize safety. Make sure to wear the following safety gear:
- Safety glasses
- Hearing protection
- Dust mask
Safety glasses protect your eyes from flying debris and dust. Hearing protection guards against the loud noise produced by power tools, preventing potential hearing damage. A dust mask helps filter out fine particles that can be harmful if inhaled, ensuring your respiratory health during the construction process.
Step-by-Step Trundle Bed Plans
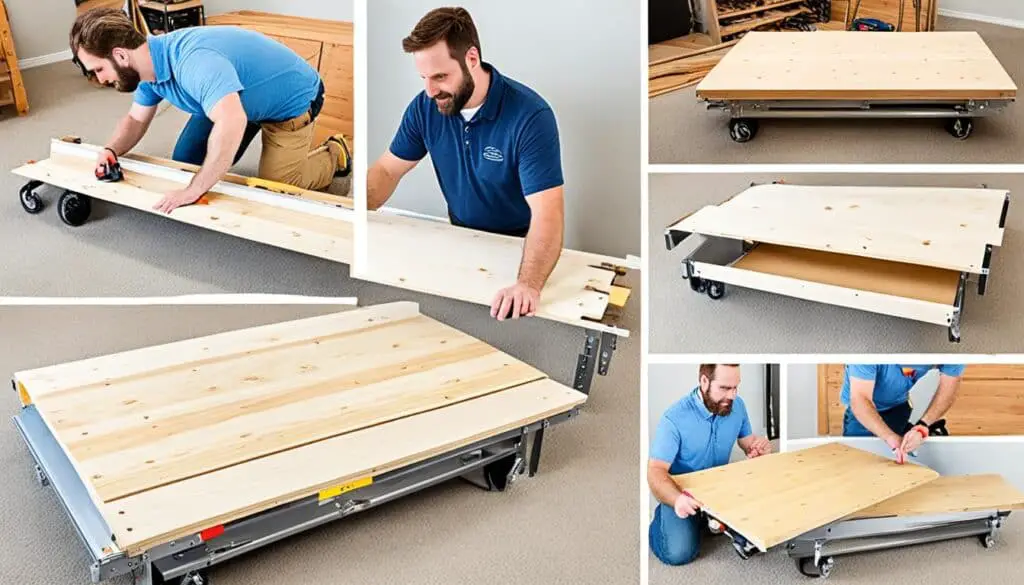
Building a trundle bed involves several steps. Here is a step-by-step guide to help you construct your own trundle bed:
- Step 1: Measure and cut the plywood and boards according to the dimensions of your trundle bed design.
- Step 2: Assemble the trundle box by fastening the boards together using pocket screws and wood glue.
- Step 3: Attach the drawer face to the trundle box using pocket screws.
- Step 4: Install the drawer pulls on the front of the drawer face for easy access.
- Step 5: Attach the casters to the bottom of the trundle box to allow smooth rolling in and out.
- Step 6: Sand the surfaces of the trundle bed to achieve a smooth finish.
- Step 7: Apply a protective finish, such as paint or stain, to enhance the appearance and durability of the trundle bed.
Following these steps will guide you through the construction process of building a trundle bed. Make sure to double-check your measurements and take your time to ensure a sturdy and well-built trundle bed.
If you need visual reference, refer to the image below:
Now that you have a clear understanding of the construction process, you can proceed with confidence to build your own trundle bed.
Customizing Trundle Bed Dimensions for Your Space
One of the advantages of building your own trundle bed is the ability to customize its dimensions to fit your space perfectly. By adjusting the plans, you can create a trundle bed that suits your specific needs and preferences.
Adjusting Plans for Different Mattress Sizes
When customizing your trundle bed, consider the different mattress sizes available, such as twin, full, or queen. You can resize the trundle box and drawer face accordingly to accommodate the desired mattress size. This ensures a comfortable sleeping surface for you or your guests.
Considering Under-Bed Clearance
In addition to adjusting the bed dimensions, it’s crucial to consider the under-bed clearance. The trundle bed should be able to smoothly roll in and out from under the main bed. Leave enough space for the casters and any potential obstructions that may be present to ensure easy accessibility.
When customizing your trundle bed, take into account the customizable trundle bed options, adjusting bed dimensions to accommodate different mattress sizes, and considering under-bed space for smooth operation. These customization features allow you to create a trundle bed that fits perfectly in your space while providing maximum functionality and comfort.
Stylish Design Ideas for Your DIY Trundle Bed
Your DIY trundle bed can be more than just a functional piece of furniture; it can also be a stylish addition to your home decor. Consider incorporating design elements such as decorative trim, carved details, or unique finishes to enhance the visual appeal of your trundle bed. You can choose materials and colors that complement your existing decor and create a cohesive look in the room where the trundle bed will be placed. Get creative and experiment with different design ideas to make your DIY trundle bed truly one-of-a-kind.
Adding decorative trim to your trundle bed can give it an elegant and sophisticated look. Consider using crown molding or intricate woodwork to create a beautiful frame for the bed. You can also incorporate carved details on the headboard, footboard, or side panels to add a touch of craftsmanship and uniqueness.
Another way to make your trundle bed stylish is by using unique finishes. Experiment with different paint colors or stains that complement your room’s color scheme. You can also try distressing or antiquing techniques to give your trundle bed a vintage or rustic look. Finish off with a clear coat to protect the wood and add a subtle sheen.
When selecting materials, think beyond traditional wood. Explore options like wrought iron, leather, or upholstered panels to add texture and interest to your trundle bed. These materials can create a focal point in your room and bring a touch of luxury to your bed design.
Don’t forget about the details when designing your trundle bed. Consider adding decorative hardware, such as drawer pulls or knobs, that complement the overall design. These small accents can make a big difference in the overall aesthetic of your trundle bed.
By incorporating these design ideas into your DIY trundle bed, you can create a stylish and unique piece of furniture that not only provides extra sleeping space but also adds beauty and character to your home.
Assembling the Trundle Frame: Tips and Tricks
When it comes to assembling your trundle bed frame, there are a few important tips and tricks to keep in mind to ensure a successful construction. Paying attention to details such as square and level assembly and attaching casters can make a significant difference in the functionality and ease of use of your trundle bed.
Ensuring a Square and Level Assembly
One of the crucial steps in assembling your trundle bed frame is ensuring a square and level assembly. This ensures that the frame is stable and properly aligned, allowing for smooth operation. To achieve this, utilize a carpenter’s square to check the corners for 90-degree angles. If any adjustments are needed, make them before securing the joints. Taking the time to ensure square and level assembly will contribute to a sturdy and well-built trundle bed frame.
Attaching Casters for Smooth Rolling
Another important aspect of trundle bed assembly is attaching casters to the bottom of the trundle frame. These casters enable the trundle bed to roll smoothly in and out from under the main bed. Make sure to choose high-quality, durable casters that can support the weight of the trundle bed and provide easy mobility. Once attached, test the trundle bed’s movement to ensure that it rolls without any obstructions and moves effortlessly.
Adding the Finishing Touches to Your Trundle
Sanding for a Smooth Finish
To complete your DIY trundle bed, it’s essential to pay attention to the finishing touches. Start by sanding the surfaces of the trundle frame to achieve a smooth finish and remove any rough edges. Sanding the wood provides a polished look and ensures a comfortable sleeping experience. Take your time to sand all visible surfaces, including the edges and corners, to create a seamless and professional appearance.
Painting or Staining Techniques
After sanding, it’s time to choose the right finishing technique for your trundle bed. You can either paint it in a color that matches your decor or apply a wood stain to showcase the natural beauty of the materials. Painting allows you to add a pop of color and create a focal point in the room, while staining enhances the wood’s texture and grain. Consider the overall aesthetic you want to achieve and select a technique that complements your style.
When painting, be sure to prime the surface before applying the paint for better adhesion and coverage. Use a brush or roller to apply the paint evenly, and allow sufficient drying time between coats. Sand lightly between coats for a smoother finish. If staining, choose a stain that suits the wood type and apply it using a brush or cloth, following the manufacturer’s instructions. Wipe off any excess stain and allow it to dry thoroughly.

Both painting and staining techniques offer versatility and allow you to customize the appearance of your trundle bed to match your personal style and home decor.
Creative Bedding and Mattress Solutions
A DIY trundle bed opens up opportunities for creative bedding and mattress solutions. Consider using unique and stylish bedding options such as patterned or textured sheets, duvet covers, and throw pillows to make the trundle bed visually appealing.
When selecting mattresses for the trundle bed, keep in mind the thickness and size requirements to ensure a comfortable sleeping surface. You can also explore trundle bed accessories to enhance the functionality and aesthetics of the trundle bed. Popular trundle bed accessories include:
- Mattress toppers: Add an extra layer of comfort and support to the trundle bed mattress. Choose from various materials, such as memory foam or down alternative, to suit your preferences.
- Mattress protectors: Protect the trundle bed mattress from spills, stains, and allergens. Opt for waterproof or hypoallergenic options for added peace of mind.
- Bed skirts: Complete the look of your trundle bed by adding a bed skirt. Choose a style that matches your decor to create a polished and cohesive appearance.
By experimenting with creative bedding options and incorporating the right accessories, you can transform your DIY trundle bed into a cozy and stylish sleeping space.
Maintenance and Care for Your DIY Trundle Bed
Like any piece of furniture, a DIY trundle bed requires regular maintenance and care to keep it in good condition. By following some simple cleaning tips and implementing protective measures, you can ensure the longevity and functionality of your trundle bed. Additionally, performing regular checks on the joints and hardware will help prevent any issues and ensure the bed remains secure.
Cleaning and Protective Measures
To keep your trundle bed looking its best, it’s important to clean it regularly. Start by dusting the surfaces with a soft cloth or microfiber duster to remove any dust or debris. For more thorough cleaning, use a mild cleaner or a mixture of warm water and gentle soap to wipe down the bed. Be sure to follow the manufacturer’s instructions for any specific cleaning recommendations.
When it comes to protecting your trundle bed, there are a few measures you can take. Consider using mattress protectors to shield the mattress from spills, stains, and general wear and tear. These protectors can be easily removed and washed, keeping your mattress clean and fresh. Additionally, using a bed skirt can help prevent dust from accumulating under the bed and provide a polished look to the overall appearance of the bed.

Regular Checks and Tightening of Joints
To ensure the stability and functionality of your trundle bed, it’s essential to perform regular checks on the joints and hardware. Over time, screws and fasteners may become loose, compromising the integrity of the bed. Take the time to inspect the joints and tighten any loose screws or connections using a screwdriver or appropriate tool.
Additionally, it’s a good practice to periodically check the overall stability of the bed and make any necessary adjustments. If you notice any wobbling or instability, investigate the cause and address it promptly. By regularly checking and tightening the joints, you can prevent potential issues and prolong the lifespan of your trundle bed.
Adapting Trundle Bed Plans for Children and Adults
Trundle beds can be adapted to suit the needs of both children and adults. When building a trundle bed for children, it is important to prioritize safety. Ensure that the bed meets safety standards, has rounded edges, and sturdy construction to prevent accidents. For adults, design variations can be incorporated to enhance the functionality of the trundle bed, such as adding storage drawers or a pull-out desk. Consider the specific needs and preferences of the intended users when adapting trundle bed plans.
Safety Considerations for Kids’ Beds
When building a trundle bed for children, safety should be the primary concern. Make sure the bed meets safety standards and guidelines to prevent any potential accidents. Rounded edges should be utilized to minimize the risk of injury. Additionally, consider the overall construction of the bed to ensure its sturdiness and stability for a safe sleeping environment.
Design Variations for Guest Rooms
For trundle beds designed for adult use, various design variations can be implemented to enhance the functionality and practicality of the bed. Consider incorporating storage drawers within the trundle section to provide additional storage space for bedding, linens, or other items. Another option is to include a pull-out desk, which can serve as a convenient workspace for guests or a sitting area during the day. By tailoring the design to suit the specific needs of adult users, you can create a versatile and functional guest bed solution.
Adapting Trundle Bed Plans for Children and Adults
| Considerations | Trundle Bed for Children | Trundle Bed for Adults |
|---|---|---|
| Safety | Meets safety standards | – |
| Design | Round edges, sturdy construction | Variations for storage or workspace |
| Functionality | – | Storage drawers, pull-out desk |
Innovative Storage Options with Trundle Beds
Trundle beds offer innovative storage solutions that can help maximize space in your home. By incorporating smart storage design into your trundle bed, you can create a functional and organized sleeping space that meets your storage needs.
If you’re looking to store extra bedding, clothes, or other belongings, consider adding drawers to your trundle bed design. These drawers can be seamlessly integrated into the trundle bed, providing convenient storage space that is hidden away when not in use.
Another storage option is to add shelves or compartments to the trundle bed frame. This allows you to utilize the vertical space and create additional storage for books, toys, or decorative items. By making use of the trundle bed’s frame, you can optimize the storage capacity of your bed without sacrificing valuable floor space.
These hidden storage solutions are especially beneficial for smaller rooms where space is limited. By customizing your trundle bed with drawers, shelves, or compartments, you can free up space in your room and keep it neat and organized. Say goodbye to clutter and make the most of your available space with a trundle bed that offers innovative storage solutions.

Accessorizing Your Trundle Bed to Enhance Room Decor
Accessorizing your trundle bed can take your room decor to the next level. By adding the right elements, you can transform your trundle bed into a stylish focal point that complements your personal style and enhances the overall aesthetics of the room.
Choosing Bedding that Complements Your Style
When selecting bedding for your trundle bed, consider the color scheme and theme of your room. Choose sheets, duvet covers, and pillowcases that coordinate with the room’s decor and reflect your personal style. Opt for patterns, textures, and colors that complement each other and create a cohesive look. Consider using decorative throw pillows, cozy blankets, or a luxurious bedspread to add comfort and visual interest.
To create a relaxing and inviting sleeping space, layer different textures and fabrics. Mix and match pillows of different sizes and shapes to add dimension and create a visually appealing arrangement. Experiment with different combinations until you find a look that suits your style and creates a cozy atmosphere.
Utilizing Trundle Drawers for Additional Storage
One of the advantages of a trundle bed is the additional storage it provides. Take advantage of the trundle drawers by organizing items such as extra linens, pillows, or clothes. By using the trundle drawers effectively, you can maintain a clean and organized space while maximizing functionality.
Consider using dividers or baskets inside the trundle drawers to further organize your belongings. This allows for easy access and keeps everything neatly in place. Additionally, you can use the top of the trundle bed as a display area for decorative items, such as books, plants, or artwork, to add a personal touch and enhance the overall aesthetic of the room.
Utilizing the trundle drawers not only adds practical value but also contributes to the overall room decor by keeping clutter hidden and maintaining a clean and visually pleasing environment.
Enhancing Room Decor with Accessories
In addition to choosing the right bedding and utilizing the trundle drawers, there are other accessories you can incorporate to enhance the overall decor of the room. Consider adding decorative elements such as:
- Wall art: Hang artwork or photographs that complement the style and color scheme of the room.
- Rugs: Place a rug underneath the trundle bed to define the space and add warmth.
- Curtains: Hang curtains or drapes that match the room’s color palette and add a touch of elegance.
- Accent lighting: Use table lamps, string lights, or wall sconces to create a cozy ambiance and highlight specific areas of the room.
- Decorative pillows: Choose decorative pillows that coordinate with the bedding and other accessories in the room.
By incorporating these accessories, you can create a cohesive and visually appealing room decor that complements your trundle bed and reflects your personal style and taste.
Conclusion
In conclusion, building a DIY trundle bed can be a fulfilling and rewarding project that offers both style and functionality. By sharing your DIY journey and results with others, you have the opportunity to inspire and motivate fellow DIY enthusiasts. Your experience in planning and executing a successful trundle bed project will not only provide you with a stylish sleeping solution but also boost your confidence and skills in woodworking and home improvement.
With this newfound confidence, you can now plan future projects with ease and explore the world of DIY with enthusiasm. Whether it’s building furniture, renovating rooms, or taking on other home improvement projects, embrace the joy and satisfaction of creating something with your own hands. By continually challenging yourself and seeking new opportunities to learn and grow, you can continue to expand your DIY skills and achieve even greater results.
So, don’t hesitate to share your DIY journey, plan future projects, and embark on new adventures in the world of DIY. Your determination, creativity, and passion for creating beautiful and functional pieces can inspire others and bring immense satisfaction and pride. Take pride in your achievements and continue to enjoy the fulfillment that DIY projects bring.
FAQ
What are the benefits of building a DIY trundle bed?
A DIY trundle bed maximizes space in small rooms, accommodates guests with ease, and allows for personalization and creativity in design.
What materials do I need for a trundle bed project?
You will need plywood, boards, drawer pulls, casters, pocket screws, wood glue, and wood filler.
What tools are essential for building a trundle bed?
Essential tools include a tape measure, pencil, carpenter’s square, cordless drill/driver, circular saw, pocket hole jig, brad nailer or hammer, safety glasses, hearing protection, and a dust mask.
What are the steps to build a trundle bed?
The step-by-step process includes customizing dimensions, assembling the trundle frame, adding finishing touches, and accessorizing the bed for style and functionality.
How can I customize the dimensions of my trundle bed?
You can adjust the plans to fit different mattress sizes and consider the under-bed clearance for smooth rolling.
How can I make my DIY trundle bed stylish and unique?
You can incorporate design elements, decorative trim, unique finishes, and choose materials and colors that complement your existing decor.
What should I consider when assembling the trundle frame?
It is important to ensure a square and level assembly and attach casters for smooth rolling.
What are the finishing touches I can add to my trundle bed?
You can sand the surfaces for a smooth finish, paint or stain the bed, and apply a protective finish.
How can I enhance the bedding and mattress solutions for my trundle bed?
Consider using unique bedding options and selecting mattresses that meet the thickness and size requirements. Explore trundle bed accessories for added comfort and style.
How do I maintain and care for my DIY trundle bed?
Regular cleaning, protective measures, and checks on joints and hardware are essential for maintenance and care.
Can I adapt trundle bed plans for different users?
Yes, you can prioritize safety for children’s beds and incorporate design variations for guest rooms or adult beds.
How can I make the most of storage with a trundle bed?
You can add drawers, shelves, or compartments to the trundle bed design to create additional storage space.
How can I accessorize my trundle bed to enhance room decor?
Choose bedding that complements your style, add decorative elements, and utilize trundle drawers for additional storage.


