Are you tired of your old, outdated shower? Do you dream of a fresh and modern bathroom space, but think that a remodel is out of your budget? Think again! In this article, we will share with you easy DIY shower remodel tips and tricks that will help you transform your shower without breaking the bank. From budget-friendly ideas to affordable updates, get ready to create the bathroom of your dreams!
Key Takeaways:
- Remodeling your shower doesn’t have to be expensive; there are plenty of affordable options available.
- DIY shower remodels allow you to personalize your bathroom space according to your own style and preferences.
- With the right tips and tricks, you can create a modern oasis that fits your budget and design vision.
- Consider budget-friendly ideas like replacing shower fixtures, installing new flooring, and updating lighting for a fresh look.
- Don’t let the fear of a difficult DIY project hold you back; we will guide you through each step of the process.
Why Should You Consider a DIY Shower Remodel?
A DIY shower remodel offers an exciting opportunity to personalize your bathroom space and save money on labor costs. By taking on easy shower renovation projects yourself, you can upgrade your bathroom without breaking the bank. Whether you’re looking to refresh the look of your shower or completely transform it, DIY bathroom upgrades can turn your ordinary shower space into a modern oasis.
Here are a few reasons why you should consider a DIY shower remodel:
- Cost savings: One of the biggest advantages of a DIY shower remodel is the potential to save money. By eliminating labor costs, you can allocate your budget towards high-quality materials and fixtures that fit your style and preferences.
- Personalization: With a DIY project, you have the freedom to customize your shower space according to your own taste and needs. From choosing the perfect tiles and shower fixtures to adding unique design elements, you can create a shower that reflects your personality and enhances your daily routine.
- Satisfaction of accomplishment: Taking on a DIY shower remodel can be a rewarding experience. From planning to execution, seeing your vision come to life can provide a great sense of achievement and pride in your home improvement skills.
“A DIY shower remodel allows you to unleash your creativity and create a space that truly feels like your own.”
Whether you’re looking to update the appearance of your shower or improve its functionality, a DIY shower remodel is a project worth considering. With the right tools, materials, and a little bit of patience, you can transform your shower into a beautiful and functional space that you’ll love spending time in.
So, roll up your sleeves, gather inspiration, and get ready to embark on a fulfilling journey of transforming your shower with easy DIY renovation projects!
Key Factors to Consider for Your DIY Shower Remodel
Embarking on a DIY shower remodel is an exciting venture that allows you to transform your shower space according to your personal style and preferences. However, before diving into the remodeling process, it’s crucial to plan carefully and consider a few key factors that will contribute to the success of your project.
Budget-friendly Shower Remodel
One of the essential considerations for your DIY shower remodel is your budget. Determine how much you’re willing to spend on the project and allocate funds to different aspects such as new fixtures, tiles, and other materials. By setting a realistic budget, you can prioritize your expenses and ensure that you’re getting the most value out of your investment.
Transforming Your Shower Space
To achieve a truly remarkable shower space, it’s important to think about how you want to transform it. Consider the design elements that resonate with your style and vision. Do you prefer a minimalist and sleek look or a more luxurious and spa-like atmosphere? Also, think about the functionality of your shower space and how you can optimize it for your daily needs.
“A well-planned shower remodel has the power to completely change the look and feel of your bathroom, giving you a space that is not only beautiful but also functional.”
Consider Storage Spaces
When remodeling your shower, don’t forget to take storage spaces into account. Assess your current storage needs and think about how you can integrate practical solutions into your shower space. You might consider adding built-in niches or installing shelves to keep toiletries and bath essentials within reach while maintaining a clutter-free environment.
Choose a Color Scheme
The color scheme you choose can greatly impact the overall aesthetic of your shower space. Think about the mood you want to create and select colors that complement your desired atmosphere. Whether you opt for soothing neutrals or bold accents, make sure the colors you choose harmonize with the rest of your bathroom decor.
New Fixtures
When it comes to a shower remodel, the right fixtures can make all the difference. Consider updating your showerhead, faucets, and handles to give your shower a fresh and modern look. Look for fixtures that not only align with your design preferences but also offer features that enhance your showering experience, such as adjustable water pressure or eco-friendly options.
Bathroom Utilities
Before you begin your DIY shower remodel, familiarize yourself with the location of the utilities in your bathroom. Knowing the positioning of electrical wiring, plumbing, and other essential systems will ensure that you avoid any potential issues during the remodeling process. This knowledge will guide your decision-making and help you plan accordingly.
By taking these key factors into consideration, you’ll be well-prepared to embark on your budget-friendly shower remodel and transform your shower space into a beautiful oasis of relaxation and rejuvenation.
Must-Have Tools for Your DIY Shower Remodel
To successfully complete your DIY shower remodel, you will need a variety of tools. Gathering the right tools before starting your project will make the process smoother and more efficient. Here are the must-have tools for your DIY shower remodel:
Safety Gear
Ensure your safety during the remodel by wearing appropriate safety gear. Here are the essential safety items:
- Masks: Protect yourself from dust and fumes with a high-quality mask.
- Goggles: Safeguard your eyes from debris and chemicals with a sturdy pair of goggles.
- Gloves: Keep your hands protected from sharp edges and harsh materials by wearing durable gloves.
Common Tools
These are the basic tools that every DIY enthusiast should have in their toolbox:
- Hammers: A versatile tool for various tasks, including removing old tiles and installing new fixtures.
- Tape Measures: Accurate measurements are crucial for a precise and professional-looking remodel.
- Power Drills: Make drilling holes and fastening screws effortless with a reliable power drill.
Additional Tools
In addition to the safety gear and common tools, consider having these additional tools on hand to make your DIY shower remodel even easier:
- Wet-Dry Vacuums: Keep your workspace clean and free of debris with a wet-dry vacuum.
- Cordless Drills: Enjoy the freedom of movement without the hassle of cords with a cordless drill.
Remember to always follow the manufacturer’s guidelines for each tool and prioritize safety throughout the remodeling process. With the right tools at your disposal, your DIY shower remodel will be a success!
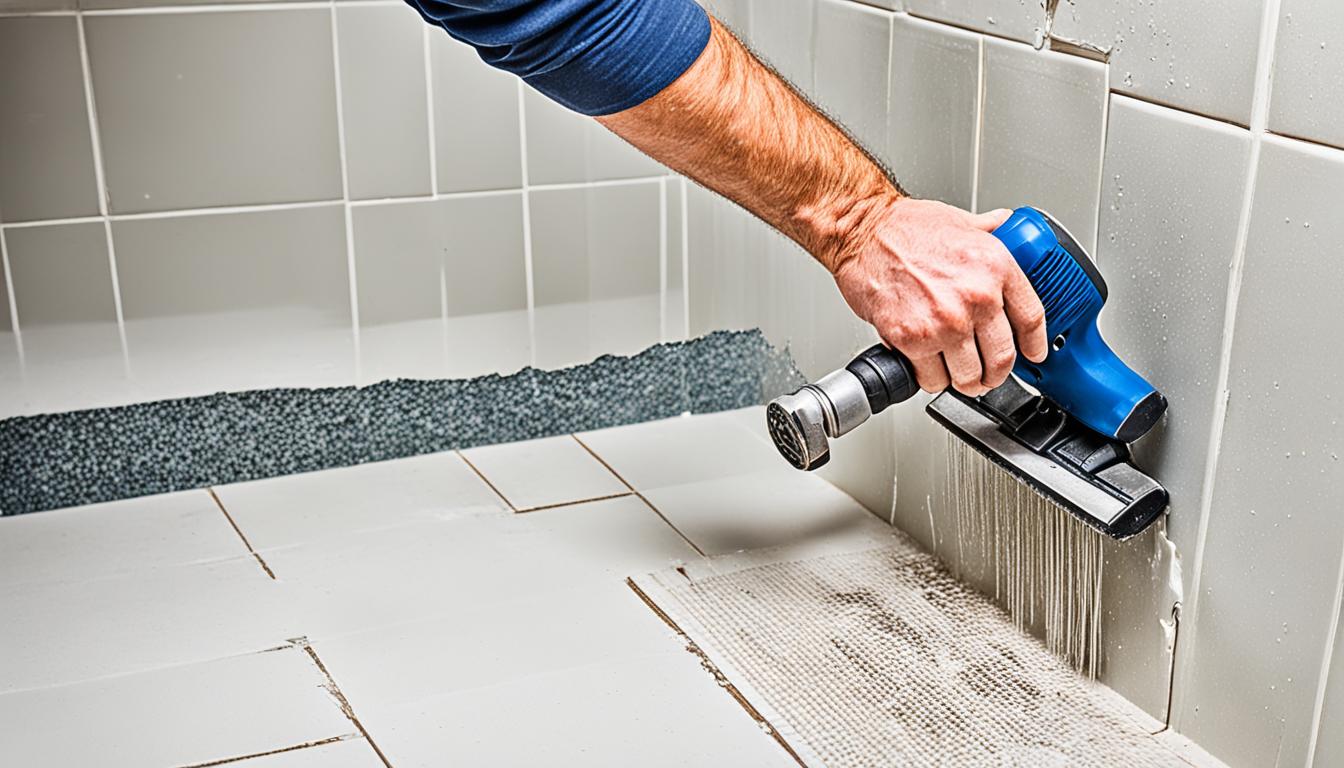
How to Remove Bathroom Fixtures for Your DIY Shower Remodel
Before you can install new fixtures in your shower, you’ll need to remove the old ones. Follow these steps for a successful DIY bathroom demolition:
1. Shut off the water
Locate the water shut-off valve for your bathroom and turn it off to prevent any leaks or water damage during the removal process.
2. Drain and remove the toilet
Disconnect the water supply line to the toilet and flush it to drain the water. Remove the bolts securing the toilet to the floor and carefully lift it off the flange. Cover the exposed flange with a rag to prevent any sewer gases from entering your home.
3. Remove the vanity and cabinets
Use a pry bar and hammer to loosen and remove the vanity and cabinets from the walls. Take caution not to damage any plumbing or wiring behind them.
4. Take down the mirror
If you plan to replace the bathroom mirror, carefully remove it by unscrewing any brackets or adhesive holding it in place.
5. Disconnect and remove other fixtures
Unscrew any showerheads, faucets, towel rods, or other fixtures that need to be replaced. Use the appropriate tools, such as wrenches or pliers, to disconnect them from the water supply lines or mounting brackets.
6. Protect the plumbing and wiring
During the demolition process, be mindful of any exposed plumbing or wiring. Take precautions to avoid damaging these essential components of your bathroom.

“Removing old bathroom fixtures is the first step towards creating your dream shower. Take your time and be careful not to damage any plumbing or electrical components.”
7. Dispose of the old fixtures responsibly
Once all the fixtures have been removed, dispose of them responsibly. Depending on your local regulations, you may need to take them to a recycling center or schedule a bulky item pickup with your waste management provider.
| Fixture | Tools Needed |
|---|---|
| Toilet | Screwdriver, adjustable wrench, plunger |
| Vanity and cabinets | Hammer, pry bar |
| Mirror | Screwdriver, putty knife (for adhesive) |
| Showerheads and faucets | Wrench, pliers |
| Towel rods and other accessories | Screwdriver, wrench (if necessary) |
With the old bathroom fixtures removed, you’re now ready to install your new ones and continue with your DIY shower remodel.


Steps to Install a New Shower or Tub for Your DIY Remodel
Now that you’ve successfully removed the old shower or tub, it’s time to take the next step in your DIY remodel process – installing the new one. This section will guide you through the steps to ensure a smooth and efficient installation process.
- Choose the right shower pan or basin: Select a shower pan or basin that fits your new design and space. Consider factors such as size, shape, and material to ensure it meets your functional and aesthetic requirements.
- Address any subfloor issues: Before installing the new shower or tub, thoroughly inspect the subfloor for any signs of rotting wood or water damage. If any issues are found, repair or replace the affected areas to create a solid foundation for your new installation.
- Follow manufacturer instructions: Carefully read and follow the installation instructions provided by the manufacturer of your shower or tub. This will ensure that you install it correctly and avoid any potential future issues.
- Consider optimizing space and functionality: If you have limited space, consider options like walk-in showers or combination shower and tubs to make the most of the available area. These choices can provide both convenience and style.
- Use proper sealing and waterproofing techniques: To prevent water damage, make sure to apply appropriate sealing and waterproofing materials around the edges and joints of the shower or tub. This will help maintain the integrity of your installation and prolong its lifespan.
Shower Installation Example:
Let’s take a look at a simplified example of how to install a new shower:
| Tools Needed: | Materials Needed: |
|---|---|
|
|
1. Begin by gathering all the necessary tools and materials for the installation.
2. Carefully position and level the shower pan or basin according to the manufacturer’s instructions.
3. Connect the pipes and fittings to the shower fixtures, ensuring a secure and watertight connection.
4. Apply sealing materials around the edges and joints of the shower pan or basin to prevent leaks.
5. Install the waterproofing membrane to protect the surrounding walls and floor from moisture.
6. Double-check all connections and ensure everything is properly aligned and functioning.
7. Once satisfied with the installation, test the shower for any leaks or issues before proceeding with further remodeling steps.
By following these steps and taking the necessary precautions, you can successfully install a new shower or tub as part of your DIY remodel. Enjoy the process and the satisfaction of seeing your vision come to life!
How to Lay New Flooring for Your DIY Shower Remodel
Once the new shower or tub is installed, it’s time to lay the new flooring. You have several options to consider, such as tile, laminate, or vinyl, depending on your preferences and budget. However, in this section, we will focus on the popular choice of tile installation for your bathroom flooring.
If you decide to go with tile, it offers durability, water resistance, and a wide range of designs to choose from. Follow these steps to ensure a successful tile installation:
1. Prepare the Subfloor
Before you begin laying the tile, it’s essential to properly prepare the subfloor. Ensure that it is clean, dry, and free from any debris or imperfections. You can use a vacuum or broom to remove dust and dirt. If there are any uneven areas, consider using a leveling compound to create a smooth surface. This step is crucial to achieve a professional-looking tile installation.
2. Mark Reference Lines
Use a mason’s chalk line to mark reference lines on the subfloor. These lines will guide you in laying the tiles in straight rows. Start by finding the center of the room and snapping a chalk line from one end to the other. Repeat the process perpendicular to the first line to create a grid-like pattern.
3. Apply Thinset Adhesive
Using a trowel, apply thinset adhesive to a small area of the subfloor, following the reference lines. Work in small sections to ensure that the adhesive doesn’t dry out before laying the tiles. Spread the thinset evenly using the flat side of the trowel, and then create grooves using the notched side. This helps with better adhesion of the tiles.
4. Install the Tiles
With the adhesive applied, it’s time to lay the tiles. Start at the corner where the reference lines intersect and press the first tile firmly into the adhesive, following the pattern you’ve chosen. Place tile spacers between each tile to ensure even spacing and allow for grout later on. Continue laying tiles along the reference lines, working outward from the center of the room.
5. Cut Tiles for Edges
You may need to cut tiles to fit around edges, corners, or fixtures. Use a tile cutter or wet saw to make precise cuts. Measure and mark the tiles before cutting to ensure accurate sizes. Take your time with this step to achieve clean and polished edges.
6. Allow the Adhesive to Cure
Once all the tiles are laid, allow the adhesive to cure according to the manufacturer’s instructions. This typically takes 24 to 48 hours. Avoid walking or placing heavy objects on the newly installed tiles during this curing period.
7. Apply Grout
After the adhesive has cured, you can proceed with applying grout between the tiles. Mix the grout according to the manufacturer’s instructions and use a grout float to press the grout into the gaps between the tiles. Remove excess grout from the tile surfaces using a damp sponge. Allow the grout to dry, and then buff the tiles with a clean cloth for a finished look.
Remember to follow proper safety precautions when working with tools and materials. If you’re unsure about any step, consult professional help or refer to detailed guides and tutorials.
| Pros | Cons |
|---|---|
| Tiles are durable and long-lasting. | Tile installation can be time-consuming. |
| Wide variety of tile sizes, colors, and designs to choose from. | Tile installation may require additional tools and materials. |
| Tiles are water-resistant, making them ideal for bathroom flooring. | Improper installation can lead to cracking or tile damage. |
| Tile flooring is relatively easy to clean and maintain. | Grout lines may require regular cleaning to prevent stains or discoloration. |
Steps to Hang Drywall and Paint for Your DIY Shower Remodel
Once you have laid the new flooring for your shower remodel, it’s time to hang drywall and paint the walls. Proper drywall installation and painting techniques are crucial to achieving a professional-looking finish. Follow these steps to ensure a successful DIY shower remodel:
1. Hang New Drywall
Start by measuring the dimensions of the walls and cutting the drywall sheets accordingly. Use a utility knife to score the drywall along the measurement lines, then snap it along the scoreline. Attach the drywall to the studs using drywall screws or nails, making sure to leave a small gap between the sheets for expansion. Use a level to ensure the drywall is straight and flush with the adjoining walls.
2. Apply Drywall Mud and Tape
Next, apply drywall mud (also known as joint compound) over the seams between the drywall sheets. Use a trowel or putty knife to spread a thin layer of mud and then press drywall tape into the mud. Smooth out any excess mud and ensure the tape is firmly embedded in the compound. Repeat this process for all the seams and corners. Allow the mud to dry completely.
3. Prepare the Shower or Tub Wall with Cement Board
For the shower or tub wall, use cement board instead of standard drywall. Cement board is more resistant to moisture and provides a solid foundation for tile installation. Measure and cut the cement board to fit the wall, leaving a small gap at the bottom for expansion. Attach the cement board to the studs using cement board screws. Apply a waterproofing membrane over the cement board to protect against water infiltration.
4. Start Painting
Once the drywall and cement board are ready, it’s time to paint. Choose a semi-gloss paint that is suitable for bathrooms, as it provides better durability and is resistant to mold and mildew. Start by applying a primer to the walls to ensure proper adhesion of the paint. Allow the primer to dry, then apply the paint in thin, even coats. Use a paint roller for large areas and a brush for corners and edges. Let each coat dry before applying the next.
Pro Tip: Consider adding a moisture-resistant paint additive to the paint for extra protection against humidity and moisture in your shower space.
5. Finishing Touches
After the paint has dried, inspect the walls for any imperfections or areas that may require touch-ups. Sand down any rough spots or drips, and apply another coat of paint if necessary. Once you are satisfied with the paint finish, you can move on to the next steps of your DIY shower remodel.
| Materials | Tools |
|---|---|
| Drywall sheets | Utility knife |
| Drywall screws or nails | Level |
| Drywall mud | Trowel or putty knife |
| Drywall tape | Cement board |
| Cement board screws | Cement board screws |
| Waterproofing membrane | Paint primer |
| Semi-gloss paint | Paint roller |
| Paint brush |
By following these steps, you can hang drywall and paint your shower walls with confidence, creating a beautiful and long-lasting finish for your DIY shower remodel.
How to Install Cabinets and Vanity for Your DIY Shower Remodel
When it comes to your DIY shower remodel, installing cabinets and a vanity can greatly enhance both the functionality and aesthetic appeal of your bathroom space. Follow these steps to ensure a successful installation process.
1. Gather the Necessary Tools and Materials
Before you begin installing your cabinets and vanity, make sure you have all the necessary tools and materials on hand. This includes a tape measure, level, drill, screws, and the manufacturer’s recommended installation hardware. Having everything ready will save you time and ensure a smooth installation process.
2. Follow the Manufacturer’s Instructions
Carefully read and follow the manufacturer’s instructions provided with your cabinets and vanity. These instructions will guide you through the installation process and ensure that everything is properly aligned and secured. Pay close attention to any specific measurements or guidelines mentioned in the instructions.
3. Position and Secure the Cabinets
Start by positioning the cabinets in the desired location within your bathroom. Use a level to ensure they are perfectly straight and adjust as necessary. Once the cabinets are aligned, securely attach them to the wall using the recommended screws or installation hardware. Be sure to check for any plumbing or electrical obstacles before drilling into the wall.
4. Install the Vanity Top
After the cabinets are securely in place, it’s time to install the vanity top. Carefully follow the instructions provided by the manufacturer to properly attach the vanity top to the cabinets. Make sure the vanity top is level and secure before moving on to the next step.
5. Connect the Sink and Faucet
Depending on the type of sink and faucet you have chosen, you may need to follow specific instructions for connecting them. Ensure that all plumbing connections are properly sealed to prevent any potential leaks. Test the sink and faucet to ensure they are functioning correctly before proceeding.
If you’re looking to achieve a new look on a tight budget, consider refinishing and painting your existing cabinets instead of purchasing new ones. This can give your bathroom a fresh and updated appearance without the cost of replacement.
Once your cabinets and vanity are installed, take a step back and admire how they enhance the overall look and functionality of your DIY shower remodel. You’re one step closer to achieving your dream bathroom!
How to Update Lighting in Your DIY Shower Remodel
When undertaking a DIY shower remodel, updating the lighting is an important aspect to consider. Adequate lighting not only enhances the overall aesthetics of your bathroom but also plays a crucial role in creating a functional and safe space. By following these steps, you can seamlessly incorporate new lighting fixtures into your shower remodel:
1. Plan the Lighting Design
Before proceeding with any installation, carefully plan the lighting design for your shower space. Consider the functional requirements, such as task lighting for grooming activities and ambient lighting for a soothing ambiance. Determine the ideal placement of light fixtures in accordance with your new design and layout.
2. Choose Appropriate Fixtures
Select light fixtures that are specifically designed for bathroom use, considering factors such as moisture resistance and durability. Opt for fixtures that complement the overall style and theme of your bathroom and are suitable for the available space. Popular options include recessed lighting, sconces, and pendant lights.
3. Relocate Power Outlets
In some cases, you may need to relocate power outlets to accommodate the new lighting fixtures. Consult with a professional electrician to ensure compliance with electrical codes and safety standards. Properly routed power outlets will enhance accessibility and minimize the need for unsightly extension cords.
4. Follow Safety Precautions
When dealing with electrical work, it is crucial to prioritize safety. If you are not familiar with home wiring or electrical installations, it is strongly recommended to hire a licensed electrician. Doing so will ensure that the wiring is correctly configured, reducing the risk of electrical hazards and ensuring compliance with local regulations.
Updating the lighting in your DIY shower remodel can significantly elevate the overall look and functionality of your bathroom. With proper planning, suitable fixtures, and adherence to safety precautions, you can create a well-lit and inviting space to enjoy your daily showers.
Connecting Plumbing Fixtures in Your DIY Shower Remodel
Now that you have successfully demolished the old bathroom fixtures and installed the new ones, it’s time to connect the plumbing fixtures in your DIY shower remodel. This step is crucial to ensure that everything functions correctly and that you can enjoy a fully operational shower.
Follow these guidelines to connect your plumbing fixtures:
- Start by connecting the water supply lines to the shower faucet. Use a wrench to tighten the connections securely, ensuring that there are no leaks.
- Next, connect the showerhead to the shower arm. Apply plumber’s tape to the threads and tighten the connection by hand, followed by an additional quarter turn with a wrench.
- For the bathtub or shower pan, connect the drain assembly to the waste pipe. Apply plumber’s putty to create a watertight seal between the drain and the bathtub or shower pan. Tighten the drain assembly using a drain wrench or pliers.
- If you are installing a new toilet as part of your shower remodel, follow the manufacturer’s instructions for connecting the water supply line and securing the toilet to the floor.
Once all the plumbing fixtures are connected, turn on the water supply and test for any leaks or issues. Inspect each connection carefully, checking for any signs of water leakage. If you notice any leaks, tighten the connections further or consider using plumber’s tape or pipe thread compound to create a tighter seal.
Remember, proper plumbing installation is vital to prevent water damage and ensure the longevity of your DIY shower remodel. If you are unsure about any aspect of the plumbing installation, it’s always best to consult a professional plumber for assistance.
Now that your plumbing fixtures are connected, you’re one step closer to enjoying your newly remodeled shower!

Expert Tip:
When connecting plumbing fixtures in your DIY shower remodel, it’s essential to use the right tools and materials. Invest in high-quality plumbing supplies, such as durable pipe connectors and plumber’s tape, to ensure secure and leak-free connections. Additionally, consider using a plumber’s wrench for tightening connections, as it provides better leverage and prevents damage to the fixtures.
| Common Plumbing Tools | Materials |
|---|---|
| Adjustable wrench | Pipe connectors |
| Pipe cutter | Plumber’s tape |
| Plunger | Plumber’s putty |
| Drain wrench | Plastic or metal drain assembly |
Completing Your DIY Shower Remodel with Finishing Touches
Now that you’ve successfully completed your DIY shower remodel, it’s time to add those final touches that will truly personalize your space. Installing trim around the room not only enhances the aesthetics but also adds a polished look to your new shower. Consider the following finishing touches to make your bathroom space uniquely yours:
- Window Treatments: Choose curtains or blinds that complement your overall bathroom decor. Opt for materials that are water-resistant and easy to clean.
- Decorative Storage Containers: Incorporate stylish storage solutions to keep your bathroom organized. Use decorative baskets, bins, or trays to store toiletries, towels, and other essentials.
- Artwork: Hang artwork that reflects your personal taste and adds visual interest to the space. Choose pieces that are moisture-resistant or consider framing prints or photographs to protect them from humidity.
These finishing touches will elevate the overall look and feel of your DIY shower remodel, making it a true reflection of your style and personality.
Quotes:
“The right finishing touches can transform a simple shower remodel into a beautiful sanctuary where you can unwind and relax.” – Jane Smith, Interior Designer
Bathroom Trim Installation Guide
| Trim Type | Materials | Installation |
|---|---|---|
| Baseboard Trim | – Wood baseboard – Nails – Construction adhesive | 1. Measure and cut the baseboard to fit the length of the wall. 2. Apply construction adhesive to the back of the baseboard. 3. Secure the baseboard to the wall using nails. 4. Repeat the process for all walls. |
| Crown Molding | – Crown molding – Nails – Construction adhesive | 1. Measure and cut the crown molding to fit the length of the wall. 2. Apply construction adhesive to the back of the crown molding. 3. Secure the crown molding to the wall using nails. 4. Repeat the process for all walls. |
| Tile Trim | – Tile edging strip – Tile adhesive – Grout | 1. Measure and cut the tile edging strip to fit the length of the tile edges. 2. Apply tile adhesive to the back of the edging strip. 3. Press the edging strip onto the tile edges. 4. Allow the adhesive to dry. 5. Apply grout to fill any gaps between the edging strip and tiles. 6. Wipe away excess grout. |
Conclusion: Transform Your Shower with a DIY Remodel
A DIY shower remodel provides a fantastic opportunity to save money, personalize your space, and achieve the bathroom of your dreams. By following the step-by-step process outlined in this article, you can successfully transform your shower space into a modern oasis without breaking the bank.
One of the primary benefits of a DIY shower remodel is the cost savings. By doing the work yourself, you can avoid labor expenses and allocate your budget towards high-quality materials and fixtures. This gives you the freedom to choose exactly what you want and create a shower that reflects your personal style.
Moreover, by taking on a DIY shower remodel, you have full control over the design and functionality of your bathroom. You can customize every element, from the tiles and fixtures to the lighting and storage solutions, to suit your preferences. This level of personalization ensures that your shower space truly feels like a reflection of your unique taste and needs.
So, whether you’re looking to update your outdated shower, enhance the functionality of your bathroom, or simply give your space a fresh new look, a DIY shower remodel is the way to go. With careful planning, the right tools, and a bit of creativity, you can achieve remarkable results and enjoy the satisfaction of completing a successful home improvement project.
FAQ
What are some easy DIY shower remodel tips and tricks?
Some easy DIY shower remodel tips and tricks include replacing shower fixtures, installing new tiles, and updating the flooring. You can also consider refinishing and painting existing cabinets to achieve a new look without the cost of replacement.
Why should I consider a DIY shower remodel?
A DIY shower remodel allows you to personalize your bathroom space and save money on labor costs. You can upgrade your bathroom without breaking the bank by taking on easy shower renovation projects yourself.
What key factors should I consider for my DIY shower remodel?
When planning your DIY shower remodel, it’s important to consider your budget, design elements, and desired storage spaces. Choose a color scheme, fixtures, and a shower pan or basin that fits your vision.
What are the must-have tools for my DIY shower remodel?
The essential tools for your DIY shower remodel include safety gear like masks and goggles, as well as common tools like hammers, tape measures, and power drills. Additional tools like wet-dry vacuums and cordless drills can also be helpful.
How do I remove bathroom fixtures for my DIY shower remodel?
To remove bathroom fixtures for your DIY shower remodel, start by shutting off the water and draining and removing the toilet. Use tools like hammers and pry bars to remove the vanity, cabinets, mirror, and any other features you plan to replace.
What are the steps to install a new shower or tub for my DIY remodel?
To install a new shower or tub for your DIY remodel, choose a shower pan or basin that fits your new design and space. Make sure to address any rotting wood or water damage in the subfloor before installation. Consider options like walk-in showers or combination shower and tubs to optimize space and functionality.
How do I lay new flooring for my DIY shower remodel?
When laying new flooring for your DIY shower remodel, consider options like tile, laminate, or vinyl. If you choose tile, use a mason’s chalk line to mark reference lines and ensure straight placement. Prep the subfloor properly and follow best practices for tile installation.
What are the steps to hang drywall and paint for my DIY shower remodel?
After laying the flooring, hang new drywall and apply drywall mud and tape to cover seams and fill gaps. Use cement board for the shower or tub wall and apply a waterproofing membrane. Once the walls are ready, start painting them with a semi-gloss finish for easy cleaning and resistance to mold and mildew.
How do I install cabinets and vanity for my DIY shower remodel?
When installing cabinets and a vanity for your DIY shower remodel, follow the manufacturer’s instructions. Make sure to connect the sink and faucet properly. If you’re on a tight budget, consider refinishing and painting your existing cabinets to achieve a new look without the cost of replacement.
How do I update lighting in my DIY shower remodel?
When updating lighting in your DIY shower remodel, configure electrical fixtures and update lighting according to your new design. Consider relocating power outlets for better accessibility. If you’re not familiar with home wiring, it’s recommended to hire an electrician to ensure safety and proper installation.
How do I connect plumbing fixtures in my DIY shower remodel?
To connect plumbing fixtures in your DIY shower remodel, follow proper plumbing procedures and ensure everything is functioning correctly. Double-check for any leaks or issues before proceeding. It’s important to take care and ensure proper installation to avoid future plumbing problems.
How can I complete my DIY shower remodel with finishing touches?
To complete your DIY shower remodel with finishing touches, install trim around the room to add the final touches to your project. Consider window treatments, decorative storage containers, and artwork to personalize the space and make it your own.
What are the benefits of a DIY shower remodel?
A DIY shower remodel offers numerous benefits, including cost savings, personalization, and the ability to achieve your desired design. By following the step-by-step process, you can transform your shower space affordably and create a modern oasis in your bathroom.