Are you looking to add a personal touch to your home decor? Have you considered stenciling onto wood? This creative DIY technique allows you to transform plain wooden surfaces into customized works of art. But how do you get started? What are the best techniques and tools for achieving clean and professional results?
In this comprehensive guide, we will walk you through everything you need to know about wood stenciling. From choosing the right stencils and paint to preventing bleeding and fixing mistakes, we’ve got you covered. Get ready to unleash your creativity and explore the world of wood stenciling!
Key Takeaways:
- Stenciling onto wood is a fun and creative way to personalize your home decor.
- Choose the right stencils, paints, and tools for achieving clean and crisp stencil lines on wood.
- Prevent bleeding by using techniques such as repositionable stencil adhesive spray and contact vinyl paper.
- Fix stencil bleed by gently wiping off excess paint and touching up with a small straight pin.
- Follow a step-by-step guide to achieve successful wood stenciling and explore various project ideas.
Where to Get Stencils for Wood
When it comes to finding stencils for your wood projects, you have several options to choose from. Whether you prefer the convenience of online shopping or the hands-on experience of browsing in-store, there are plenty of places where you can purchase wood stencils to bring your creative ideas to life.
If you enjoy the ease and variety of online shopping, consider checking out popular platforms like Etsy and Amazon. These online marketplaces offer a wide range of stencils for wood, including letter stencils and unique designs. You can easily explore different sellers and read customer reviews to ensure the quality and reliability of the stencils you purchase.
If you prefer to see and touch the stencils before making a decision, local craft stores can be a great option. Stores like Michaels, Joanns, and Hobby Lobby often have dedicated sections for stenciling supplies, including a selection of stencils specifically designed for wood projects. Visiting these stores allows you to examine the stencils up close, get a feel for the material, and choose the perfect design for your project.
For those who own a Cricut machine or enjoy DIY projects, making your own stencils using vinyl papers is a fantastic option. Cricut machines offer precise cutting capabilities, allowing you to create custom stencils that perfectly match your vision. Simply choose your desired design, load the vinyl paper into the machine, and let it work its magic. This way, you can create one-of-a-kind stencils that are tailored to your specific wood stenciling project.
Whether you decide to purchase stencils online or explore local crafting stores, the key is to choose the option that best suits your needs and preferences. With the right stencils in hand, you can embark on your wood stenciling journey and let your creativity shine.
Choosing the Right Paint for Wood Stenciling
The type of paint you choose can make a significant impact on the outcome of your wood stenciling project. With the right paint, you can achieve clean and crisp stencil lines that enhance the overall look of your design. There are several options to consider when it comes to selecting the best paint for wood stenciling.
Stencil Creme

Stencil creme is a popular choice for stenciling on various surfaces, including wood, walls, and furniture. It features a velvety and creamy consistency, which allows for smooth application and quick drying time. The formula of stencil creme also helps prevent bleeding under the stencil, resulting in clean and precise lines.
Acrylic Craft Paint and Latex Paint
Acrylic craft paint and latex paint are versatile options for wood stenciling. They offer excellent coverage and adhere well to wooden surfaces. These paints are available in a wide range of colors, allowing you to create vibrant and eye-catching designs. When applied correctly, acrylic craft paint and latex paint can achieve crisp lines that enhance the details of your stencil pattern.
Chalk Paint
For a vintage or farmhouse look, consider using chalk paint for your wood stenciling projects. Chalk paint has a matte finish, covers quickly, and dries fast. It provides a unique texture that adds character to your stenciled designs. Whether you’re going for a distressed or shabby-chic look, chalk paint can help you achieve the desired effect.
When choosing the right paint for wood stenciling, it’s essential to consider your project and desired effect. Whether you opt for stencil creme, acrylic craft paint, latex paint, or chalk paint, each type of paint offers its own advantages and can bring your wood stenciling projects to life.
| # | Preview | Product | |
|---|---|---|---|
| 1 |

|
Chica and Jo Craft with Nail Polish: 20+ Easy Projects for DIY Style (Design Originals)… | Buy on Amazon |
Essential Tools for Wood Stenciling
Having the right tools is crucial for achieving precise and clean stencil lines on wood. Here are three essential brushes that are perfect for wood stenciling:
-
Foam Brushes
Foam brushes are a popular choice for wood stenciling due to their ability to evenly distribute paint and minimize drips. The soft foam bristles provide a smooth application, resulting in crisp stencil lines on your wood surface.
-
Stencil Brushes
Stencil brushes are specifically designed for stenciling projects. Their round shape and short bristles make them easy to control when applying paint with the dry brush technique. These brushes are perfect for creating texture and achieving a faded, vintage look on your stenciled designs.
-
Round Stencil Sponge Brush
A round stencil sponge brush combines the benefits of both foam brushes and stencil brushes. It has a sponge-like texture that allows for tapping and pouncing motions, making it ideal for achieving a soft, stippled effect on your wood stenciling projects.
When using these brushes, remember to apply a small amount of paint to avoid excessive coverage and ensure clean lines. With the right tools at your disposal, you can confidently embark on your wood stenciling journey and create stunning designs on any wooden surface.
Preventing Bleeding When Stenciling on Wood
One of the main challenges when stenciling on wood is preventing bleeding or smudging of the paint. To ensure clean and crisp stencil lines, there are several techniques you can use:
- Repositionable Stencil Adhesive Spray: Use a repositionable stencil adhesive spray to hold the stencil in place and seal the edges. This prevents paint from bleeding under the stencil and ensures sharp lines.
- Contact Vinyl Paper: If you have a Cricut machine to create your own stencils, consider using contact vinyl paper. It adheres well to wood surfaces and helps prevent paint from bleeding.
- Matte Mod Podge: Applying a coat of matte Mod Podge to the wood before stenciling can also help seal the edges and prevent bleeding. This creates a barrier between the wood and the paint, ensuring clean stencil lines.
- Dry Brushing Technique: Another technique to minimize bleeding is the dry brushing technique. With this technique, you tap off excess paint from the brush and apply the paint with an up and down motion. This allows for more control and reduces the chances of paint seeping under the stencil.
Choose the technique that works best for you and your project to achieve professional-looking stenciled designs on wood.

Fixing Stencil Bleed on Wood
Even with the best preventive techniques, stencil bleed can sometimes occur. If you notice any bleed or smudging under the stencil, there are a few ways to fix it.
- Using a damp paper towel, you can gently wipe off the excess paint and clean up the edges of the design.
- For smaller bleed spots, wrapping a damp paper towel around the end of a butter knife can help you wipe away the excess paint and restore crisp lines.
- If necessary, you can touch up the areas with a small straight pin dipped in paint to fix any imperfections.
Don’t get discouraged by stencil bleed, as it can be easily fixed with a little bit of attention to detail.

Example Fixes
| Bleed Severity | Solution |
|---|---|
| Excess paint around edges | Use a damp paper towel to gently wipe off the excess paint, ensuring clean edges of the design. |
| Small bleed spots | Wrap a damp paper towel around the end of a butter knife and gently wipe away the excess paint to restore crisp lines. |
| Minor imperfections | Dip a small straight pin in paint and carefully touch up the areas to fix any imperfections. |
Step-by-Step Guide for Stenciling on Wood
Now that you have all the necessary information and tools, let’s dive into the step-by-step process of stenciling on wood.
- Prepare Your Wood Surface: Start by ensuring that your wood surface is clean and smooth. Sand any rough areas and wipe away any dust or debris.
- Choose Your Stencil: Select a stencil that suits your design preferences and the size of the wood surface you’ll be working on. Consider using a high-quality stencil for clean and crisp results.
- Secure the Stencil: Position the stencil on the wood surface and secure it in place using tape or adhesive. Make sure it’s centered and aligned properly.
- Apply Mod Podge (Optional): For extra protection against bleeding, apply a coat of matte Mod Podge around the edges of the stencil. This creates a barrier and helps ensure clean lines.
- Choose Your Brush: Depending on the desired effect, choose a foam brush, stencil brush, or round stencil sponge brush. Each brush offers unique characteristics for different techniques.
- Prepare the Paint: Dip your chosen brush into the paint, making sure to tap off any excess. This prevents drips and ensures a controlled application.
- Apply the Paint: Lightly dab or bounce the brush onto the stencil, covering the design evenly. Use a gentle touch to avoid smudging or bleeding.
- Allow the Paint to Dry: If multiple coats are required or desired, allow each layer of paint to dry completely before applying the next. This helps achieve a more vibrant and polished finish.
- Remove the Stencil: Carefully peel off the stencil, starting from one corner and slowly working your way across. Take your time to avoid smudging the design.
- Seal the Finished Artwork: Consider sealing your stenciled design with a polyurethane spray for added protection, especially if it will be displayed outdoors.
Follow these step-by-step instructions for successful wood stenciling every time. With practice and attention to detail, you can create stunning and personalized designs on wood surfaces.
Experience and Tips for Wood Stenciling
Wood stenciling may require some practice to achieve perfect results, but with a few tips and tricks, you can become an expert. Here are some valuable insights to help you create stunning stenciled designs on wood:
Tips for Perfect Wood Stenciling
- Prepare the surface: Before starting your wood stenciling project, ensure that the wood surface is clean, smooth, and free from any dust or debris. This will help the stencil adhere properly and prevent any imperfections in the final result.
- Choose the right stencil size: When selecting a stencil, consider the size of the wood surface and the design you want to create. A stencil that is too small may look lost on a large piece of wood, while a stencil that is too large may overpower a smaller surface.
- Secure the stencil: To achieve crisp stencil lines, make sure to secure the stencil firmly to the wood surface using tape or adhesive. This will prevent any movement or shifting while you apply the paint.
Crisp Stencil Lines
To achieve crisp lines in your wood stenciling, follow these techniques:
- Use Mod Podge for clean edges: Before applying the paint, consider sealing the edges of the stencil with Mod Podge. This will create a barrier that prevents the paint from bleeding under the stencil, resulting in clean and sharp lines.
- Choose a good brush for dry brushing: Dry brushing is a technique that involves applying a small amount of paint to the brush and removing any excess before lightly brushing it over the stencil. It creates a soft and textured effect. For this technique, a foam brush or a round stencil sponge brush works best.
Patience and Layering
When applying paint to wood stencils, patience and layering are key to achieving the desired results:
- Patience: Take your time and apply the paint with a light hand, ensuring even coverage and avoiding excess. Rushing may result in smudges or inconsistencies in the stencil lines.
- Layering: To create a crispier and fuller look, allow each layer of paint to dry before adding more coats. This will enhance the color intensity and make the stencil design stand out.
Fixing Mistakes and Imperfections
Don’t worry if you encounter any mistakes or imperfections while wood stenciling. Here’s how you can fix them:
- Touch up with paint: If you notice any bleed or smudging under the stencil, use a toothpick dipped in paint to touch up the affected areas. This will help clean up any imperfections and refine the stencil lines.
- Clean up stencil lines: To achieve clean and sharp stencil lines, use a damp paper towel or a butter knife wrapped with a damp paper towel to carefully wipe away any excess paint around the stencil edges.
Remember, wood stenciling is all about creativity and experimentation. Don’t be afraid to try new techniques, designs, and color combinations to create unique and personalized decorations for your home. With practice and these tips in mind, you’ll be able to achieve perfect wood stenciling results and showcase your artistic talents!
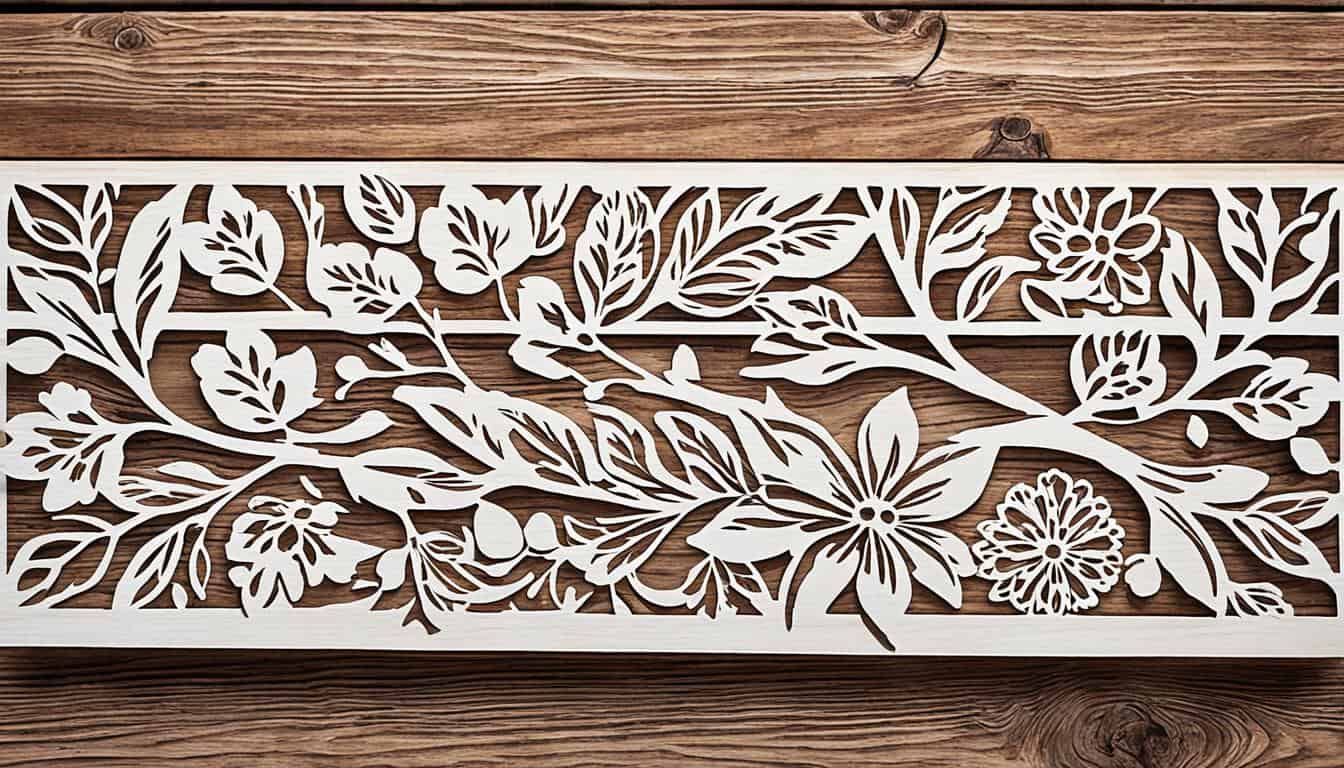
Stenciling Ideas for Wood Projects
Now that you have mastered the art of wood stenciling, it’s time to let your creativity run wild with various project ideas. Stencil wooden signs with inspirational quotes, family names, or holiday greetings. Create unique patterns on furniture pieces such as tables, chairs, or dressers. Use stencils to add decorative elements to picture frames, wooden boxes, or shelves. Explore different themes and motifs, such as botanical designs, geometric patterns, or vintage-inspired graphics. The possibilities are endless when it comes to wood stenciling, so let your imagination guide you and enjoy the process of bringing your ideas to life!
Whether you’re a beginner or an experienced DIY enthusiast, wood stenciling offers countless opportunities for personalized and creative projects. Here are a few ideas to get you started:
- Stencil a welcome sign for your front porch, adding a touch of warmth and hospitality to your home.
- Create a custom wooden sign displaying your favorite quote or mantra, inspiring and uplifting everyone who sees it.
- Add a personal touch to children’s rooms by stenciling their names or creating fun and whimsical designs.
- Transform an old wooden table into a statement piece by stenciling a striking pattern on the tabletop.
- Stencil beautiful floral motifs onto wooden coasters, adding a touch of elegance to your living space.
“The only limit to your wood stenciling projects is your imagination.”
Experiment with different stencil designs, sizes, and techniques to achieve unique and eye-catching results. Let the natural beauty of wood shine through by using lighter or transparent paint colors, or go bold with vibrant and contrasting shades. Don’t be afraid to mix and match stencil patterns for a truly one-of-a-kind look.
“Wood stenciling allows you to express your creativity and showcase your personal style.”
Whether you’re embellishing wooden furniture, creating wall art, or crafting small decorative items, wood stenciling adds a personal touch and a sense of charm to any project. It’s a versatile technique that can be adapted to various styles and aesthetics, from rustic farmhouse to modern minimalist.
“Let your wood stenciling projects reflect your unique personality and create a warm and inviting atmosphere in your home.”
Remember to enjoy the process and have fun with your wood stencil projects. Each stroke of the brush and carefully placed stencil will bring your ideas to life, making your creations truly special and meaningful.
Conclusion
Wood stenciling is a versatile and enjoyable DIY technique that allows you to personalize your home decor with ease. By following the tips and techniques outlined in this guide, you can achieve clean and crisp stencil lines on wood surfaces. From selecting the right stencils and paint to preventing bleeding and fixing mistakes, each step plays a crucial role in the success of your wood stenciling projects.
Remember to practice and experiment with different designs and ideas to unleash your creativity and create unique and beautiful stenciled artwork. Whether you’re stenciling furniture, signs, or other wooden pieces, this guide provides a comprehensive overview of all the essential aspects of wood stenciling. With the right tools, techniques, and a little patience, you can transform plain wood into eye-catching decorations that showcase your personal style and creativity.
So, have fun exploring the world of wood stenciling and enjoy the process of transforming your plain wood pieces into stunning works of art. Let your imagination run wild, experiment with various patterns and designs, and create home decor that truly reflects your personality. With the knowledge gained from this guide, you’re well on your way to becoming a wood stenciling expert!
FAQ
Where can I purchase stencils for wood projects?
You can find a wide variety of stencils for wood projects on online marketplaces like Etsy and Amazon. Craft stores like Michaels, Joanns, and Hobby Lobby also have a selection of stencils. If you have a Cricut machine, you can make your own stencils using vinyl papers.
What type of paint should I use for wood stenciling?
Stencil creme, acrylic craft paint, latex paint, and chalk paint are all great choices for wood stenciling. Consider your project and desired effect when choosing the paint for your wood stenciling.
What are the essential tools for wood stenciling?
Foam brushes, stencil brushes, and round stencil sponge brushes are all essential tools for wood stenciling. Choose the tool that best suits your preference and ensures even paint distribution.
How can I prevent bleeding when stenciling on wood?
To prevent bleeding, you can use a repositionable stencil adhesive spray, contact vinyl paper, or matte Mod Podge to seal the edges of the stencil. Additionally, using the dry brushing technique can help minimize bleeding.
How can I fix stencil bleed on wood?
If you notice any bleed or smudging under the stencil, you can gently wipe off the excess paint with a damp paper towel or butter knife wrapped in a damp paper towel. Touching up the areas with a small straight pin dipped in paint can also fix any imperfections.
What is the step-by-step process for stenciling on wood?
After preparing your wood surface and securing the stencil in place, apply a coat of matte Mod Podge to seal the edges. Dip your brush in the paint, tap off excess, and apply the paint to the stencil using dabbing or bouncing motions. Allow the paint to dry between coats, then carefully remove the stencil to reveal your design.
What are some tips for successful wood stenciling?
Use Mod Podge to seal the edges of your stencil for crisp lines. Choose a brush that works well with the dry brushing technique. Apply paint with a dry brush technique, ensuring even coverage and avoiding excess paint. Let each layer of paint dry before adding more coats for a crispier look. Use a toothpick to touch up areas with paint and clean up stencil lines if needed.
What are some wood stenciling project ideas?
You can stencil wooden signs with quotes, create unique patterns on furniture, add decorative elements to picture frames, boxes, or shelves, and explore different themes like botanical designs, geometric patterns, or vintage-inspired graphics.
What is the conclusion of this wood stenciling guide?
Wood stenciling is a versatile and enjoyable DIY technique for adding personal touches to your home decor. By following the tips and techniques outlined in this guide, you can achieve clean and crisp stencil lines on wood surfaces. Practice and experiment to unleash your creativity and create unique stenciled artwork.