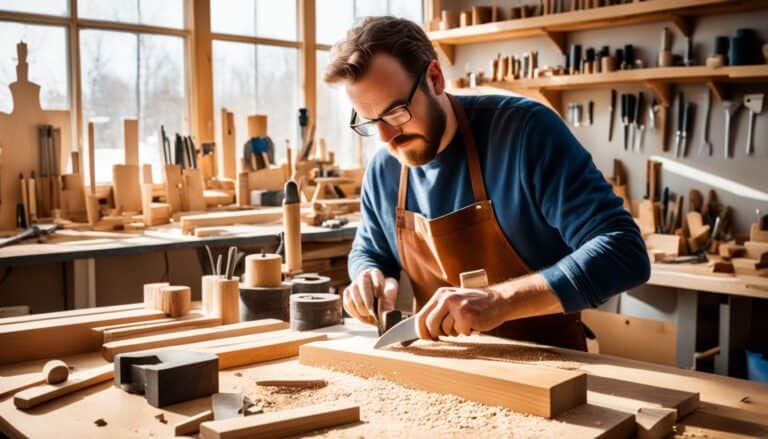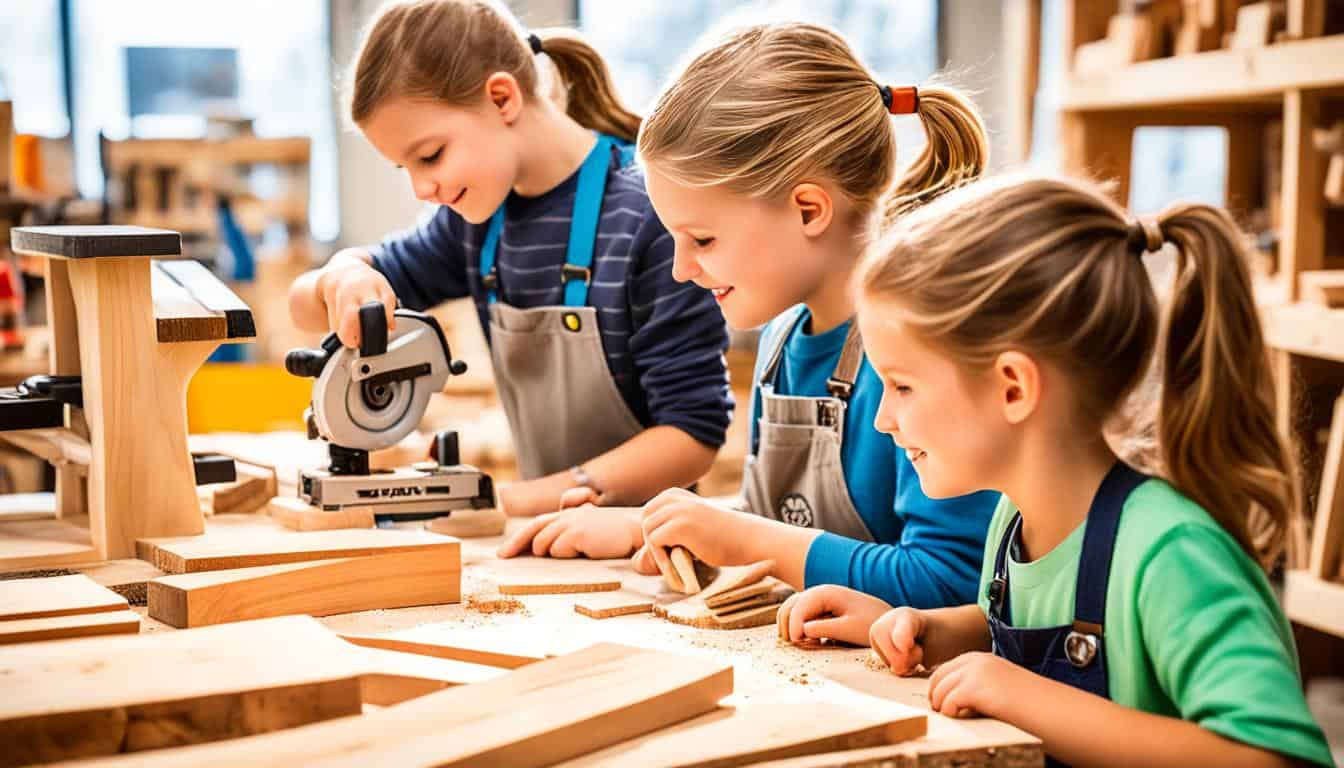
Are you looking for a way to nurture your child’s creativity and teach them practical skills at the same time? Have you ever considered introducing your little ones to the world of woodworking? You may be surprised at how woodworking projects for kids can spark their imagination, boost their confidence, and provide hours of fun!
But wait, woodworking for kids? Isn’t that dangerous? The answer is yes and no. While it’s true that woodworking involves tools and sharp objects, with the right precautions and supervision, kids can safely enjoy this hands-on activity. So, how can you get started and what are some easy projects to explore?
Read on to discover a range of beginner-friendly woodworking projects that are perfect for kids. These projects are simple, fun, and can be made using basic tools. They provide an excellent opportunity for kids to unleash their creativity, develop practical skills, and experience a sense of accomplishment when they complete a project.
Key Takeaways:
- Woodworking projects for kids nurture creativity and teach practical skills.
- Supervision and age-appropriate tools are essential for safety.
- Beginner-friendly projects include a laptop stand, DIY mailbox organizer, plywood clock using scrap plywood, solar light post, DIY wooden tool box, DIY lap desk, and more.
- Young woodworkers can learn the importance of safety, organization, and care for tools.
- Woodworking projects for kids make great gifts and encourage a sense of pride and accomplishment.
Kids Woodworking Projects for Creative Fun
Woodworking projects are a wonderful way to ignite your child’s imagination and develop their practical skills. These projects are not only enjoyable but also provide a sense of accomplishment and confidence to young builders. By introducing them to beginner woodworking projects, you can nurture their creativity while teaching them the basics of working with wood. Below, we’ve compiled a list of simple woodworking projects for kids that can be created using basic tools.
Laptop Stand
One fun and practical project for kids is a DIY laptop stand. This project only requires a few pieces of scrap wood and basic tools like a handsaw and sandpaper. Kids can measure, cut, and assemble the pieces to create a portable stand for their laptops. Not only will this allow them to showcase their creativity, but it will also provide a functional workspace for studying or watching movies.
Easy DIY Mailbox Organizer
Another project that kids will enjoy is a DIY mailbox organizer. With some plywood, nails, and a hammer, they can create a personalized organizer for sorting mail or holding small items. Kids can design and paint the organizer to match their room or add their favorite colors.
Plywood Clock using Scrap Plywood
A unique woodworking project for kids is creating a plywood clock using scrap plywood. With wood glue, a clock mechanism, and some creativity, kids can design and assemble their own clock. They can paint or decorate the clock face to make it truly one-of-a-kind.
Solar Light Post
Kids can get hands-on with solar power by building a solar light post. This project involves using 4×4 wooden posts and solar lights to create an outdoor lamp. They can paint or stain the post and then add solar lights at the top. This project not only enhances their woodworking skills but also introduces them to renewable energy sources.
DIY Wooden Tool Box
Every young woodworker needs a toolbox of their own. With some wood, nails, and a hammer, kids can build a DIY wooden tool box. They can personalize it by adding their name or painting it in their favorite colors. This project teaches them the importance of organization and taking care of their tools.
| Project | Description |
|---|---|
| Laptop Stand | Create a portable stand for laptops using scrap wood. |
| Mailbox Organizer | Build a personalized organizer for sorting mail or holding small items. |
| Plywood Clock | Design and assemble a unique clock using scrap plywood. |
| Solar Light Post | Create an outdoor lamp powered by solar energy. |
| Wooden Tool Box | Build a functional toolbox for storing woodworking tools. |
These woodworking projects provide a great opportunity for kids to explore their creativity and build practical items they can use or give as gifts. Through these simple projects, children can develop their woodworking skills and gain a sense of pride in their creations. Remember to always supervise them during their woodworking activities and prioritize safety at all times.
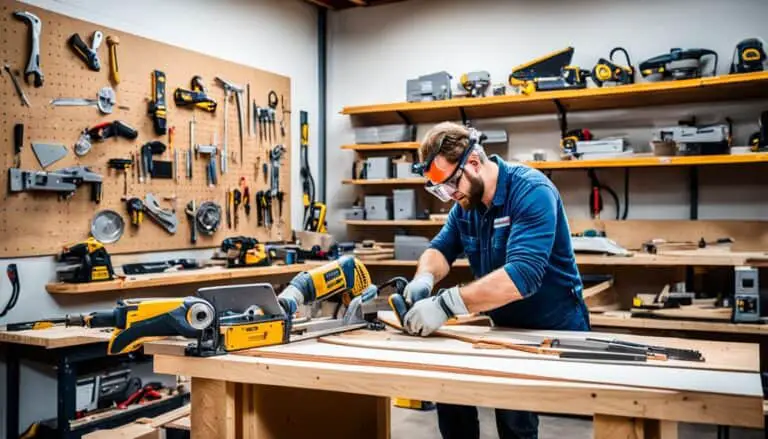
Safety Tips for Kids in the Workshop
When working with kids in the workshop, safety is of utmost importance. Always supervise children when they are using woodworking tools and never leave them unattended. Ensure that the tools used are age-appropriate and the right size for their hands. Provide kids with safety gear such as safety glasses or goggles, ear protection, and dust masks. Teach children how to use tools properly, starting with basic tools like hammers and handsaws before introducing more advanced tools like power drills. Emphasize the importance of handling sharp tools with care and having an emergency plan in case of accidents. Teach kids to take their time and not rush through a project to avoid mistakes and accidents.
Laptop Stand – A Beginner Project for Kids
Looking for an easy woodworking project for your kids? Why not start with a laptop stand? This beginner-friendly project is perfect for introducing children to the world of woodworking.
To create a laptop stand, your kids can use simple tools and scrap wood. By cutting the boards and attaching them using nails, they can construct a sturdy stand that’s perfect for doing homework or engaging in other activities on their laptops.
This project serves as a great opportunity for kids to practice basic woodworking skills while seeing tangible results. They’ll learn how to measure and cut wood, as well as how to assemble the pieces together.
| Materials | Tools |
|---|---|
| – Scrap wood | – Hammer |
| – Nails | – Hand saw |
With the right tools and materials, your kids can create a laptop stand that’s both functional and unique. They’ll gain a sense of accomplishment and pride in their woodworking abilities, and they’ll have a practical item they can use every day.
So, gather the materials, put on their safety gear, and let your kids unleash their creativity and woodworking skills with this fun and easy project!
DIY Mailbox Organizer – A Fun and Practical Project for Kids
If you’re looking for a woodworking project that combines creativity and practicality, a DIY mailbox organizer is a perfect choice for kids. With basic tools like a miter box, hand saw, and hammer, kids can design and assemble their own mailbox organizer to store mail or other small items. Not only does this project allow kids to exercise their creativity, but it also provides them with a useful organizational solution.
Creating a DIY mailbox organizer is a fun and engaging woodworking activity for children. They can choose the colors, shapes, and sizes of the compartments, allowing them to express their personal style. It’s a great opportunity for kids to practice measuring, cutting, and assembling pieces of wood, enhancing their woodworking skills.
| Benefits of DIY Mailbox Organizer | Materials | Tools |
|---|---|---|
|
|
|
Guide your kids through the process, teaching them how to measure and mark the wood, cut it using a miter box, and assemble the pieces with nails or screws. Once the basic structure is complete, they can personalize their mailbox organizer by painting or staining it in their favorite colors.
A DIY mailbox organizer not only serves a practical purpose but also allows kids to take pride in their craftsmanship. It’s a project that can be used in daily life and can make a great gift for family or friends. Kids can proudly showcase their woodworking skills and creativity with this fun and practical project.
Plywood Clock using Scrap Plywood – A Unique Woodworking Project for Kids
Kids can also make their own plywood clock using scrap plywood. This project involves using wood glue and a clock mechanism to create a personalized and functional clock. Kids can add their own creative touch by painting or decorating the clock. It can be a great birthday or Christmas gift, or even a teacher gift. This project allows kids to learn about woodworking and explore their creativity.
Creating a plywood clock is a perfect way for kids to delve into the world of woodworking. By using scrap plywood, they can bring new life to materials that might have otherwise been discarded. Additionally, this project allows kids to hone their artistic skills as they design and decorate their own clock.
To get started, kids will need the following materials:
- Scrap plywood
- Wood glue
- Clock mechanism
- Paints or decorations
Begin by cutting the plywood into a desired shape for the clock. Kids can experiment with different designs, such as round, square, or even unique shapes like animals or stars. Once the shape is cut, they can use wood glue to attach the clock mechanism to the center of the plywood.
Tip: Kids can find clock mechanisms at local craft stores or online. Opt for a mechanism that is appropriate for the size and weight of the plywood shape.
After attaching the clock mechanism, kids can unleash their creativity by painting or decorating the plywood clock. They can use acrylic paints, markers, or even glue on decorative elements like beads or sequins. Encourage kids to let their imaginations run wild and create a clock that reflects their own unique style and personality.
Once the paint or decorations have dried, the plywood clock is ready to be displayed or gifted. Kids can hang it on their bedroom walls or offer it to a loved one as a thoughtful present. Its handmade charm and personal touch will make this clock a cherished item for years to come.
A Personalized Plywood Clock Project for Kids
This guided project is not only an opportunity for kids to explore woodworking, but also a chance for them to embark on a personal journey of self-expression and creativity. By designing, building, and decorating their own plywood clock, kids can develop skills in problem-solving, dexterity, and artistic expression.
Benefits of the Plywood Clock Project
The plywood clock project offers various benefits for kids:
| Benefits | Description |
|---|---|
| Woodworking Skills | Children can learn basic woodworking techniques such as cutting, gluing, and assembling materials. |
| Creativity | Kids can unleash their artistic abilities by designing and decorating their own clock. |
| Sense of Achievement | Completing the project will boost kids’ confidence and pride in their craftsmanship. |
| Gift-Giving | The personalized clock makes a special and unique gift for birthdays, holidays, or teacher appreciation. |
Overall, the plywood clock project combines woodworking skills with artistic expression, allowing kids to create a functional and meaningful item. They will not only enjoy the process of building and decorating their own clock, but also gain valuable skills and a sense of accomplishment along the way.
Solar Light Post – A Creative Woodworking Project for Kids
If you’re looking for a creative woodworking project that combines craftsmanship with an understanding of renewable energy, a solar light post is the perfect choice. With just a few materials, kids can create their own decorative post that can illuminate outdoor spaces. This project not only allows children to exercise their woodworking skills but also introduces them to the concept of solar power.
To create a solar light post, kids will need:
- 4×4 wooden posts
- Solar lights
- Paint or stain
- Wood glue or screws
Start by cutting the wooden posts to the desired height using a saw. Then, assemble the posts to create the framework of the light post. Kids can use wood glue or screws to securely attach the pieces together.
Once the framework is complete, it’s time to add the solar lights. Choose solar lights that are suitable for outdoor use and easily fit the dimensions of the post. Kids can get creative by designing their own pattern or painting on the post to personalize it and make it unique.
To finish off the project, give the post a coat of paint or stain to protect it from the elements and enhance its visual appeal. Use bright colors or natural wood finishes to complement the outdoor surroundings.
When the solar light post is complete, it can be placed on a front porch, patio, or deck to add a touch of personalization and illumination. Not only does it serve as a decorative element, but it also demonstrates the practical applications of renewable energy.
Encourage your kids to experiment with different styles and designs, allowing their creativity to shine through. This project provides them with an opportunity to develop their woodworking skills while learning about the benefits of solar power in a fun and engaging way.
Benefits of the Solar Light Post Project
The solar light post project offers several benefits for kids:
- Enhances creativity: Kids can design and decorate their solar light post, giving them the opportunity to express their unique style and personality.
- Teaches woodworking skills: This project introduces kids to basic woodworking techniques, helping them develop their craftsmanship and attention to detail.
- Introduces renewable energy: By incorporating solar lights, kids gain an understanding of sustainable energy sources and their applications.
- Instills pride and accomplishment: Completing a woodworking project from start to finish gives kids a sense of pride and accomplishment in their abilities.
Engage your children in the solar light post project to cultivate their creativity, foster their woodworking skills, and teach them about renewable energy in a hands-on and enjoyable way.
DIY Wooden Tool Box – Essential for Young Woodworkers
Every young woodworker needs a toolbox, and kids can make their own using basic tools and small wood pieces. This project allows them to practice woodworking skills while creating a functional tool box. The toolbox can be used to store tools, utensils, or desk supplies. It’s a practical project that introduces kids to the importance of organization and taking care of their tools.
Creating a wooden tool box not only teaches kids valuable woodworking skills but also instills a sense of responsibility and organization. With their own handmade tool box, young woodworkers can keep their tools and supplies neatly stored and easily accessible.
To make a DIY wooden tool box, kids will need the following materials:
- Wooden boards or plywood
- Wood glue
- Nails or screws
- Hammer or screwdriver
- Sandpaper
- Paint or stain (optional)
Here’s a step-by-step guide to creating a wooden tool box:
- Measure and cut the wooden boards or plywood into the desired dimensions for the tool box.
- Apply wood glue along the edges of the boards and assemble them into a box shape.
- Secure the corners with nails or screws.
- Allow the glue to dry and then sand the surface to smooth out any rough edges or imperfections.
- Apply a coat of paint or stain to enhance the appearance of the tool box (optional).
- Once the paint or stain is dry, the tool box is ready to be used!
Encourage kids to personalize their tool box by adding their name or decorating it with paints, stickers, or woodburning designs. This will make the tool box truly their own and further ignite their creativity.
“A tool box not only holds your tools but also holds your dreams of what you can build.”
– Unknown


DIY Lap Desk – A Personalized Project for Kids
If your little ones enjoy both woodworking and art, they’ll love creating their very own lap desk. This project combines creativity with functionality, allowing kids to showcase their personal style while having a practical workspace. By personalizing the finish on top, they can express their creativity using unicorn spit, a gel stain, and a glaze coat in various colors.
Building a lap desk is a great beginner woodworking project for kids. With basic tools and materials, they can create a customized desk that fits their needs. It’s not only a fun activity but also a useful piece of furniture that they can use for drawing, homework, or even eating a snack while watching their favorite show.
“The lap desk project offers a perfect opportunity for children to explore their artistic side while honing their woodworking skills. They can take pride in creating a functional and personalized piece of furniture that reflects their unique personality.” – James Smith, Woodworking Expert
Materials Needed:
- 1/2-inch plywood
- Unicorn spit
- Gel stain
- Glaze coat
- Saw
- Sandpaper
- Wood glue
- Clamps
- Paintbrushes
Instructions:
- Measure and cut the plywood into a rectangular shape that suits the size of the lap desk you desire.
- Sand the edges and surfaces of the plywood to ensure a smooth finish.
- Apply a coat of wood glue to the edges and attach them together, using clamps to hold them in place until the glue dries.
- Once the desk is assembled, let your kid’s creativity shine by applying unicorn spit, gel stain, and glaze coat to the top surface.
- Allow the finish to dry completely according to the product instructions.
Your child now has their own personalized lap desk! They can proudly display their finished creation and enjoy using it for various activities. Whether they’re sketching their latest masterpiece or tackling their homework assignments, this lap desk offers a functional and unique workspace.

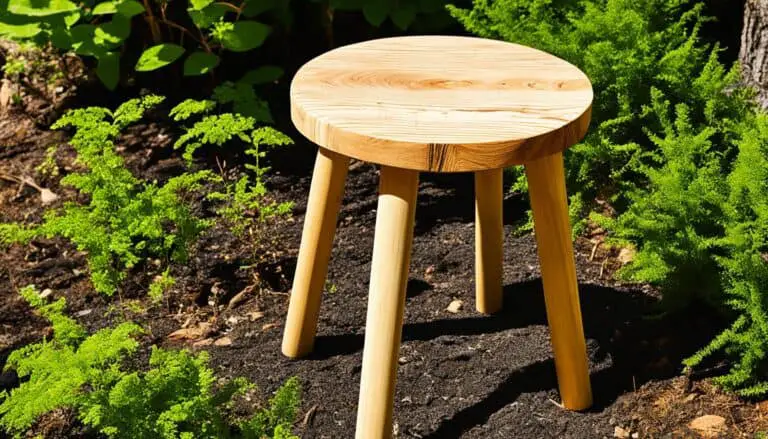
DIY Wooden Step Stool – Useful for Kids of All Ages
Building a wooden step stool is a great woodworking project for kids that can be used anywhere in the house. It’s a fun and practical project that allows kids to practice their woodworking skills while creating something useful for themselves or their family. Whether it’s reaching a high shelf, stepping up onto a chair, or helping out in the kitchen, a wooden step stool can be a handy tool for kids of all ages.
Creating a wooden step stool is relatively easy and requires only basic woodworking tools. Kids can start with pre-cut pieces of wood or use a saw to cut them to size. They will also need sandpaper to smooth the edges and surfaces, wood glue to join the pieces together, and nails or screws to secure the stool in place.
Once the basic structure is assembled, kids can get creative with the finish of their step stool. They can apply paint, stain, or varnish to add color and protect the wood. They can also personalize it by adding decorations or decals, making it truly their own.
A wooden step stool project is a great opportunity for kids to learn woodworking techniques such as measuring, cutting, sanding, and assembly. It also teaches them the value of patience and precision, as they work to create a sturdy and functional piece. The sense of accomplishment they feel when they complete their step stool is invaluable.
So, if you’re looking for a beginner woodworking project that is both practical and fun, a DIY wooden step stool is the perfect choice. It provides kids with a hands-on experience in woodworking and allows them to create something that they can use every day. Start your woodworking journey with this simple yet rewarding project!
Cedar Picket Birdhouse – A Fun Project for Bird Lovers
Are you looking for a woodworking project that combines creativity and nature? Look no further than the cedar picket birdhouse! This project is not only a great way for kids to explore the world of woodworking, but also a wonderful opportunity to create something that benefits our feathered friends.
The cedar picket birdhouse is designed with simplicity in mind. Using wood glue and nails, kids can construct a charming birdhouse that provides a cozy home for birds in any outdoor space. The natural cedar material offers durability and protection from the elements, ensuring that the birdhouse will last for years to come.
Creating a birdhouse not only allows kids to showcase their woodworking skills, but also encourages an appreciation for nature and wildlife. They can observe birds visiting their newly built homes and witness the joy that comes from providing shelter and food for these beautiful creatures.
With this project, kids can learn about the different species of birds that might be attracted to their birdhouse, such as sparrows, chickadees, or bluebirds. It’s an opportunity for them to explore birdwatching and engage in conversations about conservation and the importance of preserving habitats.
To get started on this exciting woodworking adventure, gather the following materials:
- Cedar picket boards
- Wood glue
- Nails
- Hammer
- Saw
- Drill (optional)
Follow these steps to build your own cedar picket birdhouse:
- Measure and cut the cedar picket boards into appropriate lengths for the different sections of the birdhouse, such as the sides, roof, and bottom.
- Assemble the birdhouse by applying wood glue to the edges of the boards and securing them together with nails.
- Create an entrance hole for the birds using a drill or a saw. Make sure the size of the hole is suitable for the bird species you want to attract.
- Add any desired decorations or finishes to personalize the birdhouse, such as painting it or adding a coat of varnish.
- Find a suitable location to hang or mount the birdhouse, ensuring it is secure and protected from predators.
- Sit back, relax, and enjoy the sight of birds visiting their new home!
Building a cedar picket birdhouse is not only a fun woodworking project for kids, but also a way to foster a love for nature and wildlife. By providing a safe haven for birds, kids can actively contribute to the well-being of our environment and experience the joy that comes from being a good steward of nature.
DIY Ruler Pencil Holder – A Practical Gift for Teachers
Looking for a thoughtful and personalized gift for your child’s teacher? Help your kids create a practical and unique ruler pencil holder with this simple woodworking project. This DIY project is suitable for kids who are interested in beginner woodworking projects and provides an opportunity for them to practice their woodworking skills.
All you need are some scrap wood pieces and rulers, which can easily be found at a local hardware store or repurposed from old materials. Kids can then assemble the pieces using basic tools and wood glue to create a functional and one-of-a-kind pencil holder.
Here is a step-by-step guide on how to make a ruler pencil holder:
- Gather the materials:
- Scrap wood pieces
- Rulers
- Wood glue
- Basic woodworking tools (hammer, nails, saw)
- Measure and cut the wood pieces according to the desired dimensions for the pencil holder. This can vary depending on the size of the rulers you are using and the number of sections you want in the pencil holder.
- Assemble the wood pieces using wood glue and nails to create the main structure of the pencil holder. Make sure the rulers fit snugly in the designated slots.
- Attach the rulers to the wood structure using wood glue, ensuring they are securely in place.
- Allow the glue to dry completely before using the pencil holder.
- Optional: Sand the edges and surfaces of the pencil holder to create a smoother finish.
- Optional: Apply a protective coating or paint to enhance the appearance and durability of the pencil holder.
This DIY ruler pencil holder is not only a functional gift for teachers but also serves as a reminder of your child’s creativity and effort. It can be a great addition to any teacher’s desk and helps keep their pencils organized and easily accessible.
Encourage your kids to personalize the pencil holder by adding their own artistic touch. They can paint or decorate the wood surface, creating a truly unique gift that will be cherished by the recipient.
Remember to supervise your kids during the woodworking process and ensure they are using appropriate tools and following safety precautions. Woodworking activities for children should always prioritize safety and adult supervision.
Benefits of the DIY Ruler Pencil Holder Project:
“The DIY ruler pencil holder project offers several benefits for kids, including:”
- Opportunity to practice woodworking skills
- Encourages creativity and personalization
- Teaches the value of handmade gifts and thoughtfulness
- Develops problem-solving and fine motor skills
- Enhances self-confidence and a sense of accomplishment
DIY Doll Bed – A Fun Woodworking Project for Kids
Looking for a woodworking project that will keep your kids engaged and entertained? Why not have them build their own doll bed! This project is not only fun but also a great way to introduce kids to beginner woodworking projects. Using survey stakes and 2x2s, they can create a simple and sturdy bed that will fit dolls up to 21″ in size.
Building a doll bed allows kids to develop their woodworking skills while creating a toy they can actively play with. It’s a hands-on experience that promotes creativity, problem-solving, and fine motor skills. Plus, they’ll have a sense of accomplishment seeing their finished product!
To add a personal touch to the bed, kids can customize the finish with paint or decorations. They can choose colors and designs that reflect their own style and creativity. It’s an opportunity for them to create something unique and truly their own.
Materials Needed:
- Six survey stakes
- Four 2x2s
- Wood glue
- Hammer or nail gun
- Saw
- Sandpaper
- Paint or decorations (optional)
Instructions:
- Start by measuring and cutting the survey stakes and 2x2s to the desired length. You’ll need four equal-length survey stakes for the bed frame, and two shorter lengths for the bed supports.
- Assemble the bed frame by attaching the four longer survey stakes together to form a rectangular shape. Use wood glue and nails to secure the joints, ensuring the frame is sturdy.
- Attach the two shorter survey stakes across the frame, evenly spaced, to serve as bed supports. Again, use wood glue and nails for secure attachment.
- Sand the surfaces of the bed frame and supports to ensure a smooth finish. This step will also help remove any sharp edges.
- Once the sanding is complete, it’s time to add a personal touch. Kids can paint the bed using their favorite colors or decorate it with stickers, stencils, or other embellishments. Let their creativity shine!
- Allow the paint or decorations to dry completely before the doll bed is ready for use.
Building a DIY doll bed is not only a fun project but also a wonderful way to nurture your child’s woodworking skills. It encourages creativity, patience, and problem-solving while providing them with a tangible and functional toy that they can cherish. So gather the materials, set up the workspace, and let your kids embark on this exciting woodworking adventure!

Conclusion
Woodworking projects for kids are an excellent way to introduce them to the world of woodworking and foster their creativity. These projects provide kids with the opportunity to practice and develop their basic woodworking skills while creating something they can use or gift to others. However, safety should always be a top priority when working with kids in the workshop. It is crucial to provide appropriate tools and supervision to ensure their well-being.
By encouraging their creativity and giving them the chance to build and create, kids can develop valuable skills and experience a sense of pride and accomplishment. Woodworking allows them to not only learn practical skills but also nurtures their imagination and problem-solving abilities. It is a rewarding activity for kids to see their ideas come to life through their own craftsmanship.
When engaging in woodworking projects with kids, consider their age and skill level to choose suitable projects and tools. Provide them with age-appropriate tools that they can safely handle. Always teach and emphasize proper tool usage and safety precautions. Additionally, ensure that the workshop environment is organized, clean, and free from any potential hazards.
Woodworking projects for kids offer a wonderful way to bond with them, ignite their passion for working with their hands, and instill a lifelong love for craftsmanship. Through woodworking, children can not only develop practical skills but also gain confidence and a sense of accomplishment. So, start exploring the world of woodworking projects for kids and witness their creative potential flourish.
FAQ
What are some easy woodworking projects for kids?
Some easy woodworking projects for kids include a laptop stand, DIY mailbox organizer, plywood clock using scrap plywood, solar light post, wooden tool box, lap desk, wooden step stool, cedar picket birdhouse, ruler pencil holder, doll bed, bird feeder, scrap wood candle holder, Christmas village, wood slice Christmas tree, and woodblock pumpkins.
How can I ensure the safety of kids in the workshop?
To ensure the safety of kids in the workshop, always supervise them when using woodworking tools, provide age-appropriate tools, and teach them how to use the tools properly. Additionally, provide them with safety gear, such as safety glasses or goggles, ear protection, and dust masks. Emphasize the importance of handling sharp tools with care and having an emergency plan in case of accidents.
What is a good beginner woodworking project for kids?
A good beginner woodworking project for kids is a laptop stand. This project can be made using simple tools and scrap wood, allowing kids to practice basic woodworking skills and see the results of their efforts.
What is a fun and practical woodworking project for kids?
A fun and practical woodworking project for kids is a DIY mailbox organizer. This project can be made using a miter box, hand saw, and hammer. Kids can create their own design and assemble the pieces to create a functional organizer for storing mail or other small items.
How can kids create a unique plywood clock using scrap plywood?
Kids can create a unique plywood clock using scrap plywood by using wood glue and a clock mechanism. They can personalize the clock by painting or decorating it, making it a great gift or addition to their room.
How can kids create a creative solar light post?
Kids can create a creative solar light post using 4x4s and solar lights. They can design their own pattern or painting on the post, adding a personal touch to outdoor spaces.
What is essential for young woodworkers?
An essential item for young woodworkers is a DIY wooden tool box. Kids can create their own tool box using basic tools and small wood pieces, allowing them to practice woodworking skills while having a functional storage solution for their tools.
How can kids create a personalized DIY lap desk?
Kids can create a personalized DIY lap desk using basic tools and finishing techniques. They can express their creativity by using different colors and designs, making the lap desk unique and functional.
What is a useful woodworking project for kids of all ages?
A wooden step stool is a useful woodworking project for kids of all ages. It is an easy beginner project that allows kids to practice basic woodworking skills while creating something they can use around the house.
How can kids create a birdhouse using cedar pickets?
Kids can create a birdhouse using cedar pickets by using wood glue and nails. The simple design is perfect for housing birds and can be a great addition to any outdoor space.
What is a practical gift idea for teachers?
A practical gift idea for teachers is a DIY ruler pencil holder. Kids can make this gift using basic tools and wood glue. They can assemble the box and attach rulers to create a unique and functional pencil holder.
How can kids build their own doll bed?
Kids can build their own doll bed using survey stakes and 2x2s. This project allows kids to practice basic woodworking skills while creating a toy they can play with.