Have you ever wondered how to add depth and character to your living space? Look no further than box molding. This timeless architectural feature has the power to transform any room into a sophisticated haven.
Whether you want to create an elegant accent wall in your bedroom or add a touch of class to your hallway, box molding is a versatile design element that can elevate the look of your space.
In this article, we will explore various box molding ideas and styles, learn how to install box molding step-by-step, and discover the different types of box molding available. Get ready to take your interior design to the next level with the beauty and charm of box molding!
Key Takeaways:
- Box molding is a timeless architectural feature that can enhance any space.
- It can be used to create accent walls, add depth to hallways, and frame artwork or mirrors.
- Installing box molding is a manageable DIY project with the right tools and guidance.
- There are different types of box molding available, including base cap molding and picture frame molding.
- Box molding can be customized to suit various design styles, from traditional to modern.
Box Molding Ideas for Hallways
Hallways are often overlooked when it comes to interior design, but adding box molding can instantly elevate the look and feel of these often-neglected spaces. By installing box molding along the walls of your hallway, you can create a sense of depth and visual interest.
Whether you choose to go for a classic and traditional look or a more modern and minimalistic design, box molding can be customized to suit any style. Consider using contrasting colors or adding paneling details for added impact.
Here are some box molding ideas for hallways to inspire your design:
- Create a timeless and elegant look by installing white box molding along the walls of your hallway. This classic style adds a touch of sophistication and pairs well with any decor.
- For a more modern and minimalist approach, opt for sleek and simple box molding in a neutral color. This clean design adds subtle visual interest without overwhelming the space.
- Add drama to your hallway by using dark-colored box molding against a light-colored wall. This creates a striking contrast and makes the molding stand out as a bold architectural feature.
- Consider incorporating paneling details within the boxes of your hallway molding. This adds texture and creates a unique visual element that complements the overall design.
Remember to take into account the dimensions and proportions of your hallway when planning your box molding design. Ensure that the scale of the molding complements the size of the space and enhances its overall aesthetic.
By utilizing box molding in your hallway design, you can transform a once mundane space into a visually appealing and inviting area that sets the tone for the rest of your home.
“Adding box molding to your hallway is a simple yet effective way to enhance its architectural features. Whether you prefer a classic or contemporary design, box molding can be customized to suit your style and create a sense of visual interest.”
Installing Box Molding: A Step-by-Step Tutorial
Installing box molding may seem intimidating if you’ve never done it before, but with a step-by-step tutorial, it can be a manageable DIY project.
Follow these simple steps to install box molding in your space:
Step 1: Plan the Layout and Spacing
Start by planning the layout and spacing of your boxes. Use painter’s tape to visualize the design on your wall. This will help you determine the placement and size of each box.
Step 2: Measure and Cut the Molding
Measure and cut your molding pieces at a 45-degree angle using a miter saw or miter shears. Ensure the cuts are precise for a seamless fit.
Step 3: Attach the Molding to the Wall
Attach the molding to the wall using a brad nailer and construction adhesive. Make sure to line up the corners and maintain the desired spacing between each piece of molding.
Step 4: Fill Nail Holes and Gaps
Fill any nail holes and gaps with wood filler. Once the filler is dry, sand the surface smooth for a polished finish.
Step 5: Caulk the Edges
To achieve a seamless look, caulk the edges of the box molding. This will help fill any small gaps and create a clean and professional finish.
Step 6: Paint the Box Molding
Finally, paint the box molding to match your desired color scheme. Use a high-quality paint and apply multiple coats for a smooth and even finish.
By following these steps, you can successfully install box molding in your space and transform its look and feel.
Tips for Successful Box Molding Installation
- Take accurate measurements and double-check them before cutting the molding.
- Use a level and spacing blocks to ensure precise placement and alignment.
- Secure the molding well using a brad nailer and construction adhesive.
- Fill nail holes and gaps with wood filler and sand smooth for a flawless finish.
- Choose a high-quality paint that is suitable for trim and apply thin, even coats for a professional look.
Remember, practice makes perfect. If you’re new to DIY projects, start with a small area or seek guidance from tutorials or experts in the field.
Types of Box Molding
Box molding comes in a variety of styles and materials, allowing you to choose the perfect option that suits your design aesthetic. Here are some common types of box molding:
1. Base Cap Molding
This classic and timeless box molding style is often made of wood or PVC. It adds a touch of sophistication to any space and can be used in various applications throughout your home.
2. Picture Frame Molding
Add a decorative touch to your walls with picture frame molding. This type of box molding creates a framed look and can be used as a focal point or to showcase artwork or photographs.
3. Chair Rail Molding
Installed at a midpoint on the wall, chair rail molding adds visual interest and can protect your walls from furniture. It is available in various profiles and can be used to create a more formal or traditional look.
When selecting box molding, it’s important to consider the overall style of your space. Choose a profile and material that complements your design vision and enhances the aesthetic appeal of your home.
| Box Molding Style | Material | Description |
|---|---|---|
| Base Cap Molding | Wood or PVC | A classic and timeless box molding style that adds sophistication to any space. |
| Picture Frame Molding | Various | Creates a decorative framed look for showcasing artwork or photographs. |
| Chair Rail Molding | Various | Installed at a midpoint on the wall, adds visual interest and can protect walls from furniture. |
Planning Your Box Molding Layout
Before you embark on installing box molding, it’s crucial to plan your layout to achieve a cohesive and visually pleasing design. This step will ensure that your box molding integrates seamlessly into your space and enhances its overall aesthetic. To create an impactful design, follow these expert tips:
- Start by determining the number of boxes you want to create and their respective sizes. Consider the dimensions of your walls, ceiling, and baseboard to guide your decision-making process.
- Next, think about the spacing between the boxes and the surrounding elements. Maintaining consistent spacing throughout the design is vital for achieving a balanced look and preserving the overall harmony of your space.
- For precise placement and alignment of the molding pieces, use spacing blocks or a laser level. This step will help you maintain accuracy and ensure that your box molding sits level and symmetrical.
- Remember that the size and layout of your space may influence the number and dimensions of the boxes you choose. It’s important to be adaptable and flexible in your planning to achieve the best results.
By investing time and effort into planning your box molding layout, you’ll be able to create a stunning design that enhances the visual appeal of your space. Ready to take your design to the next level? Let’s move on to the next section.
| Benefits of Planning Your Box Molding Layout | Tips |
|---|---|
| 1. Achieve a cohesive and visually pleasing design | 1. Determine the number and size of the boxes |
| 2. Ensure a balanced look and maintain overall harmony | 2. Consider spacing between boxes and surrounding elements |
| 3. Precise placement and alignment of molding pieces | 3. Use spacing blocks or a laser level for accuracy |
| 4. Adaptability for different space sizes and layouts | 4. Remain flexible in your planning process |

Measure, Cut, and Install Box Molding
Now that you have planned out your box molding layout, it’s time to measure, cut, and install the molding pieces. Follow these steps to ensure a successful installation:
- Measure: Use a tape measure to determine the length of each side of the box. Take accurate measurements to ensure a precise fit for the molding.
- Cut: Use a miter saw or miter shears to cut the molding at a 45-degree angle. This angled cut will allow the pieces to fit together neatly at the corners of the box.
- Install: Begin by attaching the vertical molding pieces to the wall. Use a brad nailer or construction adhesive to secure them in place. Make sure to line up the corners and maintain the desired spacing.
- Horizontal Pieces: After installing the vertical pieces, move on to the horizontal pieces. Again, use a brad nailer or construction adhesive to attach them to the wall, ensuring proper alignment and spacing.
Repeat these steps for each box in your design, taking the time to measure, cut, and install each piece with care. This will ensure a professional-looking finish to your box molding installation.
When installing box molding, it’s important to have the right tools on hand. Here are some essential box molding tools you may need:
- Miter saw or miter shears for precise cuts
- Tape measure for accurate measurements
- Brad nailer or construction adhesive for secure installation
- Sanding block or sandpaper for smoothing rough edges
- Wood filler for filling any nail holes or gaps
- Paint and brushes for adding a finishing touch
By following these steps and using the appropriate tools, you can measure, cut, and install box molding with confidence, creating a stunning architectural feature in your space.


Filling and Finishing Box Molding
Once the box molding is installed, it’s important to ensure a seamless finish by filling any nail holes, gaps, and cracks. Follow these steps for a polished and professional look:
Step 1: Filling Nail Holes and Gaps
Start by using wood filler to fill in any nail holes and gaps in the box molding. Apply the wood filler using a putty knife and make sure to press it firmly into the holes and gaps.
Step 2: Smoothing the Surface
After the wood filler has dried, use sandpaper to smooth the surface of the box molding. Sand in a circular motion, applying gentle pressure, until the surface is completely smooth.
Step 3: Caulking the Edges and Corners
To achieve a clean and polished finish, caulk the edges and corners of the box molding. Use a small bead of caulk along the joints and smooth it with a caulk tool or your finger for a seamless look. Wipe away any excess caulk with a damp cloth.
Step 4: Painting the Box Molding
Preparation is key before painting the box molding. Make sure the surface is clean and free from dust or debris. Apply painter’s tape to protect the adjacent surfaces. Choose a paint color that complements your overall design and apply multiple coats for a smooth and even finish. Take care to paint the edges and corners of the box molding for a polished appearance.
Completing the filling and finishing process for box molding is essential to achieve a professional and visually appealing result. By filling nail holes, gaps, and cracks, and applying a smooth and even paint finish, you can enhance the overall look of your box molding and elevate the design of your space.
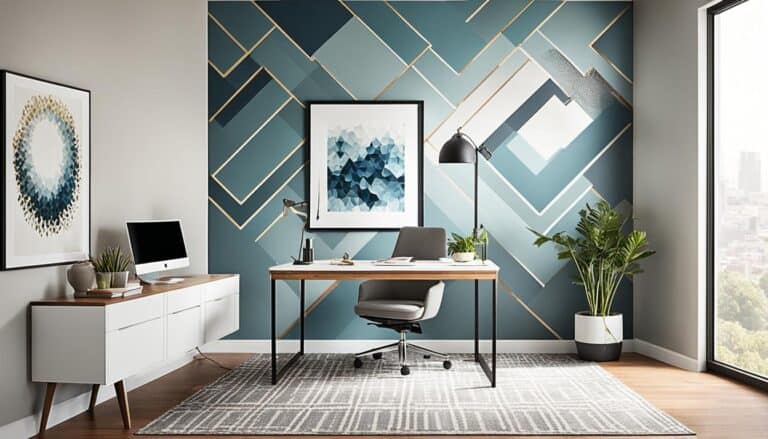
Enhancing Your Space with Box Molding in the Bedroom
Box molding is a versatile design element that can add a touch of elegance and sophistication to any bedroom. Whether you want to create a bold and dramatic statement or achieve a more subtle and refined look, incorporating box molding in your bedroom can enhance the overall aesthetic and create a focal point in the space.
To elevate your bedroom design, consider installing box molding to create an eye-catching accent wall. By arranging the molding in a unique pattern, such as a grid or herringbone design, you can add visual interest and texture to the room. Experiment with contrasting colors or incorporate textured wallpaper within the boxes to further enhance the design.
Box molding can also be used to frame artwork or mirrors on the bedroom walls, adding a decorative touch. This creates a cohesive look and draws attention to the focal points of the room. By utilizing box molding in this way, you can transform a simple bedroom into a stylish and sophisticated space.
To visualize the impact of box molding in the bedroom, take a look at the image below:
Whether your bedroom design is modern or traditional, box molding can be customized to suit your personal style and preferences. Its versatility allows you to create a look that truly reflects your individuality and adds character to the room.
By enhancing your space with box molding in the bedroom, you can create a visually appealing and stylish environment that promotes relaxation and comfort.
Box Molding for Dining Rooms and Living Rooms
Dining rooms and living rooms provide the perfect opportunity to showcase the timeless elegance of box molding. By incorporating this architectural feature into your space, you can elevate the style and create a sense of grandeur.
In dining rooms, consider using box molding as wainscoting or chair rail molding for a formal and luxurious look. This decorative element adds depth and texture to the walls, enhancing the overall ambiance of the room. Experiment with different box molding styles and colors to create a stunning focal point that complements your formal dining room decor.
In living rooms, box molding can be used to create accent walls or highlight key features such as fireplaces. By installing box molding along the walls, you can add depth and visual interest to the space. Choose contrasting colors or incorporate decorative paneling within the boxes to further enhance the design. Box molding in living rooms allows you to create a unique and personalized touch that transforms your living space into a stylish haven.
Box molding in dining rooms and living rooms adds a touch of elegance and sophistication to the space. Whether you choose to embrace a formal dining room decor or incorporate a bold accent wall in your living room, box molding allows you to create a truly stunning and visually appealing environment.
Box Molding as a Transformative Entryway Detail
Make a lasting first impression by incorporating box molding in your entryway. By installing box molding on the walls of your foyer or entryway, you can create a sense of elegance and sophistication. Consider using box molding in a traditional paneling design or create a unique pattern that reflects your personal style. Box molding can also be used to frame a mirror or artwork above a console table, adding a decorative touch. With box molding, you can transform your entryway into a welcoming and stylish space.
Enhancing Entryway Design with Box Molding
The design of your entryway sets the tone for the rest of your home. Box molding can be a striking design element that instantly elevates the look and feel of this important space. By incorporating box molding, you can create visual interest and add depth to your entryway walls. Whether you choose to go for a classic and timeless look or a more modern and contemporary vibe, box molding can be customized to suit your design vision.
Entryway Decor Ideas with Box Molding
Box molding offers endless possibilities for enhancing your entryway decor. Here are some ideas to help you get started:
- Create a focal point by installing box molding around a large mirror or artwork. This can add a touch of elegance and draw attention to your statement piece.
- Add texture and visual interest by using different finishes or materials for the box molding. Consider incorporating wood, metal, or even textured wallpaper within the boxes.
- Experiment with colors and contrasts to make your entryway pop. You can paint the box molding in a bold color that complements the overall color scheme of your home.
- Combine box molding with other architectural elements, such as wainscoting or crown molding, to create a cohesive and sophisticated look.
Comparing Different Box Molding Styles for Entryways
| Box Molding Style | Description |
|---|---|
| Traditional Paneling | Classic and timeless, featuring rectangular boxes with a simple profile. Adds a refined and elegant touch to your entryway. |
| Geometric Patterns | Create a unique and eye-catching entryway with geometric patterns like chevrons or herringbone designs. Adds a modern and contemporary flair. |
| Picture Frame Molding | Frame your entryway walls with picture frame molding for a sophisticated and gallery-like look. Perfect for showcasing artwork or family photos. |
| Multi-Level Molding | Add depth and visual interest to your entryway by incorporating multi-level molding. Create a layered effect with different heights and widths. |
By selecting the right box molding style for your entryway, you can create a captivating and welcoming space that leaves a lasting impression on your guests.
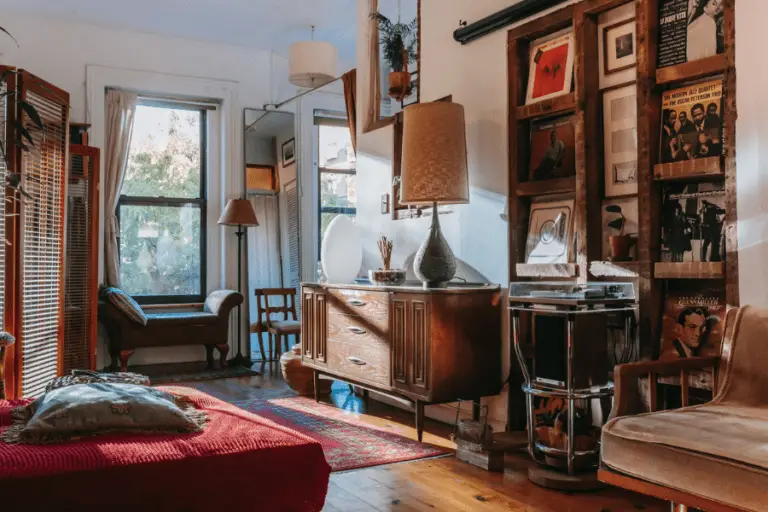
Box Molding for a Farmhouse-Inspired Look
Box molding can be adapted to suit a farmhouse-inspired aesthetic, adding warmth and charm to your space. Consider using shiplap or reclaimed wood paneling for the box molding to create a rustic and textured look. Install the box molding in a horizontal or vertical pattern to add visual interest and highlight the farmhouse style. Pair the box molding with vintage and distressed furniture for a cohesive and inviting farmhouse-inspired space.

Injecting rustic charm into your home decor is made easy with box molding in a farmhouse style. By incorporating elements such as shiplap or reclaimed wood paneling, you can create a textured and weathered look that blends seamlessly with the farmhouse aesthetic. Install the box molding in a horizontal or vertical pattern to add visual interest and draw attention to the architectural detail. The warm and inviting nature of this design will make your space feel cozy and welcoming.
When it comes to furniture, opt for vintage or distressed pieces that complement the farmhouse style. Choose pieces with worn finishes and natural materials like wood and metal. This will enhance the rustic appeal and create a cohesive look that ties the room together. By incorporating farmhouse-inspired box molding into your space, you can achieve a beautiful combination of architectural detail and cozy charm.
| Feature | Description |
|---|---|
| Shiplap Paneling | Use shiplap paneling for a classic farmhouse look. The horizontal or vertical installation will give your walls an authentic touch. |
| Reclaimed Wood | Consider using reclaimed wood for a more sustainable and eco-friendly option. The unique character of reclaimed wood adds to the rustic charm of the space. |
| Distressed Finishes | Opt for furniture with distressed finishes to complement the box molding. This will further strengthen the farmhouse-inspired aesthetic. |
| Vintage Accents | Add vintage accents such as antique mirrors or weathered signage to enhance the farmhouse charm. These pieces will add character and tell a story. |
| Natural Textures | Embrace natural textures like jute, rattan, and linen in your decor. These textures will add warmth and a sense of authenticity to the space. |
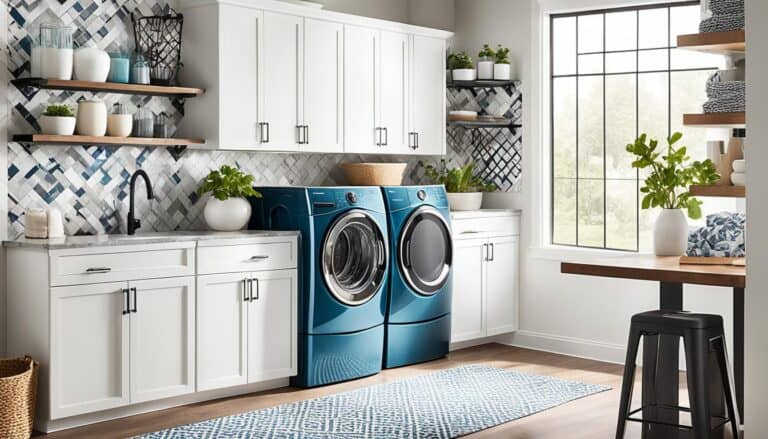
Adding Box Molding to Outdoor Spaces
Box molding is not limited to indoor spaces—it can also be incorporated into your outdoor areas to add architectural interest and enhance the overall design. By installing box molding along the exterior walls of your home, you can create a cohesive and polished look that complements your outdoor decor.
When choosing box molding for outdoor spaces, it’s important to consider the durability and weather resistance of the materials. Opt for weather-resistant options such as PVC or composite molding, which are designed to withstand the elements and maintain their appearance over time.
Adding box molding to your outdoor spaces allows you to create a seamless transition from indoor to outdoor living areas. The consistent use of box molding both inside and outside your home helps create a harmonious design that ties everything together.
Whether you have a patio, deck, or outdoor entertainment area, box molding can be used to enhance the architectural features of these spaces. Consider installing box molding along the perimeter of your outdoor walls, creating a frame or paneling effect that adds depth and visual interest.
Furthermore, box molding in outdoor spaces can also be used creatively to highlight certain areas or elements. For example, you can install box molding around outdoor fireplaces, water features, or seating areas to create a focal point and draw attention to these inviting spaces.
In summary, don’t limit box molding to just your indoor spaces—bring this timeless design element outdoors to create a cohesive and stylish look throughout your entire home. With weather-resistant materials and thoughtful installation, outdoor box molding can transform your outdoor areas into beautiful extensions of your indoor decor, making your outdoor spaces more inviting and visually appealing.
Box Molding Maintenance and Care
To keep your box molding looking its best, regular maintenance and care are necessary. Follow these tips to ensure the longevity and beauty of your box molding:
Cleaning:
Dust the molding regularly using a soft cloth or duster to prevent the buildup of dirt and debris. Use a mild detergent and warm water to clean any stains or marks on the molding. Gently scrub the affected area, then rinse thoroughly with clean water.
Avoid Harsh Chemicals:
Avoid using harsh chemicals or abrasive cleaners on the box molding, as they can damage the surface and finish. Stick to mild cleaning solutions to preserve the integrity of the molding.
Inspect for Damage:
Regularly inspect the box molding for any signs of damage or wear. Check for cracks, chips, or loose pieces. If any issues are found, make necessary repairs promptly to prevent further damage.
Preserving the Finish:
Protect the finish of the box molding by avoiding contact with sharp objects that can scratch or dent the surface. Be cautious when moving furniture or other items near the molding to prevent accidental damage.
| Cleaning Tips | Maintenance Practices |
|---|---|
| Regular dusting with a soft cloth or duster | Inspecting for damage and making necessary repairs |
| Cleaning with mild detergent and warm water | Avoiding contact with sharp objects to prevent scratches |
| Avoiding harsh chemicals or abrasive cleaners | Protecting the finish from accidental damage |
By following these maintenance and care tips, you can ensure that your box molding retains its beauty and elegance for years to come.
Box Molding as a Timeless Design Trend
Box molding is a classic and enduring design trend that has stood the test of time. Its versatility and adaptability make it a popular choice for interior designers and homeowners alike. Whether you prefer a traditional and classic aesthetic or a modern and contemporary look, box molding can be seamlessly incorporated into various design styles.
With box molding, you can add depth, texture, and sophistication to any space. Whether you choose to use it as a subtle accent or a bold statement, box molding has the power to transform the look and feel of a room. Its clean lines and geometric shapes create visual interest and architectural elegance, making it a timeless choice for enduring design styles.
One of the greatest advantages of box molding is its ability to enhance the overall aesthetic of a space without overpowering it. By framing walls, windows, and doors, box molding adds a sense of structure and refinement, elevating the design in a subtle yet impactful way. Its timeless appeal ensures that your space will remain stylish and on-trend for years to come.
Classic Box Molding
Classic box molding, also known as panel molding or picture frame molding, is a traditional style that exudes timeless elegance. It consists of rectangular or square frames installed on walls to create a decorative and architectural element. Classic box molding creates a sense of refinement, adding a touch of sophistication to any room. It can be used to highlight artwork, mirrors, or other focal points, creating a visually appealing display.
Timeless Box Molding
Timeless box molding refers to designs that transcend trends and remain relevant throughout the years. This style focuses on clean lines, simple geometries, and understated details, ensuring that the design will not become dated or out of style. Timeless box molding blends seamlessly with a wide range of design aesthetics, allowing you to create a cohesive and enduring look in your space.
Whether you choose to incorporate classic or timeless box molding, both styles offer a timeless beauty that can enhance any space. Embrace the enduring design trend of box molding and elevate your interiors with its timeless elegance.
Conclusion
Box molding is a versatile and stylish design element that can enhance any space. Whether you choose to incorporate it in your hallway, bedroom, living room, or entryway, box molding adds depth, character, and elegance to your home.
One of the main benefits of box molding is its ability to transform a room and create a sense of sophistication. The different styles, materials, and installation techniques available allow you to customize box molding to suit your personal style and create a cohesive look throughout your space.
By embracing the timeless beauty of box molding, you can elevate your interiors and turn them into a sophisticated haven. Whether you prefer a classic and traditional design or a more modern and minimalistic approach, box molding offers endless possibilities for creating a stunning and visually appealing space.
In conclusion, box molding is not only a decorative feature but also a practical one. It can add architectural interest, create depth, and bring a touch of elegance to any room in your home. Embrace the beauty of box molding and enjoy the transformative power it offers.
FAQ
What is box molding?
Box molding is a decorative architectural feature that is installed along the walls of a space to add depth, character, and elegance to the design.
How can box molding enhance a hallway?
Installing box molding in a hallway can instantly elevate the look and feel of the space by creating a sense of depth and visual interest. It can be customized to suit any style, whether classic and traditional or modern and minimalistic.
Is installing box molding a difficult DIY project?
Installing box molding may seem intimidating at first, but with a step-by-step tutorial, it can be a manageable DIY project. Planning the layout, measuring and cutting the molding pieces, and attaching them to the wall are some of the key steps involved.
What are the different types of box molding?
Common types of box molding include base cap molding, picture frame molding, and chair rail molding. These options come in various profiles and materials to suit different design aesthetics.
How do I plan the layout for box molding?
Before installing box molding, it’s important to plan out the layout by determining the number and size of boxes, as well as the spacing between them and the walls, ceiling, and baseboard. You can use spacing blocks or a laser level for precise placement and alignment.
What is the process for measuring, cutting, and installing box molding?
To measure and cut box molding, use a tape measure to determine the length of each side of the box and cut the molding at a 45-degree angle. Start by attaching the vertical molding pieces, followed by the horizontal pieces, using a brad nailer and construction adhesive.
How do I fill and finish box molding?
After installing box molding, fill any nail holes, gaps, and cracks with wood filler, sand the surface smooth, and caulk the edges for a seamless finish. Finally, paint the box molding to match your desired color scheme.
How can box molding be used in the bedroom?
Box molding can be used in the bedroom to create an eye-catching accent wall, frame artwork or mirrors, or add a decorative touch. It adds depth, texture, and visual interest to enhance the overall aesthetic of the space.
How can box molding enhance dining rooms and living rooms?
Box molding can be used as wainscoting or chair rail molding in dining rooms for a formal and luxurious look. In living rooms, it can be used to create an accent wall or frame a fireplace, adding depth and visual interest to the space.
How can box molding transform an entryway?
By installing box molding in the entryway, you can create a sense of elegance and sophistication. It can be used in a traditional paneling design or a unique pattern that reflects your personal style, framing art or mirrors to add a decorative touch.
Can box molding be used in a farmhouse-inspired space?
Yes, box molding can be adapted to suit a farmhouse-inspired aesthetic by using shiplap or reclaimed wood paneling. It can be installed in a horizontal or vertical pattern to add warmth, charm, and visual interest to the space.
Can box molding be used in outdoor spaces?
Yes, box molding can be incorporated into outdoor areas to add architectural interest and enhance the overall design. Weather-resistant materials such as PVC or composite molding are typically used for durability in outdoor settings.
How do I maintain and care for box molding?
To keep your box molding looking its best, regularly dust it using a soft cloth or duster and clean any stains or marks with a mild detergent and warm water. Avoid using harsh chemicals or abrasive cleaners, and inspect the molding for any signs of damage or wear.
Is box molding a timeless design trend?
Yes, box molding is a timeless design trend that has stood the test of time. Its versatility and adaptability make it a popular choice for interior designers and homeowners, adding depth, texture, and sophistication to any space.