Are you looking to enhance your woodworking skills and make cleaner cuts? Discover expert advice and techniques for efficient cutting using wood cutting tools. Whether you’re a beginner or an experienced wood cutter, these tips will help you improve your skills and achieve precise results.
- Understanding fundamental techniques is crucial for efficient wood cutting.
- Proper tool selection can significantly impact the quality of your cuts.
- Mastering woodworking techniques like milling, sawing, drilling, routing, gluing, shaping, and sanding is essential.
- Investing in quality wood cutting tools and maintaining them properly is important for longevity.
- Following safety precautions is paramount to prevent accidents during wood cutting.
Understanding Woodworking Techniques
Woodworking is a skill that requires a solid understanding of various techniques to achieve successful results. Whether you are a beginner or an experienced wood cutter, mastering these techniques is essential for creating beautiful and functional pieces. In this section, we will explore the different woodworking techniques that every wood cutter should be familiar with.
Milling
Milling is the first step in preparing wood for joinery. It involves using a combination of tools such as a jointer, planer, and table saw to transform rough lumber into precisely dimensioned blocks. The goal of milling is to flatten one face of the board, make the opposite face smooth, and create parallel edges. This process ensures that the wood is ready for accurate and secure joinery.
Sawing
The sawing technique is used to cut wood into desired shapes and sizes. There are different types of saws available, each designed for specific types of cuts. From handheld saws to table saws and bandsaws, choosing the right saw for the job is crucial for achieving precise and clean cuts. Understanding the characteristics and capabilities of different saws will enable you to select the most suitable one for your woodworking projects.
Drilling & Boring
Drilling and boring are techniques used to create holes in wood. Whether you need to install hardware or create decorative features, having the right tools and knowledge is essential. By using drill bits of various sizes and types, you can achieve accurate and clean holes in wood. Additionally, understanding the appropriate drilling and boring techniques will ensure the longevity and structural integrity of your woodworking projects.
Routing
Routing is a technique used to add decorative edges, create intricate designs, and make grooves in wood. It involves using a router, either handheld or mounted on a table, with different bits to achieve desired effects. By mastering routing techniques, you can enhance the aesthetics and functionality of your woodworking projects, taking them to the next level.
Gluing & Clamping
Joining pieces of wood together is a vital aspect of woodworking. Gluing and clamping ensure strong and durable bonds between the pieces. Understanding different types of glue and proper clamping techniques is crucial for achieving reliable and long-lasting joints. By using the right glue and applying the correct clamping pressure, you can create solid connections in your woodworking projects.
Sanding & Finishing
After the construction phase, sanding and finishing techniques are used to achieve smooth and polished surfaces. Sanding involves using various grits of sandpaper to remove imperfections and achieve the desired level of smoothness. Finishing, such as applying stains or paints, enhances the appearance and protects the wood. With proper sanding and finishing techniques, you can turn your woodworking projects into works of art.
It is crucial to master these woodworking techniques to become a skilled wood cutter. Whether you are working on small projects or large-scale furniture, understanding these techniques will empower you to bring your woodworking ideas to life.
Milling – Preparing Wood for Joinery
When it comes to woodworking, milling plays a crucial role in preparing wood for joinery. It involves transforming rough lumber into geometrically precise blocks that are ready for further woodworking processes. By following a series of steps, you can ensure that the wood is flat, smooth, and accurately sized for your projects.
First, to flatten one face of the board, you’ll need a jointer. This powerful wood cutting tool shaves off any high spots and creates a level surface. This step is essential for achieving stability and accurate results in your woodworking projects.
Next, you’ll use a planer to make the opposite face of the board smooth and even. The planer will remove any remaining imperfections, leaving you with a consistent thickness throughout the wood. This step is crucial for creating a seamless finish and ensuring the quality of your final product.
Finally, you’ll need a table saw to cut the remaining edge to be parallel to the other edges. This step guarantees that all the sides of your wood blocks are aligned and ready for precise joinery. With accurate dimensions, you can confidently proceed with the construction of your woodworking projects.
Overall, milling is a fundamental process in woodworking that sets the foundation for well-crafted pieces. By investing in the right wood cutting tools and following proper milling techniques, you can ensure that your wood is perfectly prepared for joinery, resulting in professional-looking and sturdy creations.
Benefits of Milling
The milling process offers several benefits in woodworking:
- Precision: Milling allows you to create geometrically precise blocks, ensuring accurate measurements and joinery.
- Smoothness: By flattening and planing the wood, you can achieve a smooth surface that is ideal for further woodworking techniques such as sanding and finishing.
- Consistency: Milling ensures that all sides of your wood blocks are parallel and equally sized, providing a uniform appearance in your final projects.
- Efficiency: By preparing your wood through milling, you eliminate potential hurdles that could arise during the joinery process, saving time and effort in the long run.
Key Considerations for Milling
Here are a few important factors to keep in mind when milling wood:
- Sharp Tools: Make sure your jointer, planer, and table saw blades are sharp and in good condition to achieve clean cuts and prevent tear-out.
- Proper Technique: Learn and follow the correct techniques for operating each tool to ensure your safety and the best results.
- Wood Selection: Choose the right type of wood for your project, considering its stability, hardness, and suitability for milling.
- Measurement Accuracy: Pay close attention to the measurements of your wood blocks to ensure they meet your project’s specifications.
By mastering the milling process, you’ll have a solid foundation for successful woodworking projects, enabling you to create beautiful and functional pieces with precision and confidence.
Sawing – Choosing the Right Saw for the Job
Sawing is a crucial part of woodworking and requires the right tool for the job. There are various types of saws available, including chop saws, hand saws, portable circular saws, table saws, chainsaws, bandsaws, and scroll saws. Each saw has its own advantages and is suitable for different types of cuts and projects. Choosing the right saw for the task at hand will ensure efficient and precise cutting.
When it comes to wood cutting, the type of saw you choose can greatly impact the quality and accuracy of your cuts. Let’s take a closer look at some of the common types of saws and their uses:
| Saw Type | Best For |
|---|---|
| Chop Saw | Cutting large pieces of lumber |
| Hand Saw | Precise cuts and fine woodworking |
| Portable Circular Saw | Cutting plywood and making straight cuts |
| Table Saw | Accurate rip cuts and crosscuts |
| Chainsaw | Cutting through thick logs and large branches |
| Bandsaw | Cutting curves and intricate shapes |
| Scroll Saw | Creating intricate patterns and designs |
By understanding the strengths and purposes of each saw type, you can make an informed decision based on your specific cutting needs. Whether you’re working on a construction project or crafting intricate wooden art, selecting the right saw will help you achieve the best results.
Drilling & Boring – Creating Holes in Wood
Drilling and boring are essential techniques in woodworking that allow you to create precise holes in wood. By using the right wood cutting tools and drill bits, you can achieve accurate results for various woodworking projects.
When it comes to drilling and boring, it’s important to choose the appropriate drill bits for the job. Twist bits, forstner bits, and spade bits are commonly used for creating holes in wood. Twist bits are versatile and come in various sizes, making them suitable for general drilling tasks. Forstner bits, on the other hand, are designed for woodworking and provide clean and flat-bottomed holes. Spade bits are ideal for drilling large-diameter holes.
To ensure successful drilling and boring, consider the following factors:
- Size of the Hole: Select the drill bit size based on the diameter of the hole you want to create. Measure accurately and use a bit that matches the desired hole size.
- Material Being Drilled: Different materials require different drill bits. For wood, twist bits and forstner bits are commonly used, while masonry and metal may require specialized bits.
- Desired Speed: If you need to drill quickly, use a high-speed steel (HSS) drill bit. For more precise drilling, consider using a brad point or forstner bit, which provide cleaner cuts.
To perform drilling and boring, you can use either a drill press or a handheld drill driver. A drill press offers more stability and accuracy, while a handheld drill driver provides convenience and portability. Choose the tool that suits your needs and preferences.


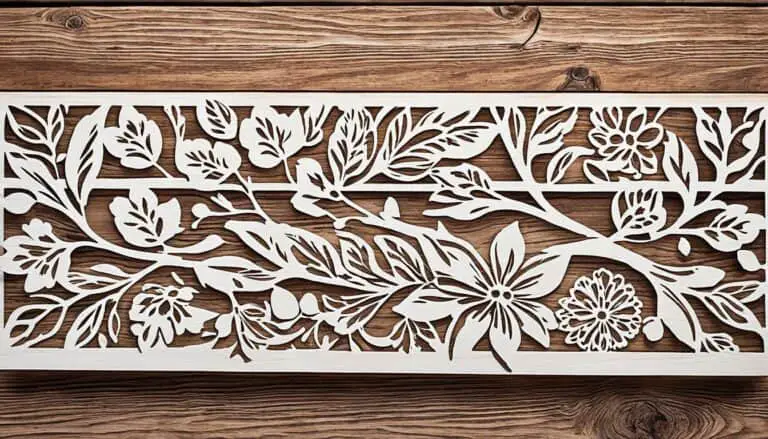
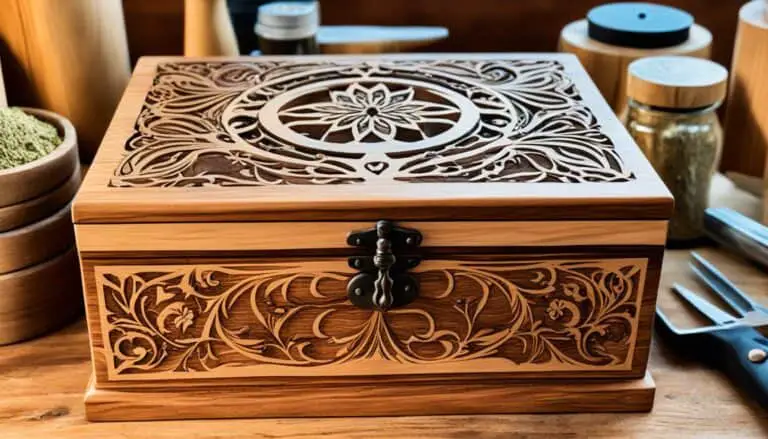
Routing – Adding Decorative Edges and Grooves
Routing is a versatile technique that allows you to add decorative edges, create grooves, and follow patterns in wood. It is a valuable skill for any woodworker looking to enhance the design and functionality of their woodworking projects.
To perform routing, you will need a wood cutting tool called a router. There are two types of routers: handheld and mounted on a table. Handheld routers are portable and offer greater maneuverability, while table-mounted routers provide stability and precision for more intricate tasks.
When using a router, you’ll need to select the appropriate router bits for your desired effects. Router bits come in various shapes and sizes, allowing you to create a wide range of cuts and designs. Common router bit types include straight bits, chamfer bits, roundover bits, and cove bits.
By utilizing different router bits, you can add decorative edges to tabletops, create grooves for inlays, and even follow patterns to replicate intricate designs. The possibilities with routing are endless, and it is a technique that can significantly elevate the visual appeal of your woodworking projects.
Adding decorative edges and grooves can transform a plain piece of wood into a visually stunning work of art. Whether it’s a simple edge profile or an intricate pattern, routing allows you to unleash your creativity and achieve unique designs.
Here is an example of how routing can enhance the look of a piece of wood:
| Before Routing | After Routing |
|---|---|
 |
In the example above, a simple square piece of wood is transformed into a decorative shelf bracket through the use of routing. The router was used to create the curved edges and grooves, adding visual interest to the piece.
When using a router, it is important to follow safety precautions, such as wearing appropriate eye and ear protection and securing the workpiece firmly. Additionally, take your time and practice using the router on scrap wood before working on your actual project.
With the right wood cutting tool and a bit of practice, you can master the art of routing and take your woodworking projects to the next level.
In woodworking, the process of joining wood together involves two important steps: gluing and clamping. Gluing ensures a strong bond between wood pieces, while clamping holds them firmly in place during the drying process. Let’s take a closer look at these essential techniques.
Types of Glue
Different woodworking applications require different types of glue. Here are some common options:
| Glue Type | Primary Use |
|---|---|
| White and Yellow Interior Glue | Ideal for indoor projects and general woodworking |
| Exterior Glue | Designed for outdoor projects, water-resistant |
| Epoxy | Provides strong, durable bonds for specific applications |
Clamps for Woodworking
When joining wood pieces, clamps play a crucial role in keeping them secure. Here are some commonly used clamps:
- Bar Clamps
- Pipe Clamps
- F-Clamps
- Spring-Loaded Clamps
Creating a Strong Bond
To ensure a strong and durable bond, follow these steps:
- Apply an even layer of glue to the surfaces being joined.
- Align the pieces and place them together.
- Use clamps to hold the pieces tightly in place.
- Wipe away any excess glue with a damp cloth.
- Allow the glue to dry completely as per the manufacturer’s instructions.

“Proper gluing and clamping techniques are essential for creating strong and lasting woodworking projects.”
By choosing the right type of glue and using appropriate clamps, you can ensure the integrity of your woodworking projects. Whether you’re building furniture, cabinets, or other wooden items, mastering the art of gluing and clamping will result in high-quality, durable craftsmanship.
Shaping & Molding – Creating Non-Rectangular Shapes
When it comes to woodworking, creating non-rectangular shapes adds a touch of artistry and uniqueness to your projects. Shaping and molding techniques allow you to carve wood into intricate designs and decorative elements that can elevate the aesthetic appeal of your work.
There are several methods you can employ to achieve these non-rectangular shapes:
- Scrollwork: Scrollwork involves using a scroll saw to create intricate and graceful patterns in wood. With a fine blade, you can make delicate cuts and curves, allowing you to craft artistic designs.
- Lathe turning: Using a lathe, you can shape wood into symmetrical forms such as bowls, vases, and spindles. By rotating the wood while cutting with specialized turning tools, you can create elegant and smooth curves.
- Veneering: Veneering is the process of applying thin slices of wood, called veneers, to a base surface. This allows you to create patterns, decorative inlays, or even three-dimensional shapes by layering different veneers and using clamping techniques to bond them to the surface.
- Lamination: Lamination involves gluing together multiple layers or pieces of wood to form a specific shape or design. This technique allows you to create furniture pieces with curved surfaces or complex structures.
- Sanding: Sanding is an essential step in shaping and molding wood. By using various grits of sandpaper or sanding discs, you can refine and smooth the surfaces of your work, removing any imperfections or rough edges.
By incorporating these techniques into your woodworking projects, you can add depth and intricacy to your designs, transforming simple pieces of wood into artistic masterpieces.
Now, let’s take a closer look at the tools and materials required for shaping and molding:
| Tool | Description |
|---|---|
| Scroll saw | A specialized saw with a fine blade that allows for precise and intricate cuts. |
| Lathe | A machine used for rotating wood while shaping it into symmetrical forms. |
| Veneers | Thin slices of wood used for creating decorative patterns or inlays. |
| Clamps | Used to hold veneers or laminated pieces together during the gluing process. |
| Sanding discs | Abrasive discs used for smoothing and refining the surfaces of your work. |
By familiarizing yourself with these tools and techniques, you can unlock a whole new world of creativity in your woodworking projects. Whether you’re adding intricate scrollwork to a wooden plaque or shaping a unique vase on a lathe, shaping and molding allows you to express your artistic vision in wood.
Sanding & Filing – Achieving Smooth Surfaces
Sanding and filing are essential techniques that contribute to achieving smooth surfaces in woodworking. Proper sanding and filing not only enhance the appearance of the wood but also ensure a professional finish. Let’s explore these techniques in detail.
Sanding: Scratching Away Imperfections
Sanding involves using sandpaper to scratch up the wood surface gradually, starting with coarser grits and progressing to finer ones. This process helps eliminate imperfections such as rough spots, unevenness, or scratches left by other tools.
Begin by using sandpaper with a coarser grit, like 80 or 100, to remove any noticeable roughness. As you progress, switch to finer grits, such as 150, 220, or even higher, to create a silky smooth finish. Remember to sand with the grain to avoid leaving visible sanding marks.
Hand sanding is effective for smaller areas or intricate details, while powered sanding tools like disc sanders and spindle sanders can expedite sanding larger surfaces more efficiently.
Pro Tip: When using sandpaper, be patient and let the sandpaper do the work. Applying excessive force may result in uneven surfaces or excessive removal of wood.
Filing: Shaping and Smoothing Wood
Filing is another technique used to shape wood and remove rough spots. It involves using a file, a hand tool with small, sharp teeth, to scrape away wood gradually. Files come in different shapes and sizes, such as flat files, half-round files, or round files, allowing you to shape and smooth specific contours or profiles.
When using a file, apply consistent pressure and use smooth, long strokes for an even finish. Start with a coarser file to remove excess material and refine the shape. Then, switch to a finer file to achieve a smoother surface.
Take care not to apply excessive force, as it may cause the file to dig into the wood or leave unwanted marks. Regularly brush away wood shavings to ensure the file remains unclogged and effective.
Combining Sanding and Filing
There is an image in the center showing a woodworker using sandpaper and a file to smooth a wood surface.

Tips for Effective Sanding and Filing
To maximize the effectiveness of sanding and filing, consider the following tips:
- Always wear protective goggles or a face shield to shield your eyes from flying debris.
- Work in a well-ventilated area or use a dust collection system to minimize the inhalation of wood dust.
- Regularly check the sandpaper or file for wear and replace them when necessary to ensure optimal results.
- Take breaks to prevent overheating the wood, especially when using powered sanding tools.
- Use masking tape to protect adjacent surfaces or delicate details that should not be sanded or filed.
By incorporating sanding and filing into your woodworking routine, you can achieve smooth surfaces that bring out the natural beauty of the wood. These techniques are essential for creating high-quality finishes, whether you are working on furniture, cabinetry, or other woodworking projects.
I completed the text for Section 9 of the upcoming article.
Circular Saw Tips – How to Use a Circular Saw Safely and Effectively
Using a circular saw is an essential skill for any woodcutter. However, it’s important to prioritize safety and learn the proper techniques to achieve clean and accurate cuts with this powerful tool. Follow these nine circular saw tips to enhance your woodworking skills:
- Choose the Correct Blade: Select the appropriate blade for the type of wood you are cutting. A fine-toothed blade is ideal for crosscuts, while a rip blade is better for ripping along the grain.
- Ensure Proper Maintenance: Regularly inspect and clean your circular saw, ensuring that all components are in good working condition. Keep the blade sharp and tighten any loose parts.
- Wear Safety Gear: Protect yourself by wearing safety goggles, ear protection, and a dust mask. Secure long hair and avoid loose clothing that might get caught in the saw.
- Use a Guide: To ensure straight and accurate cuts, consider using a circular saw guide or jig. These tools provide stability and precision, especially when cutting large pieces of wood.
- Secure the Workpiece: Always secure the workpiece before cutting by clamping it down or using a sturdy workbench. This prevents the wood from moving or binding during the cutting process.
- Measure Twice, Cut Once: Double-check your measurements before making any cuts to avoid costly mistakes. It’s better to invest time in accurate measuring than to waste materials on incorrect cuts.
- Control the Saw: Maintain a firm grip on the saw throughout the cutting process. Use both hands to control the saw’s movement and keep it steady and stable.
- Start Slowly: Ease into the cut by starting the saw at a lower speed, gradually increasing the speed as you progress. This technique helps prevent splintering and blade kickback.
- Practice Precision: Practice makes perfect. Take the time to practice your cutting technique on scrap wood before moving on to your actual project. This allows you to refine your skills and achieve cleaner cuts.
By following these circular saw tips, you’ll not only improve your woodworking skills but also ensure your safety while working with this versatile tool. Remember to always prioritize safety, use the correct blade, and practice precision for the best results.
Circular Saw Maintenance and Safety Tips
Maintaining and safely using a circular saw is crucial for efficient and safe cutting. By following proper maintenance practices and implementing safety tips, you can ensure the longevity of your circular saw and minimize the risk of accidents. Here are some important guidelines to keep in mind:
Maintenance Tips
- Cleaning: Regularly clean the saw to prevent dust and debris buildup. Use a brush or compressed air to remove sawdust from the blade guard, motor, and other components.
- Lubricating: Apply lubricating oil to the saw’s moving parts, such as the blade spindle or motor bearings, as recommended by the manufacturer. This helps reduce friction and ensures smooth operation.
- Inspecting the Blade: Before each use, inspect the circular saw blade for any signs of damage, such as worn or missing teeth, cracks, or warping. Replace the blade if necessary to maintain optimal cutting performance.
Safety Tips
- Wearing Protective Gear: Always wear appropriate personal protective equipment (PPE) when operating a circular saw, including safety glasses, ear protection, and gloves. This protects against potential eye injuries, hearing damage, and hand lacerations.
- Setting the Blade Depth Correctly: Adjust the blade depth according to the thickness of the material you’re cutting. The blade should extend no more than 1/4 inch below the workpiece to minimize the risk of kickback.
- Avoiding Binding and Kickback: Ensure the material is properly supported and free from obstructions before starting the cut. Keep your hands away from the line of cut to avoid kickback, which occurs when the blade binds or catches the material and forcefully throws it back towards the operator.
By following these maintenance and safety tips, you can properly care for your circular saw and confidently use it for a wide range of cutting tasks. Remember to always prioritize your safety and the well-being of those around you.
| Maintenance Tips | Safety Tips |
|---|---|
| 1. Cleaning | 1. Wearing Protective Gear |
| 2. Lubricating | 2. Setting the Blade Depth Correctly |
| 3. Inspecting the Blade | 3. Avoiding Binding and Kickback |
Conclusion
Mastering the art of wood cutting requires a combination of technique, practice, and the right tools and equipment. By understanding woodworking techniques, choosing the right saw for the job, and following proper safety and maintenance procedures, you can significantly improve your wood cutting efficiency.
Whether you are a beginner or an expert wood cutter, implementing these tips will help you achieve cleaner and more accurate cuts in your woodworking projects. It is crucial to prioritize safety in every step of the process, invest in quality wood cutting tools, and never stop learning and improving your skills.
Remember, a well-executed cut can make all the difference in the outcome of your project. So, take your time, measure twice, and cut once. With the right knowledge and tools at your disposal, you can unlock the true potential of your woodworking projects and create beautiful pieces that showcase your craftsmanship.
FAQ
What are the fundamental techniques in woodworking?
The fundamental techniques in woodworking include milling, sawing, drilling, routing, gluing, and sanding.
What is milling in woodworking?
Milling is the process of taking rough lumber and making it into geometrically precise blocks by flattening one face of the board, making the opposite face smooth, and cutting the remaining edge to be parallel using a jointer, planer, and table saw.
What types of saws are used in woodworking?
Various types of saws are used in woodworking, including chop saws, hand saws, portable circular saws, table saws, chainsaws, bandsaws, and scroll saws.
What are drilling and boring techniques used for in woodworking?
Drilling and boring techniques are used to create holes in wood using drill bits of different sizes and types.
How is routing used in woodworking?
Routing is a versatile technique used to add decorative edges, create grooves, and follow patterns in wood by using a router with different bits.
What is the importance of gluing and clamping in woodworking?
Gluing and clamping are important processes for joining wood together and ensuring a strong bond.
What are shaping and molding techniques in woodworking?
Shaping and molding techniques involve carving wood into non-rectangular shapes using scrollwork, lathe turning, veneering, lamination, and sanding.
How are sanding and filing used in woodworking?
Sanding and filing are essential for achieving smooth surfaces in woodworking and can be done using sandpaper or powered sanding tools.
What are some tips for using a circular saw?
Tips for using a circular saw include choosing the correct blade, proper maintenance, achieving clean and accurate cuts, and utilizing circular saw jigs and guides.
How should I maintain and use a circular saw safely?
To maintain and use a circular saw safely, you should regularly clean, lubricate, and inspect the blade, wear protective gear, set the blade depth correctly, and avoid binding and kickback.
How can I improve my wood cutting efficiency?
By understanding woodworking techniques, choosing the right tool for the job, and following proper safety and maintenance procedures, you can improve your wood cutting efficiency.