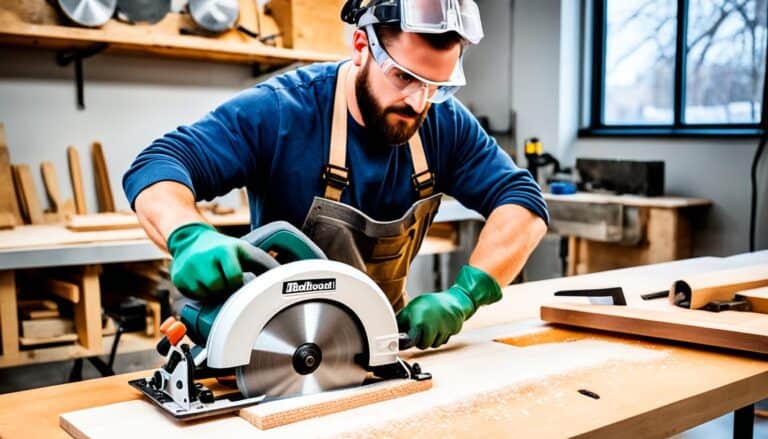
Are you tired of unsightly plywood edges ruining the look of your woodworking projects? Wondering how to achieve that sleek, professional finish? Look no further than plywood edge banding. By concealing the exposed edges of plywood, edge banding not only enhances the aesthetics of your project but also protects the wood from damage and wear over time.
In this article, we will explore the various plywood edge banding solutions and techniques that can elevate your woodworking game. From choosing the right type of plywood to the application of edge banding, we will guide you through the entire process, ensuring flawless results every time.
Key Takeaways:
- Discover the types of plywood suitable for edge banding
- Learn how to select the right plywood for your project
- Explore essential tools and materials for plywood edge banding
- Master the techniques for applying and trimming edge banding
- Understand the advantages of different edge banding options
Types of Plywood for Edge Banding
When it comes to edge banding plywood, you have a wide range of options to choose from. The type of plywood you select will depend on factors such as its intended use and the desired finish. Here are some of the most commonly used types of plywood for edge banding:
1. Softwood Plywood
Softwood plywood, including varieties like pine and spruce, is known for its strength and flexibility. It is often used for structural applications where durability is key. Softwood plywood is a popular choice for edge banding due to its ability to withstand wear and tear.
2. Hardwood Plywood
Hardwood plywood, made from trees like birch and oak, offers superior strength and resistance to cracking, staining, and twisting. It is a favored option for high-quality furniture and cabinetry, making it a reliable choice for edge banding.
3. Marine Plywood
Marine plywood is specially designed to resist water and moisture. It is constructed with waterproof glue and can withstand exposure to humid environments, making it ideal for applications such as boat interiors and outdoor furniture.
4. Baltic Birch Plywood
Baltic Birch plywood is renowned for its strength and durability. It features multiple layers of high-quality birch veneer, making it resistant to warping and voids. This type of plywood is often chosen for woodworking projects that require a stable and reliable edge banding solution.
5. MDO Plywood and OSB
MDO plywood, short for Medium Density Overlay plywood, is composed of a hardwood plywood core covered with resin-impregnated fiber overlays. It offers a smooth and uniform surface for edge banding. OSB, or Oriented Strand Board, is an engineered wood panel made from strands of wood and resin. Both MDO plywood and OSB provide their own unique advantages and can be suitable for edge banding in specific applications.
Selecting the Right Plywood for Edge Banding
When it comes to achieving a sleek and professional finish on your plywood projects, selecting the right plywood for edge banding is essential. Your choice of plywood will depend on various factors, including the project needs and the desired aesthetic appeal of the plywood’s edge.
One popular option for edge banding is birch veneer plywood. This type of plywood is suitable for staining, allowing you to achieve a beautiful, natural wood look. Pair it with matching birch edge banding to create a seamless and cohesive edge.
However, if you’re working with solid wood plywood, a different approach is required. Solid wood plywood has its own unique characteristics, and edge banding techniques may vary. Consulting experienced woodworkers can provide valuable guidance on selecting the right plywood for your specific application.
Consulting the Experts
When it comes to choosing the best plywood for edge banding, it can be beneficial to consult with experienced woodworkers. Their expertise and knowledge can help you make an informed decision based on your project requirements, desired outcome, and budget.
Experienced woodworkers can provide recommendations on the most suitable plywood type and thickness for your specific project. They can also guide you on the best edge banding solutions to achieve the desired look and functionality.
Consulting with experienced woodworkers can save you time, money, and potential mistakes. Their knowledge and insights will ensure you select the right plywood for edge banding and achieve a flawless finish on your woodworking projects.
Summary
Choosing the right plywood for edge banding is a crucial step in achieving a professional and polished finish. Consider the project needs, aesthetic requirements, and consult with experts to make an informed decision. Whether you opt for birch veneer plywood or need to work with solid wood plywood, selecting the right plywood will set the foundation for a successful edge banding process.
| Plywood Type | Edge Banding Technique |
|---|---|
| Birch Veneer Plywood | Staining and matching birch edge banding |
| Solid Wood Plywood | Consulting with experts for guidance |
Essential Tools and Materials for Plywood Edge Banding
Before you begin the plywood edge banding process, it’s important to have all the necessary tools and materials on hand. Having the right equipment will ensure a smooth and successful edge banding experience. Here are the essential items you’ll need:
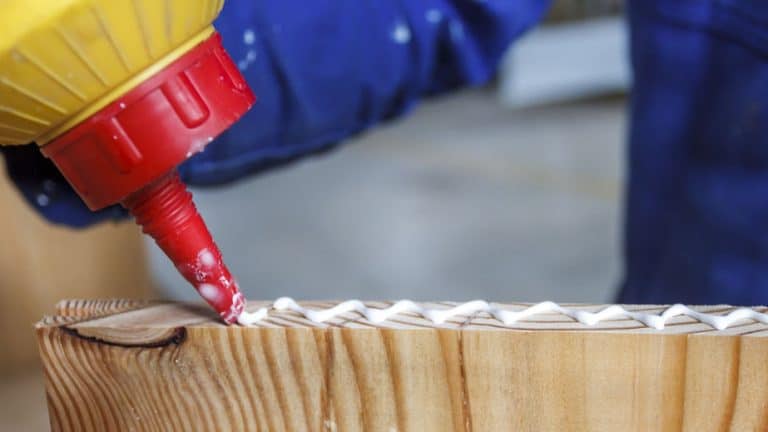
- Wood glue: This adhesive is used to secure the edge banding to the plywood.
- Edge banding: Choose the appropriate type of edge banding material for your project, such as PVC or ABS.
- A household iron: The iron is used to activate the glue on the edge banding and bond it to the plywood.
- Sandpaper: Use sandpaper to smooth the plywood edges before applying the edge banding.
- A utility knife: This tool is essential for cutting the edge banding to the correct size.
- A putty knife: Use a putty knife to press down the edge banding and remove any air bubbles.
- Adhesive: If your edge banding does not have a pre-applied adhesive, you’ll need additional adhesive to secure it to the plywood.
- Scissors: Scissors are useful for trimming any excess edge banding.
- Potentially a saw: If your plywood needs to be trimmed or cut before edge banding, a saw may be necessary.
By having these tools and materials readily available, you’ll be well-prepared to apply plywood edge banding and achieve a professional and polished finish.
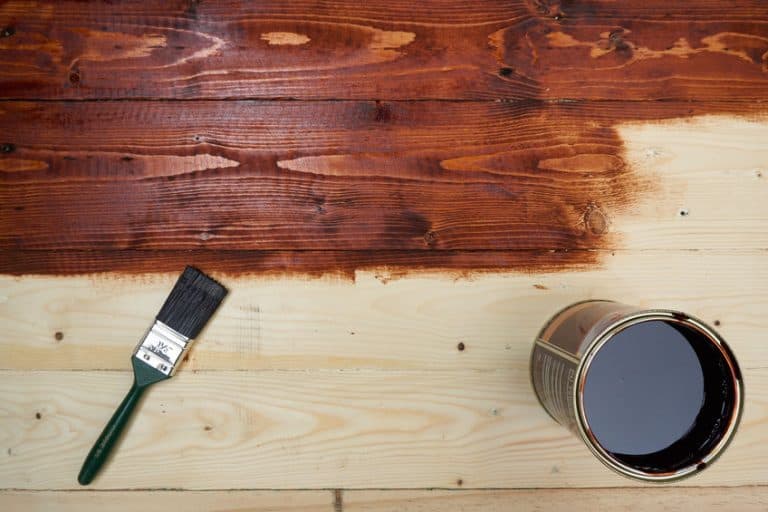
Applying Veneer Edge Banding
If you’re looking for a popular method to achieve a professional finish when applying plywood edge banding, veneer edge banding is an excellent option. Here’s a step-by-step guide on how to apply veneer edge banding.
- Measure the length and width of the plywood edge and cut the veneer edge banding to match.
- Apply heat to the edge banding using a household iron to activate the pre-glued backing. Be sure to set the iron to an appropriate temperature according to the instructions on the packaging.
- Carefully position the banding on the edge, starting from one end and slowly working your way to the other. Make sure to align the banding evenly with the edge to avoid any gaps or overlaps.
- Smooth out any wrinkles or bubbles by gently pressing the banding onto the plywood’s surface with a putty knife or an edge banding roller.
- Trim any excess banding with a sharp utility knife, holding the knife at a slight angle to achieve a clean and precise cut.
- Once the banding is in place, use sandpaper to sand the edges, ensuring a seamless transition between the plywood and the banding. This will create a smooth, finished look.
By following these steps, you can achieve a professional and polished appearance for your plywood projects using veneer edge banding.
Benefits of Veneer Edge Banding
Veneer edge banding offers several advantages for plywood edge finishing. It provides a natural and seamless appearance that blends well with the plywood, creating a cohesive look. Veneer edge banding is available in various wood species, allowing you to match the banding with your desired plywood veneer. Additionally, it can be stained or finished to achieve a consistent appearance for your woodworking projects.
Trimming Techniques for Plywood Edge Banding
Achieving precise and clean cuts is essential for a professional finish in plywood edge banding. To ensure accuracy and a seamless appearance, there are various trimming techniques and tools that you can utilize. Common tools for trimming plywood edge banding include:
- A utility knife
- A chisel
- A router with a flush trim bit
- Specialty edge trimming tools
Each tool has its advantages and specific use cases for achieving perfectly trimmed edges:
- Utility Knife: This versatile tool is commonly used for trimming edge banding. It allows for precise cuts and easy maneuverability, making it suitable for both straight and curved edges.
- Chisel: Chisels are effective for removing excess edge banding material and creating clean, straight lines. They offer more control and precision when working on delicate or intricate edges.
- Router with a Flush Trim Bit: Routers equipped with flush trim bits are ideal for achieving clean and consistent cuts. They can trim edge banding flush with the plywood surface, resulting in a seamless finish.
- Specialty Edge Trimming Tools: There are various specialty edge trimming tools available that cater specifically to different edge banding materials and project requirements. These tools are designed to provide precise trimming and ensure a professional outcome.
By selecting the appropriate trimming technique and using the right tools, you can achieve perfectly trimmed edges that enhance the overall appearance of your plywood projects.
| Trimming Technique | Advantages |
|---|---|
| Utility Knife | 1. Versatile tool for straight and curved edges 2. Provides precise cuts and maneuverability |
| Chisel | 1. Offers control and precision for delicate edges 2. Ideal for removing excess material and creating clean lines |
| Router with a Flush Trim Bit | 1. Achieves clean and consistent cuts 2. Trims edge banding flush with plywood surface |
| Specialty Edge Trimming Tools | 1. Cater to specific materials and project requirements 2. Provide precise trimming for professional results |
Using the right trimming techniques and tools will ensure that your plywood edge banding projects have clean, precise cuts and a polished finish.
Round-Over Routing for Plywood Edge Banding
One of the techniques that can elevate your plywood edge banding is round-over routing. By using a router equipped with a round-over bit, you can create a decorative and smooth curve along the edges of the plywood. This method adds a professional and polished finish to your plywood projects, giving them an extra touch of elegance.
Round-over routing serves both a functional and aesthetic purpose. It not only eliminates sharp corners, making the edges more comfortable to touch, but also enhances the overall visual appeal of the plywood. The smooth curves soften the appearance of the plywood edges, giving them a more refined and finished look.

When executing round-over routing, it’s important to select the right round-over bit for your desired edge profile. Round-over bits come in various sizes, allowing you to achieve different degrees of curvature. By choosing the appropriate bit, you can customize the level of smoothness and roundness you desire for your plywood edges.
| Cut Diameter | Recommended Use |
|---|---|
| 1/8 inch | Creates a subtle and delicate round-over profile. |
| 1/4 inch | Offers a medium-sized round-over profile suitable for most projects. |
| 3/8 inch | Produces a larger and more pronounced round-over profile for a bold look. |
Here are the steps to perform round-over routing for plywood edge banding:
- Secure the plywood piece firmly in a workbench or clamps to prevent any movement during routing.
- Insert the round-over bit into the router and adjust the depth according to the desired round-over profile.
- Carefully maneuver the router along the edges of the plywood, moving in a counterclockwise direction to avoid chip-out and tear-out.
- Ensure a steady and consistent pace while routing to achieve an even round-over along the entire edge.
- After completing the round-over routing, use sandpaper or a router bit with a bearing to smooth out any imperfections or rough spots.
- Once the edges are smooth and polished, you can proceed with the edge banding process to further enhance the appearance and functionality of the plywood.
Round-over routing is an effective technique for achieving an attractive and professional finish on plywood edges. Its ability to blend functionality and aesthetics makes it a popular choice among woodworkers. By incorporating round-over routing into your plywood edge banding process, you can elevate the overall quality and visual appeal of your woodworking projects.


Using Wood Filler for Seamless Plywood Edges
When it comes to achieving flawless edges on plywood, wood filler is an invaluable ally. Whether you need to fill voids, gaps, or imperfections on the plywood surface, wood filler can help you achieve a smooth and impeccable finish.
To get started, select a wood filler that matches the color and grain of your plywood. This will ensure a seamless look once the filling process is complete. Before applying the filler, make sure to thoroughly clean the edges of the plywood to remove any dust or debris.
Using a putty knife, apply the wood filler to the desired areas, ensuring that it fills the voids or gaps. Smooth out the filler and remove any excess using the putty knife, creating a flush surface with the surrounding plywood.
Once the wood filler is applied and smoothed, allow it to dry according to the manufacturer’s instructions. Once dry, use sandpaper to gently sand the filled areas. This will help create a seamless finish, blending the wood filler with the plywood surface.
By utilizing wood filler as part of your plywood edge banding process, you can achieve a flawless and professional look. The wood filler fills in imperfections, creating a smooth surface that enhances the overall aesthetics of your project.
Benefits of Using Wood Filler:
- Creates seamless edges on plywood
- Fills in voids, gaps, and imperfections
- Blends with the color and grain of the plywood
- Provides a smooth and flawless finish
Using wood filler in your plywood edge banding process is a simple yet effective way to achieve impeccable edges. It allows you to eliminate imperfections and create a seamless finish that enhances the overall appearance of your woodworking projects.
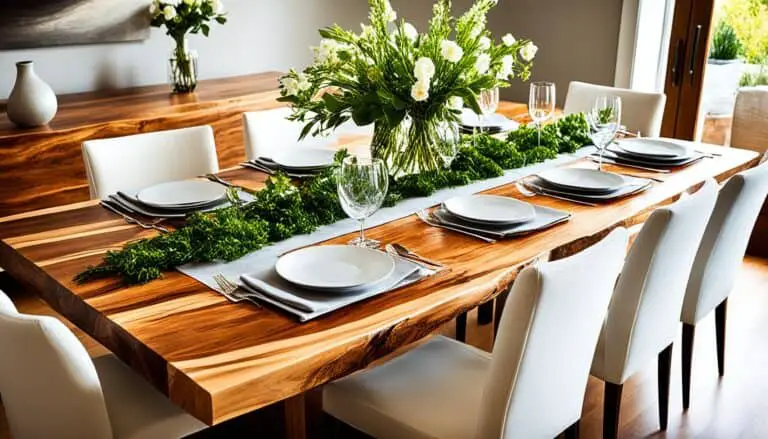
The Advantages of Plywood Edge Banding
Plywood edge banding offers a range of advantages that enhance the overall look and durability of your woodworking projects. By concealing the raw edges of plywood, edge banding provides a clean and professional finish. Not only does it improve the aesthetic appeal of the project, but it also protects the plywood edges from damage and wear over time. Additionally, plywood edge banding allows for customization, providing you with various options in terms of colors, materials, and finishes.
| Advantages of Plywood Edge Banding: |
|---|
| 1. Enhanced aesthetics: Conceals raw edges, giving your project a clean and professional appearance. |
| 2. Protection: Prevents damage and wear on the plywood edges, extending the lifespan of your project. |
| 3. Customization options: Offers a variety of colors, materials, and finishes to suit your design preferences. |
Whether you’re working on furniture, cabinetry, or other woodworking projects, plywood edge banding solutions provide a seamless and polished look that elevates the overall craftsmanship. With its numerous benefits, plywood edge banding is a valuable technique to add to your woodworking skill set.
The Process of Adhesive-Backed Edge Banding
Adhesive-backed edge banding is a popular and easy method for covering the edges of plywood. It provides a seamless and professional finish to plywood projects. The adhesive-backed edge banding comes in strips with a pre-applied adhesive backing that bonds effectively to the plywood edges. This eliminates the need for additional glue and makes the process hassle-free.
To apply adhesive-backed edge banding, follow these simple steps:
- Cut to size: Measure the length of the plywood edge and cut the edge banding strip accordingly, allowing for a slight overlap.
- Activate the adhesive: Use a household iron set to the appropriate temperature (as recommended by the manufacturer) to activate the adhesive on the edge banding strip. Apply heat evenly to ensure proper bonding.
- Apply the edge banding: Position the adhesive-backed edge banding strip onto the plywood edge, aligning it carefully. Press firmly to ensure a secure bond.
- Trim and smooth: Using a utility knife, carefully trim any excess edge banding. Then, sand the edges gently to create a seamless finish.
With adhesive-backed edge banding, you can achieve a clean and professional look without the need for complex tools or techniques. It is a convenient solution for both DIY enthusiasts and professional woodworkers.
Benefits of Adhesive-Backed Edge Banding:
Adhesive-backed edge banding offers several advantages:
- Easy application: The pre-applied adhesive simplifies the installation process and eliminates the need for clamping.
- Clean finish: The adhesive-backed edge banding provides a seamless appearance, creating a professional look.
- Wide range of options: Adhesive-backed edge banding is available in various materials, colors, and widths, allowing for customization.
- Time-saving: The adhesive-backed edge banding reduces the overall time required for edge banding compared to traditional methods.
By utilizing adhesive-backed edge banding, you can achieve a sleek and finished look for your plywood projects without any hassle.
The Advantages of Adhesive-Backed Edge Banding
Adhesive-backed edge banding provides a host of benefits when it comes to plywood edge banding solutions. This method offers ease of use, eliminating the need for clamping or additional glue. With adhesive-backed edge banding, you can achieve a clean and seamless finish, enhancing the overall appearance of your plywood projects.
One of the notable advantages of adhesive-backed edge banding is the wide range of options available. You can choose from a variety of colors and materials to match different plywood types and project aesthetics. Whether you prefer a classic wood finish or a bold and modern look, adhesive-backed edge banding offers versatility and customization.
Not only is adhesive-backed edge banding easy to apply, but it also ensures a secure and durable bond. The adhesive backing creates a strong attachment between the banding and the plywood, minimizing the risk of peeling or detachment over time. This ensures that your plywood edges maintain their polished appearance for years to come.
| Advantages of Adhesive-Backed Edge Banding |
|---|
| Easy to use |
| No clamping or additional glue required |
| Produces a clean and seamless finish |
| Wide range of colors and materials available |
| Ensures secure and durable bonding |
The Advantages of Commercially Made Edge Banding
When it comes to plywood edge banding, commercially made options provide numerous advantages that make them a popular choice among woodworkers. Whether you’re working on a small DIY project or a large-scale construction job, here are some reasons why commercially made edge banding is a preferred solution:
Easier to Work With
Commercially made edge banding is designed for ease of use. It comes in convenient rolls or strips, ready to be applied to the plywood edges. The material is flexible and easy to manipulate, allowing for seamless installation.
Faster Installation
Compared to solid-wood edging, commercially made edge banding significantly speeds up the installation process. The pre-cut strips can be quickly and accurately applied to the plywood edges, saving time and effort.
Better-Looking Results
Commercial edge banding creates a neater and more polished appearance than solid-wood strips. It offers a consistent thickness, uniform color, and smooth finish, enhancing the overall aesthetic appeal of your woodworking projects.
No Clamping Required
One of the advantages of commercially made edge banding is that it does not require clamping during the installation process. The adhesive backing on the banding ensures a secure bond without the need for additional pressure or tools.
No Glue Squeeze-Out
Unlike traditional solid-wood edging, commercially made edge banding eliminates the problem of glue squeeze-out. The adhesive backing on the banding ensures a clean and tidy edge without any excess glue spoiling the finished look.
Less Noticeable
The slim profile of commercially made edge banding makes it less prominent than solid-wood strips. It seamlessly blends with the plywood surface, creating a seamless and inconspicuous edge that doesn’t detract from the overall design.
Curved Edge Compatibility
Commercially made edge banding is flexible and can be easily applied to curved edges, offering more versatility in woodworking projects. This allows you to achieve a polished finish on both straight and curved plywood edges.
To summarize, commercially made edge banding provides several advantages over solid-wood edging. It is easier to work with, faster to install, produces better-looking results, requires no clamping or dealing with glue squeeze-out, and is less noticeable than solid-wood strips. Additionally, it offers compatibility with curved edges, expanding your options in woodworking projects.
| Advantages of Commercially Made Edge Banding |
|---|
| Easier to Work With |
| Faster Installation |
| Better-Looking Results |
| No Clamping Required |
| No Glue Squeeze-Out |
| Less Noticeable |
| Curved Edge Compatibility |
Unique Edge Banding Options from REHAU
When it comes to plywood edge banding, REHAU offers an array of exceptional options that are renowned for their quality and durability. Their edge banding products, including PVC, ABS, and polypropylene, provide different benefits and features to cater to various project requirements. If you’re seeking innovative solutions for edge banding, REHAU has you covered.
One of the standout offerings from REHAU is their LaserEdgeTM zero-joint technology. This cutting-edge solution allows for seamless application with no visible joints, delivering a flawless and professional finish. By eliminating the need for traditional glued joints, LaserEdgeTM creates a sleek look that enhances the overall aesthetics of your plywood projects.
Additionally, REHAU offers FlexEdge® semi-rigid edging, which combines flexibility and durability. This unique edge banding option allows for easy application, even on curved edges, providing versatility and convenience. FlexEdge® ensures a clean and polished appearance while offering reliable edge protection.
With REHAU’s edge banding solutions, you can achieve an impeccable finish that adds sophistication to your plywood projects. Whether you opt for LaserEdgeTM zero-joint technology or the flexibility of FlexEdge®, REHAU’s products are designed to deliver outstanding results.
| REHAU Edge Banding Options | Features and Benefits |
|---|---|
| PVC Edge Banding | Provides durability and resistance to moisture, making it suitable for various applications. |
| ABS Edge Banding | Offers excellent impact resistance and edge protection, ideal for high-traffic areas. |
| Polypropylene Edge Banding | Combines durability and flexibility, allowing for easy application on curved edges. |
| LaserEdgeTM Zero-Joint Technology | Creates a seamless finish without visible joints, enhancing the aesthetics of your projects. |
| FlexEdge® Semi-Rigid Edging | Delivers flexibility and durability, facilitating convenient application and reliable edge protection. |
When it comes to plywood edge banding, REHAU offers a wide range of options to suit your specific needs. Whether you require edge banding for furniture, cabinetry, or other woodworking projects, REHAU’s solutions are designed to provide a seamless and professional result.

Why Choose REHAU Edge Banding?
REHAU is a trusted name in the industry, known for their commitment to quality and innovation. Their edge banding options are crafted with precision and durability in mind, ensuring long-lasting performance. By choosing REHAU, you can benefit from:
- High-quality materials that withstand daily wear and tear
- Customizable options to match your plywood and project aesthetics
- Reliable edge protection and enhanced durability
- Seamless application techniques for a professional finish
- A wide range of colors and styles to suit your design preferences
- Industry-leading expertise and support to guide you through your edge banding journey
When it comes to plywood edge banding, REHAU sets the standard for excellence. Discover their range of edge banding solutions and elevate the look of your woodworking projects to unmatched levels of sophistication and durability.
The Importance of Choosing the Right Edge Banding
When it comes to achieving the desired finish on plywood, choosing the right edge banding is paramount. A carefully selected edge banding solution can enhance the overall look and quality of your woodworking projects. Consider the following factors when making your decision:
- Material: Select edge banding materials that offer durability and resilience. Popular options include PVC, ABS, and polypropylene.
- Color: Ensure that the edge banding complements the color scheme of your plywood. Consider matching or contrasting colors to achieve the desired aesthetic.
- Thickness: Choose an edge banding thickness that aligns with the thickness of your plywood. This will ensure a seamless and professional finish.
- Flexibility: Assess the flexibility of the edge banding to determine its suitability for your specific project requirements.
By carefully evaluating these factors and considering how they align with your project needs, you’re more likely to find the best plywood edge banding option. It’s also beneficial to consult with experts who can provide valuable insights and guidance.
Expert Insight:
“Choosing the right edge banding can make all the difference in achieving a professional and polished finish. Consider the material, color, thickness, and flexibility to ensure a seamless integration with your plywood.” – Woodworking Expert, Adam Woodson
By investing time and thought into selecting the best edge banding for your plywood projects, you can elevate the overall quality and aesthetic appeal. Ensure a flawless finish that demonstrates your craftsmanship and attention to detail.
| Material | Advantages |
|---|---|
| PVC | Durable, resistant to moisture and chemicals, wide range of colors |
| ABS | Flexible, impact-resistant, available in various finishes |
| Polypropylene | Lightweight, resistant to cracking and fading, environmentally friendly |
Conclusion
Plywood edge banding is an essential technique for achieving a professional and polished finish on woodworking projects. By carefully selecting the appropriate plywood type and edge banding method, considering factors such as color and material, and utilizing the right tools and techniques, you can achieve flawless edges that enhance the overall look and durability of your projects.
Whether you choose to use veneer edge banding, round-over routing, or adhesive-backed edge banding, understanding the options and techniques available is crucial for successful results. Each method offers its own benefits and considerations, allowing you to customize your projects to meet your specific needs.
When it comes to plywood edge banding solutions, REHAU stands out as a reliable brand offering a range of high-quality options. Their PVC, ABS, and polypropylene edge banding products provide durability and aesthetic appeal. Additionally, their innovative solutions, such as the LaserEdgeTM zero-joint technology and FlexEdge® semi-rigid edging, offer seamless finishes and easy application.
Remember, the key to achieving a sleek finish lies in the careful selection of plywood edge banding options, thoughtful consideration of materials and colors, and the use of proper tools and techniques. By taking these factors into account, you can elevate your woodworking projects to a new level of craftsmanship and create stunning, professional results every time.
FAQ
What is plywood edge banding?
Plywood edge banding is the process of covering the edges of plywood to achieve a clean and professional finish.
What are the different types of plywood for edge banding?
The different types of plywood for edge banding include softwood plywood, hardwood plywood, marine plywood, Baltic Birch plywood, MDO plywood, and OSB (Oriented Strand Board).
How do I select the right plywood for edge banding?
Selecting the right plywood for edge banding depends on project needs and the aesthetic appeal desired for the plywood’s edge. Consulting experienced woodworkers can provide guidance on selecting the right plywood for specific applications.
What tools and materials are necessary for plywood edge banding?
The necessary tools and materials for plywood edge banding include wood glue, edge banding, a household iron, sandpaper, a utility knife, a putty knife, adhesive, scissors, and potentially a saw.
How do I apply veneer edge banding?
To apply veneer edge banding, measure the length and width of the plywood edge, cut the banding to match, apply heat using a household iron to activate the pre-glued backing, position the banding on the edge, trim any excess, and sand the edges for a seamless finish.
What are the trimming techniques for plywood edge banding?
Common trimming tools for plywood edge banding include a utility knife, chisel, router with a flush trim bit, and specialty edge trimming tools.
How can round-over routing be used for plywood edge banding?
Round-over routing involves using a router with a round-over bit to create a smooth curve along the edges of the plywood, adding a decorative and polished finish to the project.
How can wood filler be used for seamless plywood edges?
Wood filler helps fill voids, gaps, or imperfections on the plywood surface, resulting in a smooth and flawless finish. Clean the edges thoroughly before applying the wood filler, use a putty knife to apply and smooth the filler, and sand the filled area for a seamless finish.
What are the advantages of plywood edge banding?
Plywood edge banding provides a clean and professional look, protects the edges from damage and wear, and offers customization options in terms of colors, materials, and finishes.
How does adhesive-backed edge banding work?
Adhesive-backed edge banding comes in strips with a pre-applied adhesive backing that bonds to the plywood edges. It involves cutting the edge banding to size, applying heat to activate the adhesive, and pressing it firmly onto the plywood edges.
What are the advantages of adhesive-backed edge banding?
Adhesive-backed edge banding is easy to work with, does not require clamping or additional glue, produces a clean and seamless finish, and is available in a wide range of colors and materials.
What are the advantages of commercially made edge banding?
Commercially made edge banding is easier to work with, faster to install, and produces a better-looking result compared to solid-wood edging. It requires no clamping, eliminates glue squeeze-out, and offers more versatility in woodworking projects.
What unique edge banding options does REHAU offer?
REHAU offers edge banding products such as PVC, ABS, and polypropylene, as well as innovative solutions like LaserEdgeTM zero-joint technology and FlexEdge® semi-rigid edging, which allow for easy application and create a seamless and professional finish.
How important is choosing the right edge banding for plywood?
Choosing the right edge banding is crucial for achieving the desired finish on plywood. Factors such as material, color, thickness, flexibility, and compatibility with the chosen plywood should be considered. Consulting experts can help in selecting the best option for specific projects and requirements.