We purchase a table saw and remove the guard on the table saw blade, why. If you were to look at most of the woodworkers online they do not use a blade guard either. This seems to vary contrary to the thought of safety.
Woodworkers remove the guard for several reasons.
- Visibility while you are cutting your material
- Better control of the material while cutting
- When cutting a small amount of material on an edge
- Using the fence with a small cut
- Cutting dado cuts or groves
- Cutting beveled cuts
- When using table saw jigs
Although, as a woodworker, I understand why you would remove the table saw guard, I don’t advocate it. Of course, the table saw guard is there for a reason and it is so you don’t expose yourself to the open blade.
As I continue in my research in woodworking, I’m always wanting to learn more, I’m finding we as woodworkers do things that don’t always make sense. So I wanted to dive deeper into this subject to provide the best recommendations to you.
Table Saw Basics
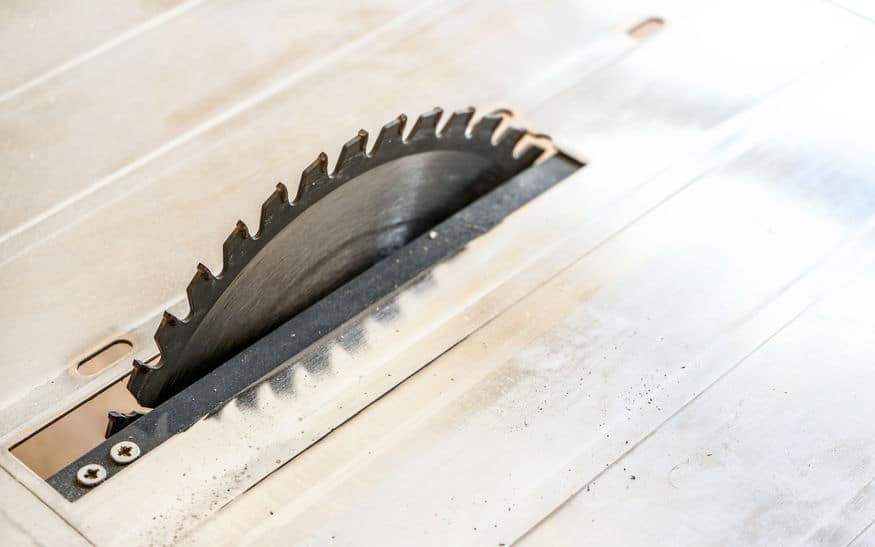
According to Wikipedia a Table Saw or Bench Saw in England is a woodworking tool, consisting of a circular saw blade, mounted on an arbor, that is driven by an electric motor. Having said that what do we use a table saw for.
If you are new to table saws I thought I would include a great video for step-by-step basics for your table saw.
Table saws are used for a variety of woodworking projects. They are mostly used for cutting material very fast with precision. They have the ability to cut angles using the blade at an angle or using a jig to slide the material at an angle.
Furniture makers are the most common users of a table saw. The ability to use a dado blade provides the capability of creating joints and slots to bring wood material together for drawers, cabinets, and other fine woodworking projects.
With the smooth tabletop (which varies in size according to the one you have) you have pretty much an open book of capability. This is one of the reasons the table saw is so popular due to its flexibility.
If you would like information on the best types of material for wood signs – Check out our article – “What Is The Best Wood For Wood Signs“
Why Do So Many People Remove Their Table Saw Blade Guards
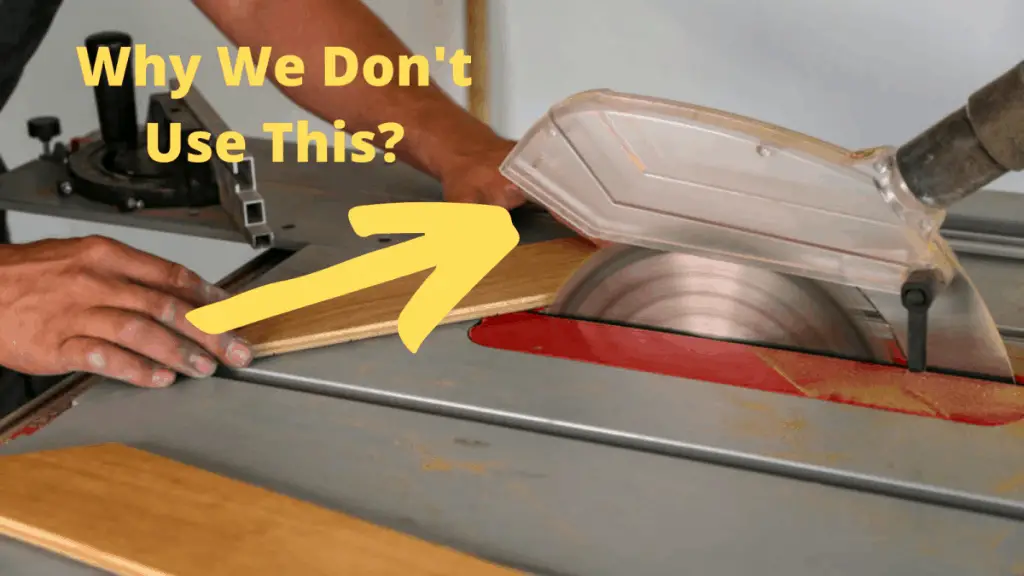
As mentioned we as woodworkers do things sometimes which don’t make sense in general. However, we do them because it works. Now I’m all about safety and wearing eye protection and a mask if needed. But sometimes using the table saw blade guard just doesn’t work for what we are wanting to accomplish.
Here are some reasons why we remove the table saw blade guard.
- Cutting Small Amount of Material – To perform small cuts on the material such as trimming the edge would warrant the blade guard being removed, especially if are using the rip fence as a guide. Additionally, you would need to remove the blade guard if you are using a dado blade for joint cuts or grooves.
- Visually See The Cut – If you are like most woodworkers you have the need to see the cut. Although you have measured and measured you still need to see the cut. This is a personal choice but the blade guard would need to removed as well.
- Using A Jig or Sled – If you are on the woodworking level where you use a jig or sled for specific cuts, like angles or custom cuts for templates for example you cannot use the blade guard it will definitely be in the way.
- Bevel Cuts – If you are wanting to cut bevel cuts, especially at a more drastic angle the blade guard will definitely get in the way. The table saw is a wonderful tool for cutting material with a bevel and a lot of woodworkers use this feature.
- Control – This is probably the biggest reason you would want to remove the blade guard. As you cut your wood material, either ripping or crosscut you will want control. By control I mean the ability to keep the material straight and flat to the surface of the table saw. This provides the best cuts and the reason you purchased a table saw. The best way to control the material is to apply constant pressure and push the material safely across the blade with a push stick (either homemade or with the one typically supplied with the table saw when purchased).
If you are looking for the best way to control your material for your table saw I would recommend the Gripper. Below I have provided a great review video of the Gripper for your information.
If you would like to purchase the gripper you can purchase it through Amazon here!
What Is A Table Saw Blade Guard For?
Now we know why we would want to remove the blade guard from the table saw I thought I would also include the information as to what is the table saw blade guard for. As mentioned I don’t advocate the removal of the blade guard, however, we have shown why you would want to.
The table saw blade guard is there for many reasons. Most folks think it is for protecting your fingers as you make your cuts and that is part of the equation. Surprisingly, it is more than that.
- Keeping Material From Flying – The biggest and most important reason a blade guard is placed on the table saw is to keep material from flying out and hurting you, someone close to you or in general from flying out in your wood shop and damaging something.
As you push the material through the saw blade of course you will get resistance and you need to keep the momentum going to cut. Wood splinters will occur or the blade will cut the material and fling it out of the blade at times. This is where the blade guard come into play.
It is designed to keep the flying material from hurting you when it does, and believe me you will have those moments if you use the table saw enough. - Protect Your Fingers – It does provide some protection for your fingers moving across the blade. However, due to the design on most blade guards this may not always be the case. It actually is more of a reminder as to where the saw blade is in relation to your fingers.
- Moving Across The Blade – When operating we move around a table saw quite a bit. This is to place material for cutting or setting material to the side. As you move about the table saw, whether the blade is moving or not, it will protect your hands from accidentally touching the blade.
Table Saw Guard Replacement
You purchase a used table saw or have a table saw which does not have a blade guard. Can you get a blade guard? Or can you upgrade your blade guard to get better use of your table saw and add functionality with more space or a dust attachment for example?
Each wood shop creates different types of wood products. Furniture, home decor, and for us wood signs are the most prevalent types of wood projects you would perform. Knowing this you would use your table saw consistently to cut one type of cut more than others.
The reason I mention this is because you purchase a table saw and want to use the blade guard. However, the blade guard you don’t have or currently have just doesn’t work for you and the cuts you make the most.
Depending on your table saw you can change out the blade guard to best serve your cutting needs with an aftermarket table saw blade guard. Table saw blade guards come in many sizes, shapes, and capabilities. My biggest concern was flexibility and ease of use. This will allow you to adjust and change your table saw blade guard to your cutting needs quickly and safely.
Here is a product that works extremely well to serve the needs and flexibility of your table blade guard swap
As noted in the video it provides the flexibility you need and additional capabilities which will serve you well into the future. The best part of this system is it adapts to pretty much any table saw on the market. If you want more information on this brand you can visit www.thesharkguard.com.
However, if you don’t want to go that direction you can also look at this product which will serve you well. It is adjustable, has a dust port, and will provide flexibility and safety to your table saw.

If you would like to purchase the Dust Collection Blade Guard you can purchase it from Amazon here!
What Is Table Saw Kickback
We all love our table saw and the flexibility it provides us. However, much like other woodworking tools, we need to approach the table saw with safety and respect in mind.
According to the NCBI (National Center for Biotechnology Information) which is part of the United States National Library of Medicine, a branch of the National Institutes of Health, there are an average of 30,000 tables saw injuries annually.
That is a staggering amount of injuries from table saws and a good portion of these injuries occur from table saw kickback. So what is the table saw kickback?
Table saw kickback occurs when the material you cutting on the table saw comes loose and is ejected from the table saw blade while it is spinning.
I have provided a video below which demonstrates what table saw kickback is and what it looks like.
Table saw kickback is preventable with the correct and safe use of your table saw. Let’s look at the ways to stop table saw kickback.
How Do I Stop My Table Saw Kickback

As mentioned above kickback is a dangerous and real-life risk from using a table saw. Fortunately, there are ways to prevent kickback from occurring and causing injury from your table saw.
There are several things you can do.
- Using The Table Saw Correctly – This seems to be the obvious answer but thought I would mention just the same. If you are not using your table saw in accordance with the manufactures specifications you can cause unwanted injury.
- Control – Controlling the material as you feed to through the table saw is key to avoiding kickback. As you feed your material observe the cut and always keep the material straight (by using the fence or a sled) and flat on the surface of the table saw.
- Riving Knife – A Riving Knife is a piece of metal which arcs up behind your blade at an angle and would move with the blade depth adjustment. It provides the control of the material as you feed the material through the blade. This helps to keep the material straight and if the material should shift, it will assist you in holding it true through the cutting process.
- Splitter – A Splitter is a piece of metal which is typically straight up behind the saw blade. It often comes with the blade guard and may or may not adjust with the blade height.
- Using A Push Stick – Using a push stick when pushing material through the cut is an obvious thought. However, you want to ensure you wait for the material to be on the table (Not hanging off the table) before using the push stick. This will prevent the material from possibly raising on the blade and causing kickback.
Additionally when using a push stick you want to place the push stick in the middle of the edge of the material and not a corner. By doing this you will ensure you don’t push at an angle and possibly cause a kickback.
All of these will help you prevent table saw kick back and use your table saw safely for years to come. I have provided a video below which goes into kickback and how to prevent it for more of a visual look.
What Is The Riving Knife On A Table Saw For?
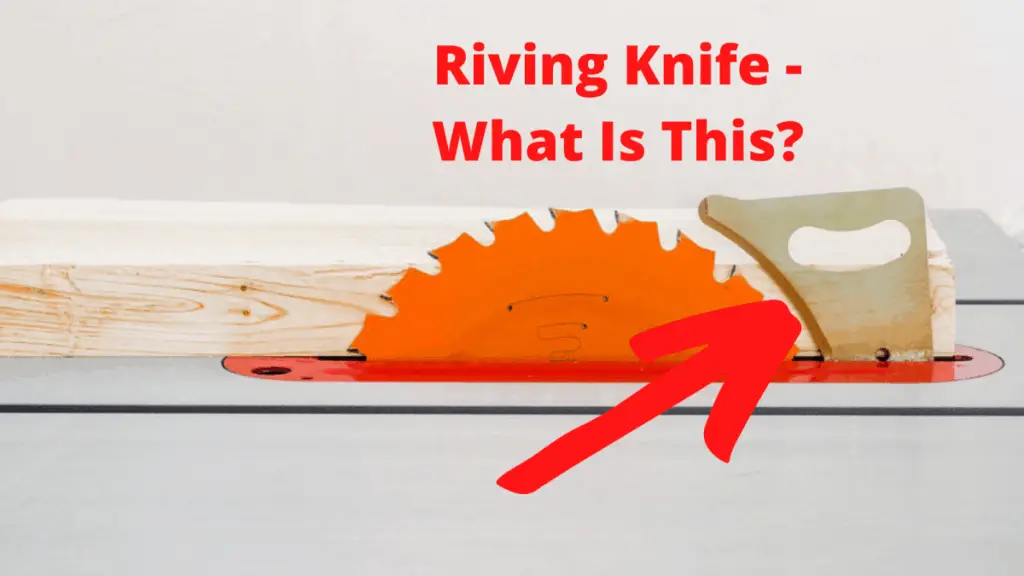
When you look at your table saw do you see an angled piece of metal on the backside of your table saw blade? If you have bought a more recent model you will most likely see this piece of metal. However, if you have an older model it most likely will not have one.
A riving knife is a simple solution to keep the material straight while you feed through the table saw blade. It has an angle to go around the back of the saw blade to ensure anything captured by the back blade teeth it keeps straight. It also moves with the height and bevel adjustments you make with the table saw blade.
If you are using a table saw a riving knife is a must and I highly recommend you install one if you don’t have one on your table saw.
Most riving knives are specific to the brand, however, I have found you can use this riving knife generically on most brands. It has an adjustable bottom that fits most brands.
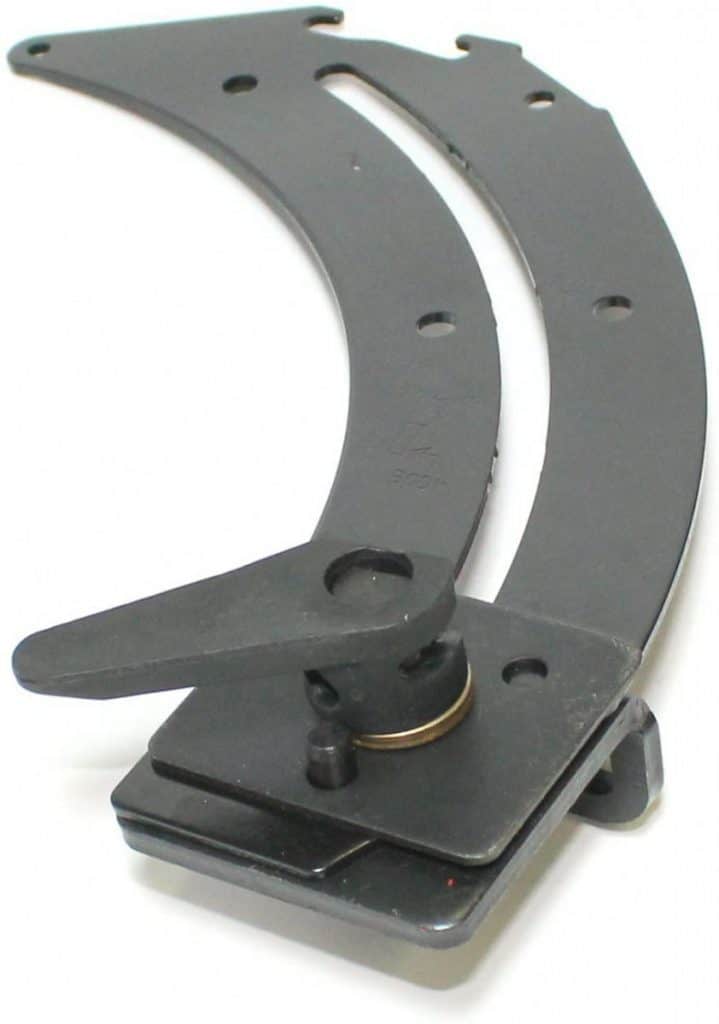
You can purchase the Bosch Riving Knife through Amazon here
What Is The Difference Between A Riving Knife And Splitter?
The main difference between a Riving Knife and a Splitter is the shape and capability.
The riving knife is typically a bigger piece of metal and angles to fit the backside of the table saw blade. This is the optimum place and uses to ensure your material doesn’t kick back at you when using your table saw.
The splitter is typically a smaller piece of metal located on the backside of the table saw blade and does not angle over the blade. Its purpose is to help guide the material with the table saw blade as well, however, since it doesn’t angle like the riving knife it doesn’t provide as much functionality.
Additionally, most of your splitters are static. This means they do not adjust with the height of the blade when you move the table saw blade up or down or side to side for beveled cuts.
If you are wanting the best solution I highly recommend the riving knife versus the splitter. However, if the splitter is all you have it is better than using the table saw blade alone.


